Guide
Setup Supabase Connection
Overview
Supabase projects require network connectivity to your Postgres database, but by default they operate behind a shared IP pool. When your application or infrastructure requires a dedicated, static IPv4 address for security policies, firewall rules, or IP whitelisting, you must enable the Dedicated IPv4 address add-on. This add-on ($4.00/month per database) assigns a unique IPv4 address to your project, allowing you to connect reliably from restricted network environments. After enabling the add-on, you'll retrieve the direct connection string, which contains all credentials and connection parameters needed by your application or database client to establish a secure connection to your Postgres database.
Before you begin
- Active Supabase account with an existing project (free or paid tier)
- Owner or Admin role in the target Supabase project (required to modify project settings and add-ons)
- Access to the Supabase Dashboard at supabase.com and ability to log in
Step by step
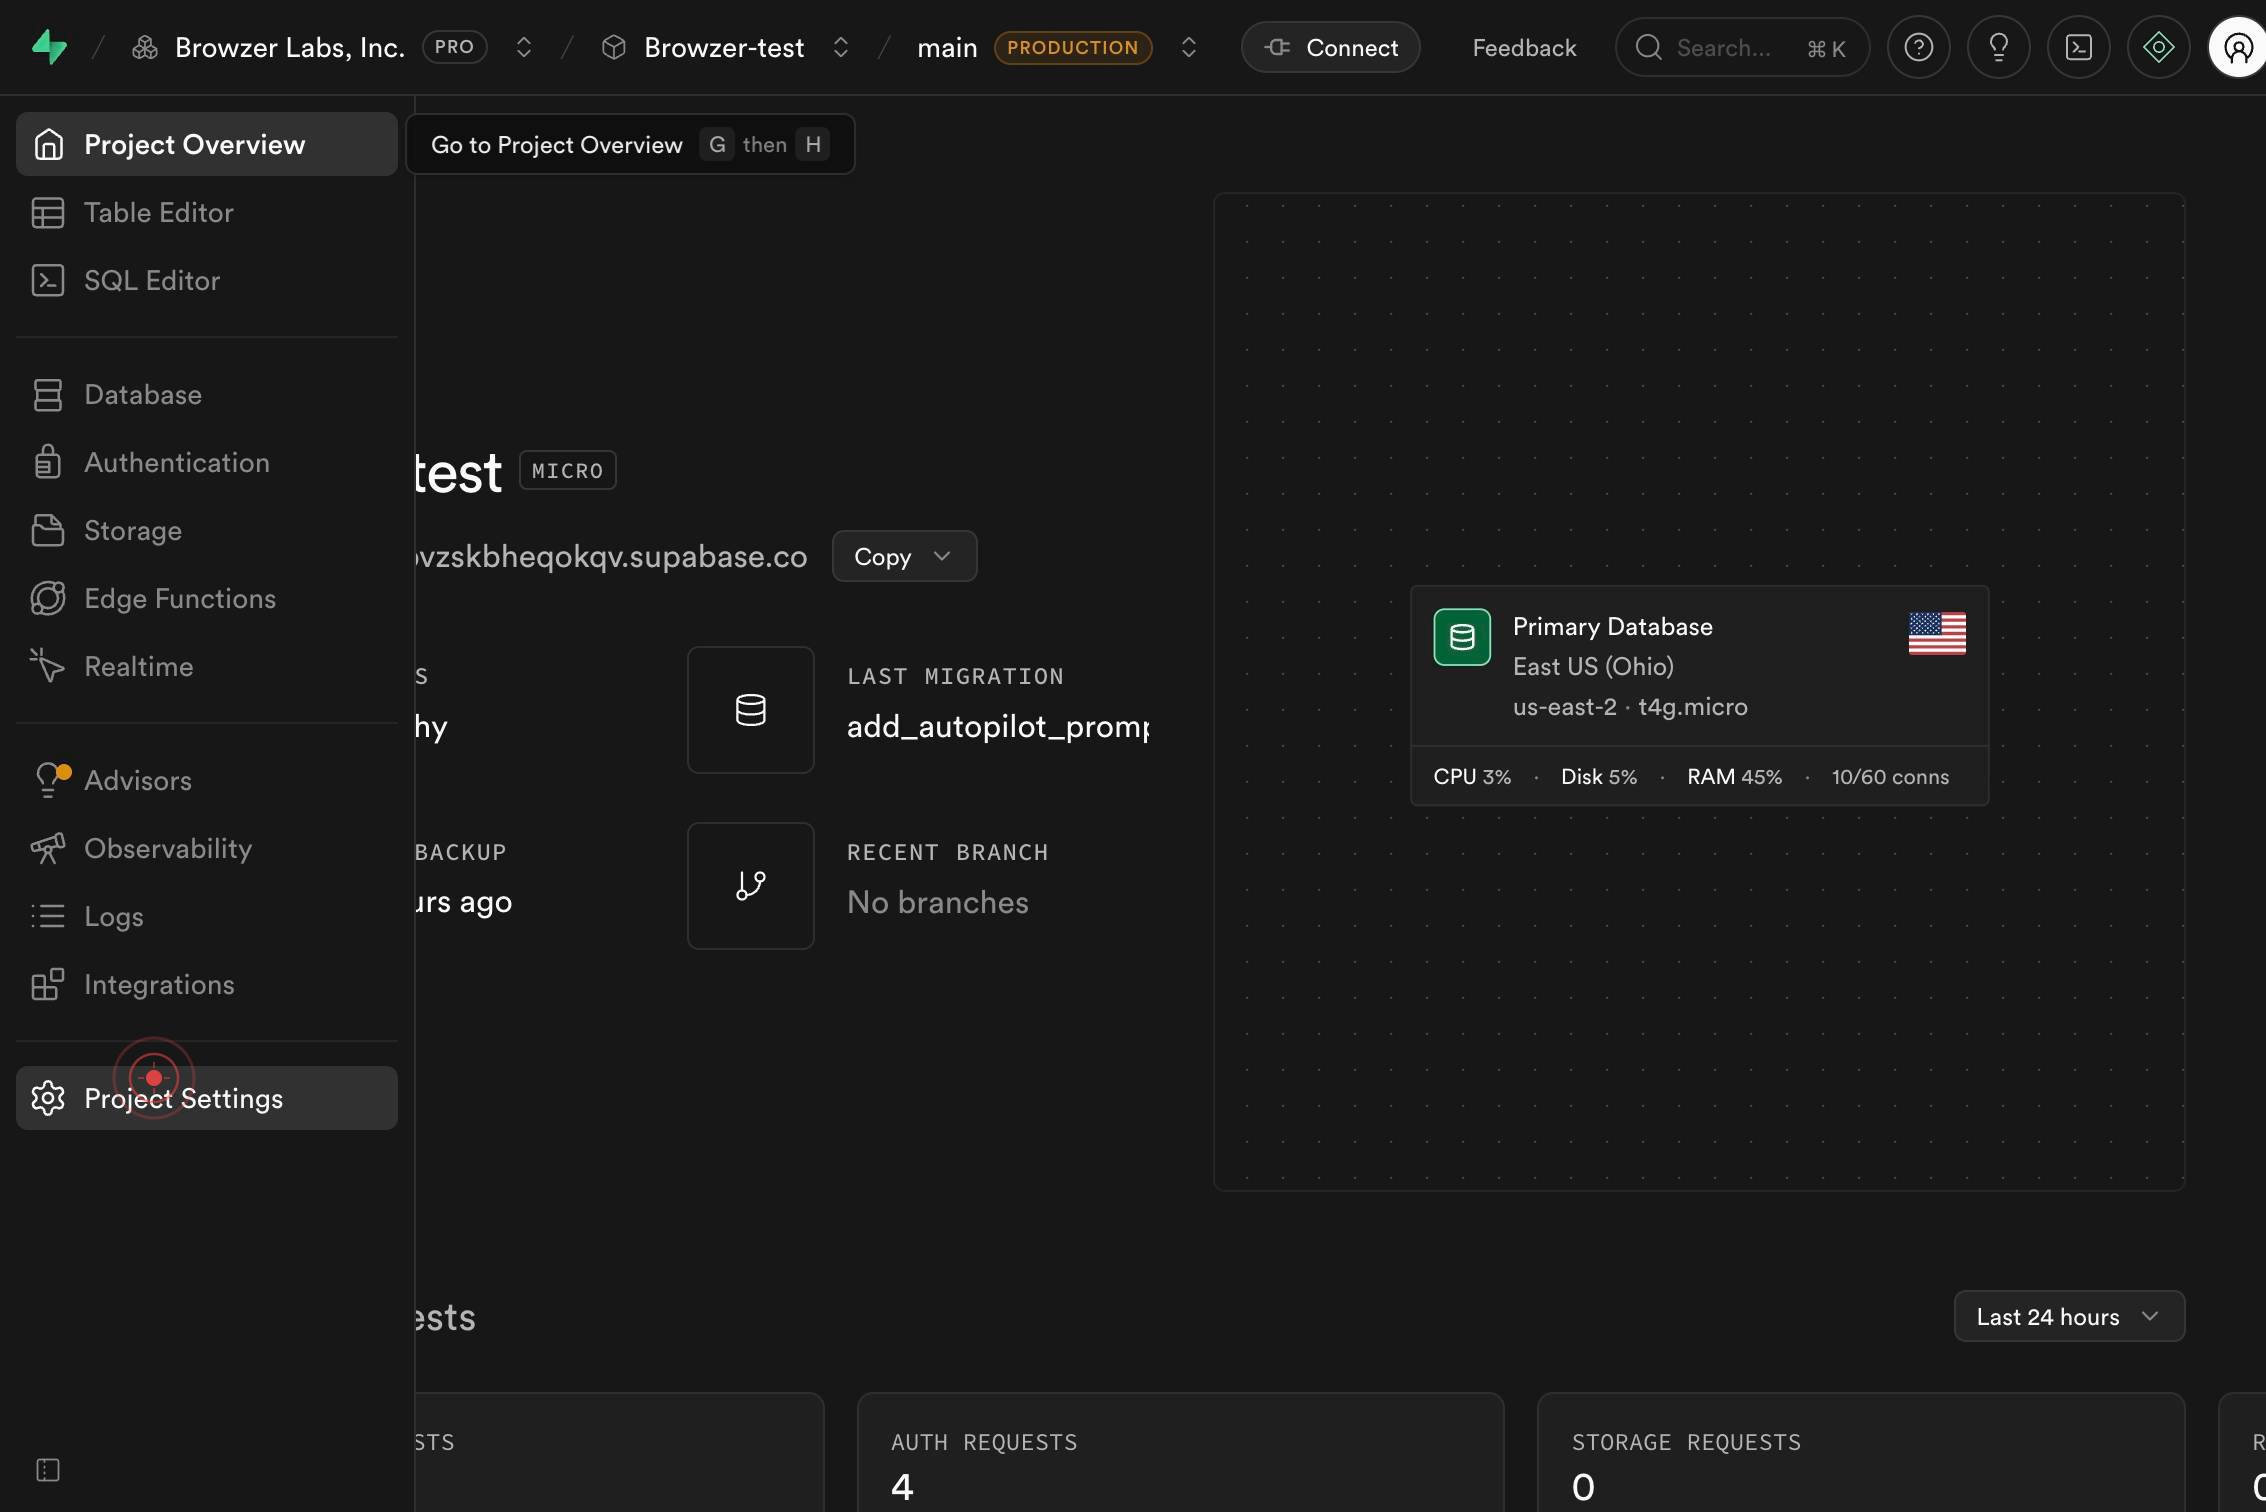
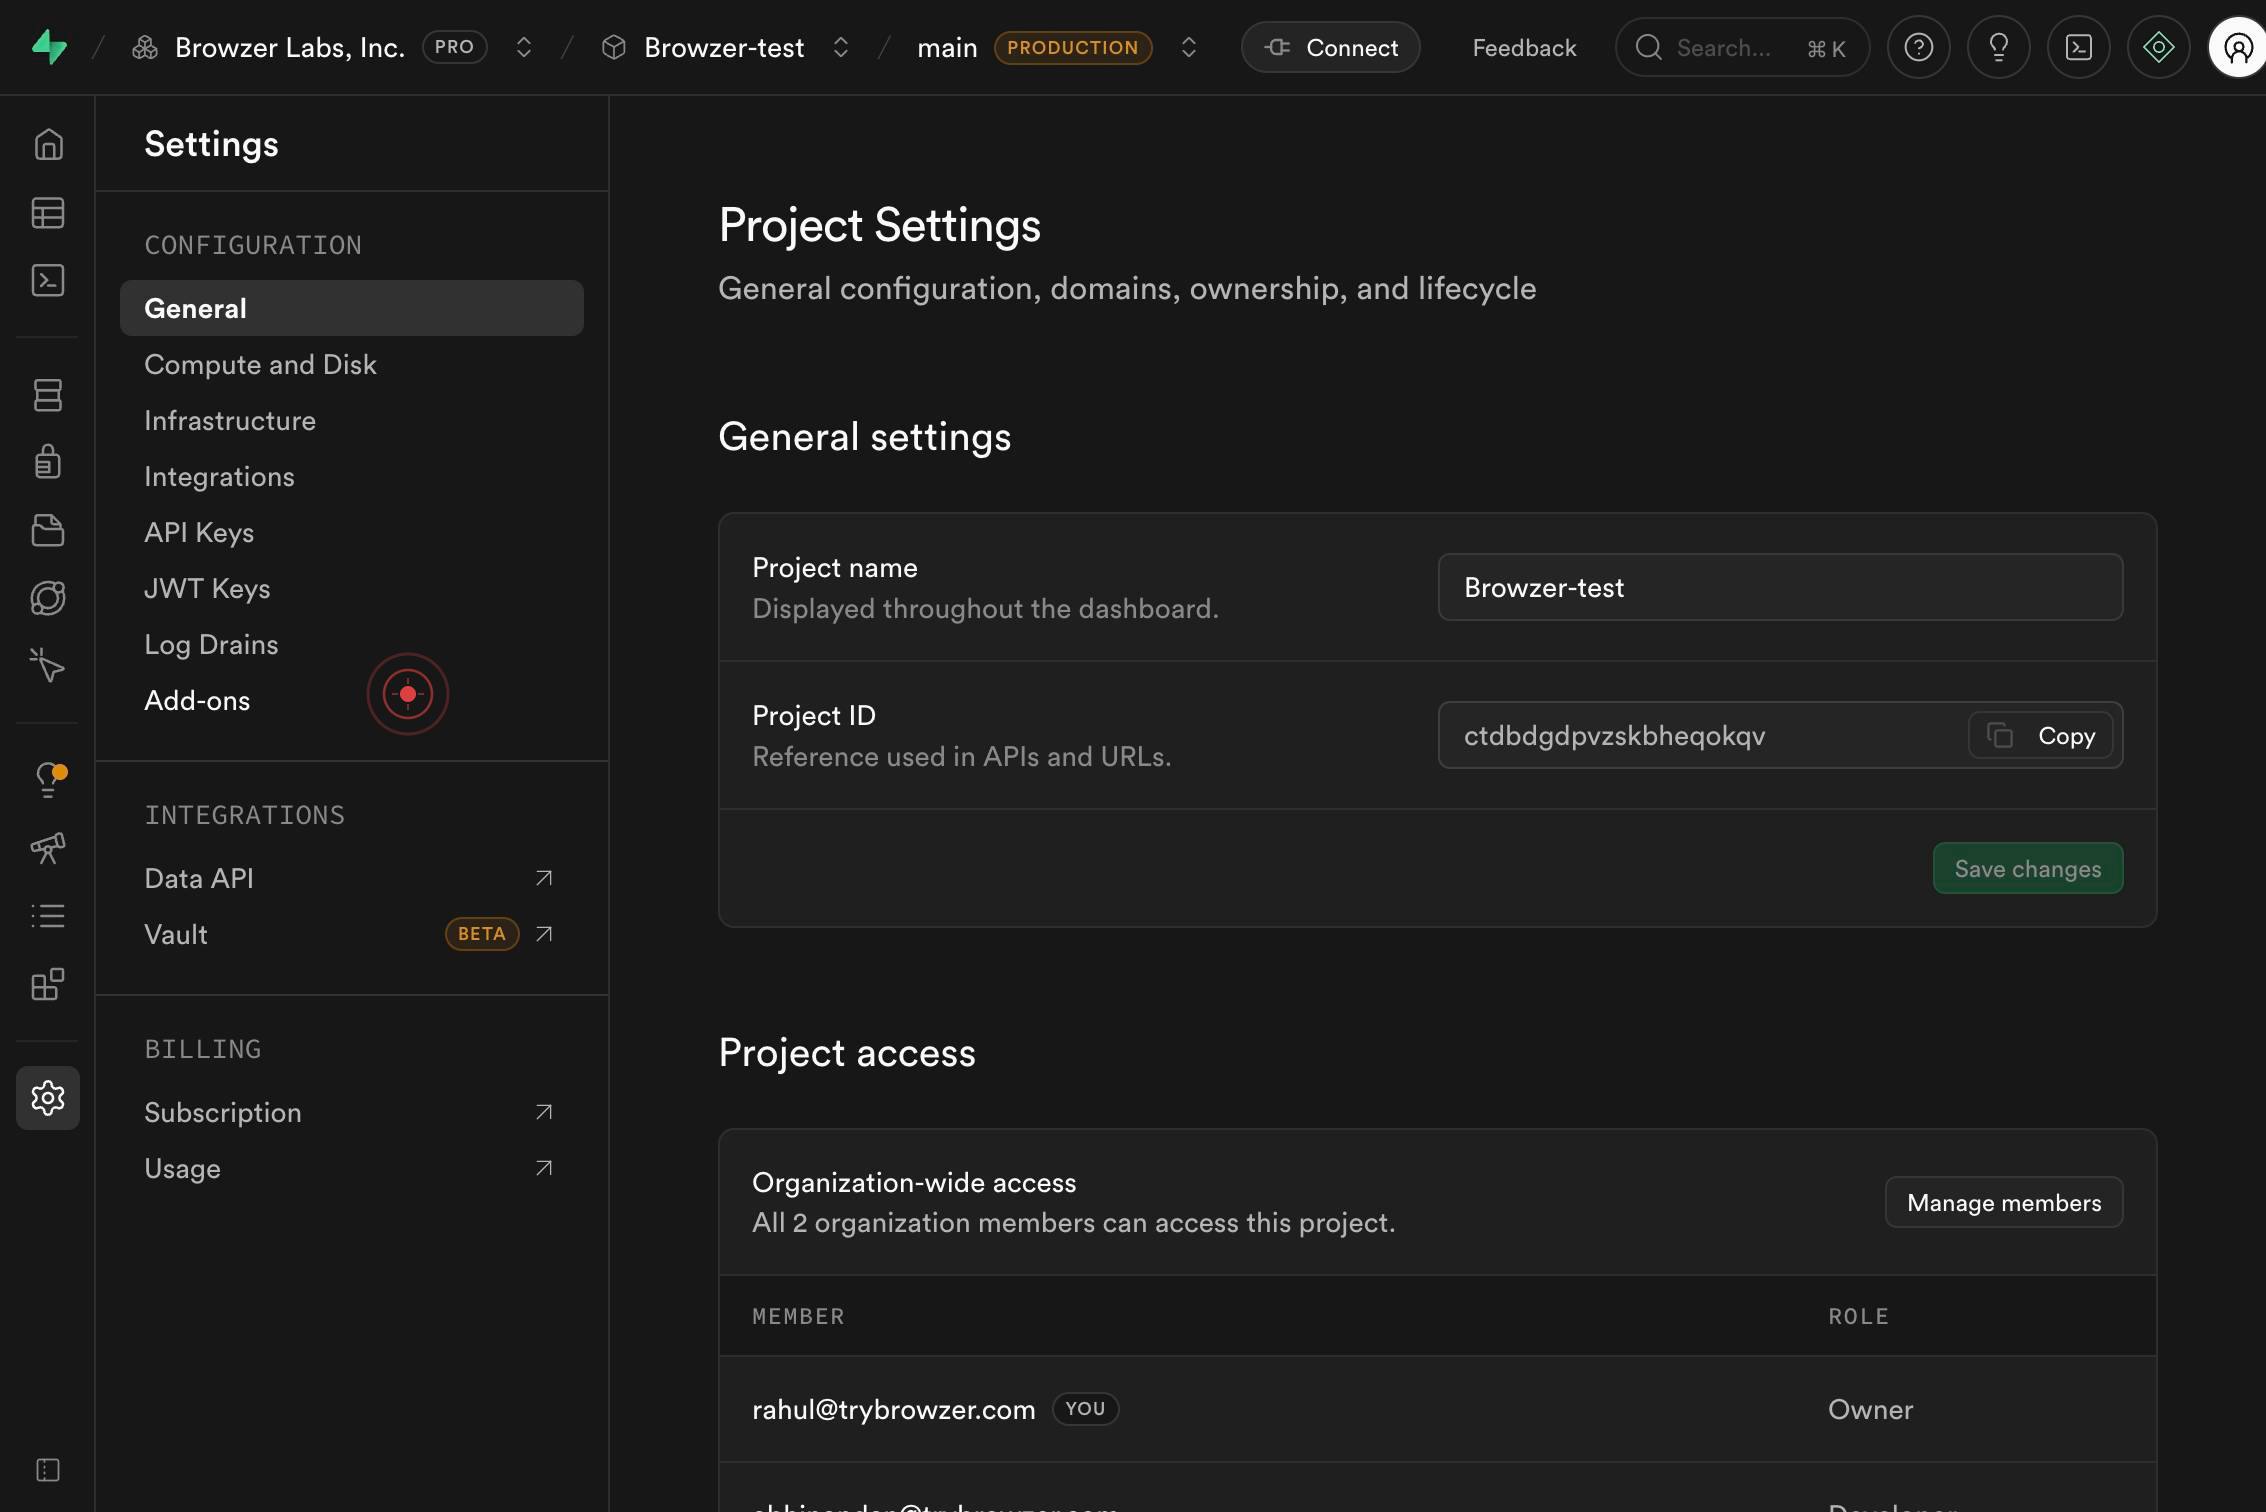
Project SettingsNavigate to your project's settings by clicking the Project Settings link in the Supabase Dashboard. This opens the main configuration page where you can manage all project-wide settings and add-ons.
Add-onsClick the Add-ons menu item to access the list of optional paid features and upgrades available for your project. This section displays all available add-ons and their current activation status.
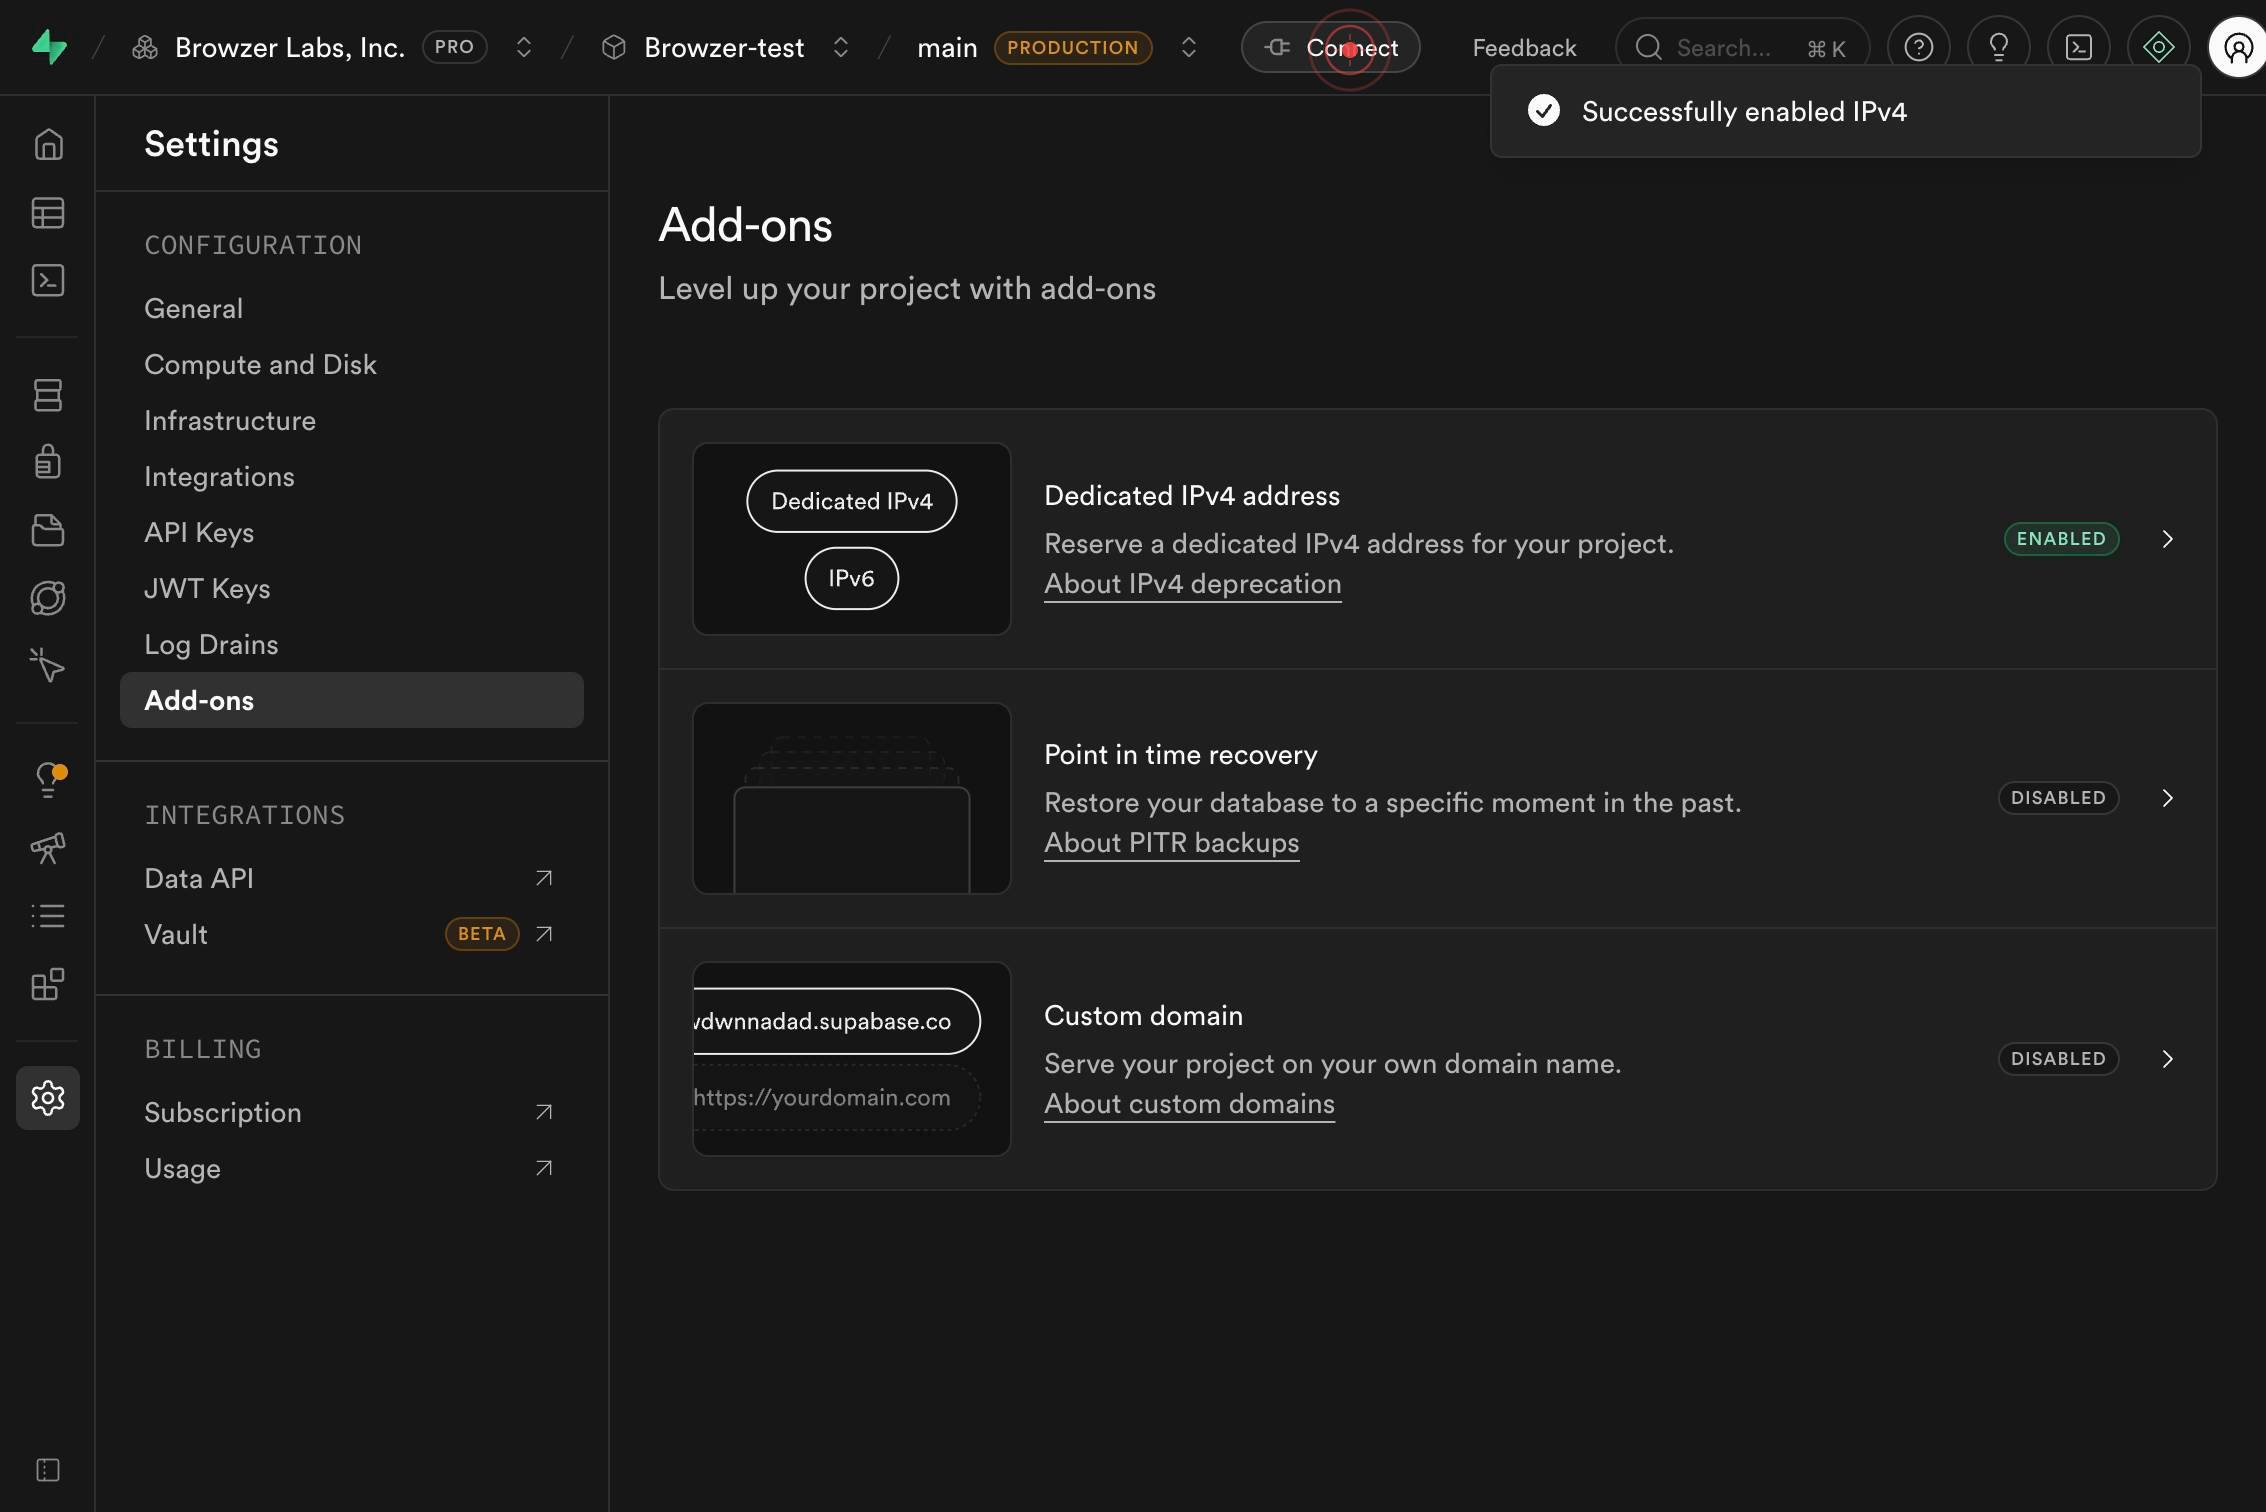
DISABLEDLocate the Dedicated IPv4 address add-on in the list and observe its current status, which displays as 'DISABLED'. This indicates the add-on is not yet active for your project.
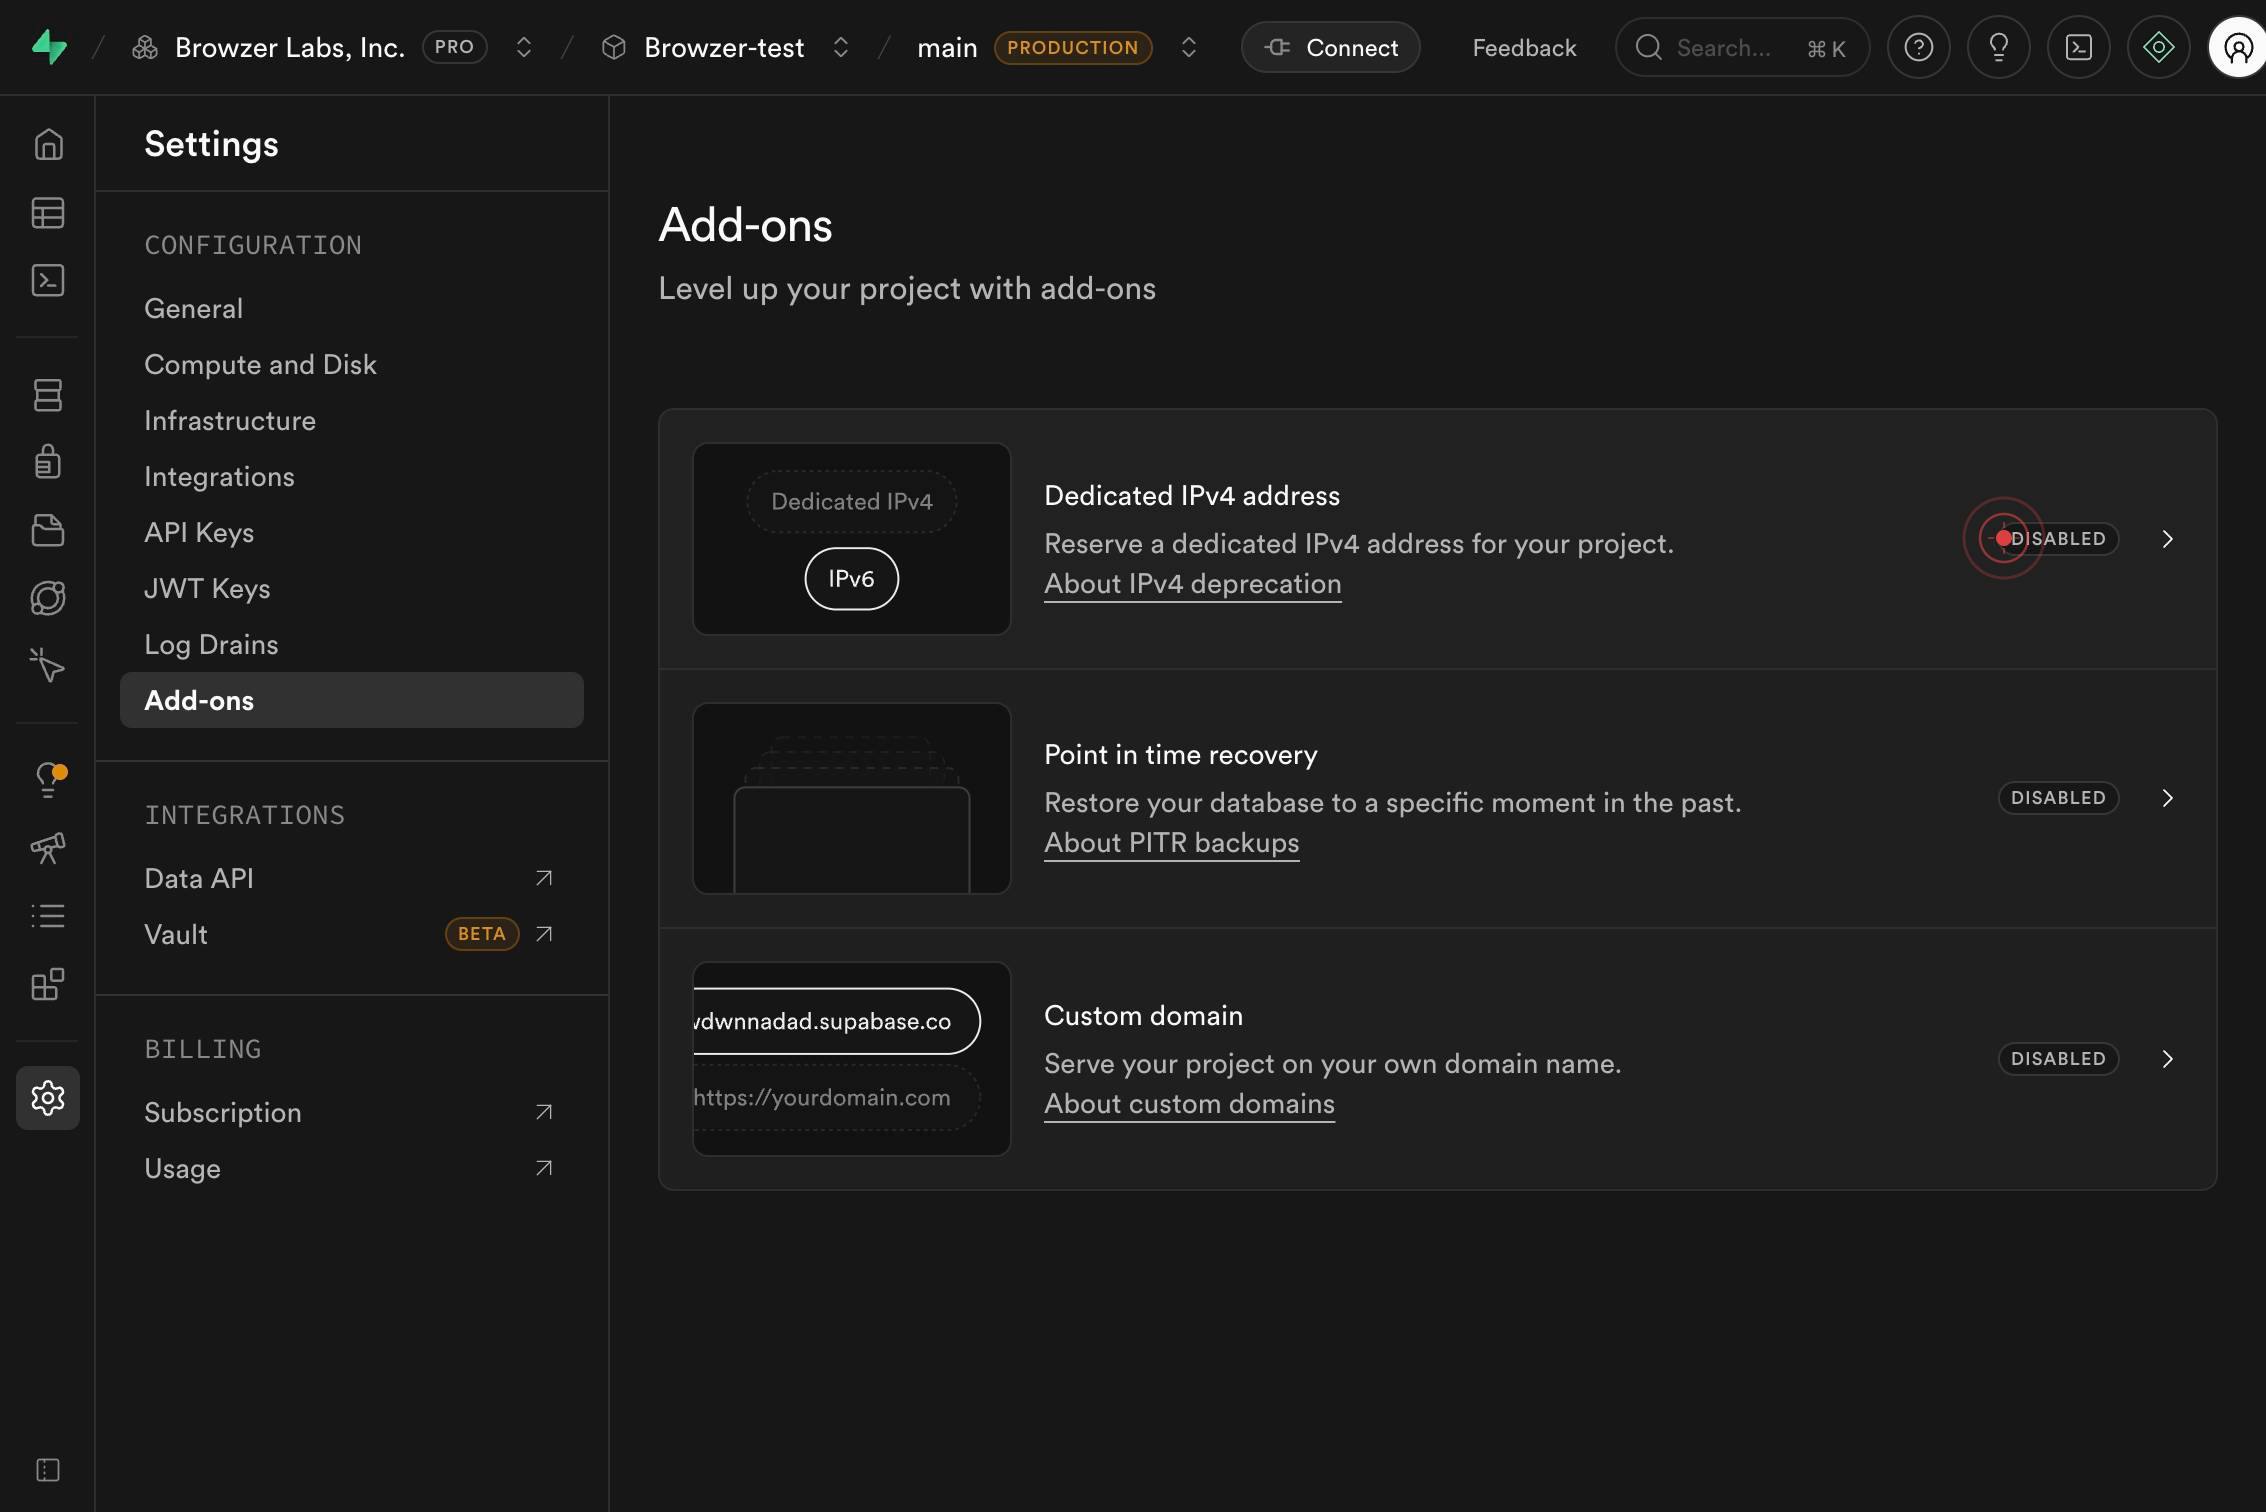
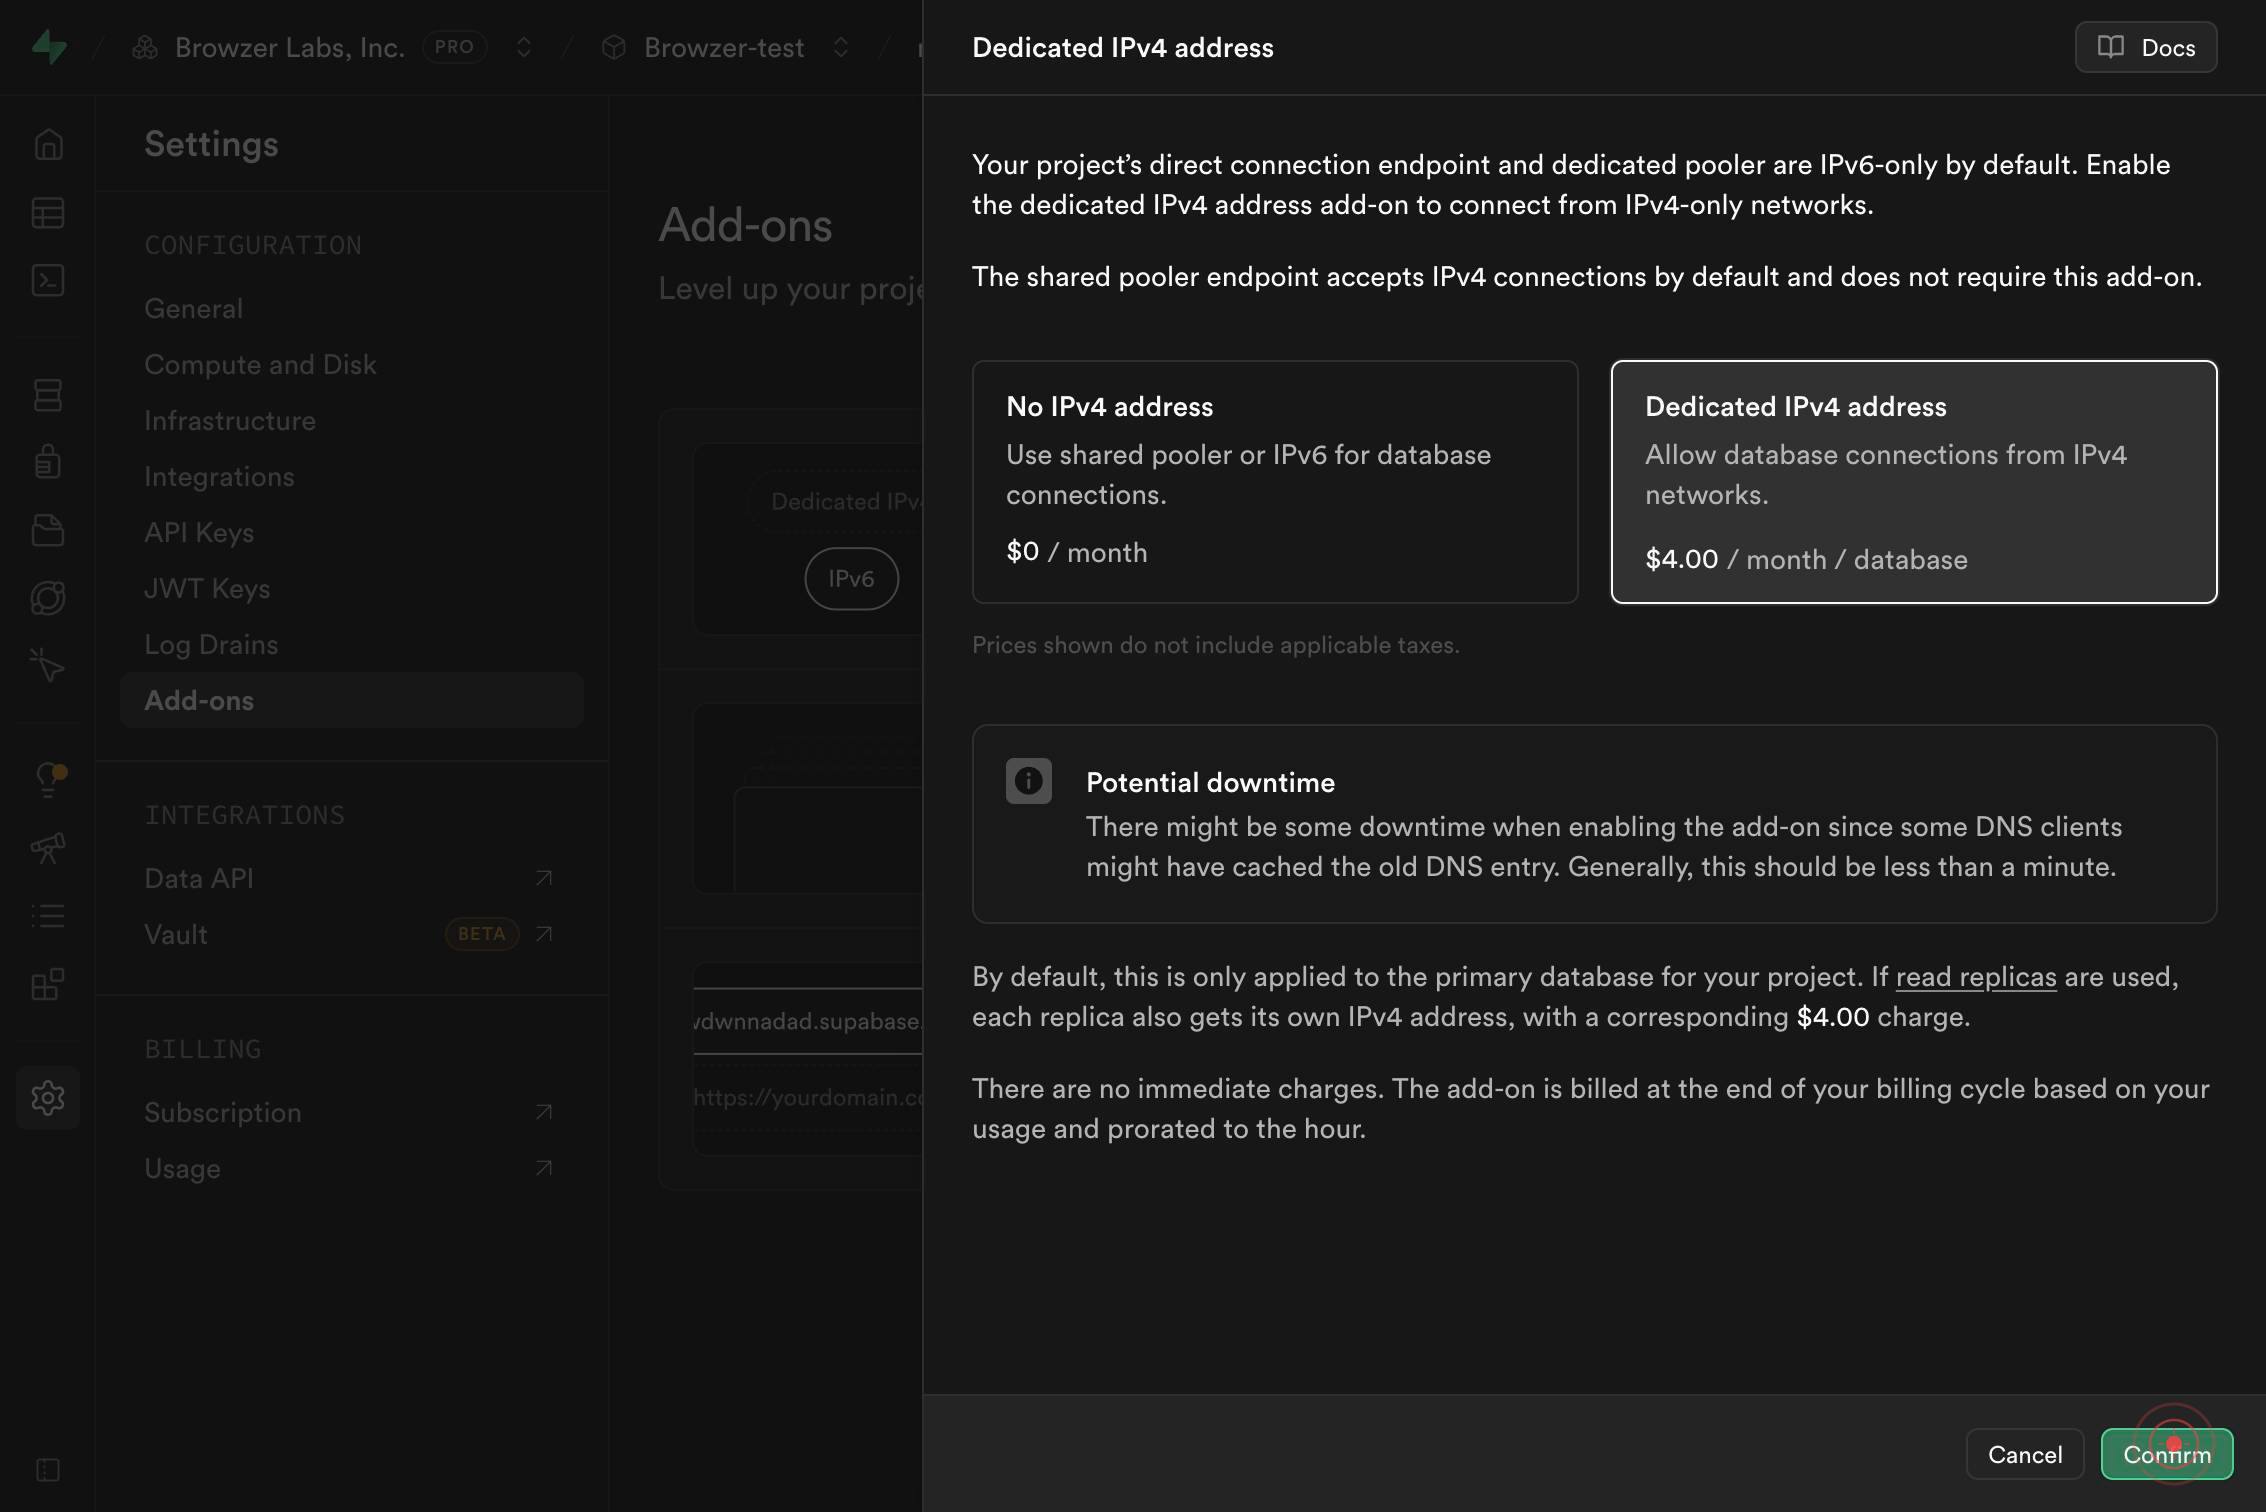
Dedicated IPv4 address Allow database connections from IPv4 networks. $4.00 / month / databaseClick on the Dedicated IPv4 address option (shown as a radio button or selectable card) to select this add-on for activation. The description confirms it costs $4.00 per month per database and allows connections from IPv4 networks.
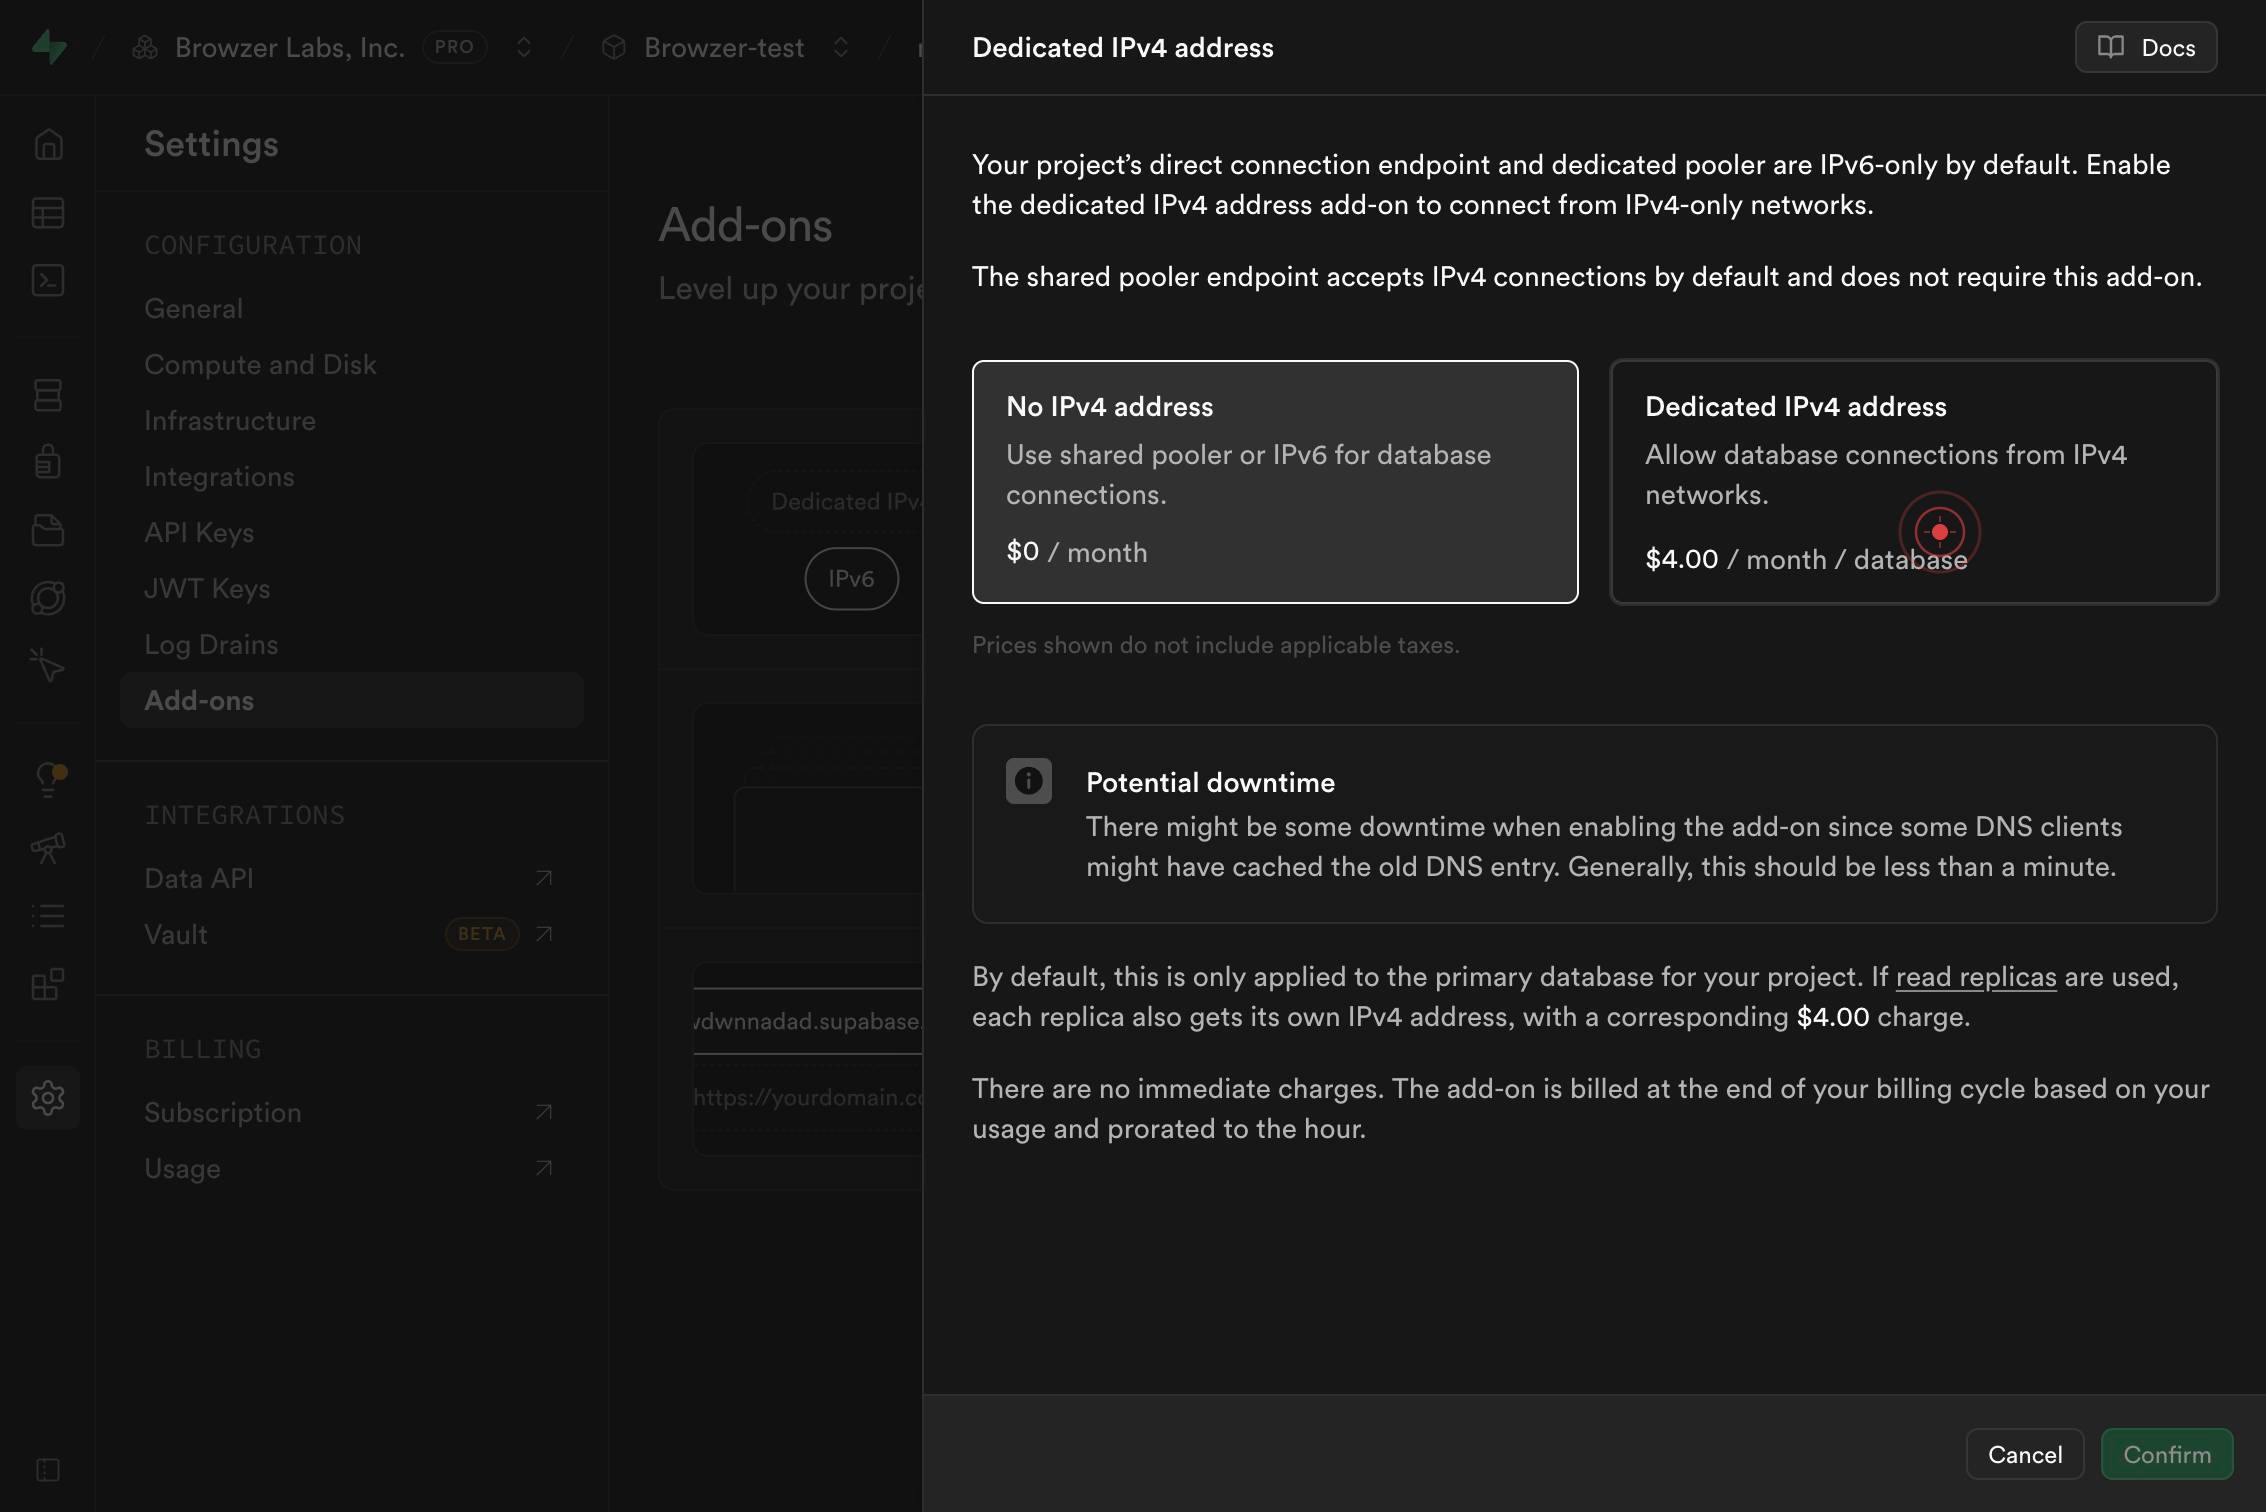
ConfirmClick the Confirm button to finalize the activation of the Dedicated IPv4 address add-on. This action applies the add-on to your project and begins the provisioning process.
ConnectClick the Connect button to open the database connection options panel. This displays various connection methods and credentials for your newly configured database with the dedicated IPv4 address.
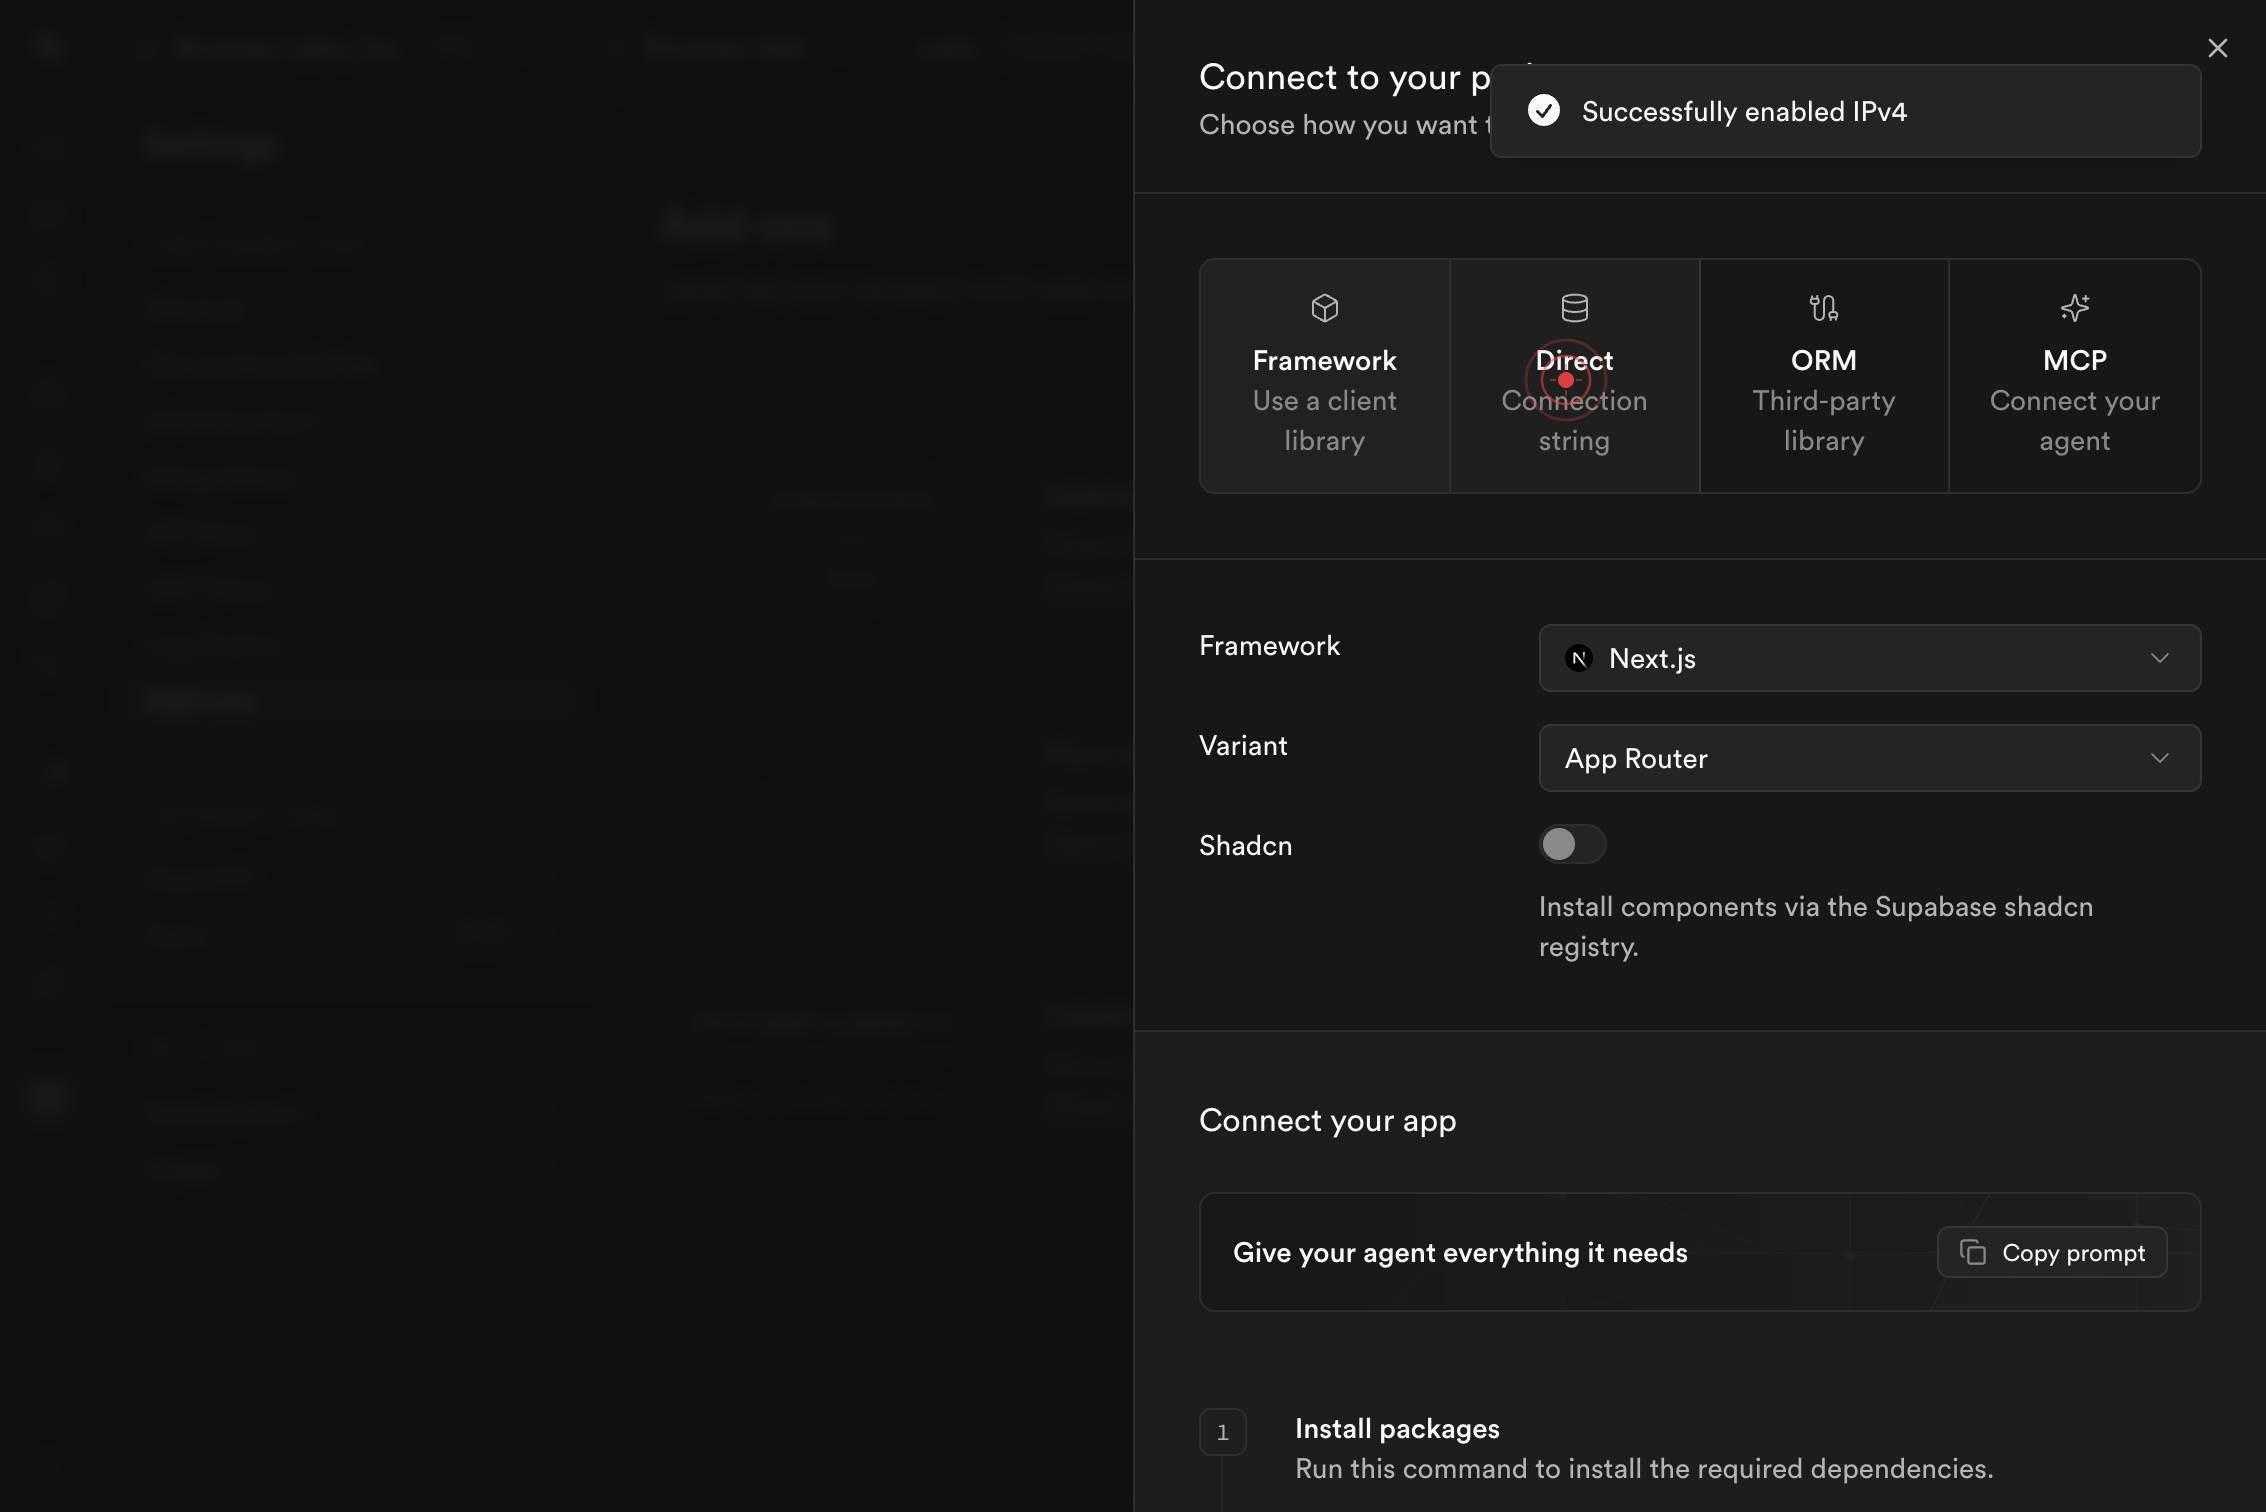
Direct Connection stringClick the Direct Connection string button to view and access your direct Postgres connection URL. This string contains your dedicated IPv4 address, port, username, password, and database name in a single URI format ready for use in your application.
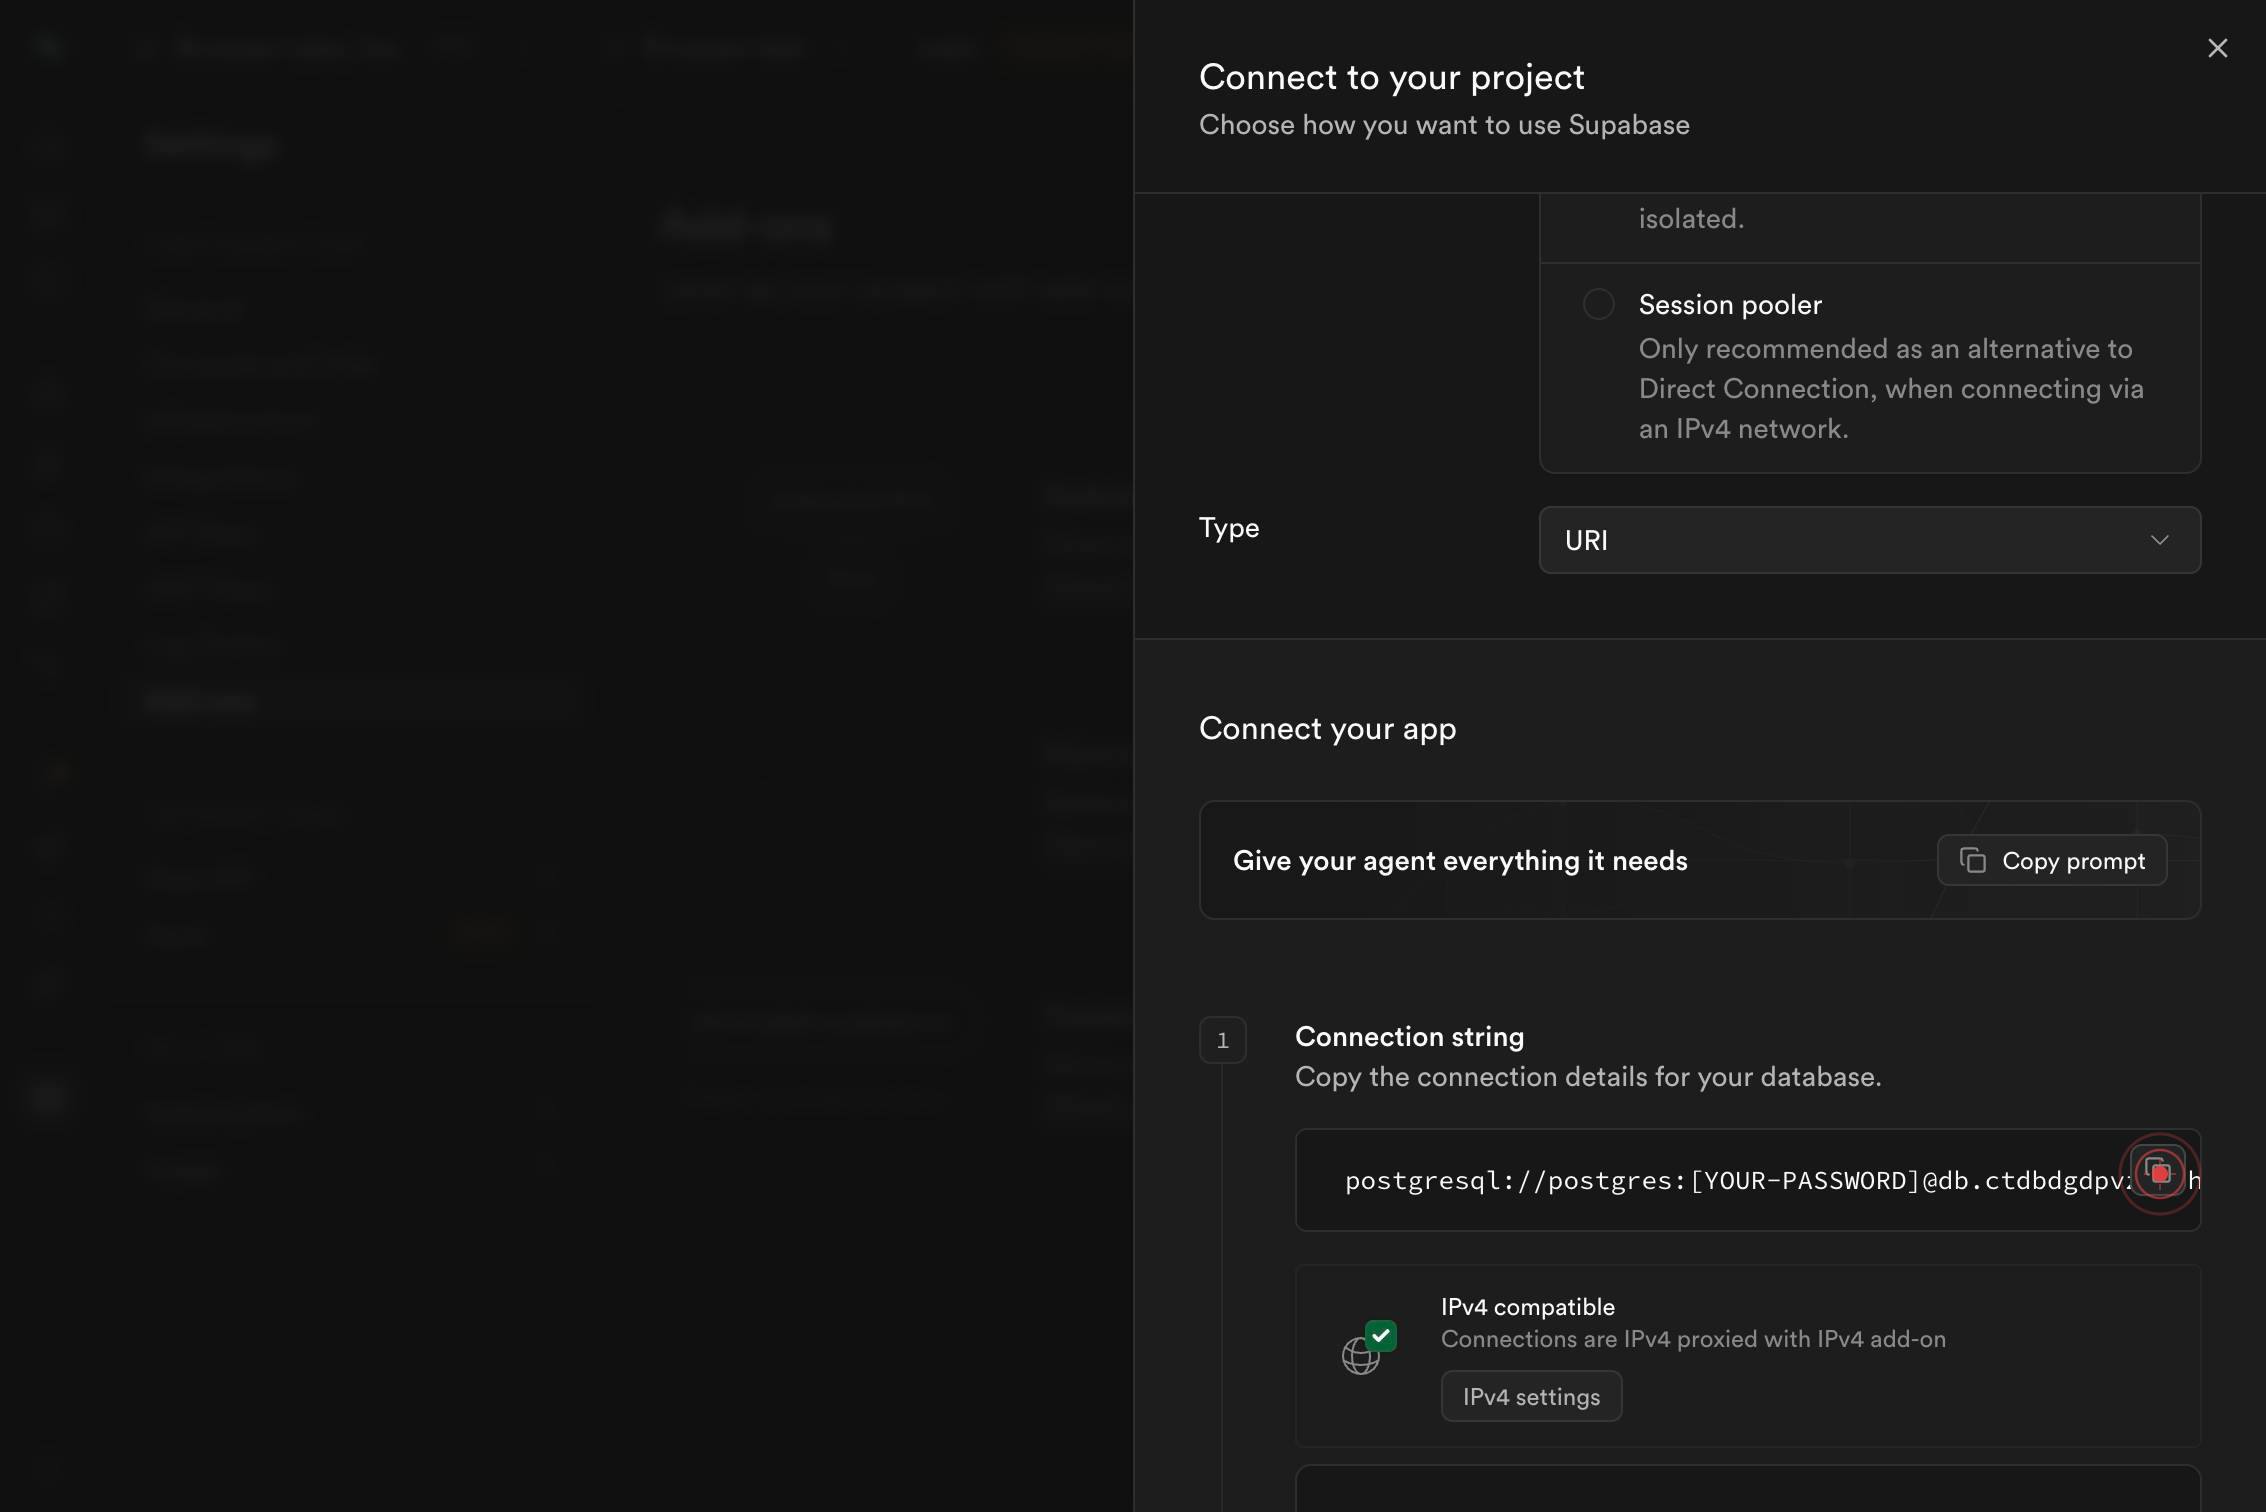
buttonClick the button (typically a copy icon or action button) to copy the direct connection string to your clipboard, making it ready to paste into your application, environment variables, or database client configuration.
Confirm it worked
- 1The Dedicated IPv4 address add-on status changes from 'DISABLED' to 'ENABLED' in the Add-ons menu
- 2A confirmation message or success indicator appears after clicking the Confirm button
- 3The Direct Connection string button is accessible and displays a connection URL containing your dedicated IPv4 address (typically in the format `postgres://user:password@ip.address:5432/database`)
- 4The connection string appears in a modal or copy-to-clipboard interface for immediate use in your application
Common issues
Keep reading
Connect to your database
# Connect to your database Supabase provides multiple methods to connect to your Postgres database, whether you’re working on the frontend, backend, or utilizing serverless functions. ## How to conn
supabase.ioUse Supabase with React | Supabase Docs
# Use Supabase with React Learn how to create a Supabase project, add some sample data to your database, and query the data from a React app. 1. Create a Supabase project Go to database.new and cre
supabase.comUse Supabase with Next.js | Supabase Docs
# Use Supabase with Next.js Learn how to create a Supabase project, add some sample data, and query from a Next.js app. 1. Create a Supabase project Go to database.new and create a new Supabase pro
supabase.com