Guide
Enable Meeting Scheduling
Overview
LIAM is an AI copilot designed to streamline communication by drafting email responses in your tone. Beyond email, LIAM offers calendar integration capabilities that allow you to automate meeting scheduling workflows. Enabling Calendar Scheduling on your profile unlocks the ability for LIAM to intelligently manage meeting invitations and scheduling requests, reducing manual calendar coordination work. This is especially valuable if you receive frequent meeting requests or need to maintain a consistent scheduling process across your organization.
Before you begin
- An active account on doitliam.com with profile access
- Admin or owner-level permissions to modify profile settings
- Access to the Settings or Profile section of your LIAM account
Step by step
ProfileNavigate to your profile settings by clicking the Profile link in the main navigation. This opens your account profile page where you can manage all personal and feature settings.
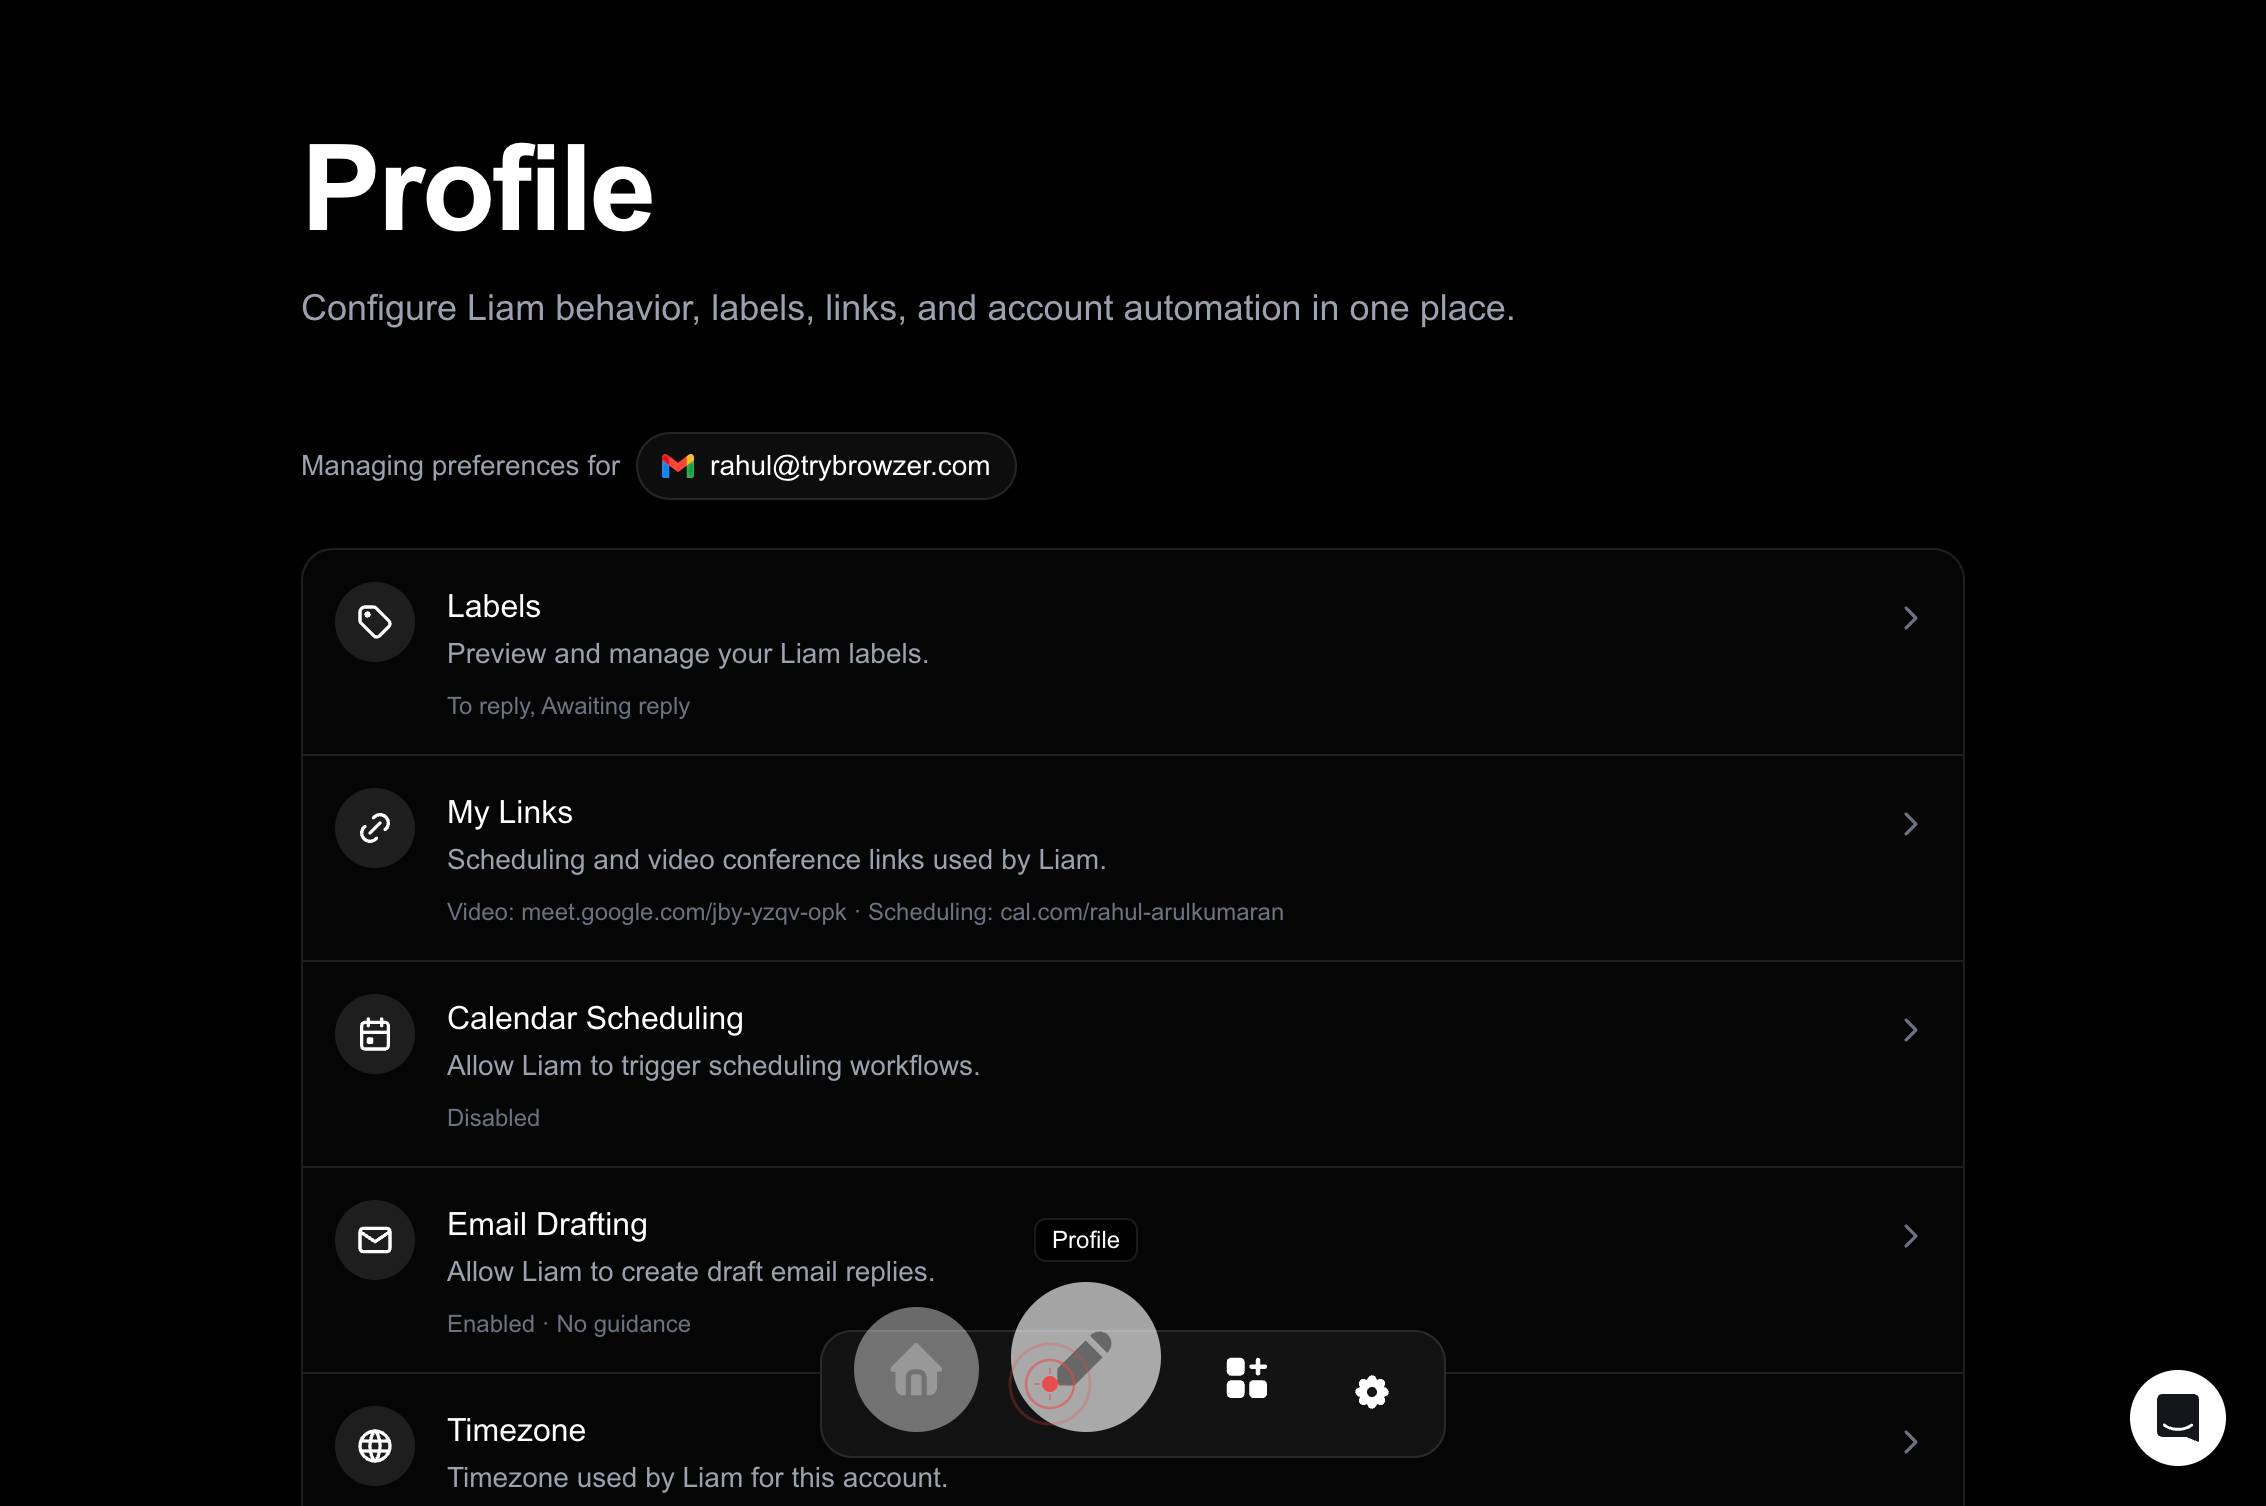
Calendar Scheduling Allow Liam to trigger scheduling workflows. DisabledLocate the Calendar Scheduling setting, which is labeled "Calendar Scheduling Allow Liam to trigger scheduling workflows. Disabled." Click on this button to access the scheduling configuration.
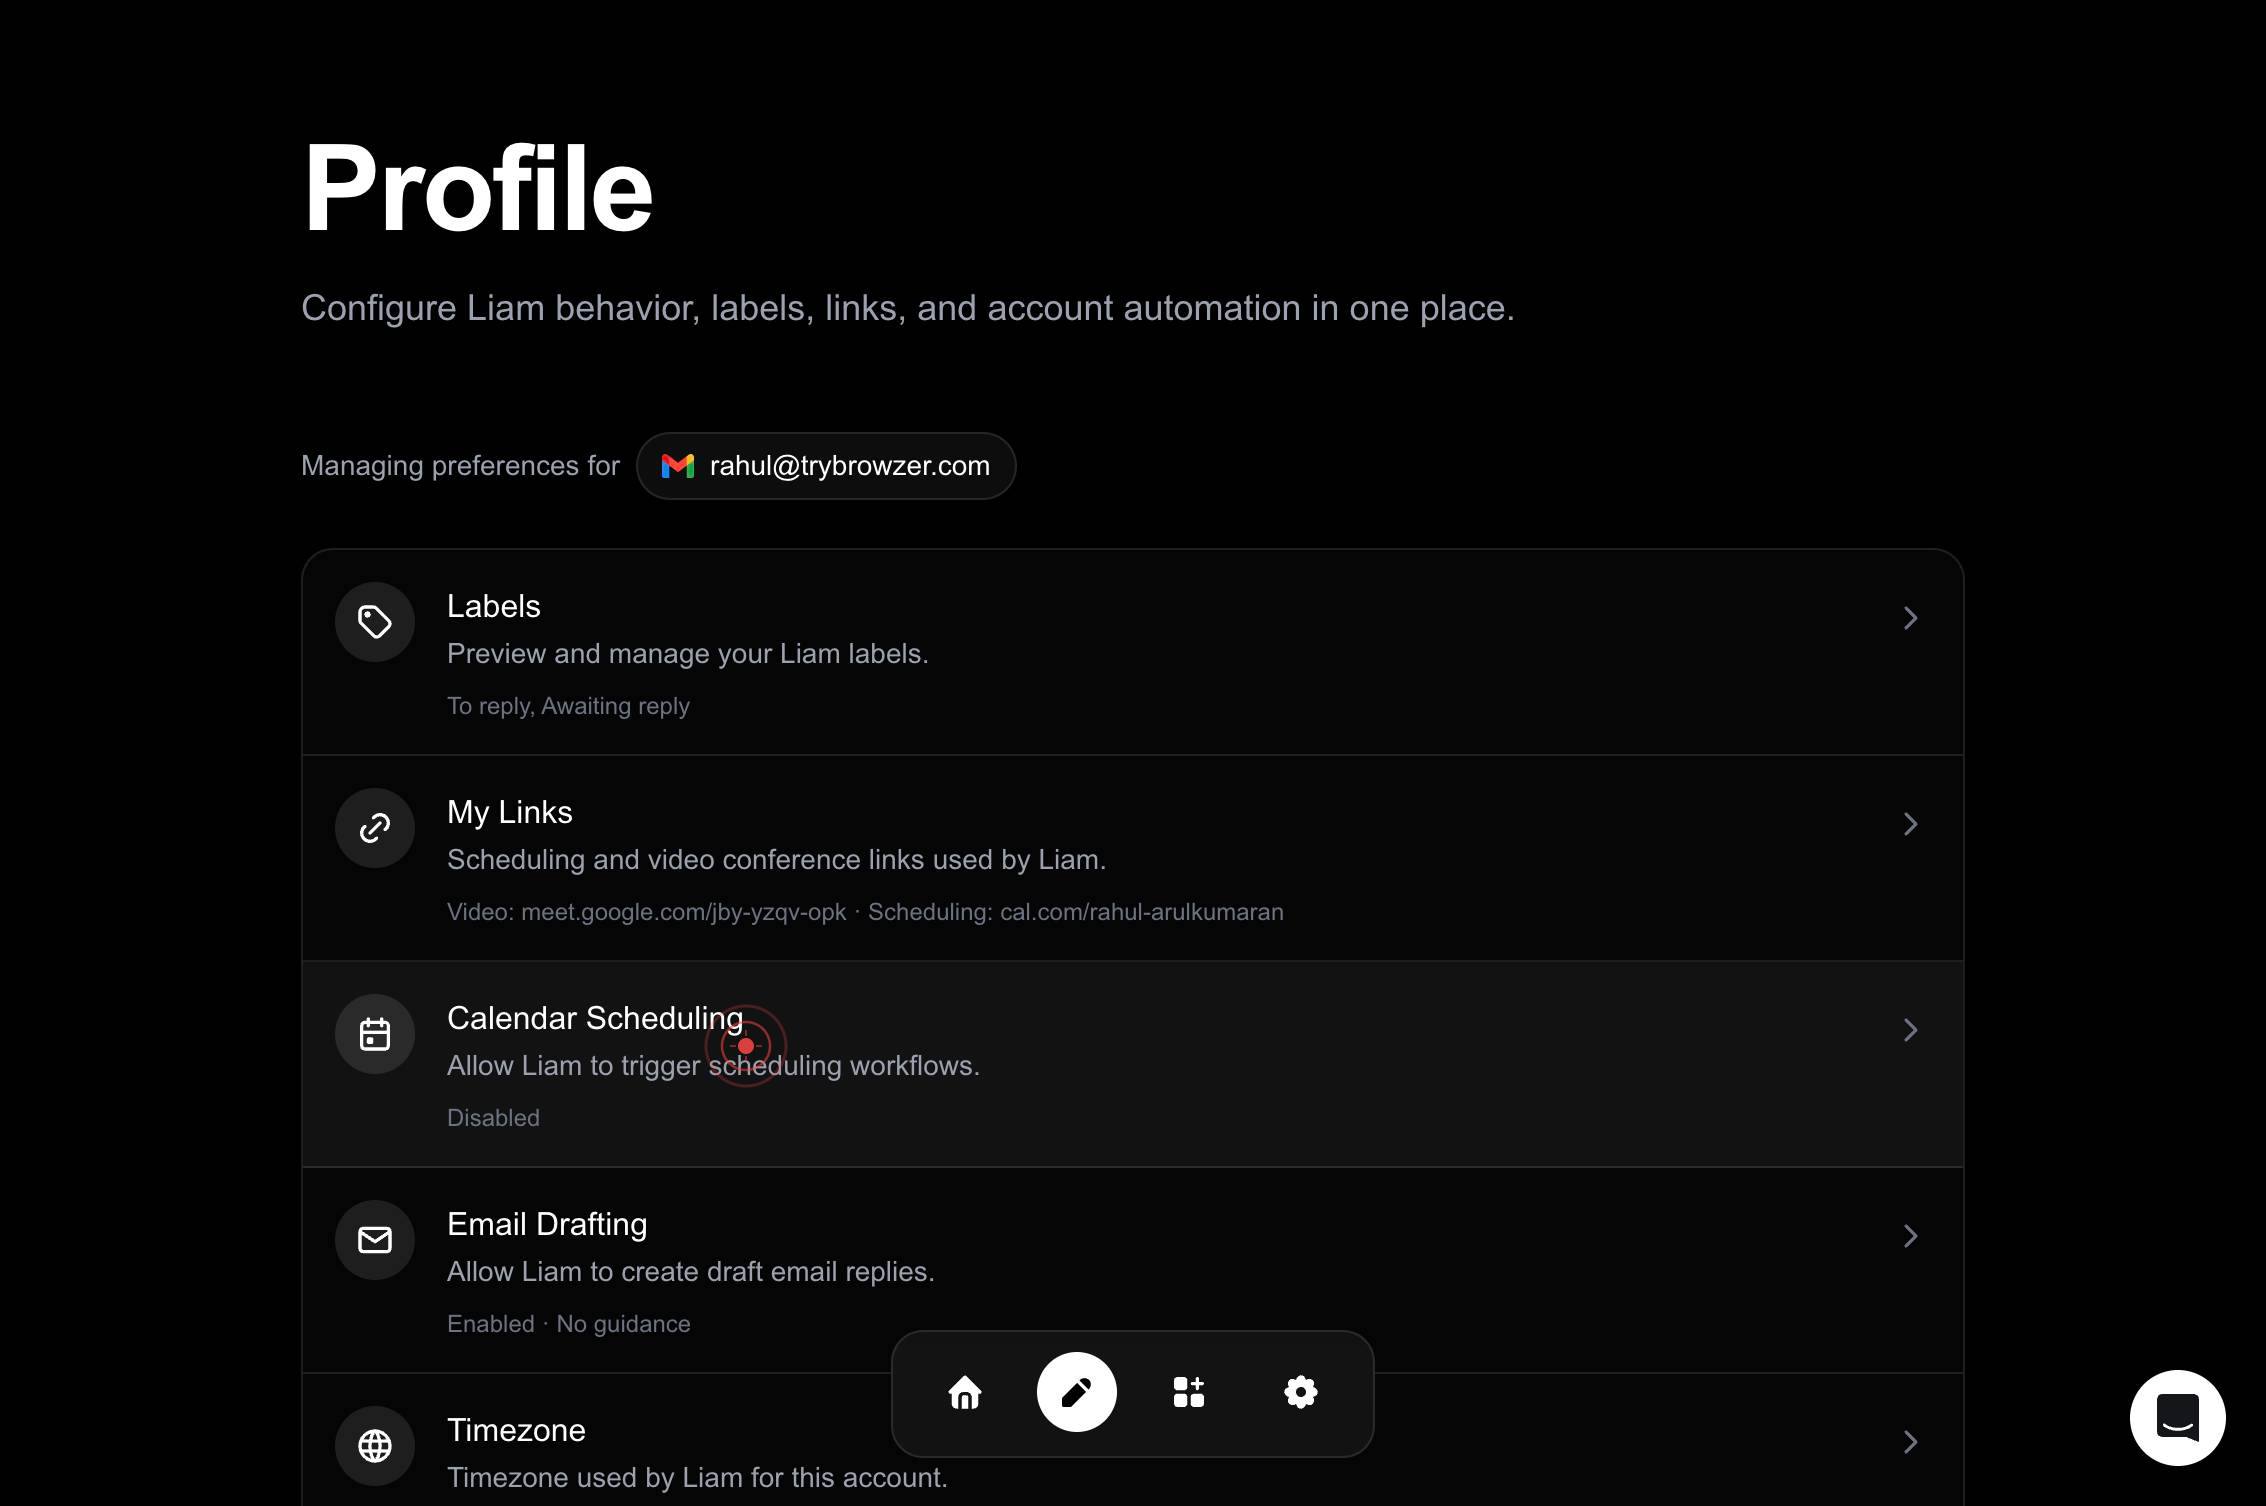
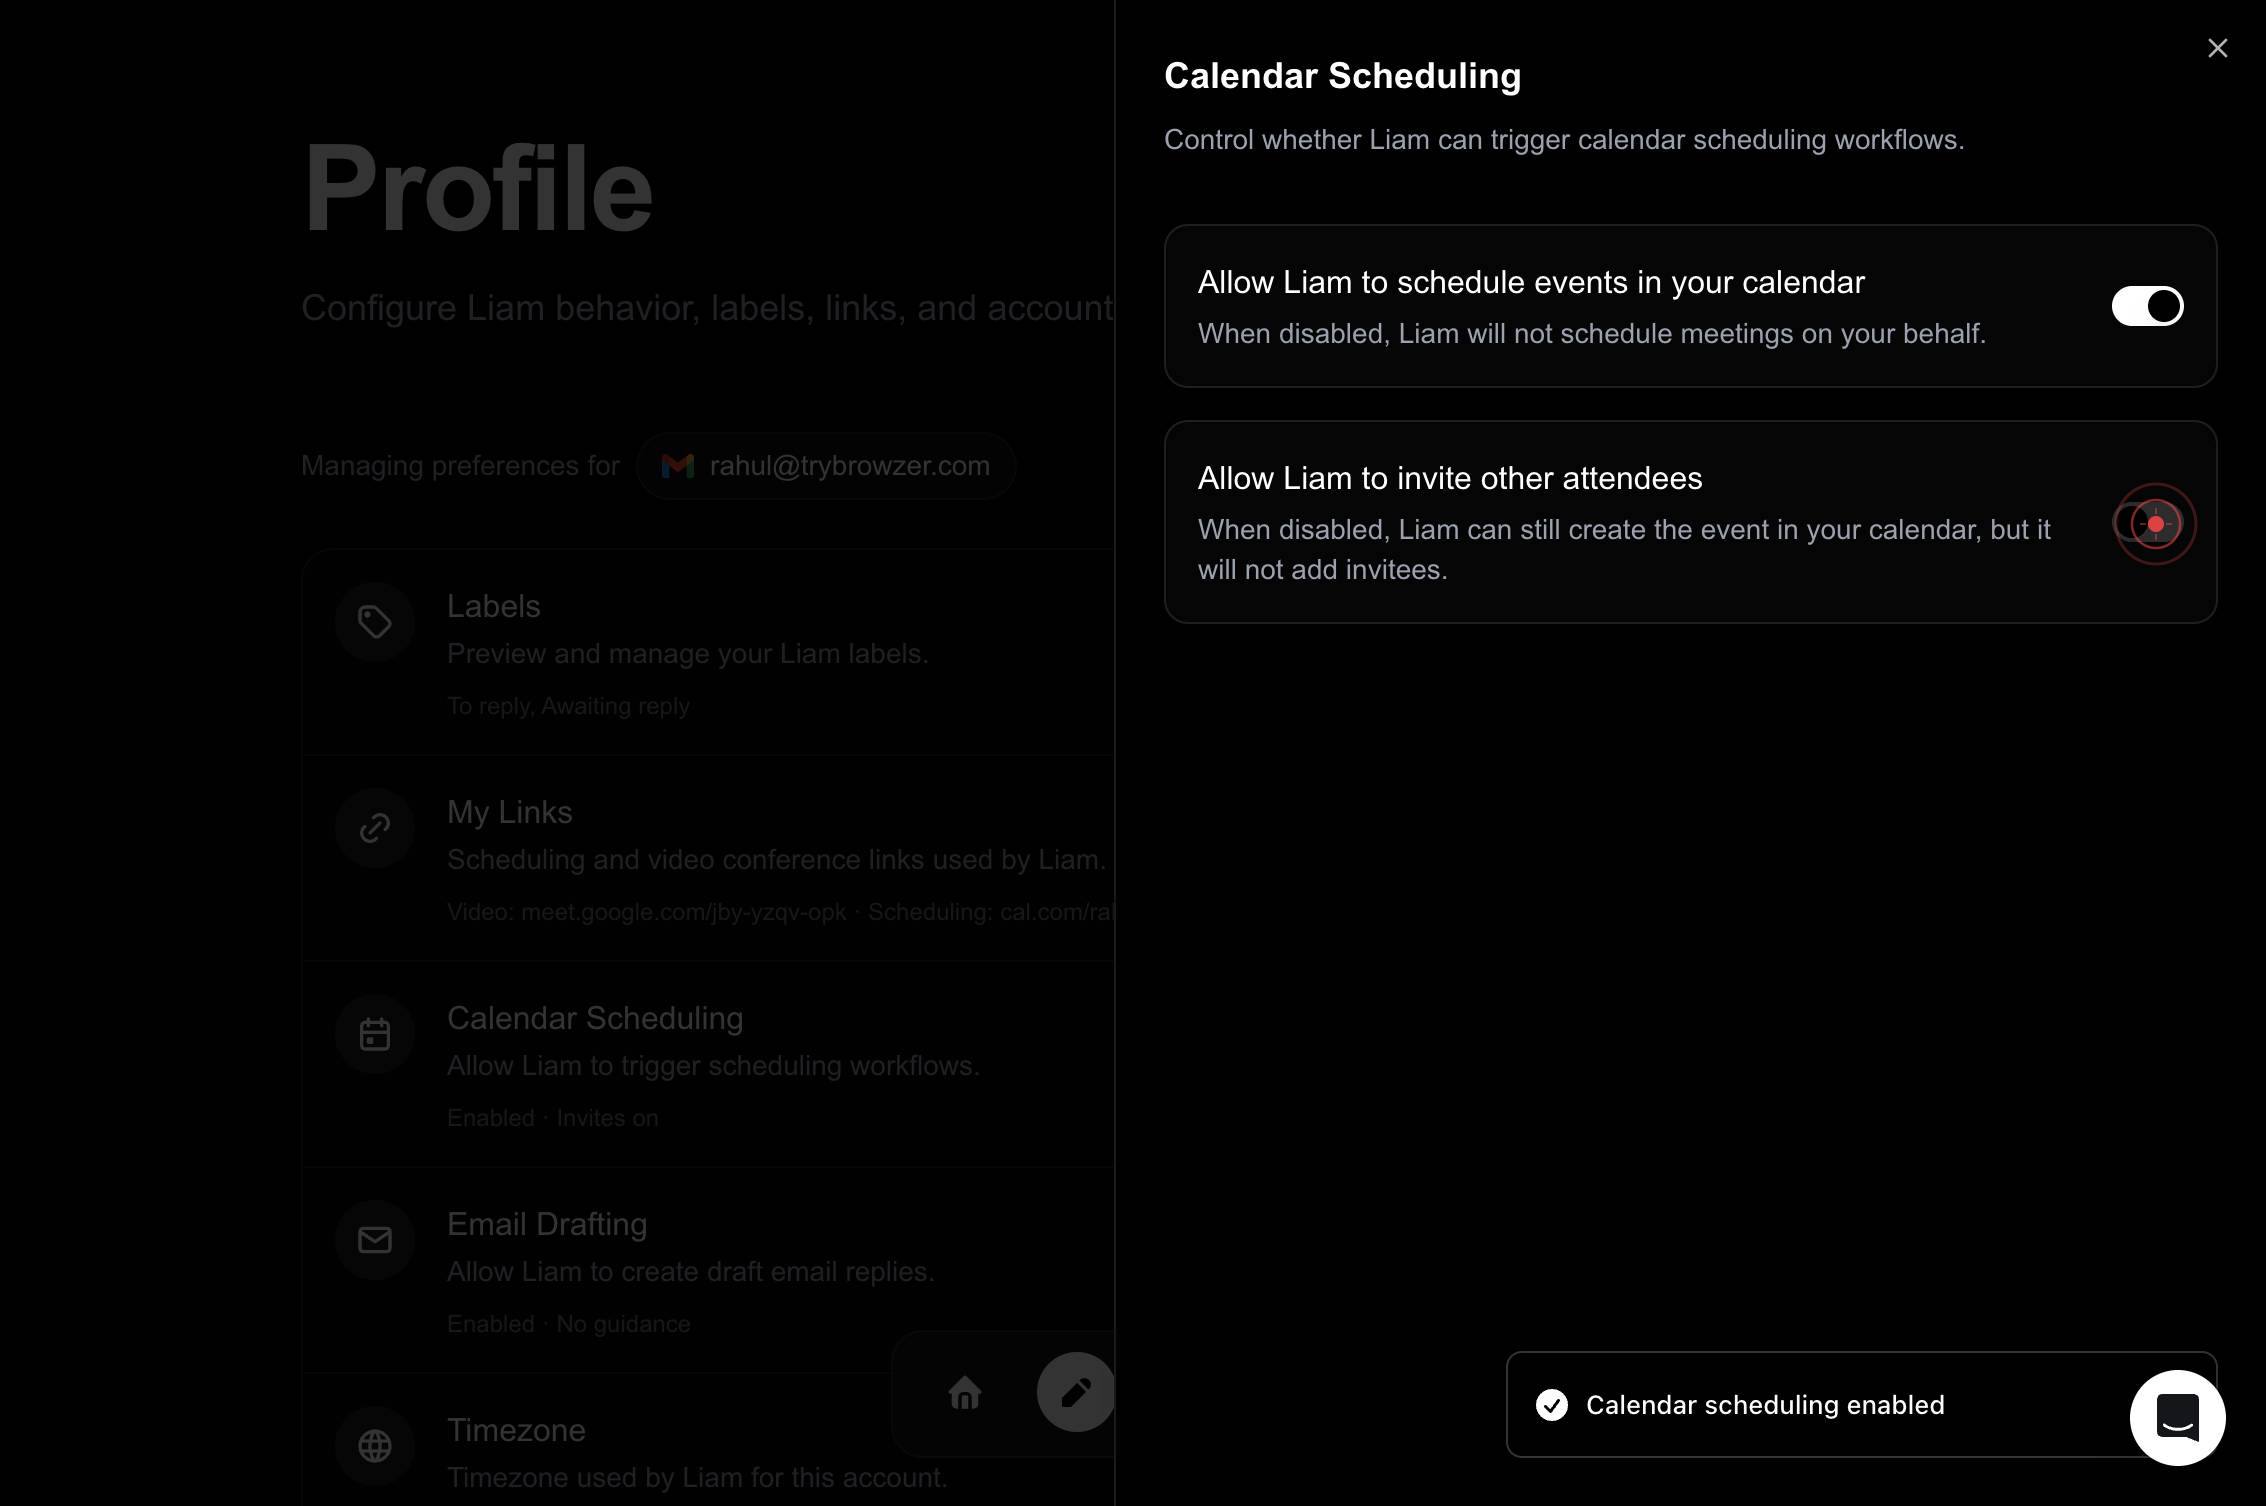
onClick the toggle switch labeled "on" to enable the Calendar Scheduling feature. This activates LIAM's ability to manage meeting scheduling workflows.
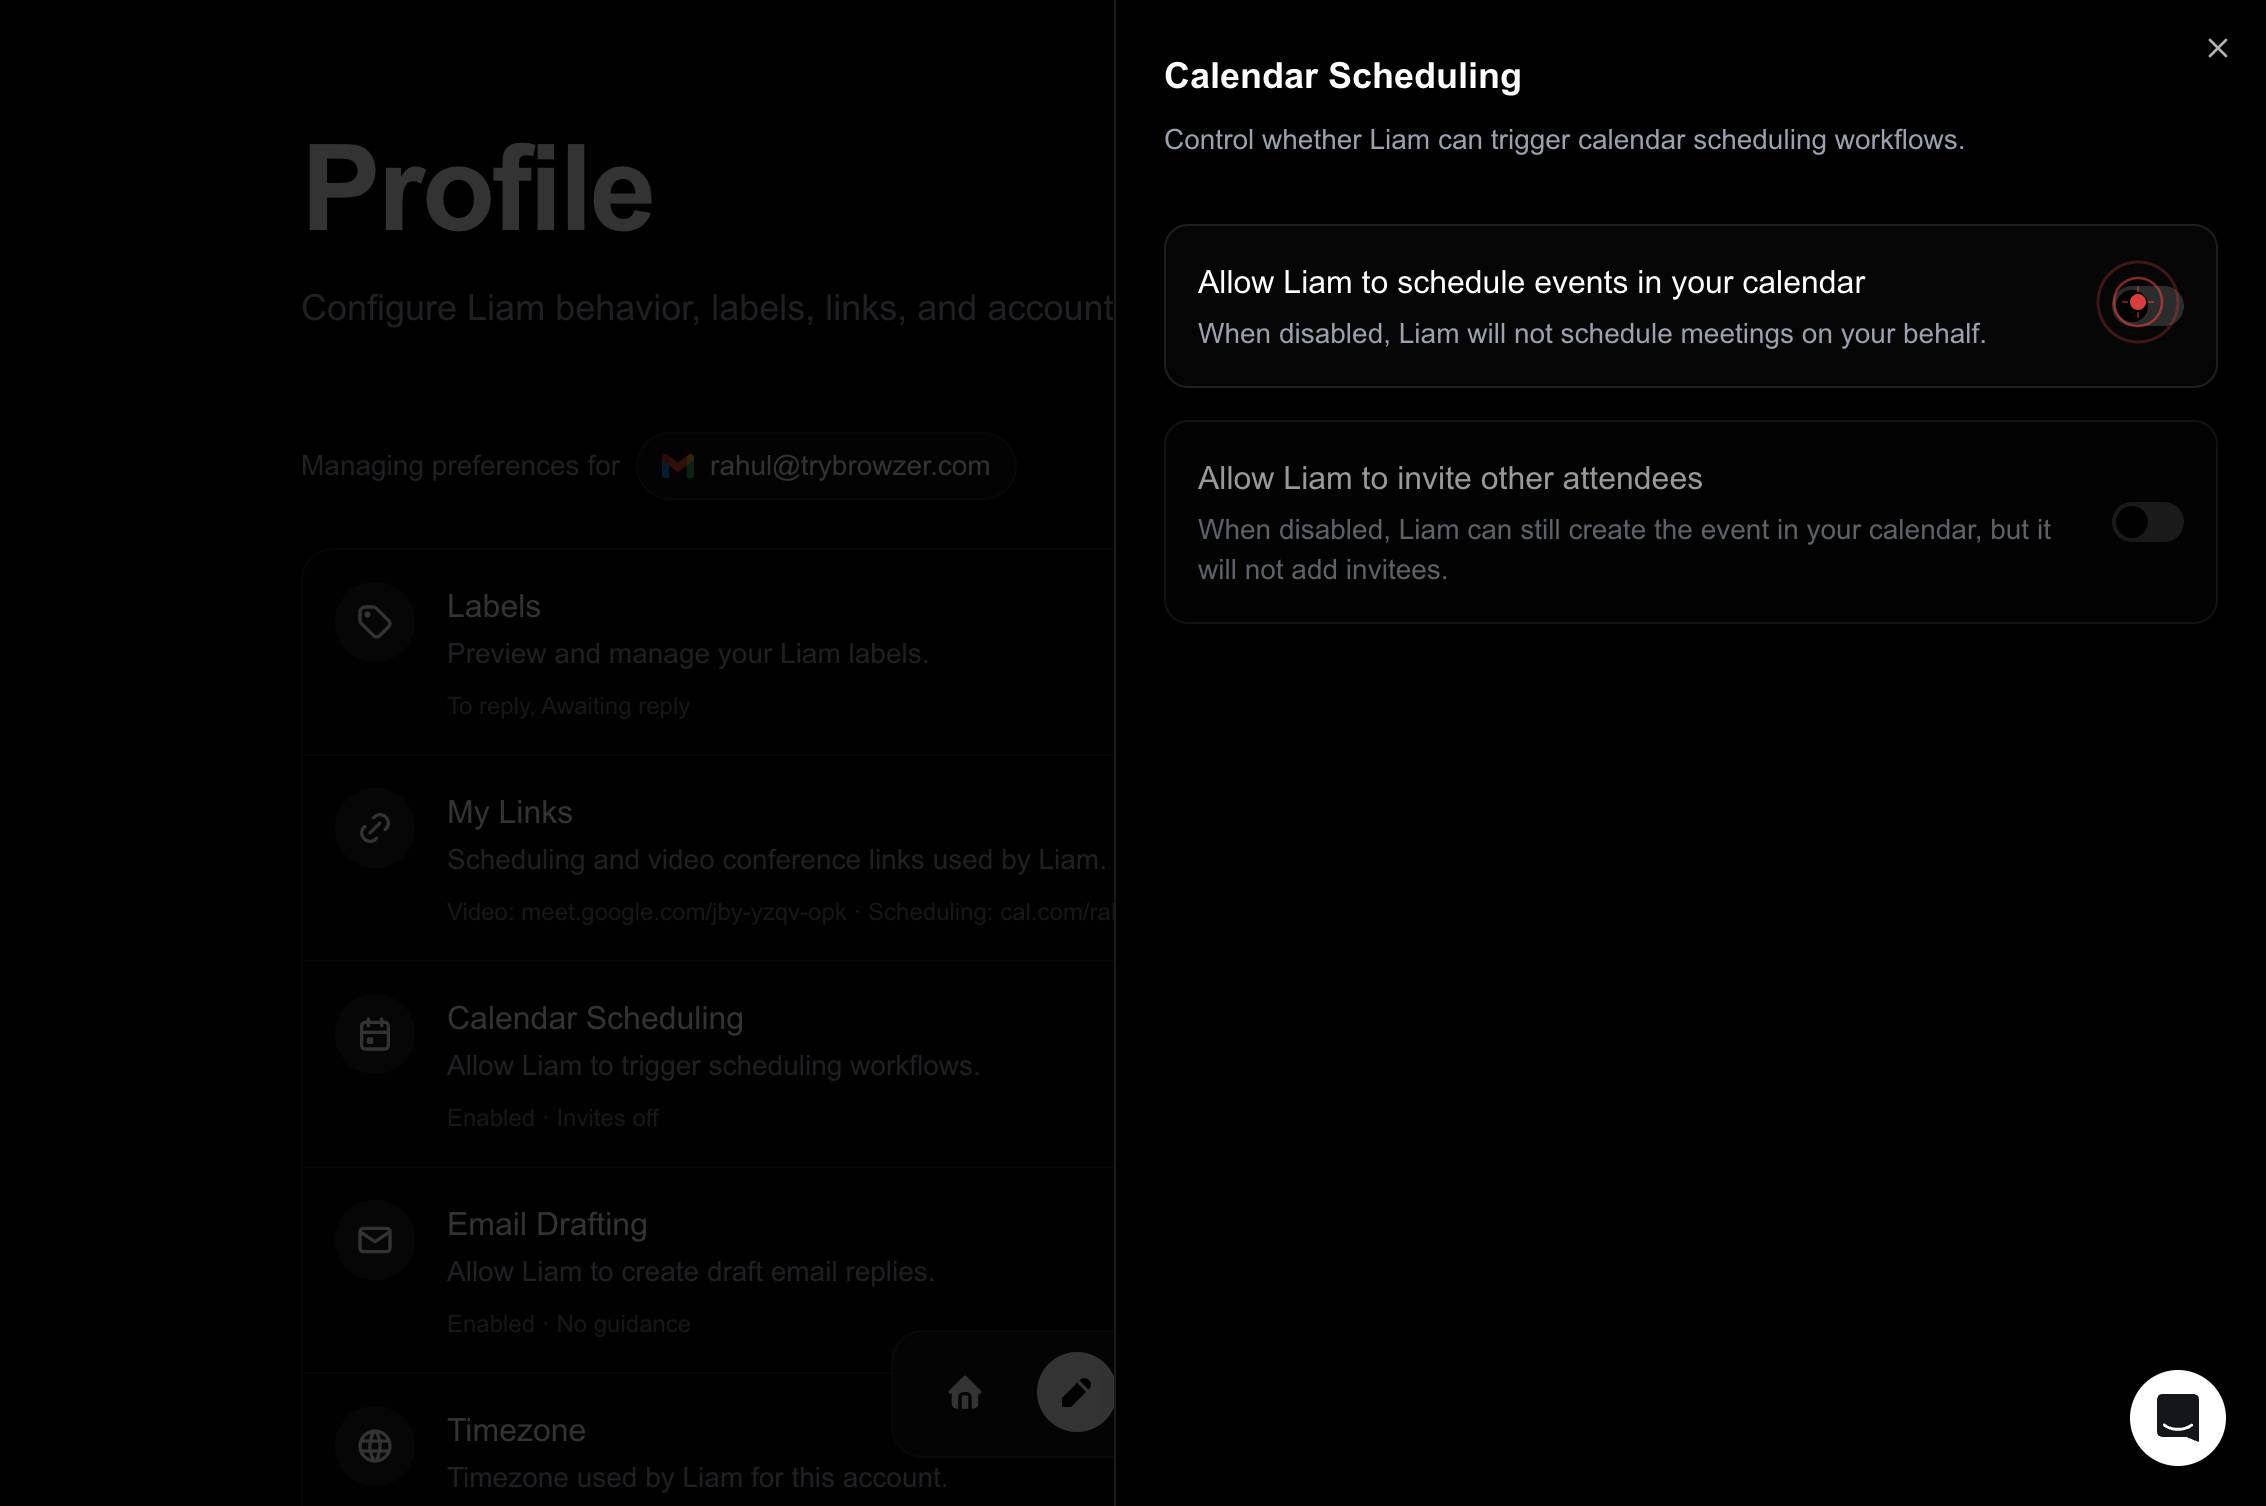
onConfirm the setting by clicking the "on" toggle switch again if a confirmation dialog appears, or proceed to save your changes. This finalizes the Calendar Scheduling enablement for your profile.
Confirm it worked
- 1After toggling, the Calendar Scheduling setting should display "Enabled" instead of "Disabled"
- 2The toggle switch should visually indicate the "on" state (typically a filled or highlighted toggle)
- 3You should remain on the profile settings page with no error messages displayed
- 4The Calendar Scheduling feature description should confirm that Liam can now trigger scheduling workflows
Common issues
Keep reading
Create an appointment schedule - Google Calendar Help
Create an appointment schedule - Google Calendar Help # Create an appointment schedule When you create a new appointment schedule, you need to: - Customise how you meet with others. - Select the ap
support.google.comCreate an appointment schedule - Google Calendar Help
Create an appointment schedule - Google Calendar Help # Create an appointment schedule When you create a new appointment schedule, you need to: - Customize how you meet with others. - Select the ap
support.google.comCreate an appointment schedule - Google Calendar Help
Create an appointment schedule - Google Calendar Help # Create an appointment schedule When you create a new appointment schedule, you need to: - Select the appointment duration and your availabili
support.google.com