Guide
Onboarding Questionnaire - Sprinto
Overview
Sprinto is a compliance and security management platform that helps organizations automate audit preparation, risk management, and policy administration. During initial setup, you must complete an onboarding questionnaire to inform Sprinto about your technical infrastructure, data handling practices, and product details. This information allows Sprinto to tailor its assessment framework, generate relevant security controls, and populate compliance policies specific to your organization's risk profile. Completing this questionnaire accurately is essential for generating an accurate compliance roadmap and ensuring all applicable security policies are included in your audit scope.
Before you begin
- Active account on app.sprinto.com with admin or setup permissions
- Knowledge of which infrastructure providers your organization uses (e.g., AWS, Heroku, GitHub)
- List of data types your product or service handles (e.g., personally identifiable information, cloud platform credentials)
- Product name and official product URLs (main website, documentation, etc.)
- Links to your Support page, Product Status page, and Terms of Service documents (or ability to add these later)
Step by step
onBegin the questionnaire by toggling the confirmation checkbox to acknowledge that you understand the scope of the onboarding process.
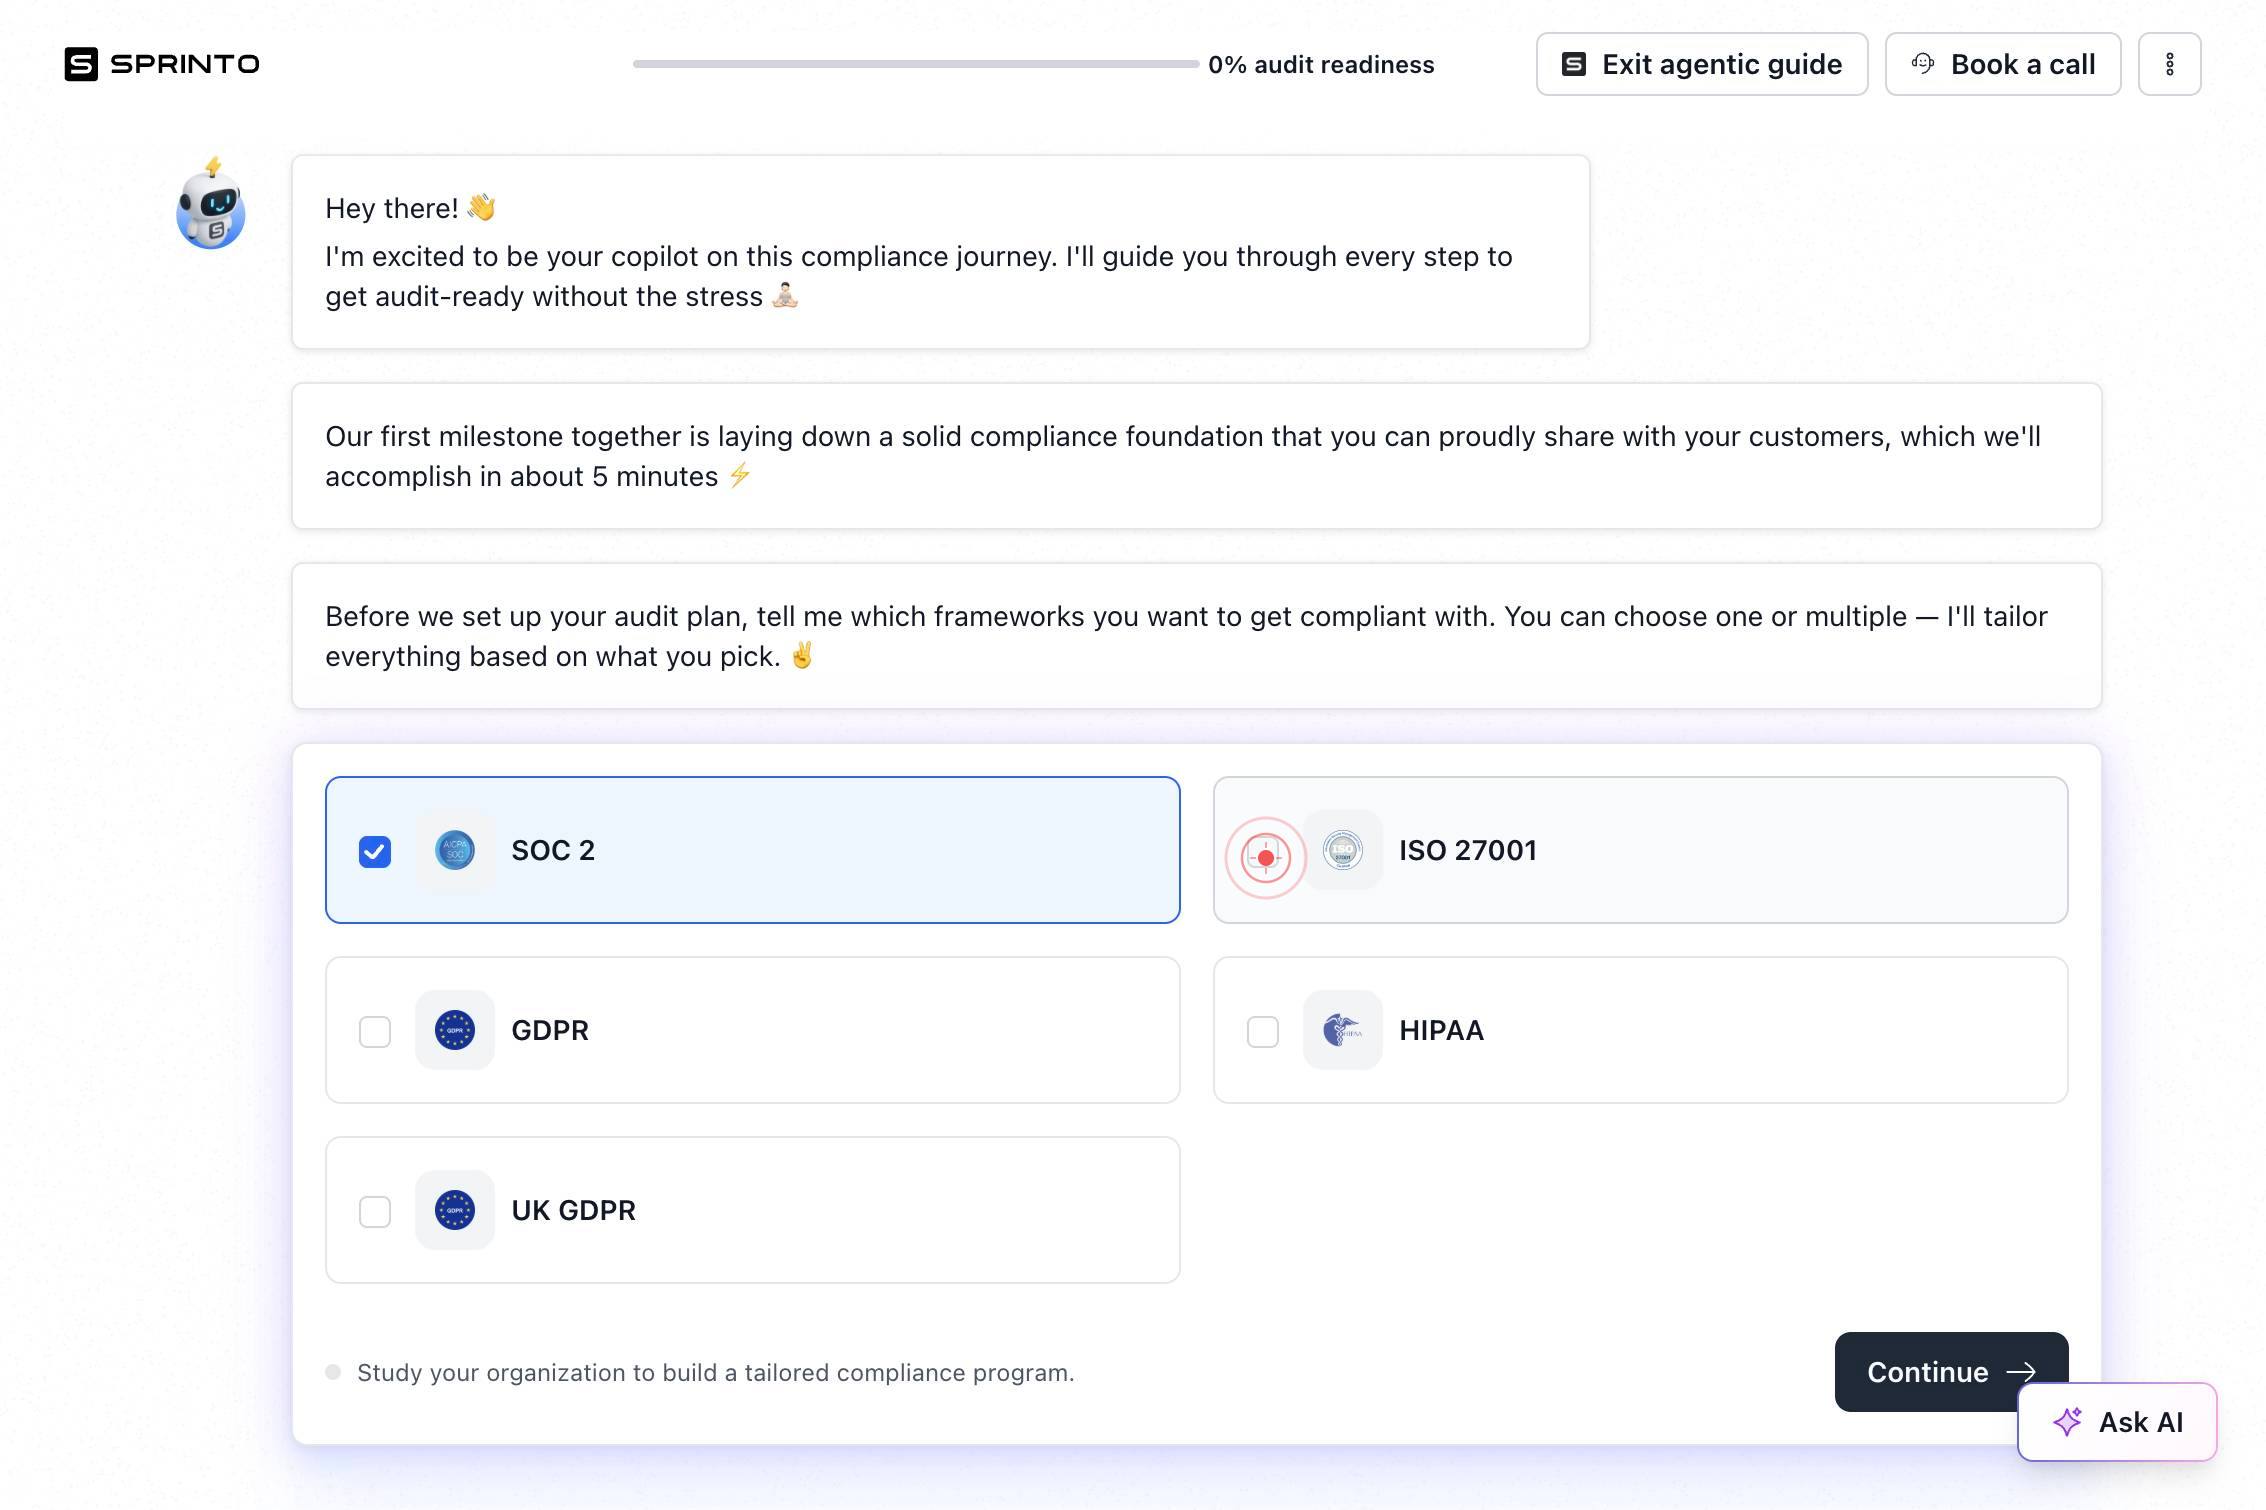
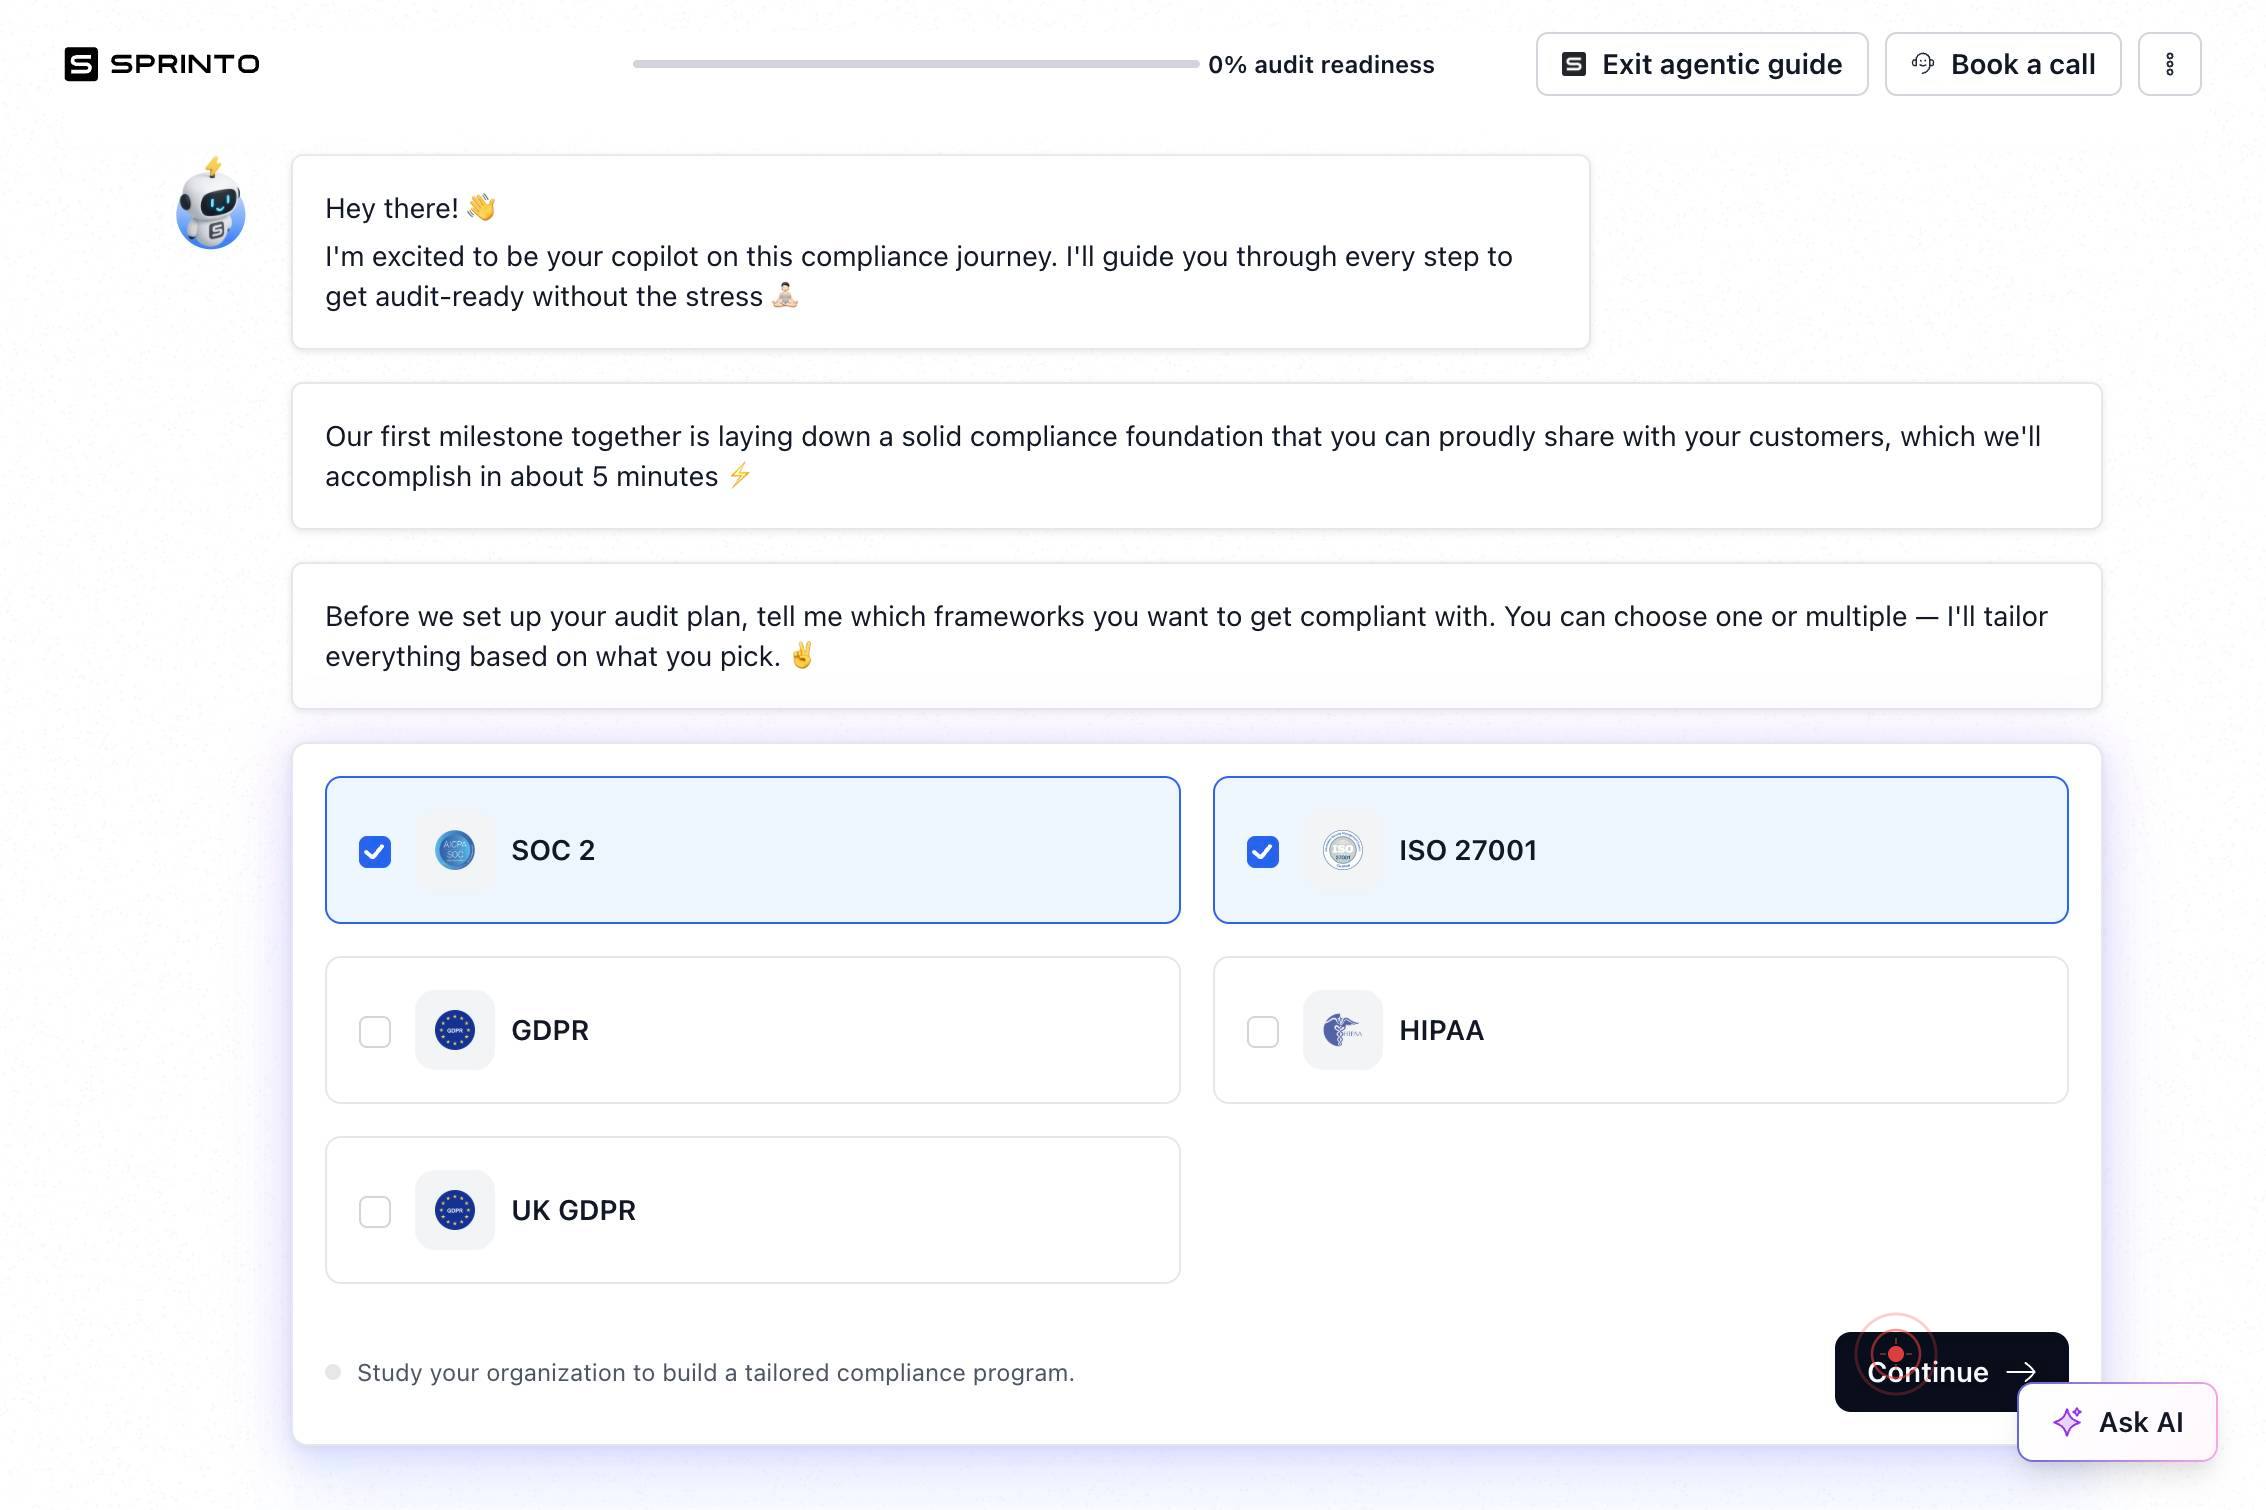
ContinueClick the 'Continue' button to proceed from the introduction screen to the infrastructure selection section.
MClick the 'M' button (likely a menu or modal toggle) to open or expand the infrastructure selection options.
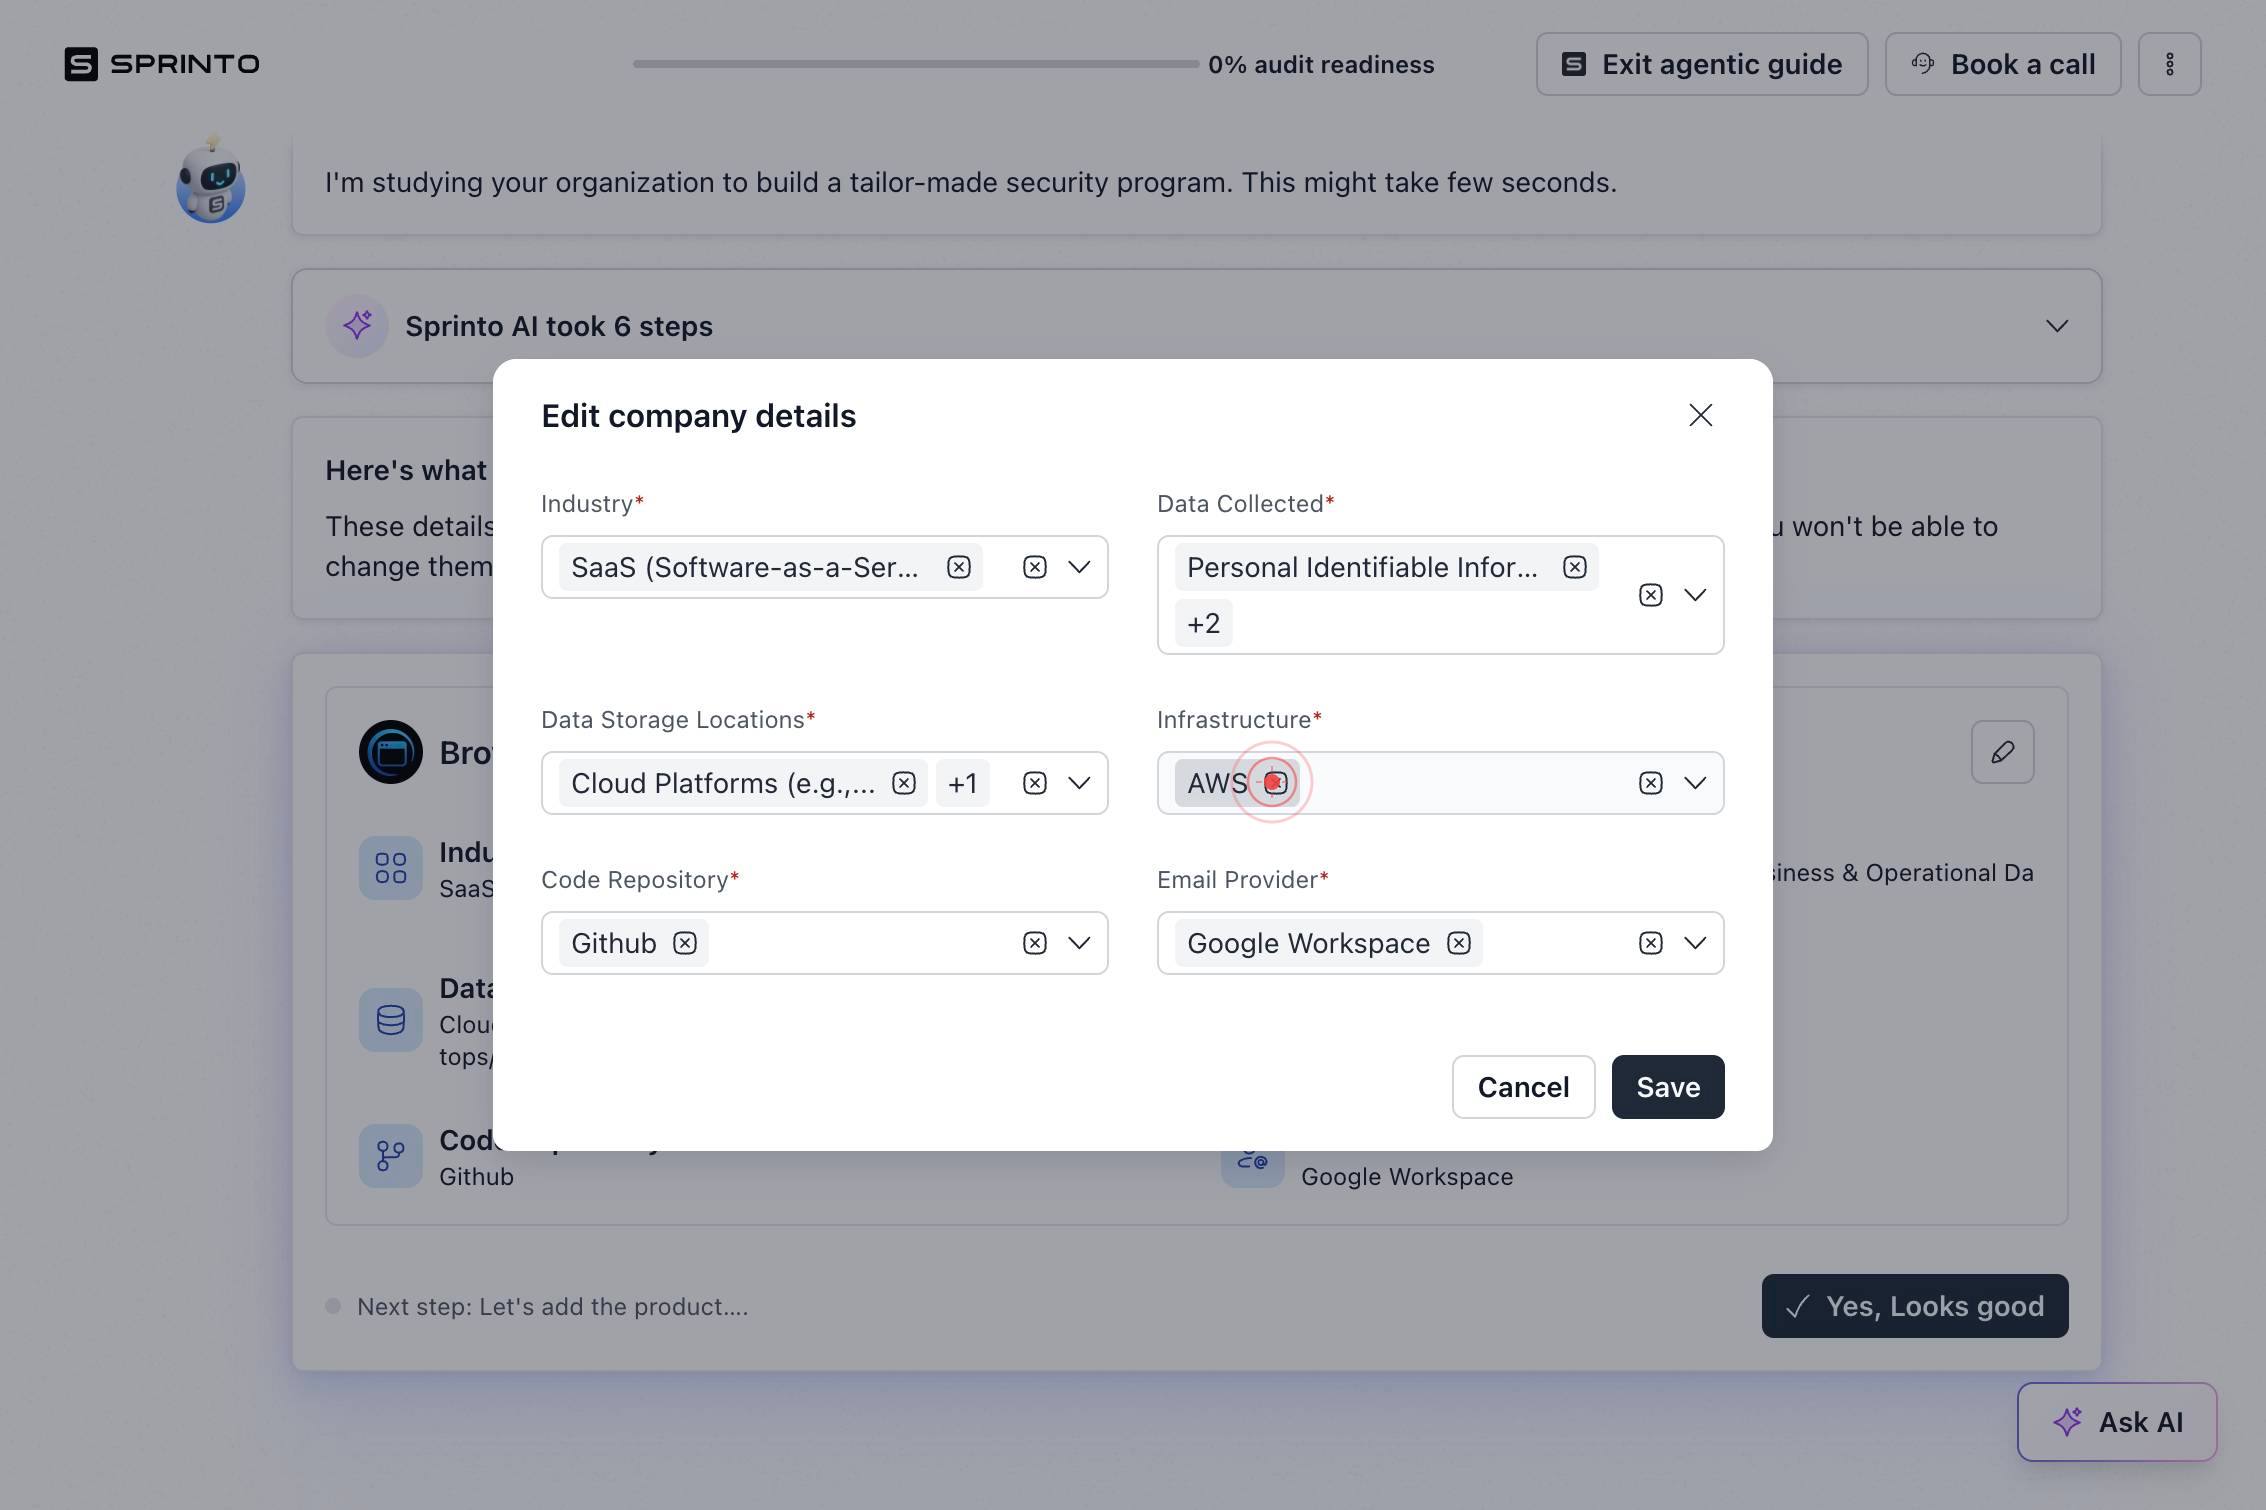
AWSClick on 'AWS' to select Amazon Web Services as one of your organization's infrastructure providers.
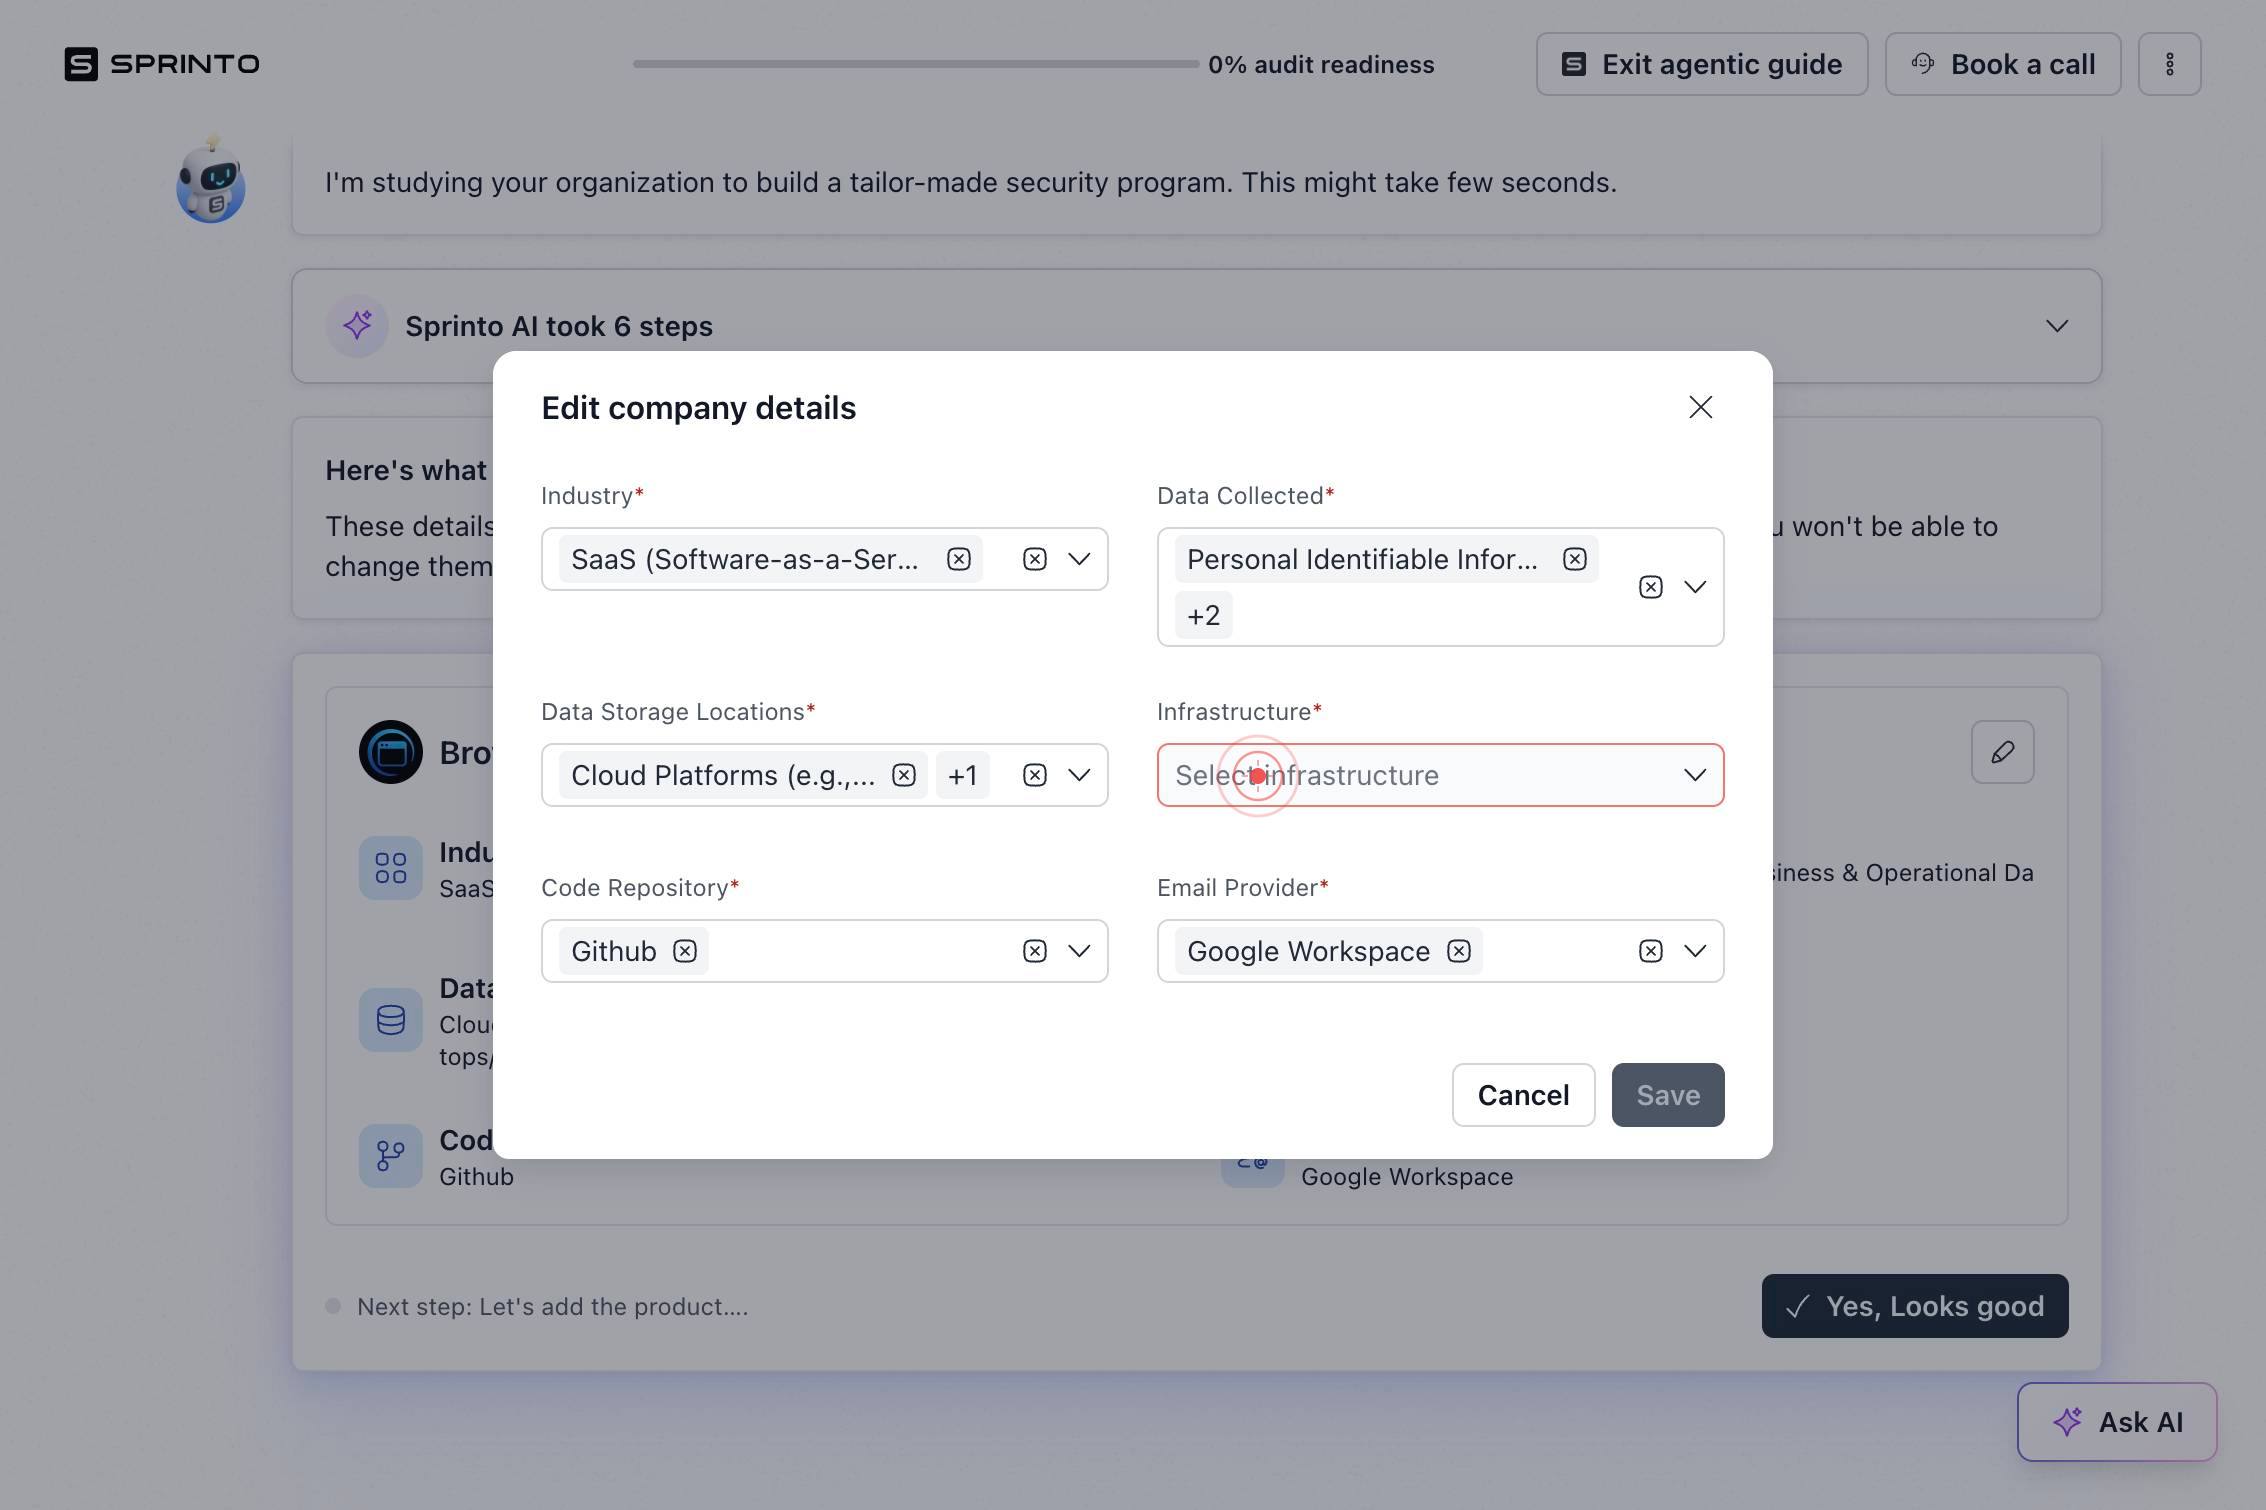
Select infrastructureClick the 'Select infrastructure' button to open the dropdown menu for adding additional infrastructure platforms.
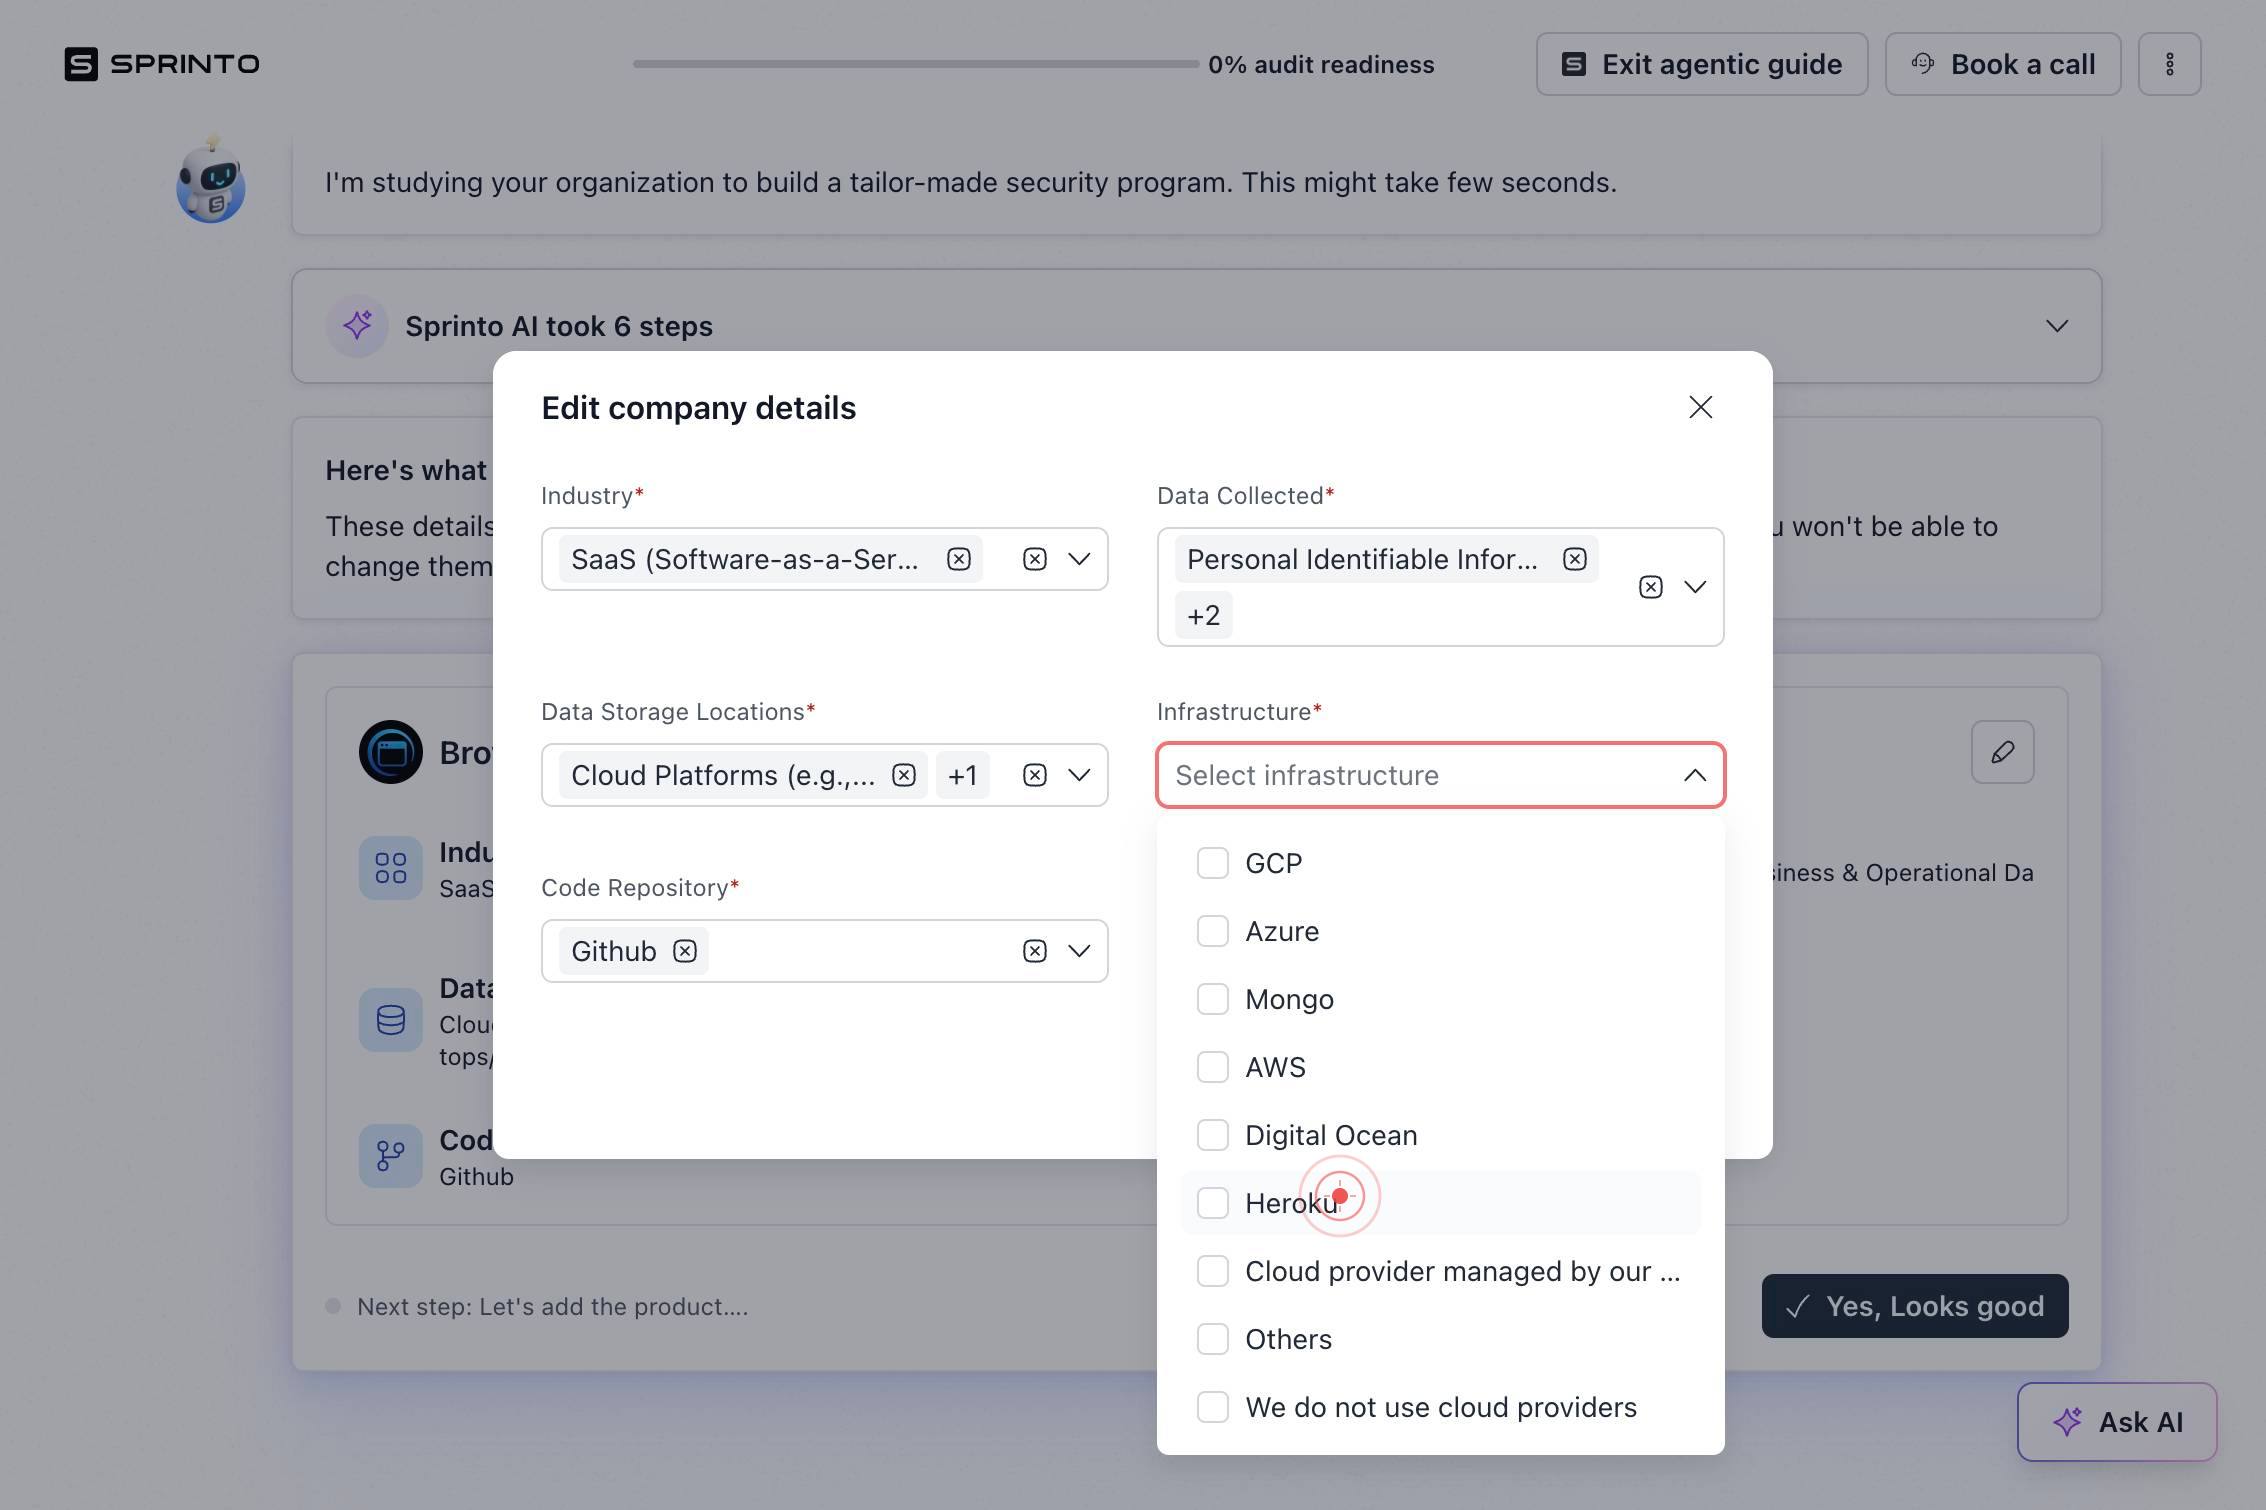
HerokuSelect 'Heroku' from the dropdown options to add it as a second infrastructure provider.
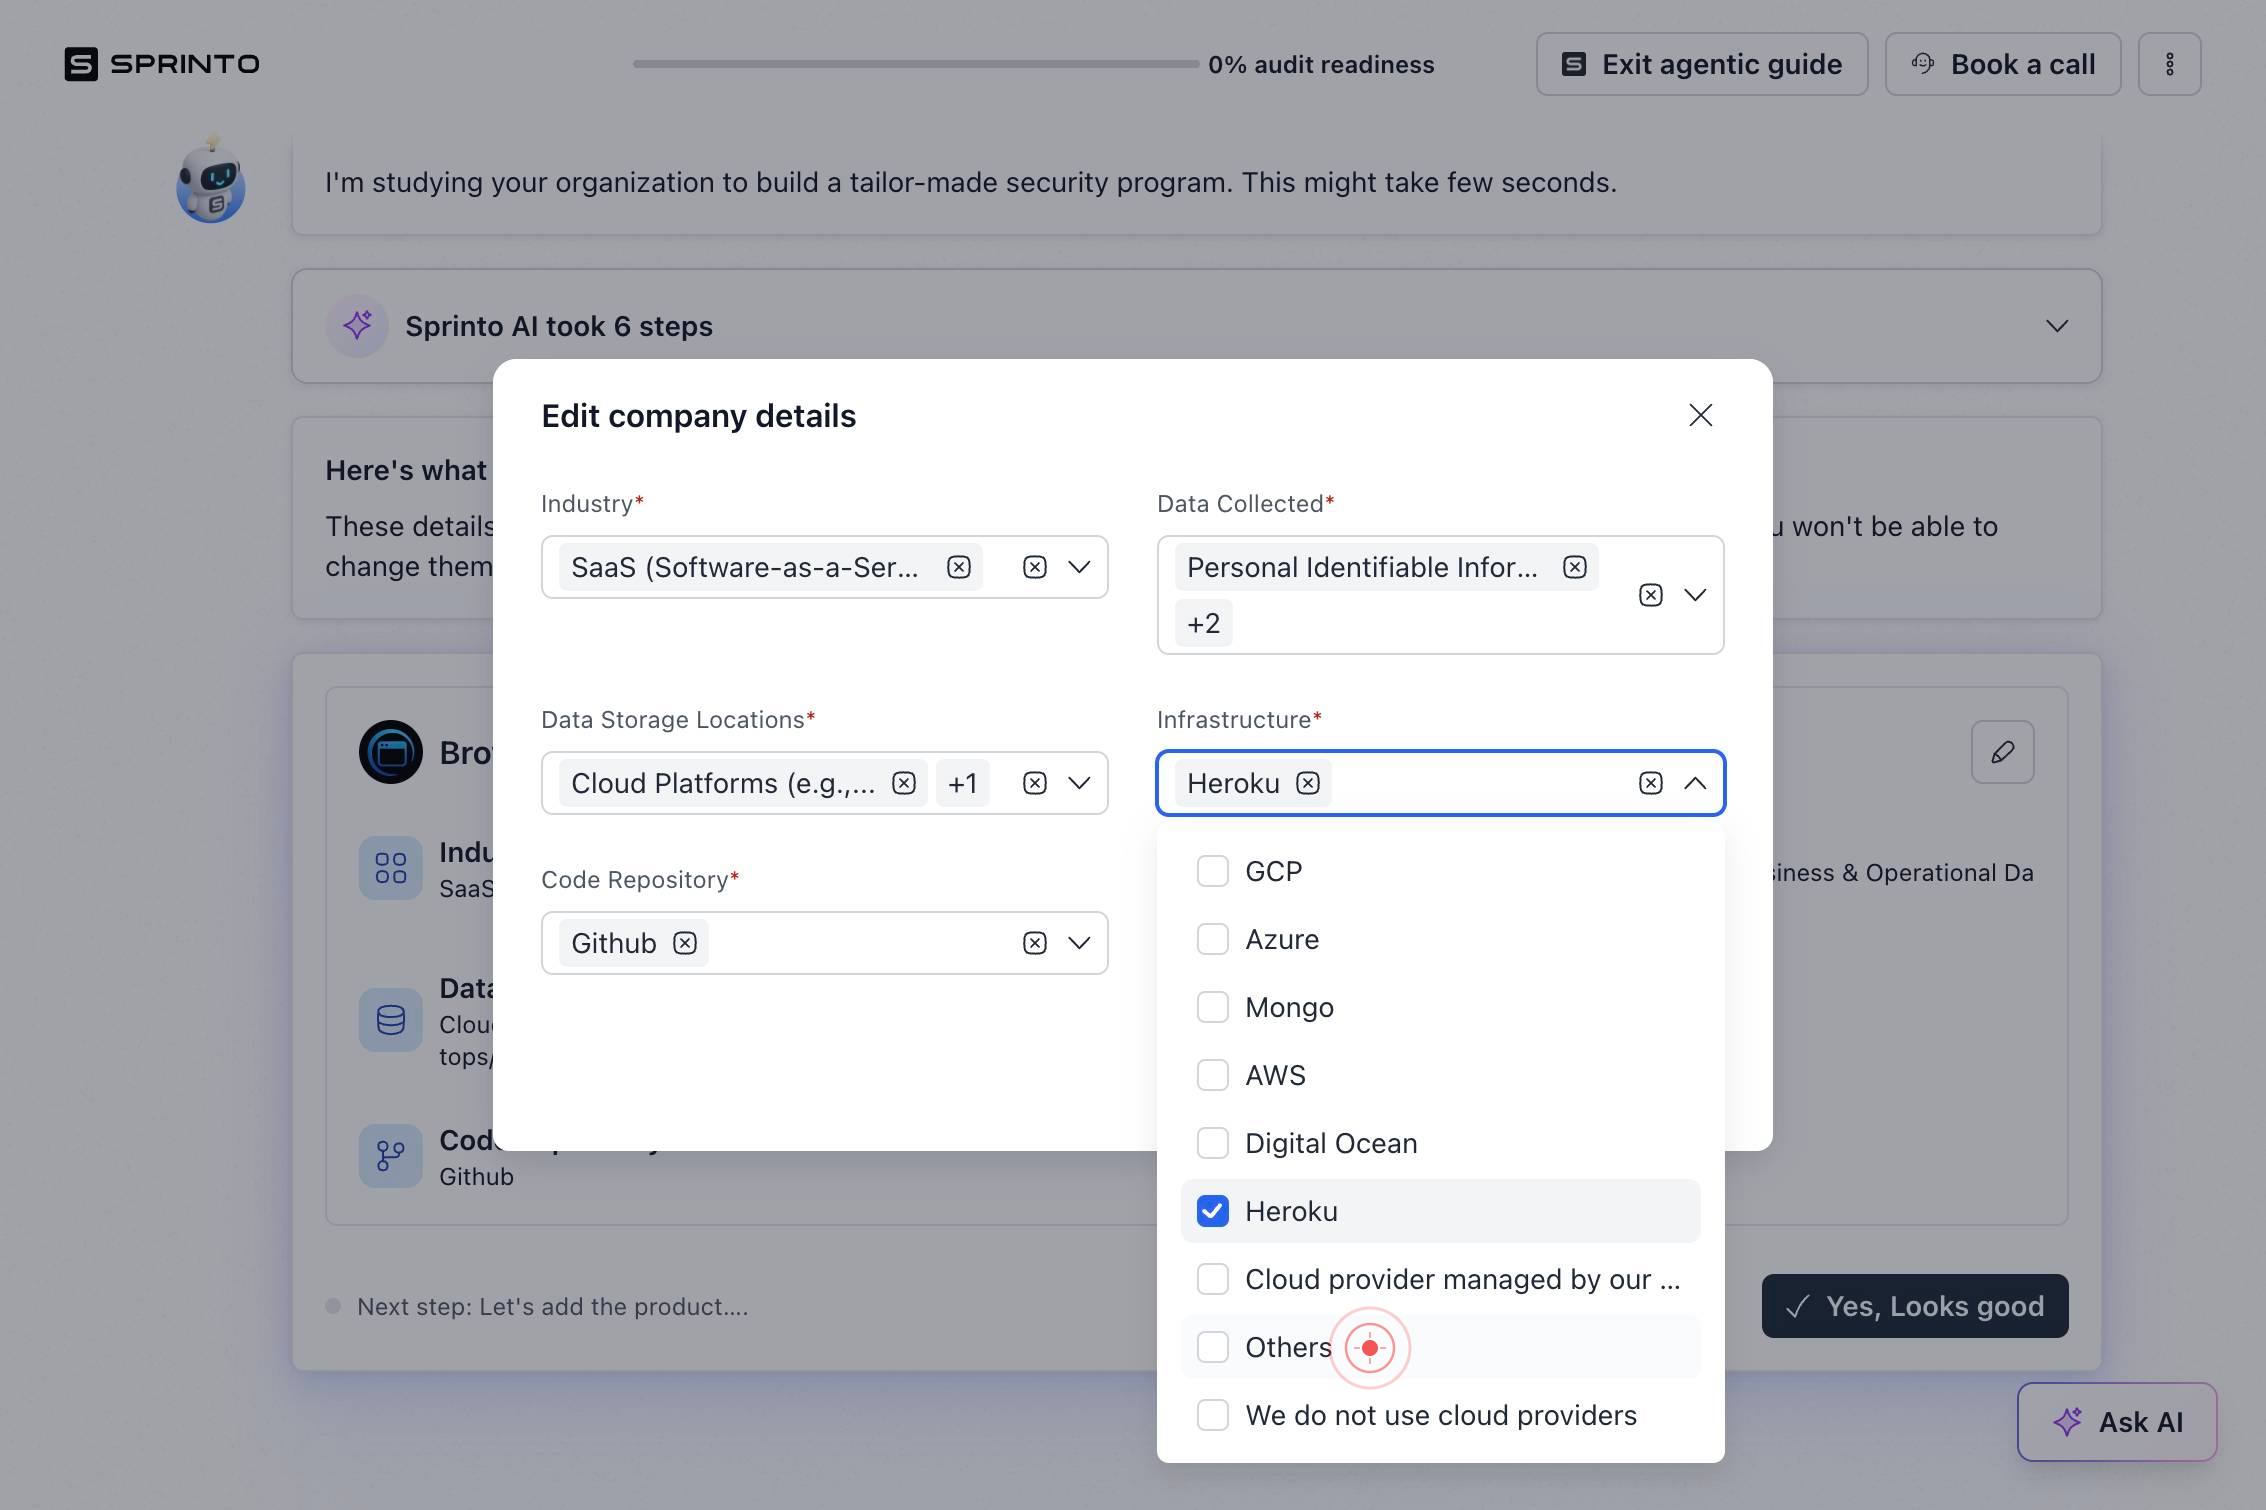
OthersClick 'Others' from the dropdown to add a catch-all option for any infrastructure platforms not explicitly listed.
GithubClick on 'Github' (GitHub) to select it as an infrastructure or version control provider your organization uses.
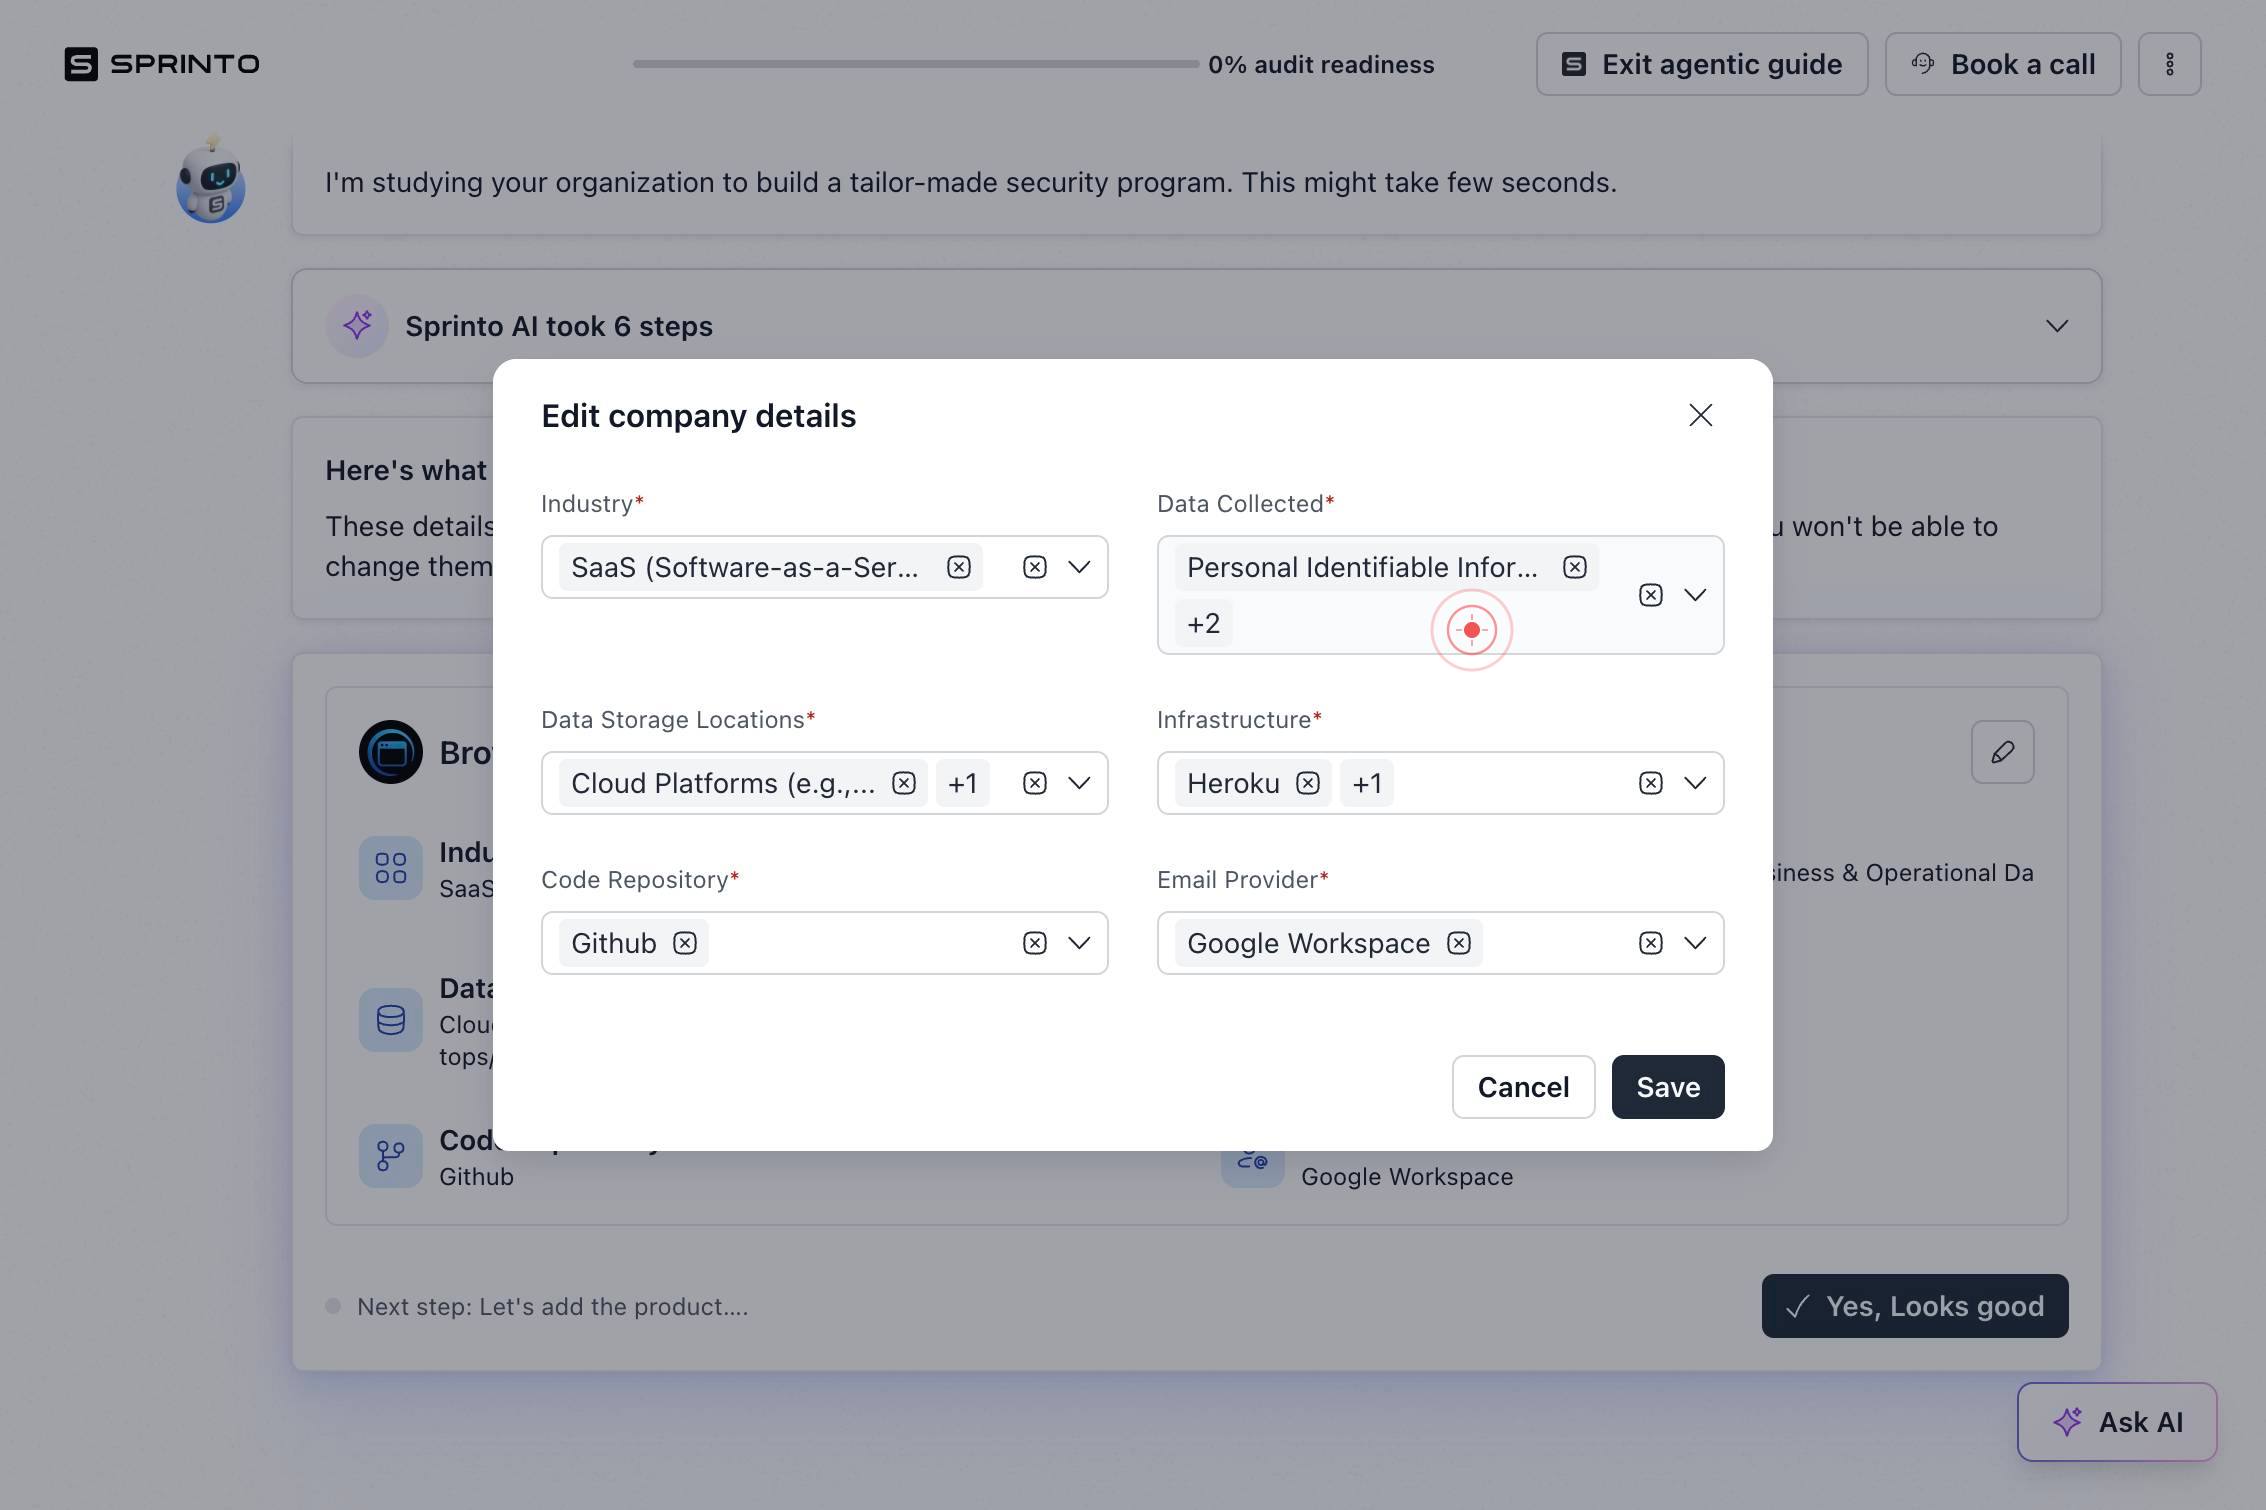
Personal Identifiable Information... +2Click the 'Personal Identifiable Information... +2' button to expand and select all data types within the Personal Identifiable Information category (this likely includes multiple sub-types such as names, email addresses, and payment information).
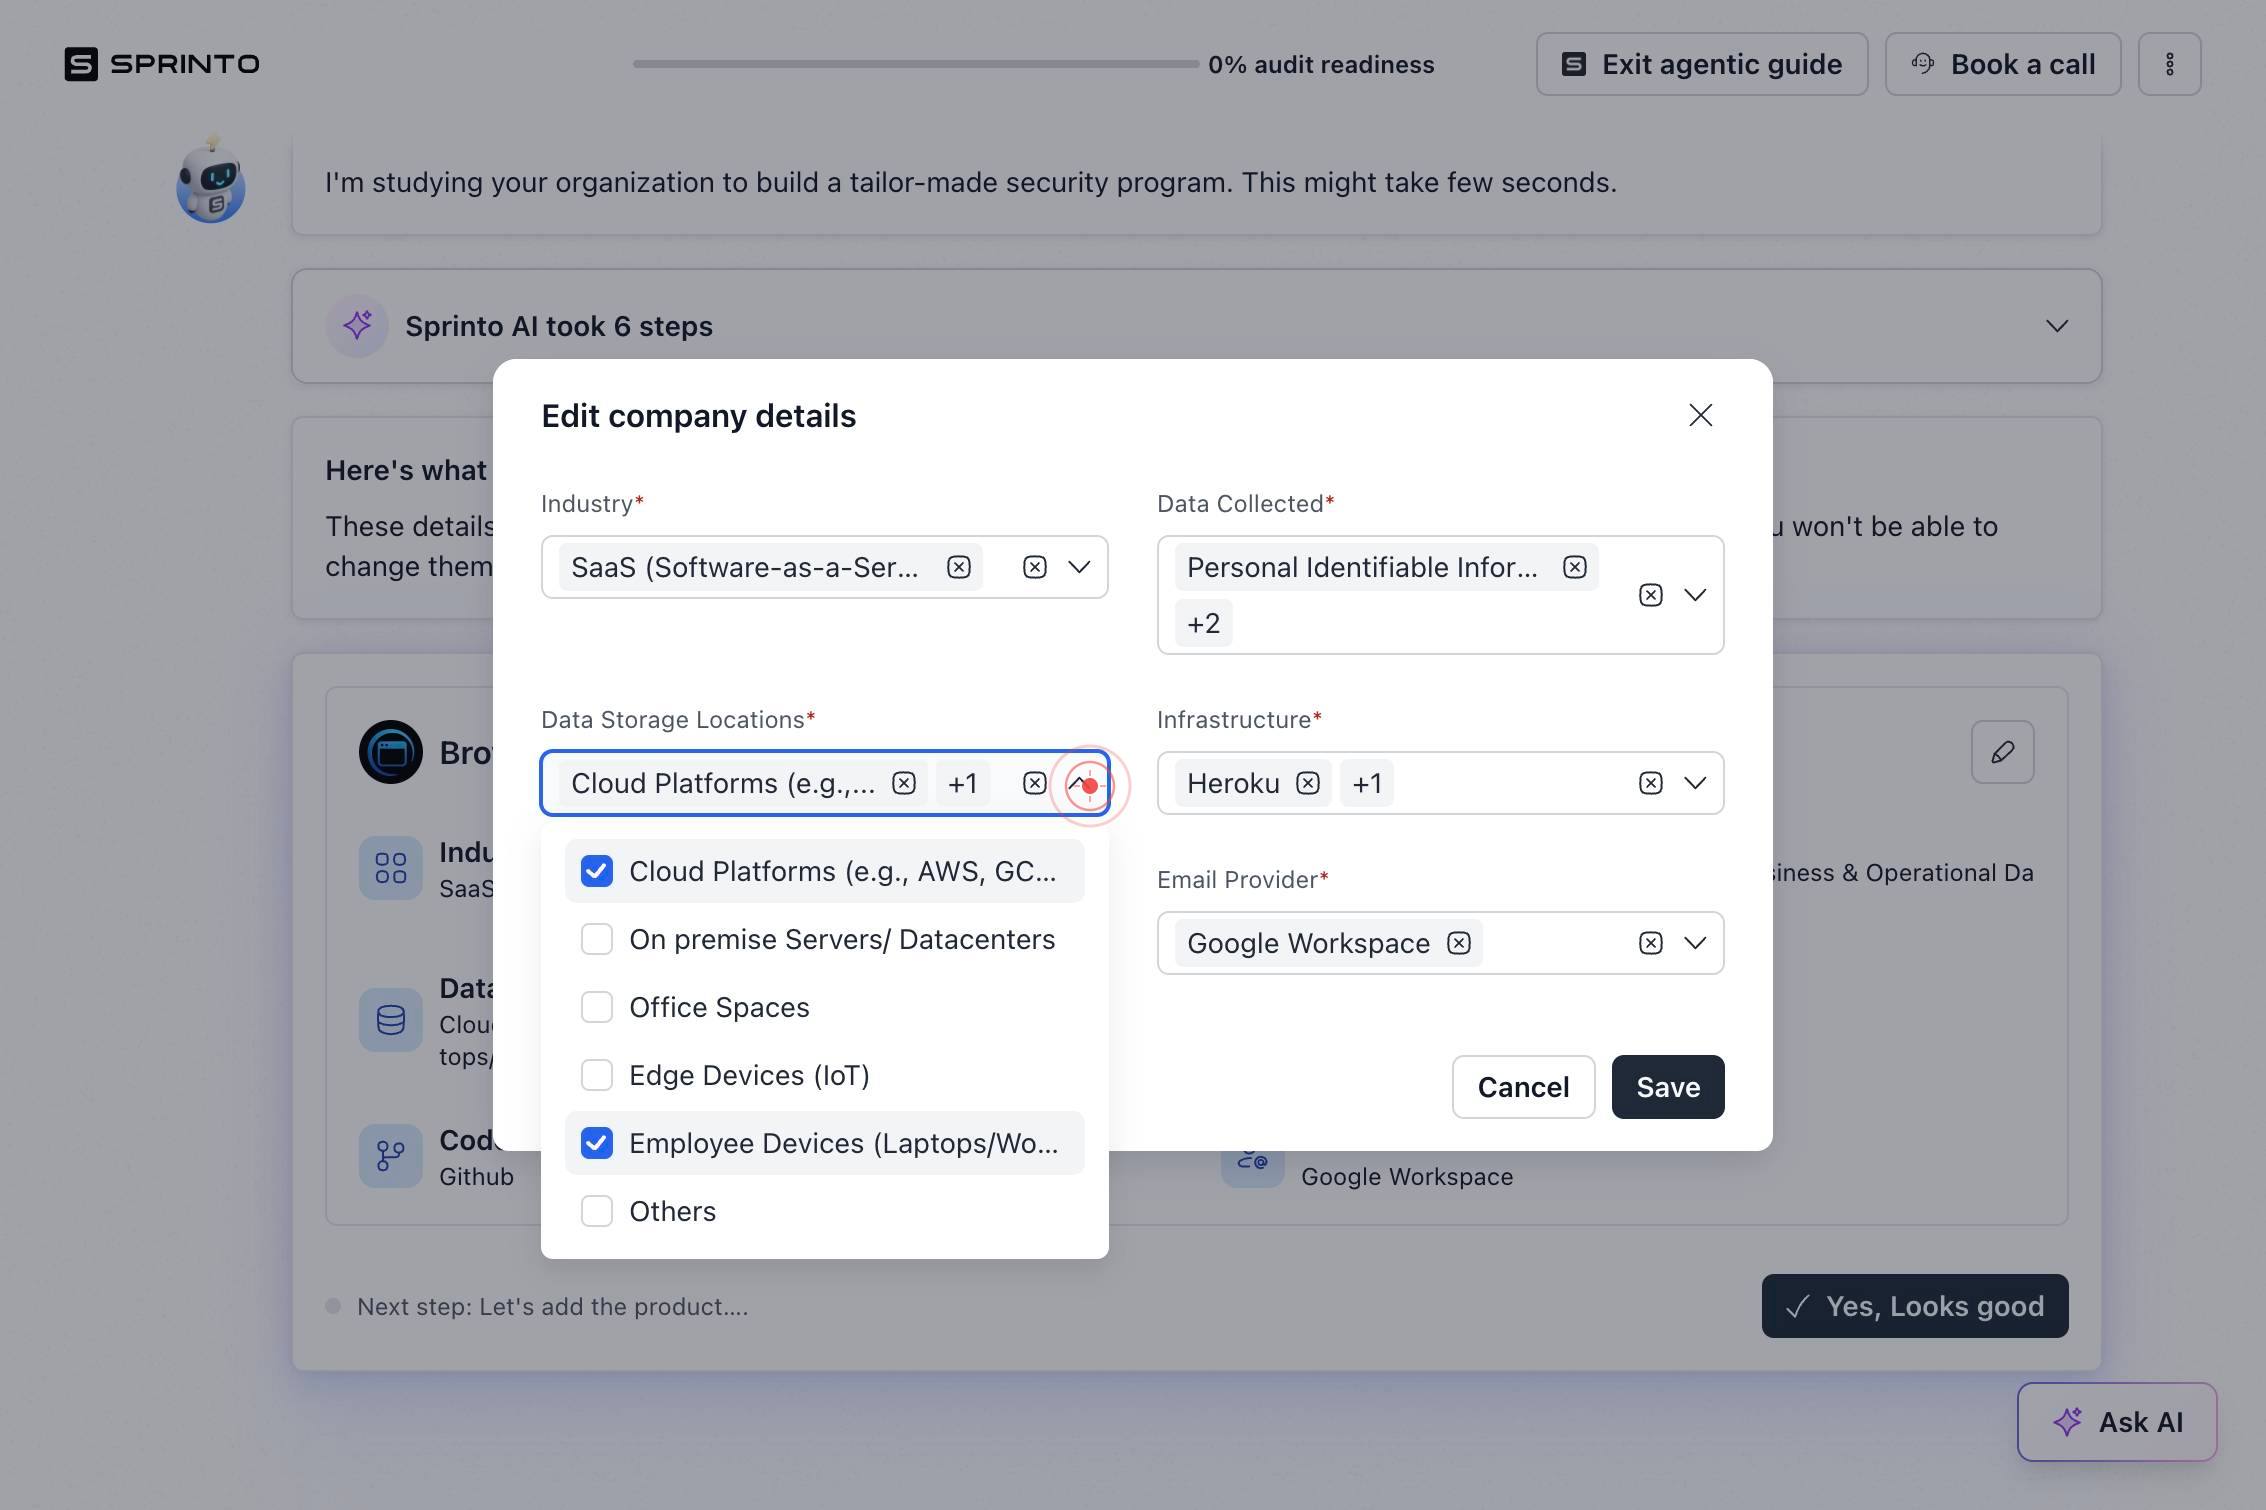
Cloud Platforms (e.g.,... +1Click the 'Cloud Platforms (e.g.,... +1' button to expand and select data types related to cloud platform credentials, API keys, and related sensitive information.
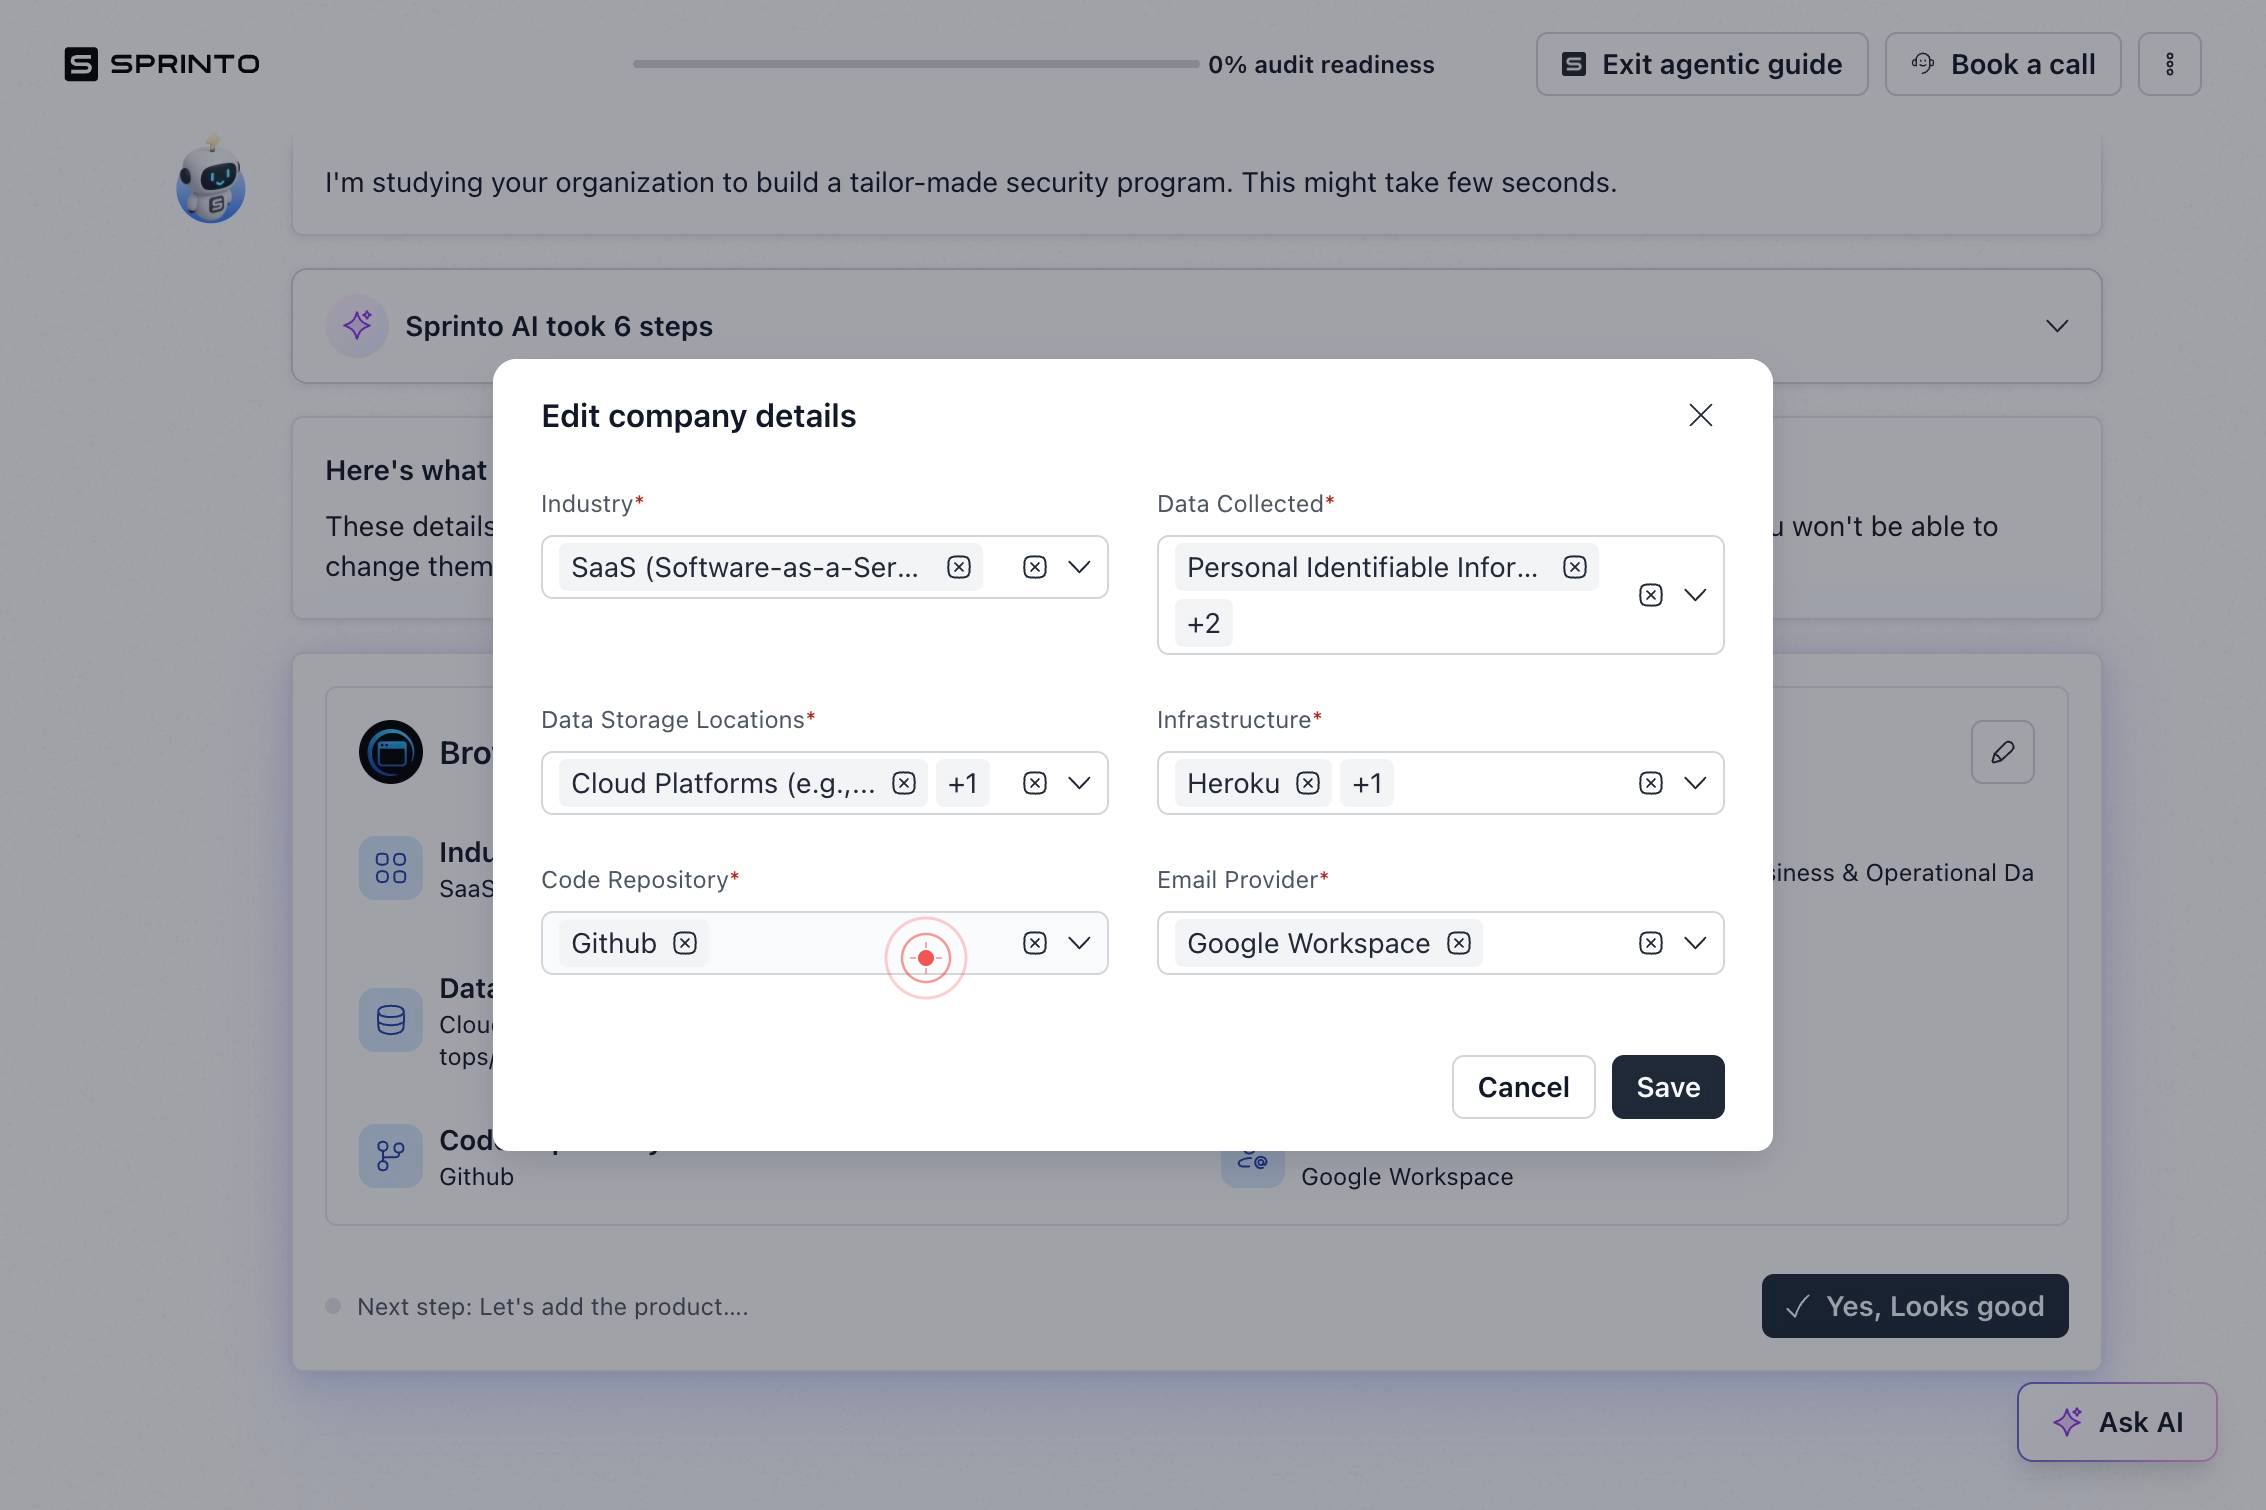
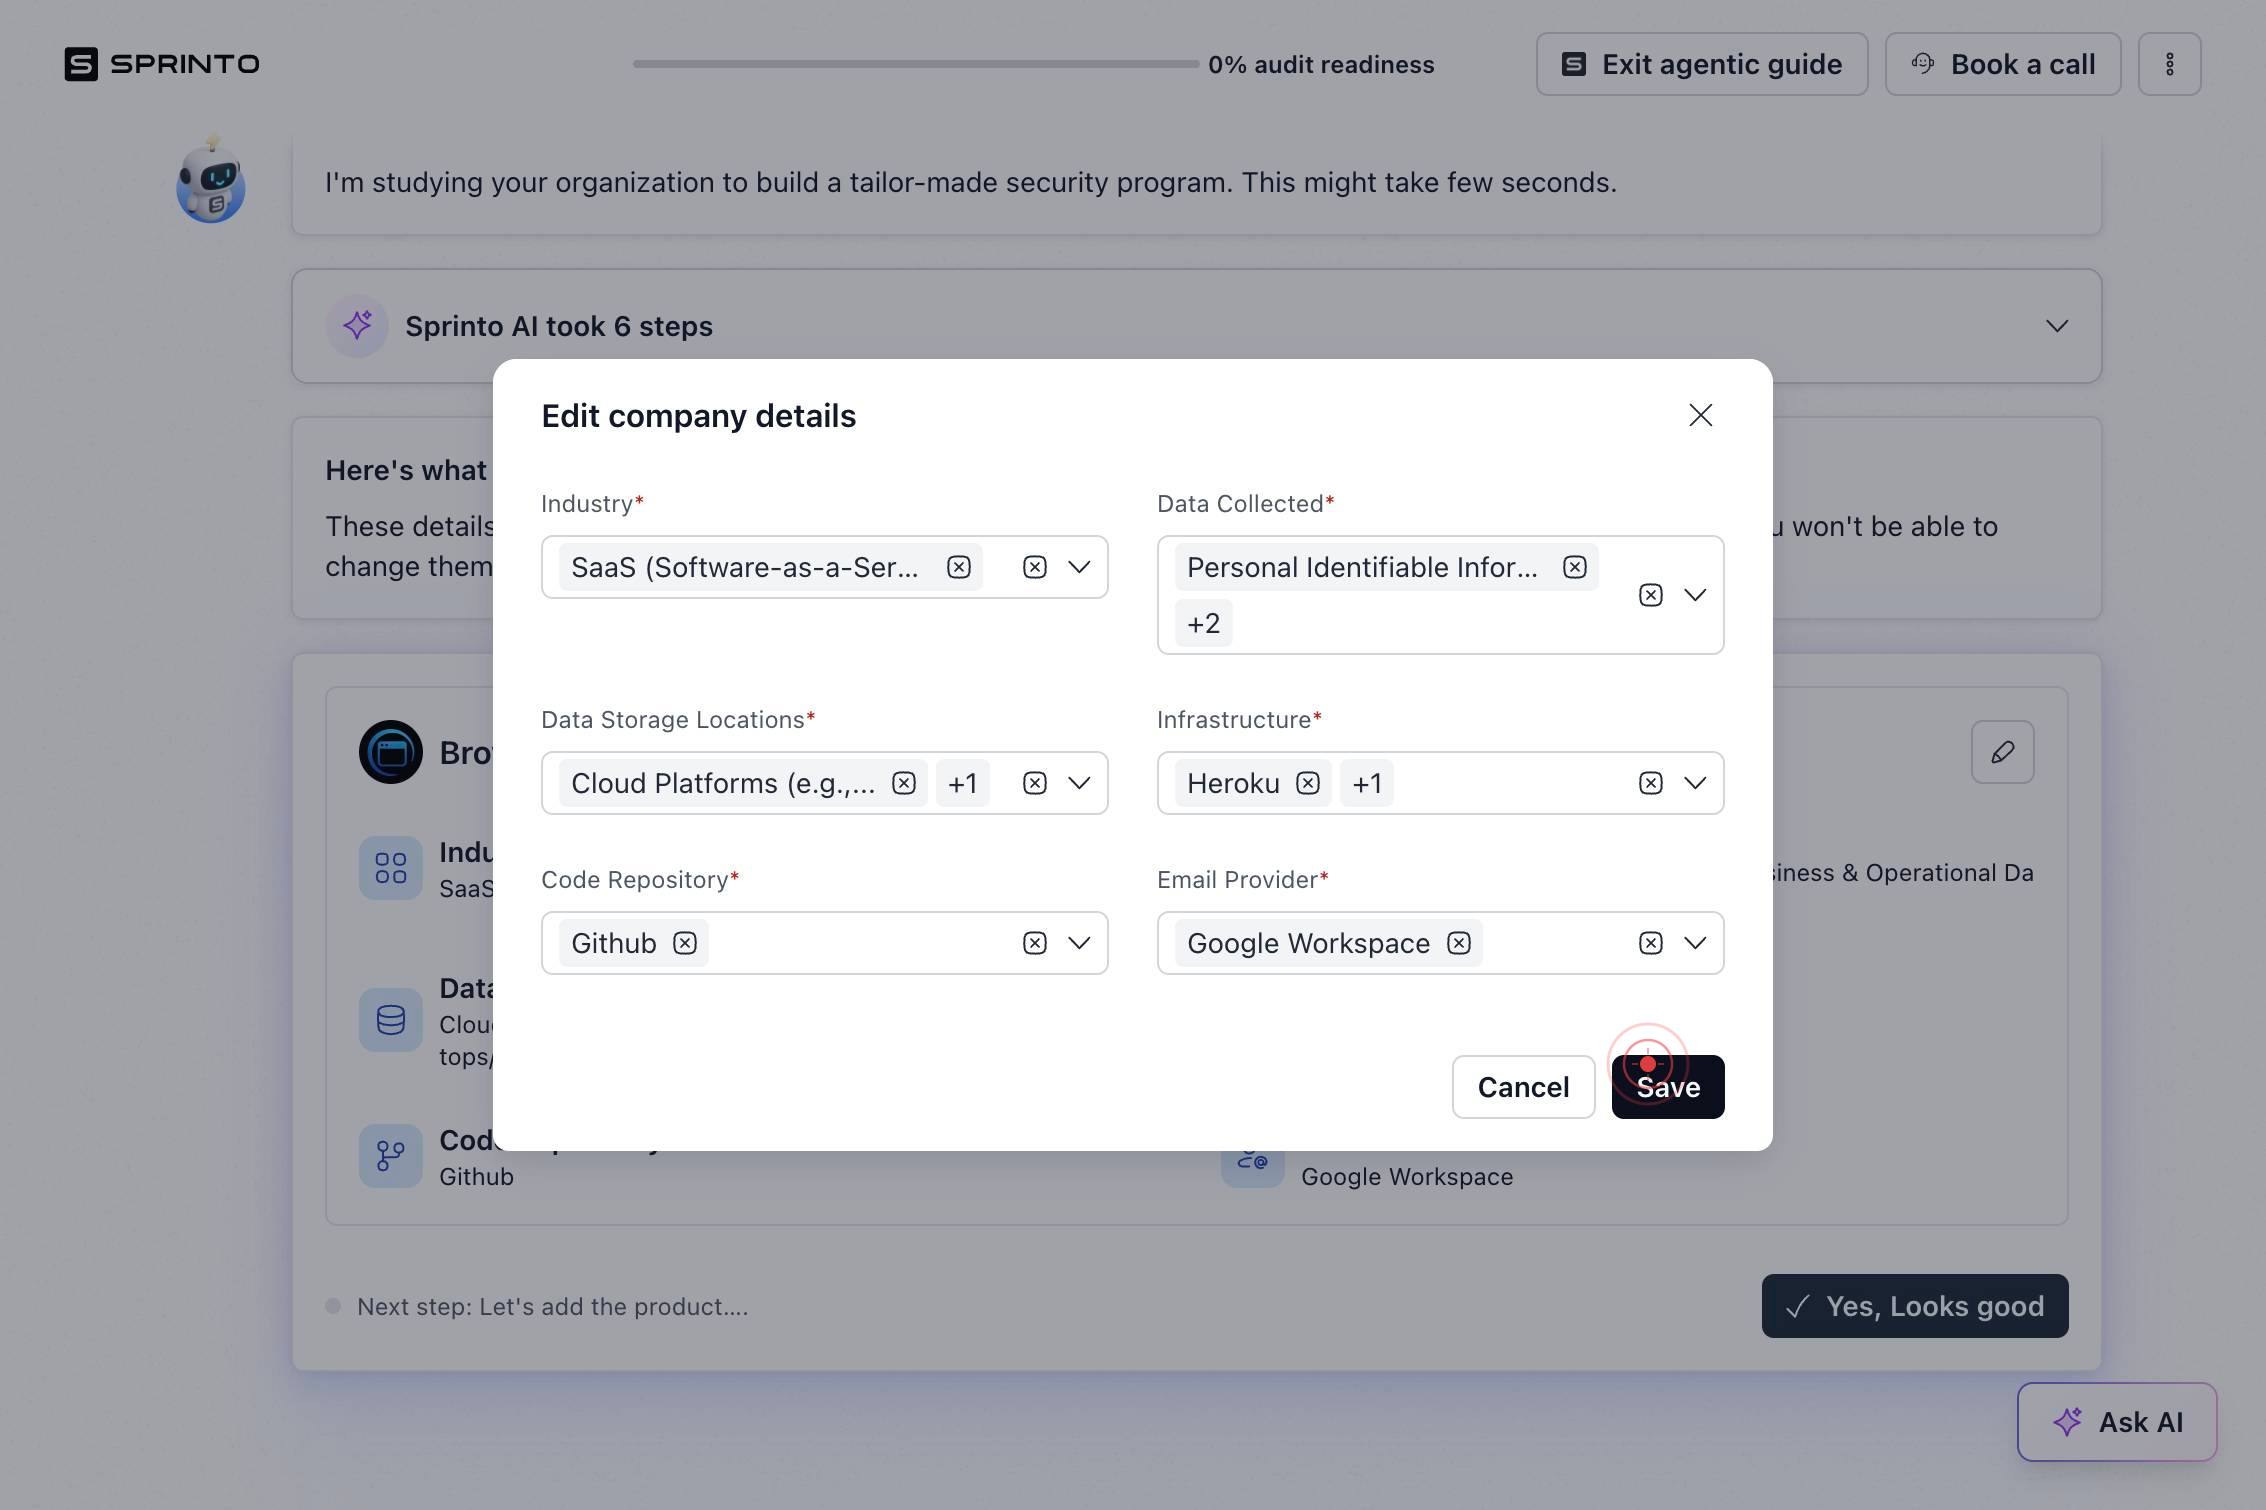
SaveClick 'Save' to persist your infrastructure and data type selections and proceed to the product details section.
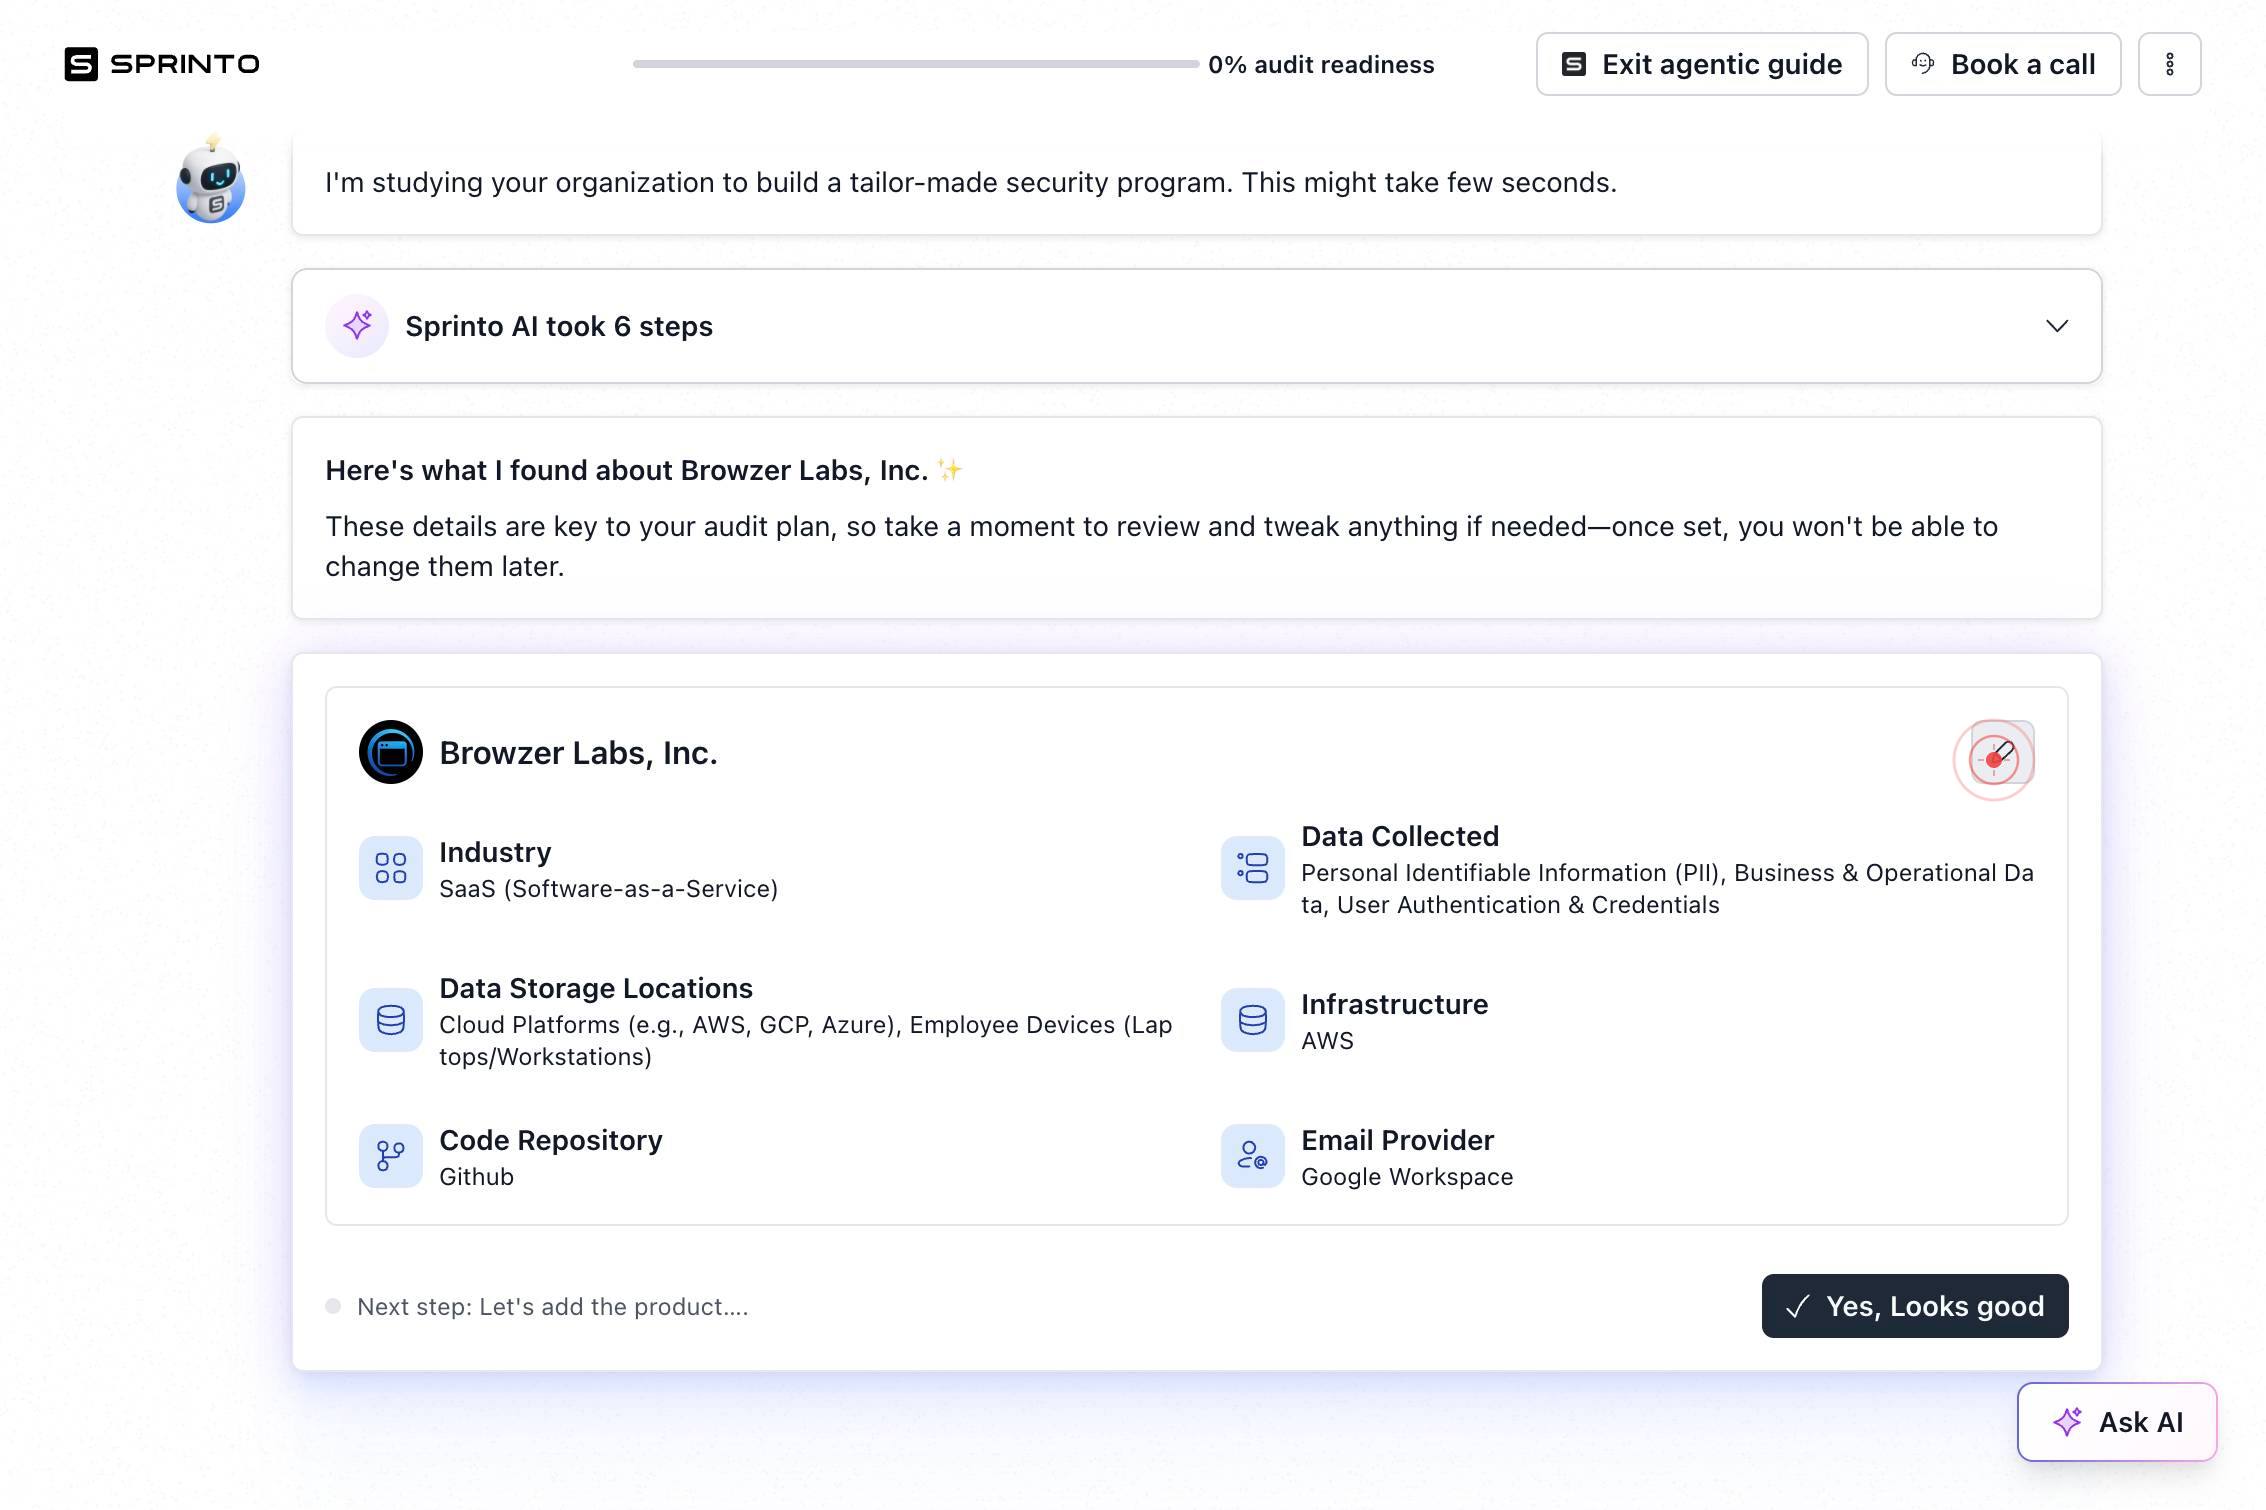
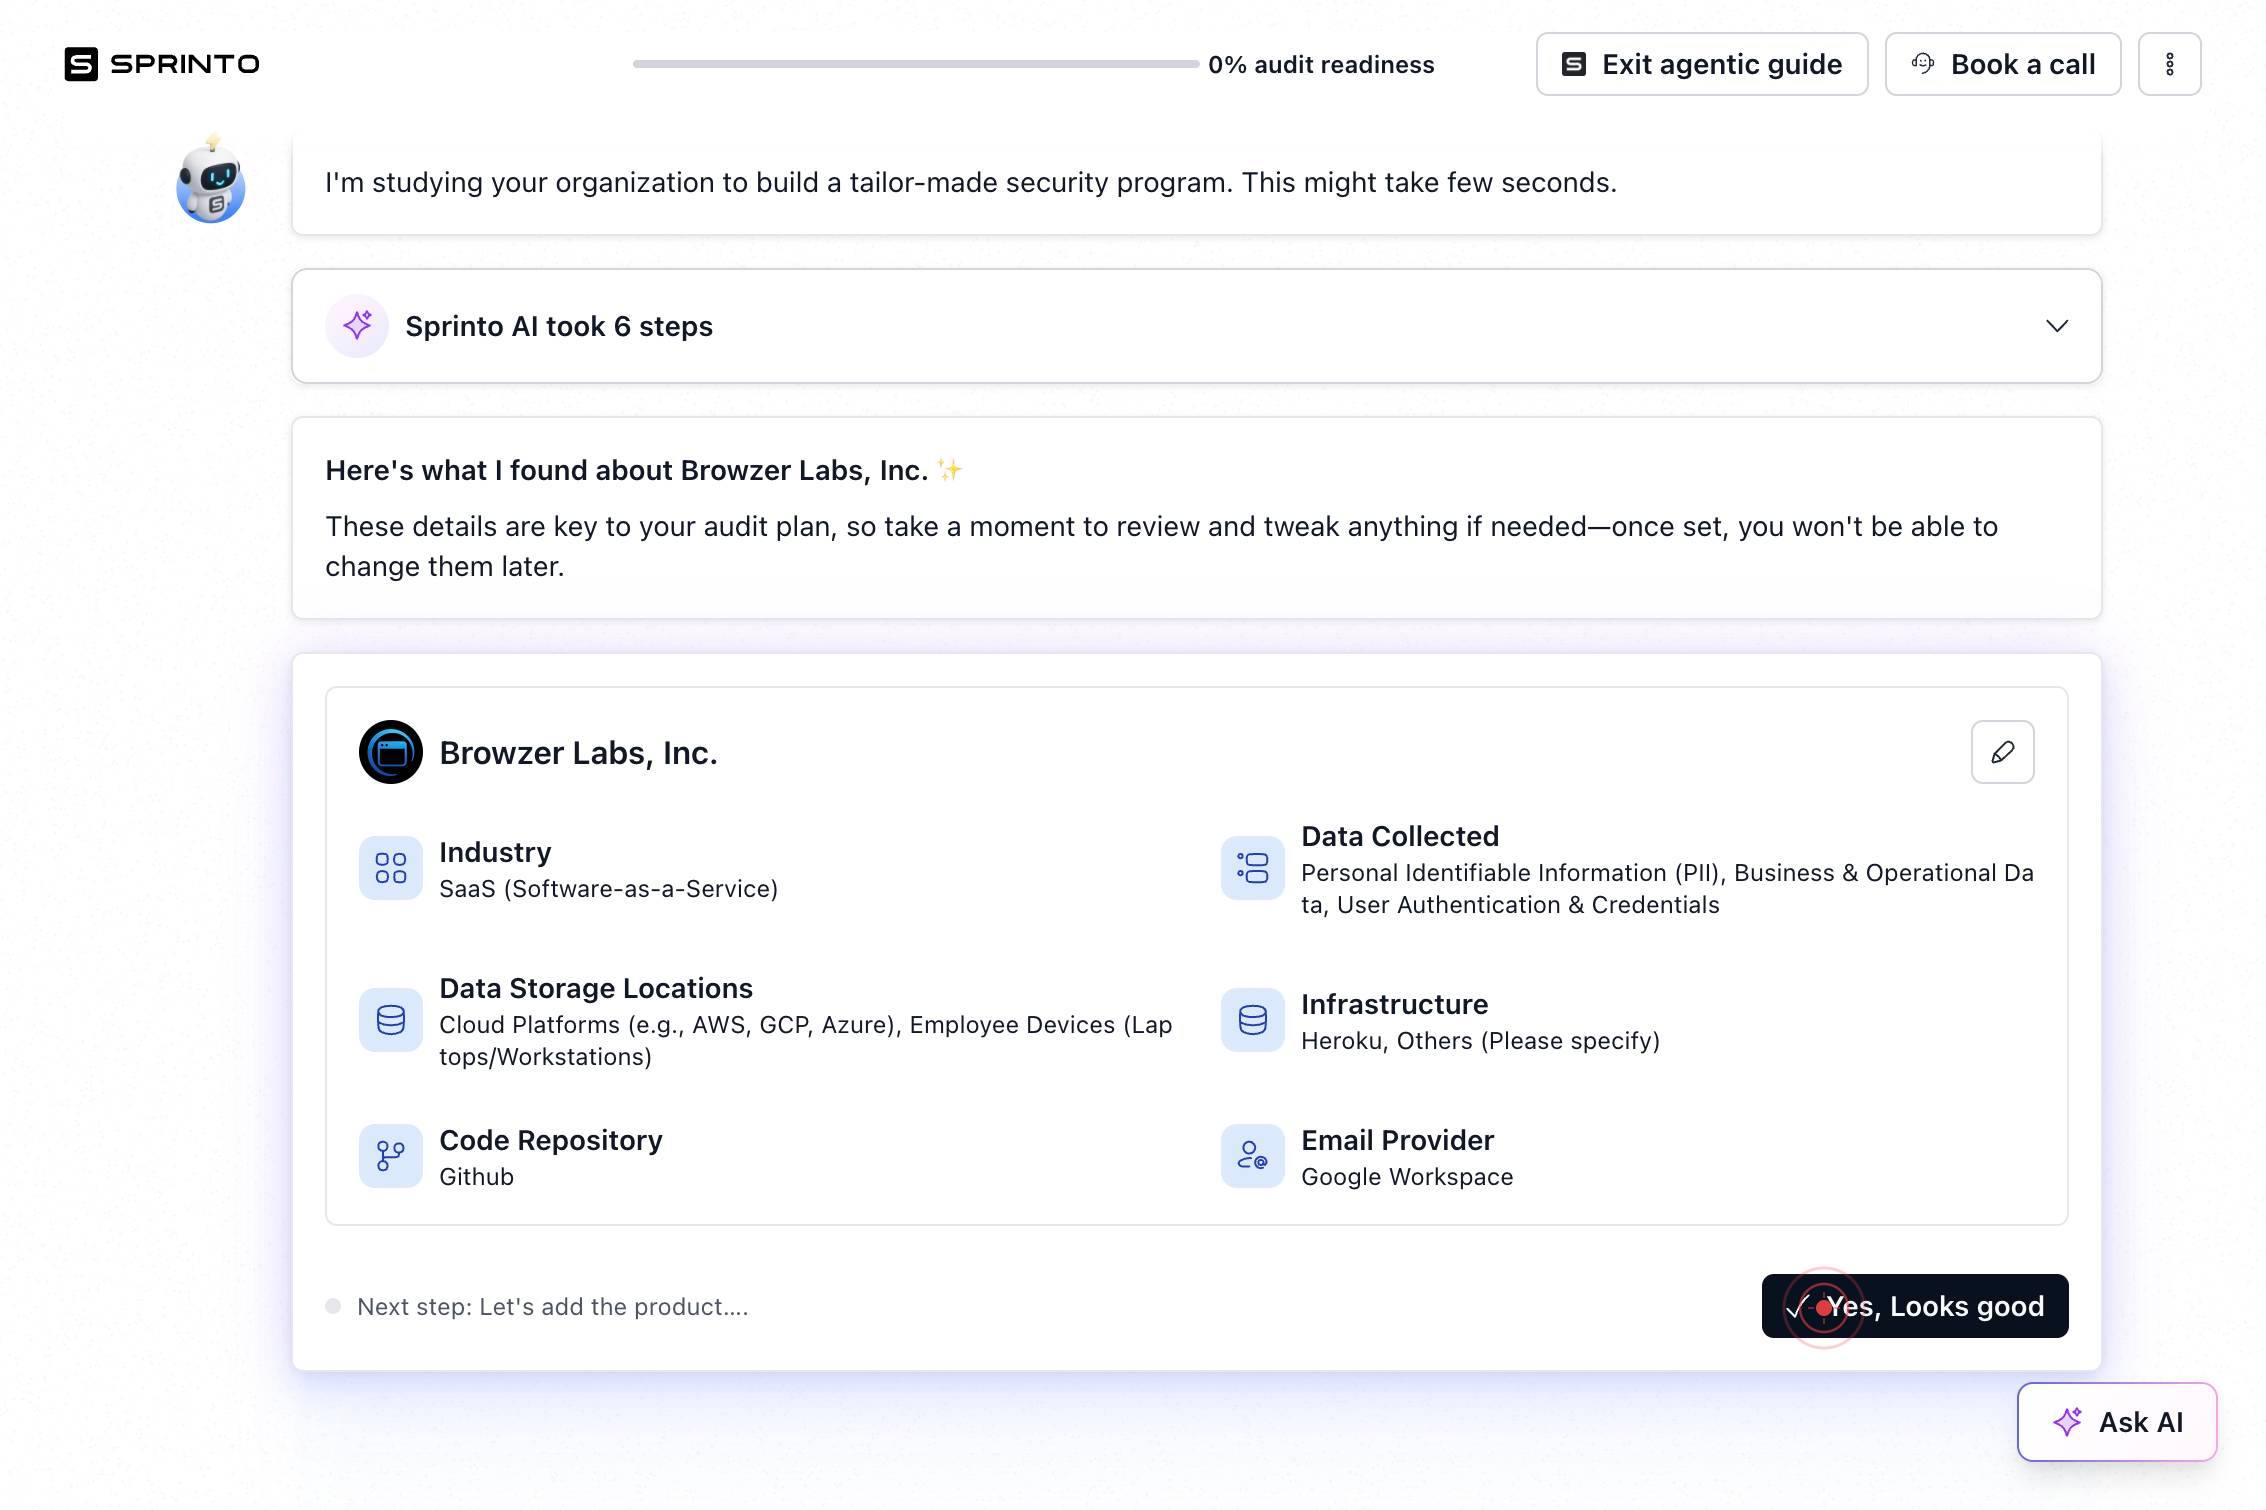
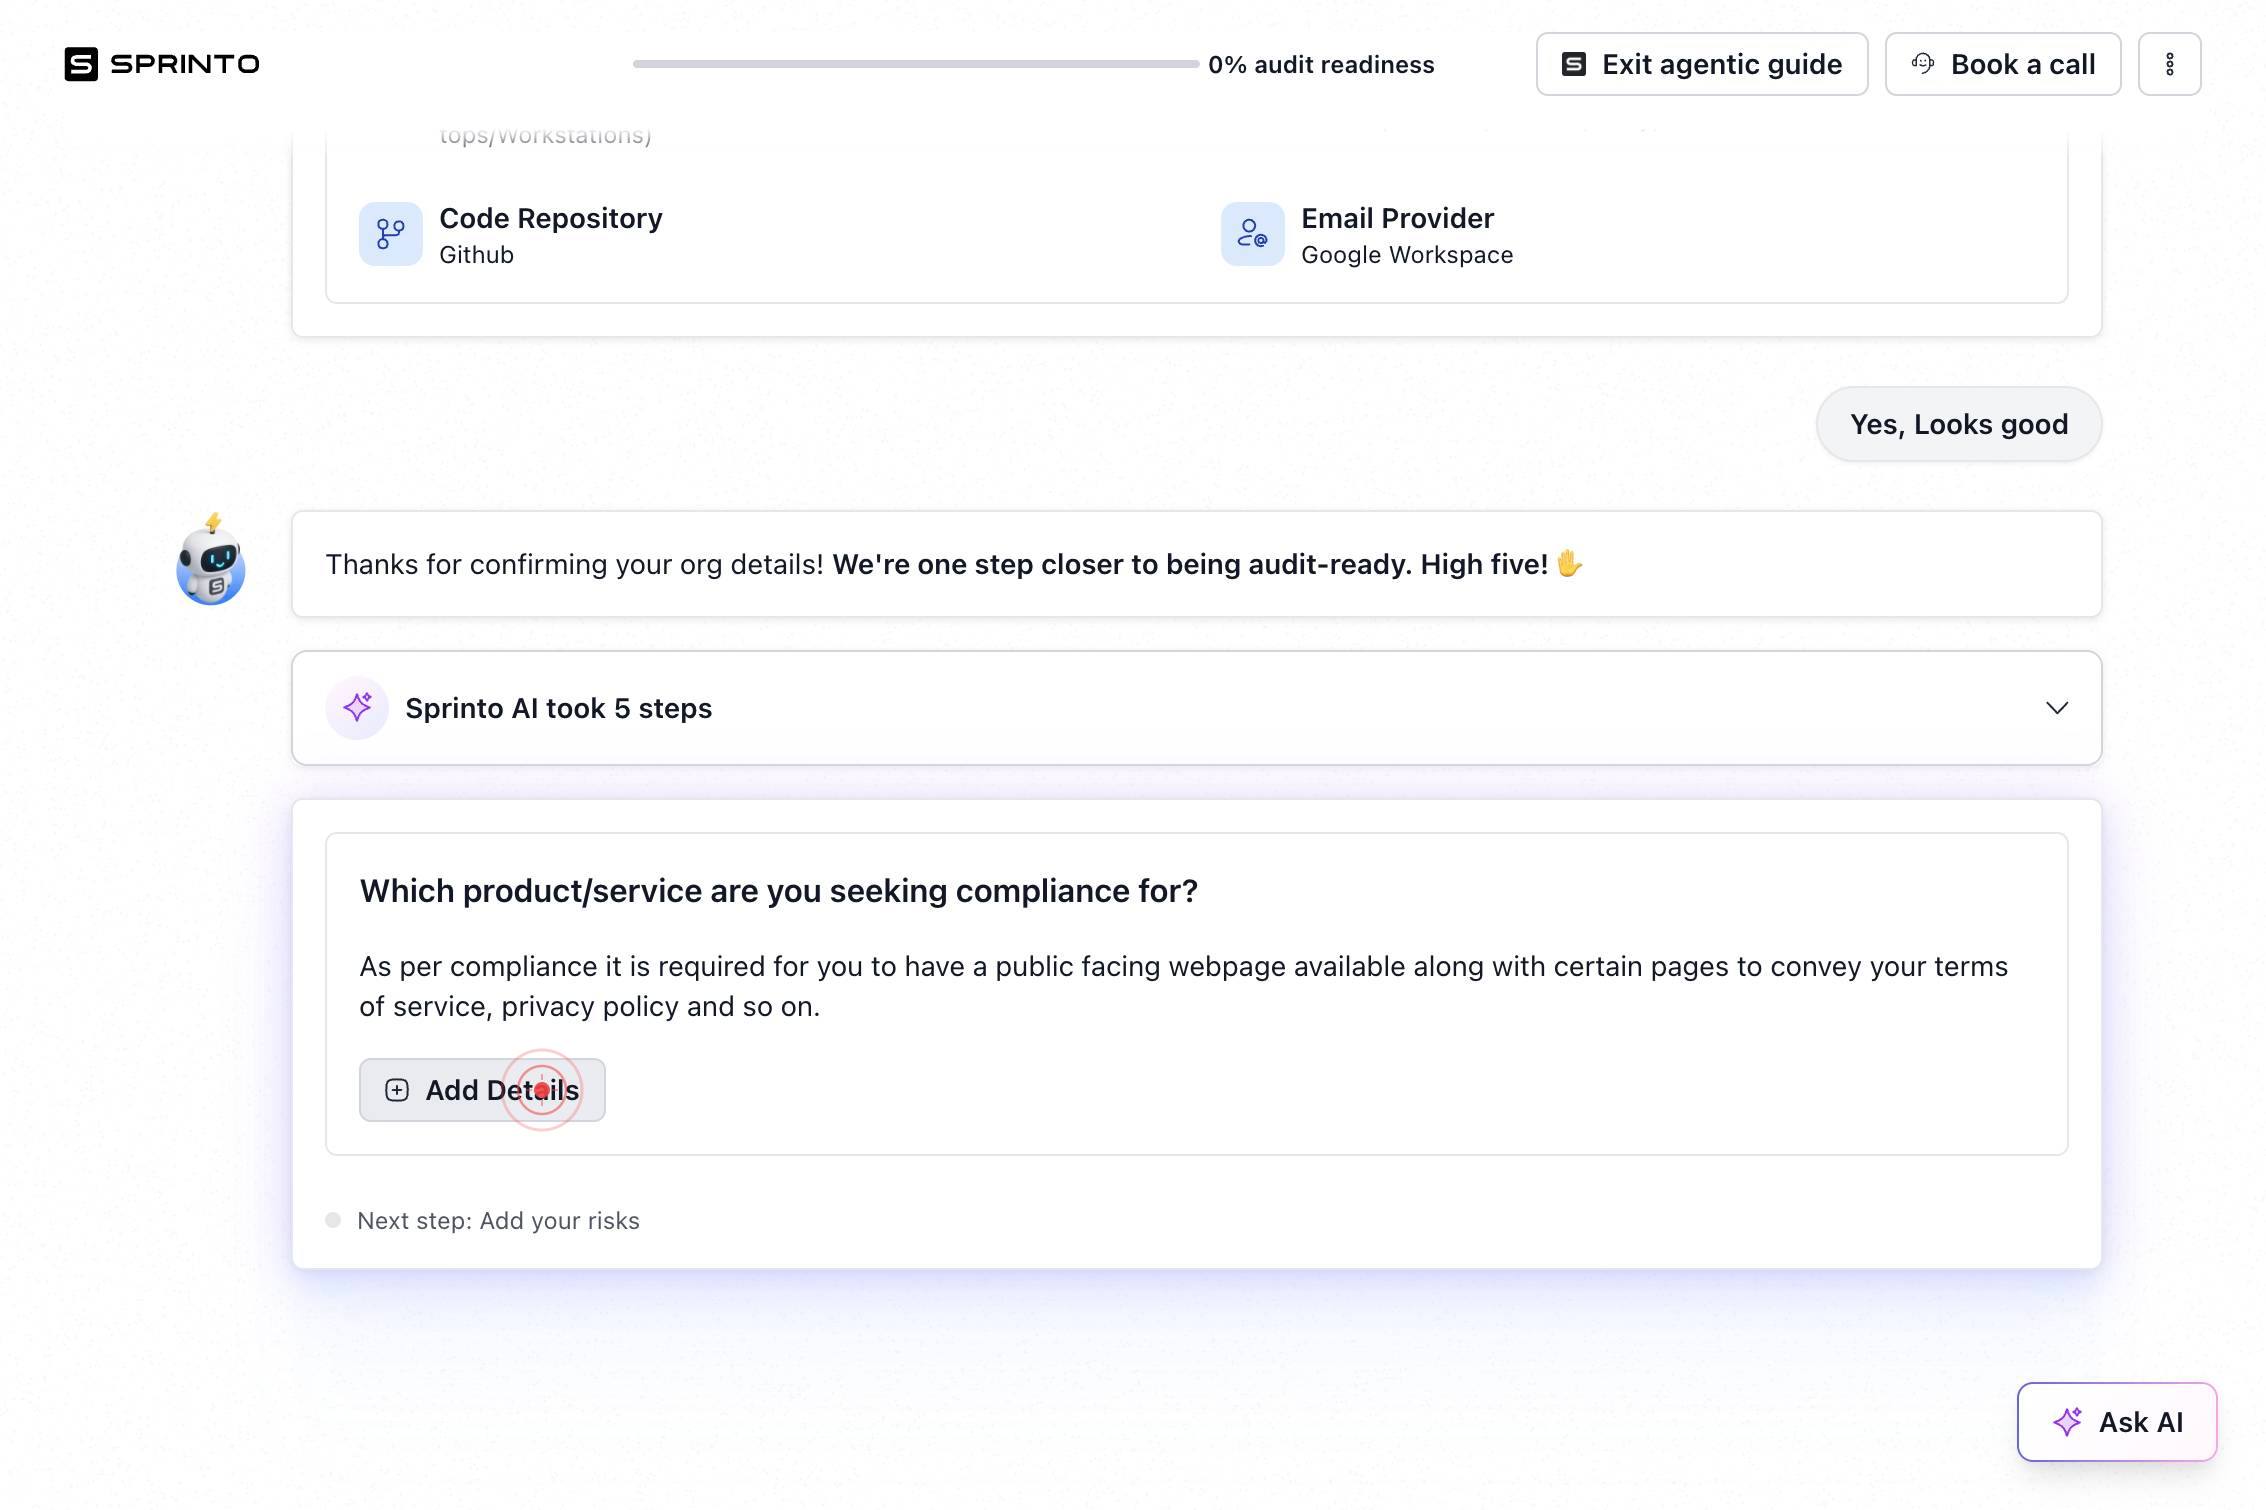
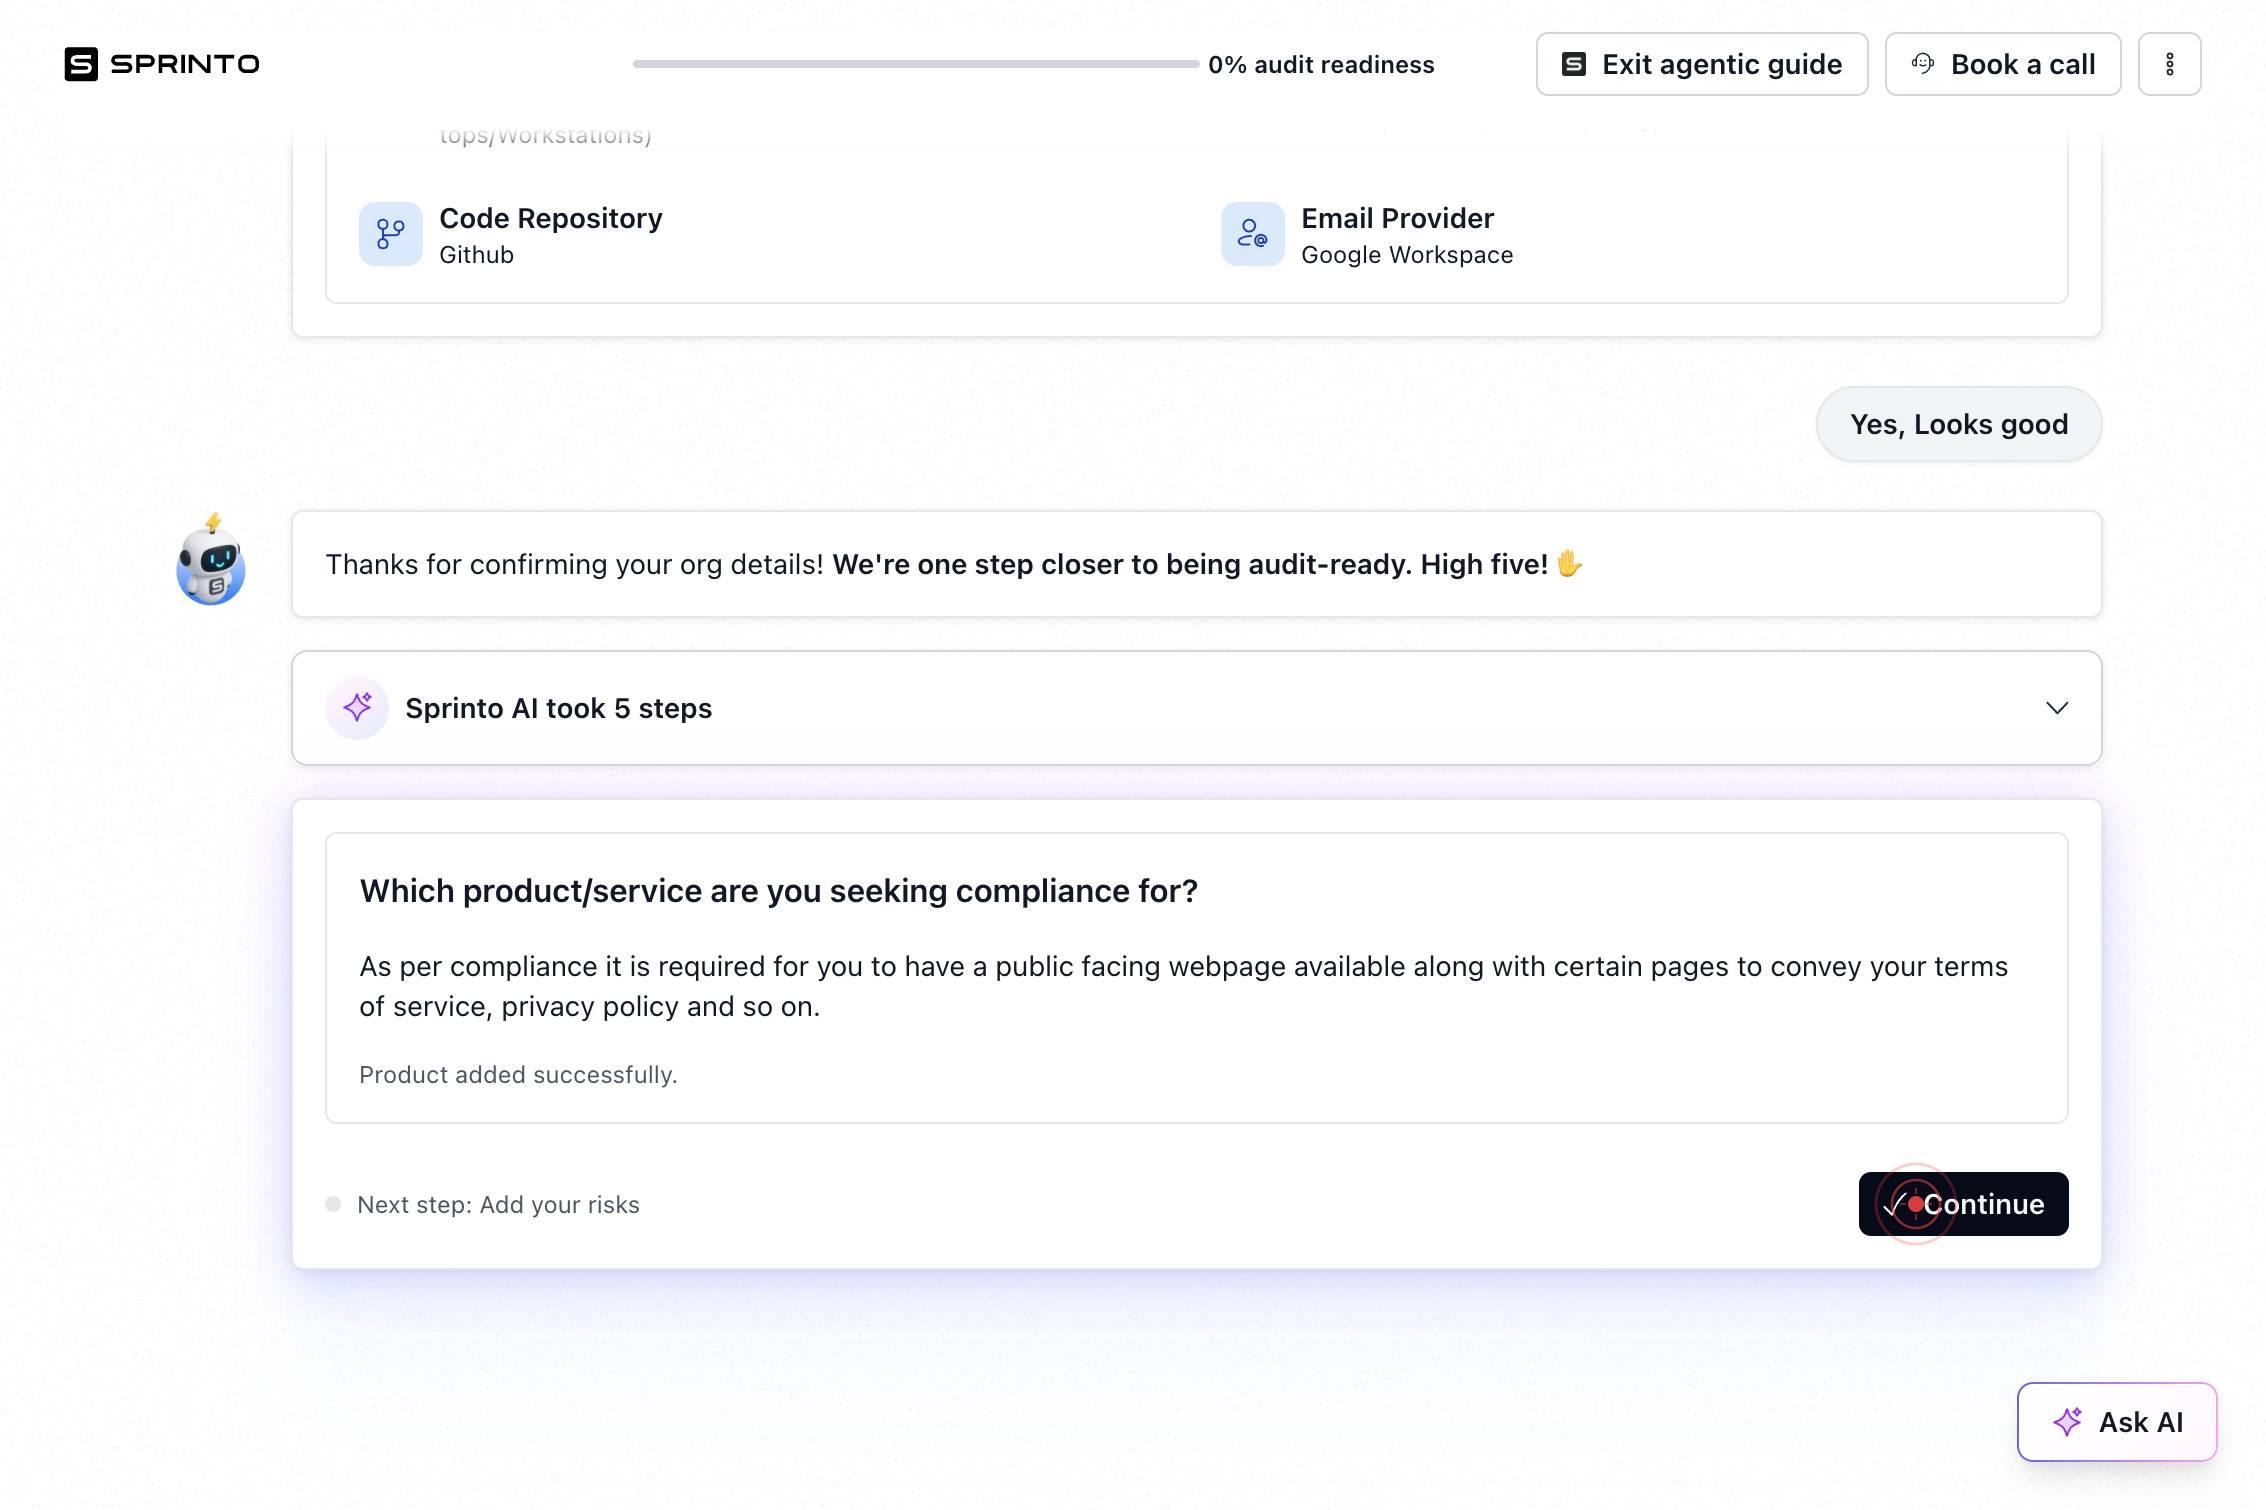
Yes, Looks goodClick 'Yes, Looks good' to confirm that your selected infrastructure and data types are accurate, signaling your readiness to provide product details.
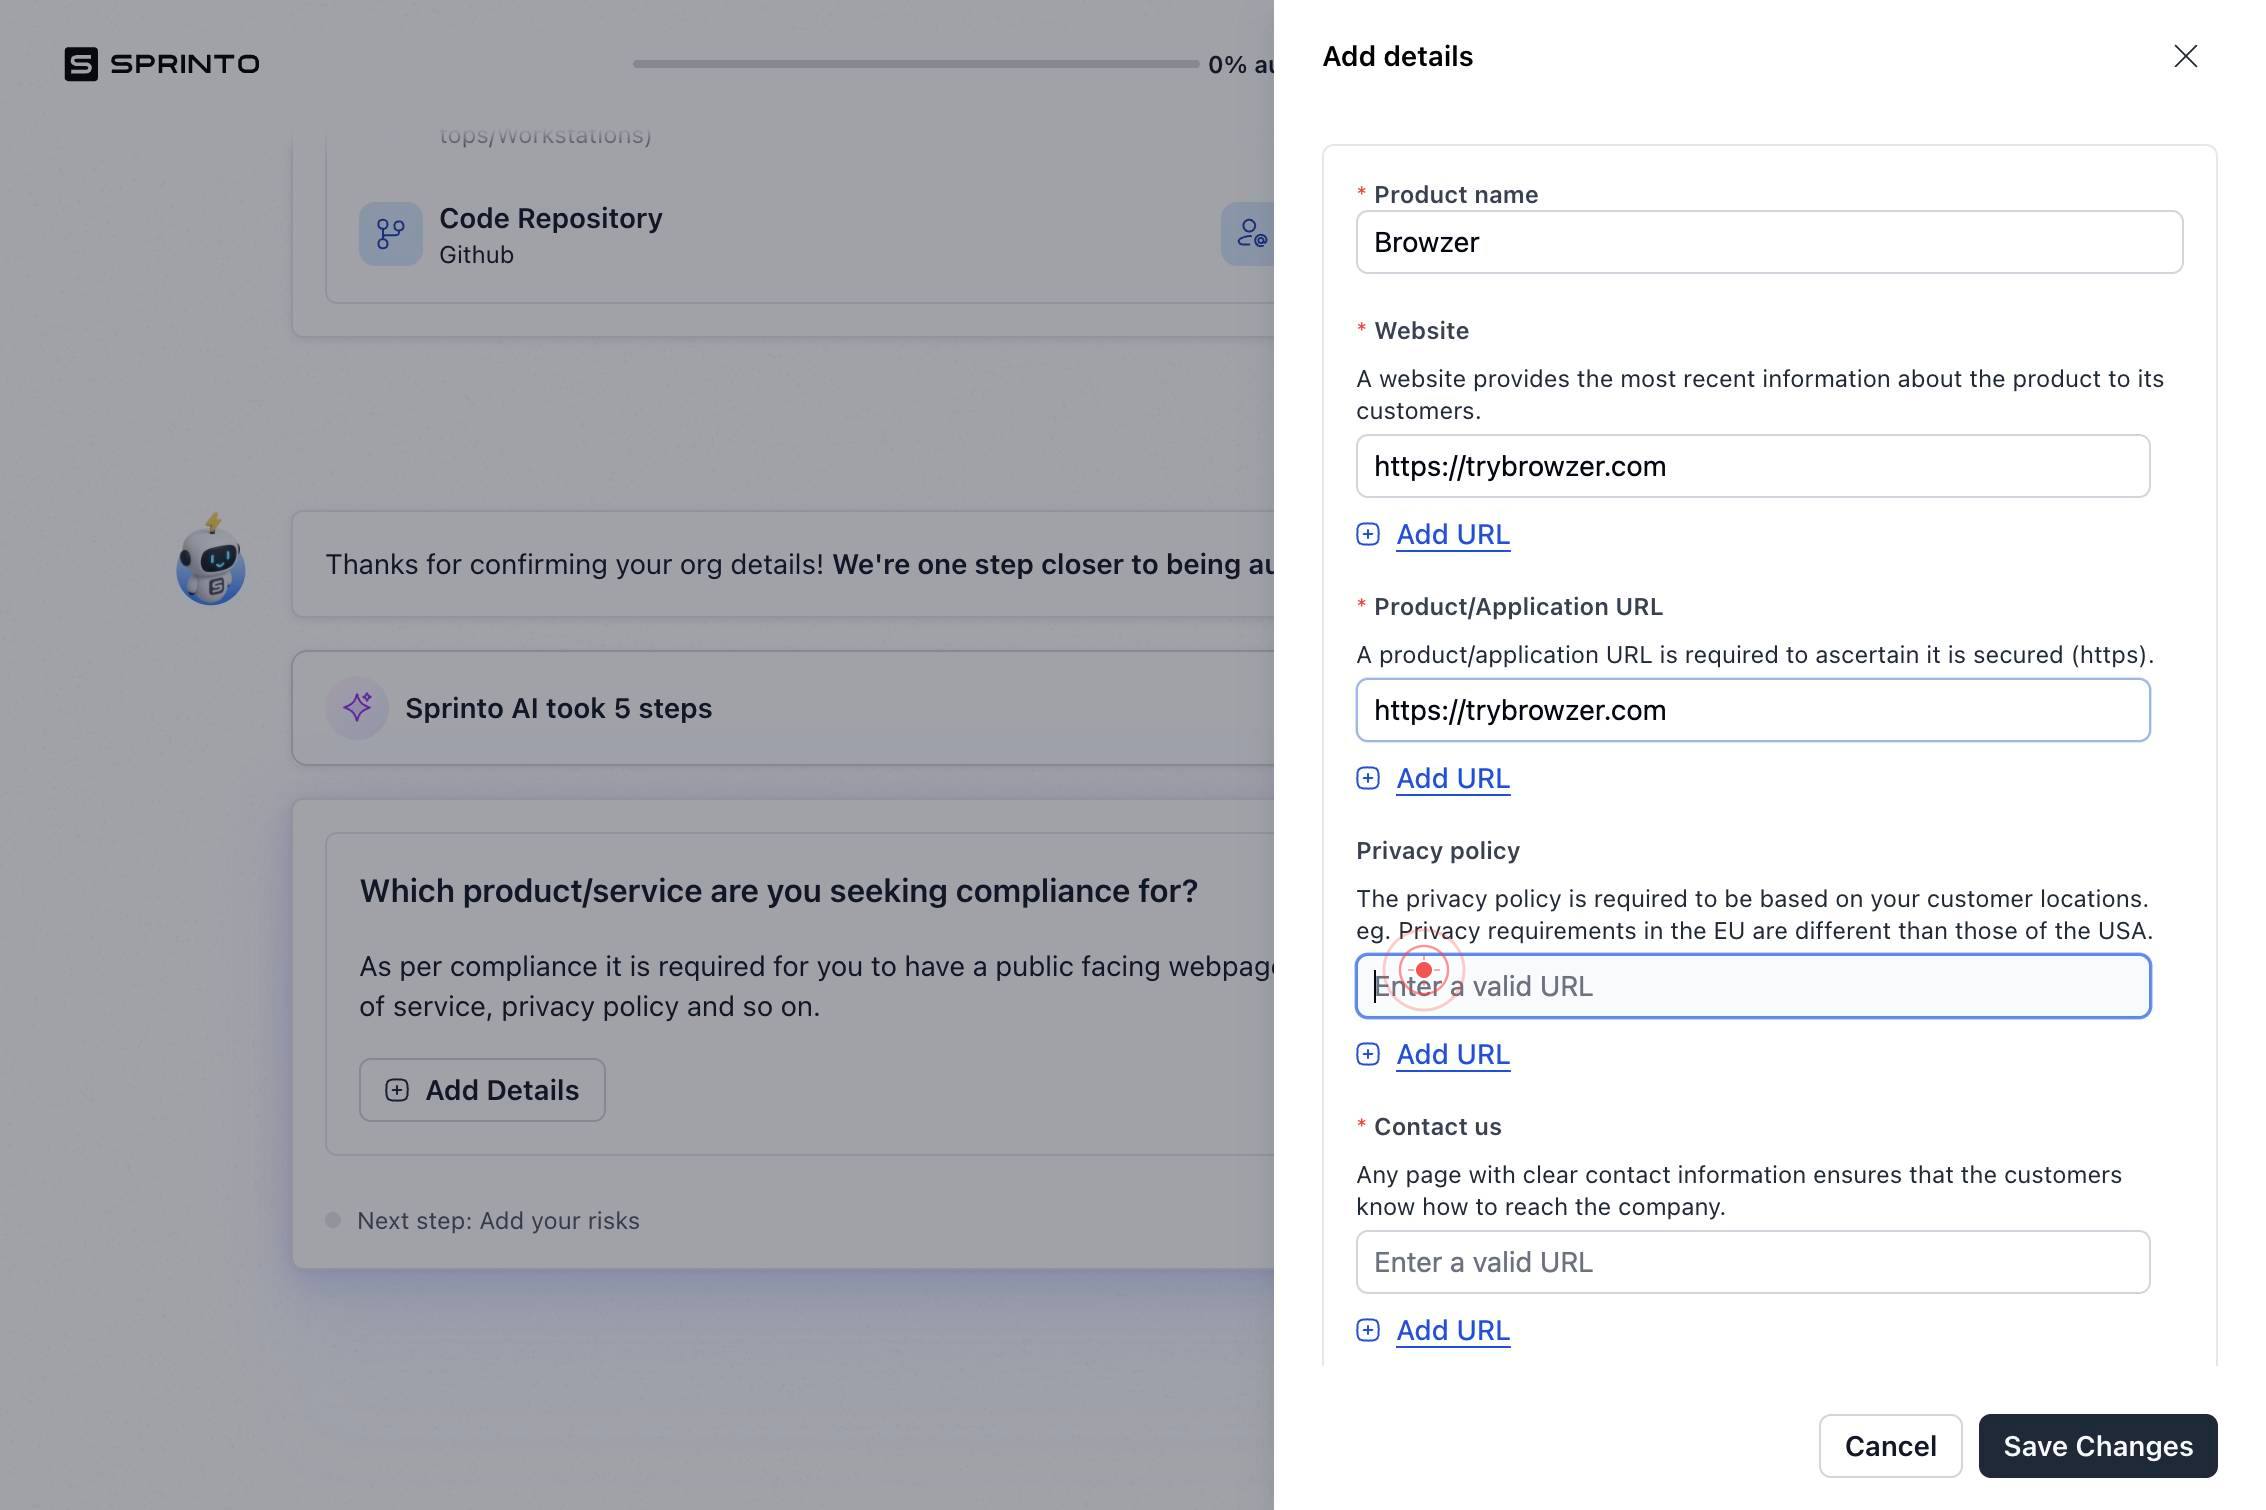
Add DetailsClick 'Add Details' to open the form for entering your product name, URLs, and associated compliance documents.
Name of the productClick in the 'Name of the product' text field to activate it and prepare for input.
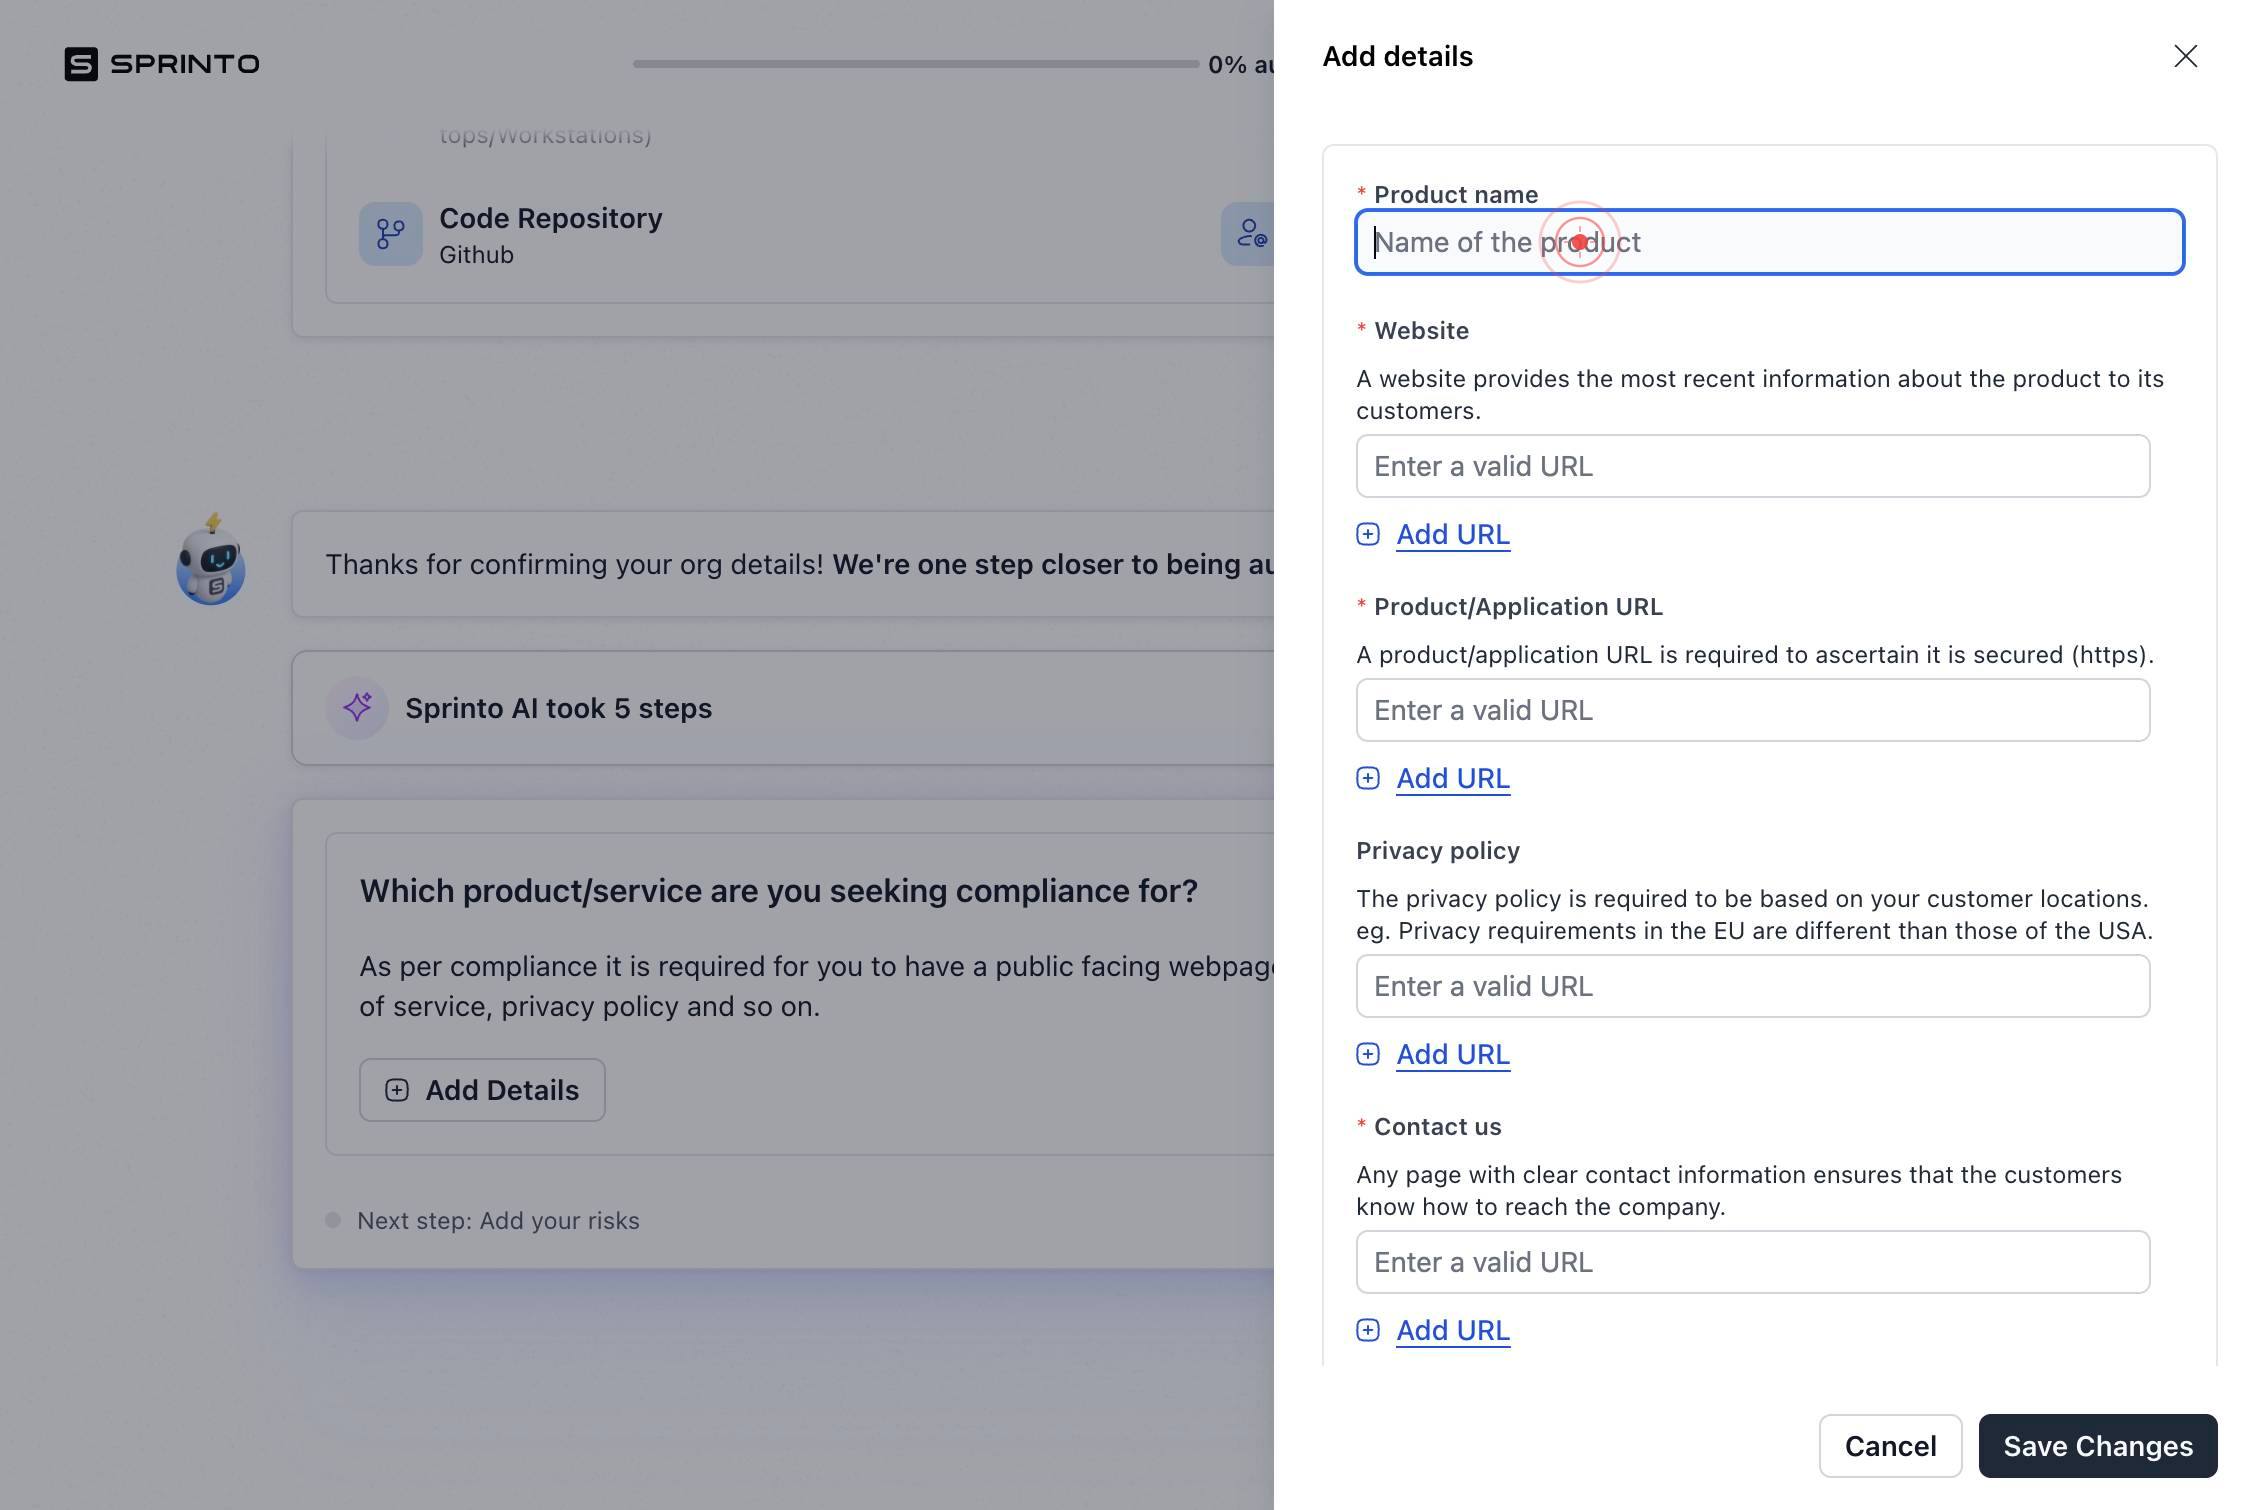
Name of the productType your product or service name into the 'Name of the product' field (e.g., 'Acme Cloud Storage Platform').
Enter a valid URLClick in the first 'Enter a valid URL' text field to add your product's main website URL.
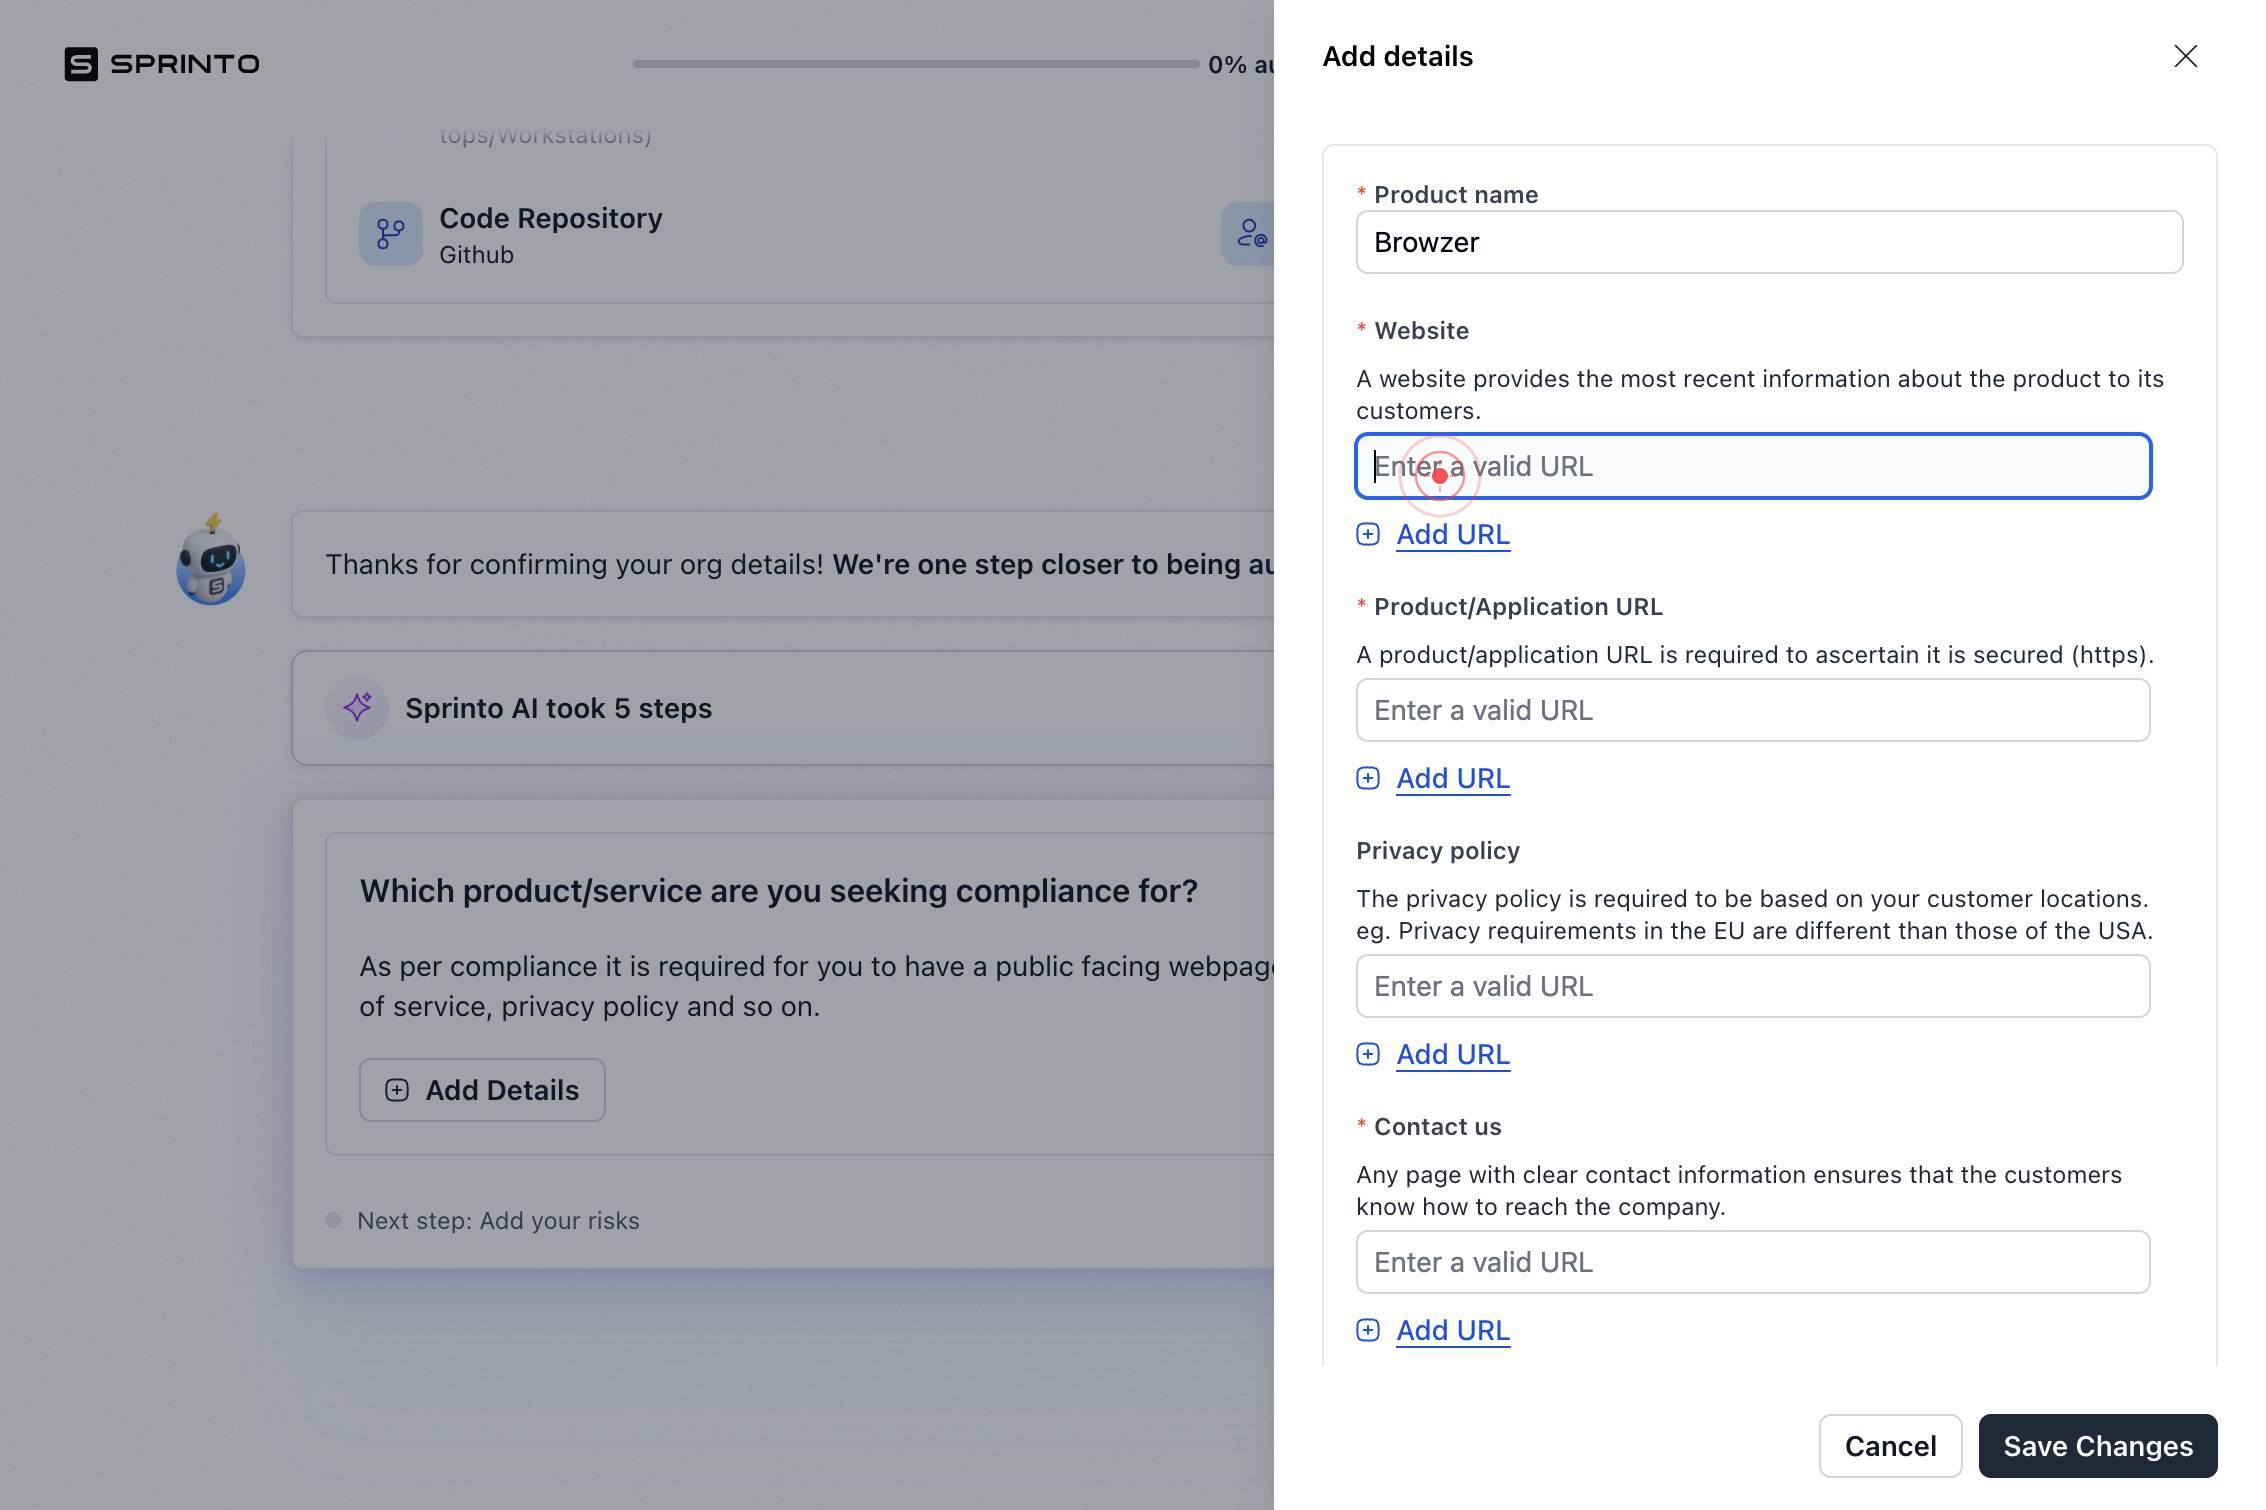
Enter a valid URLType your product's primary website URL (e.g., https://www.acme-platform.com).
Enter a valid URLClick in the second 'Enter a valid URL' text field to add your product documentation or API reference URL.
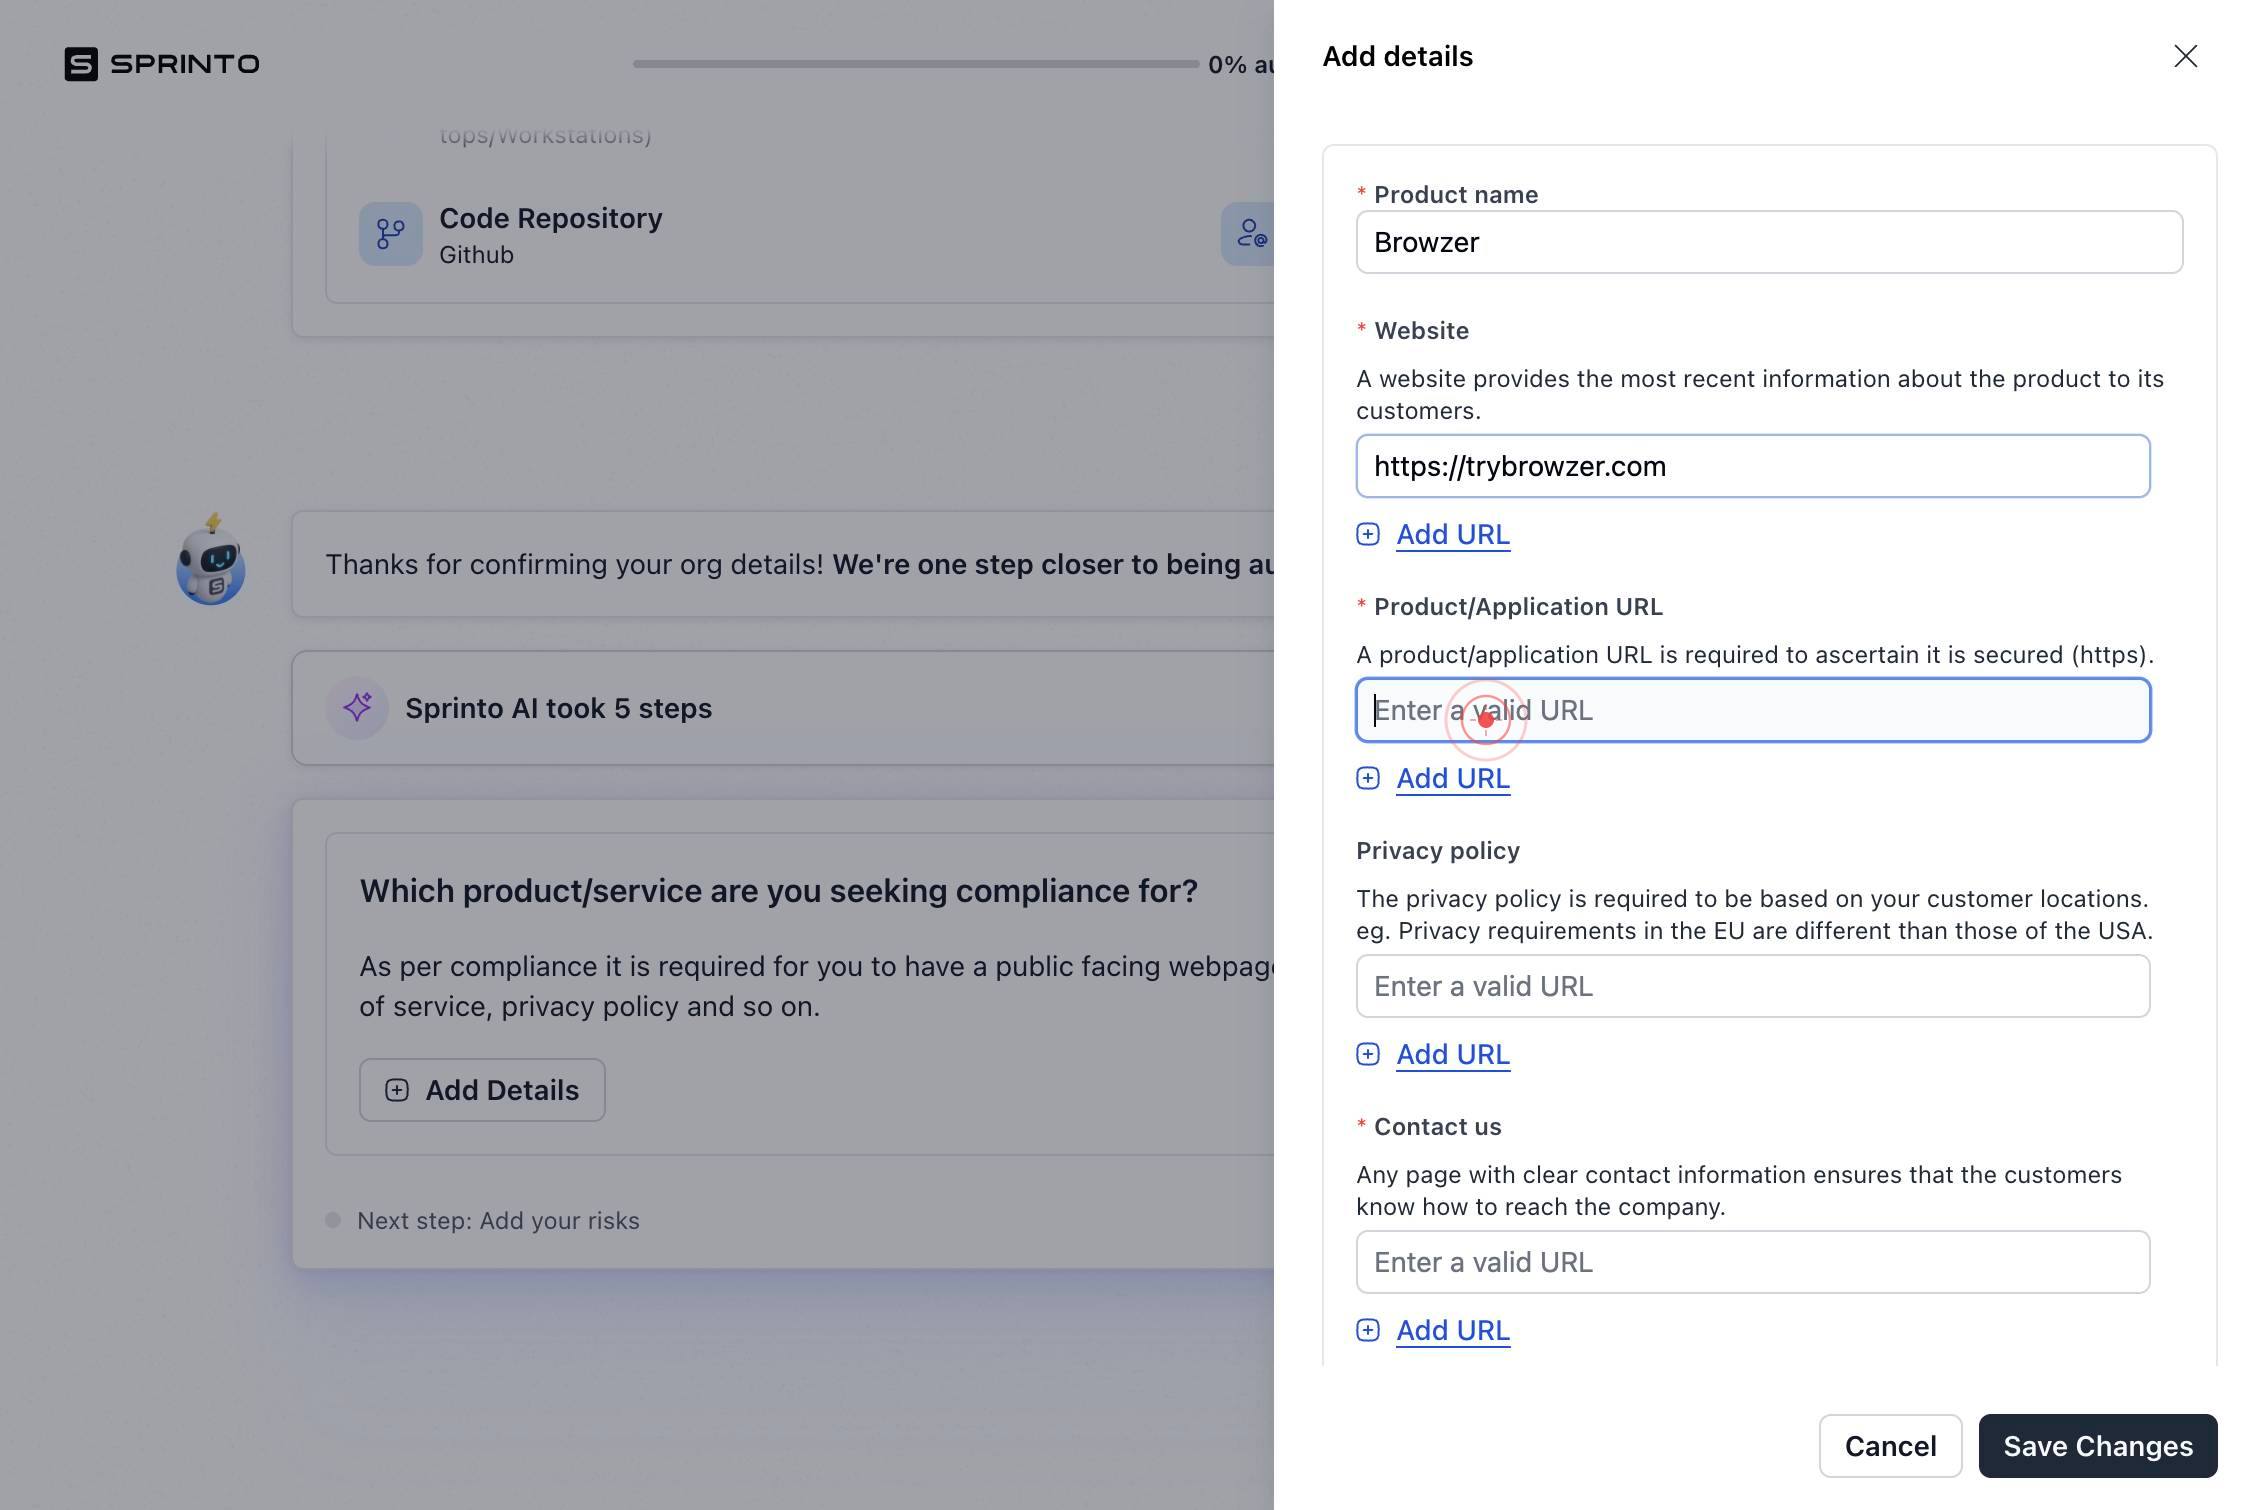
Enter a valid URLType the URL for your product documentation or technical API reference (e.g., https://docs.acme-platform.com).
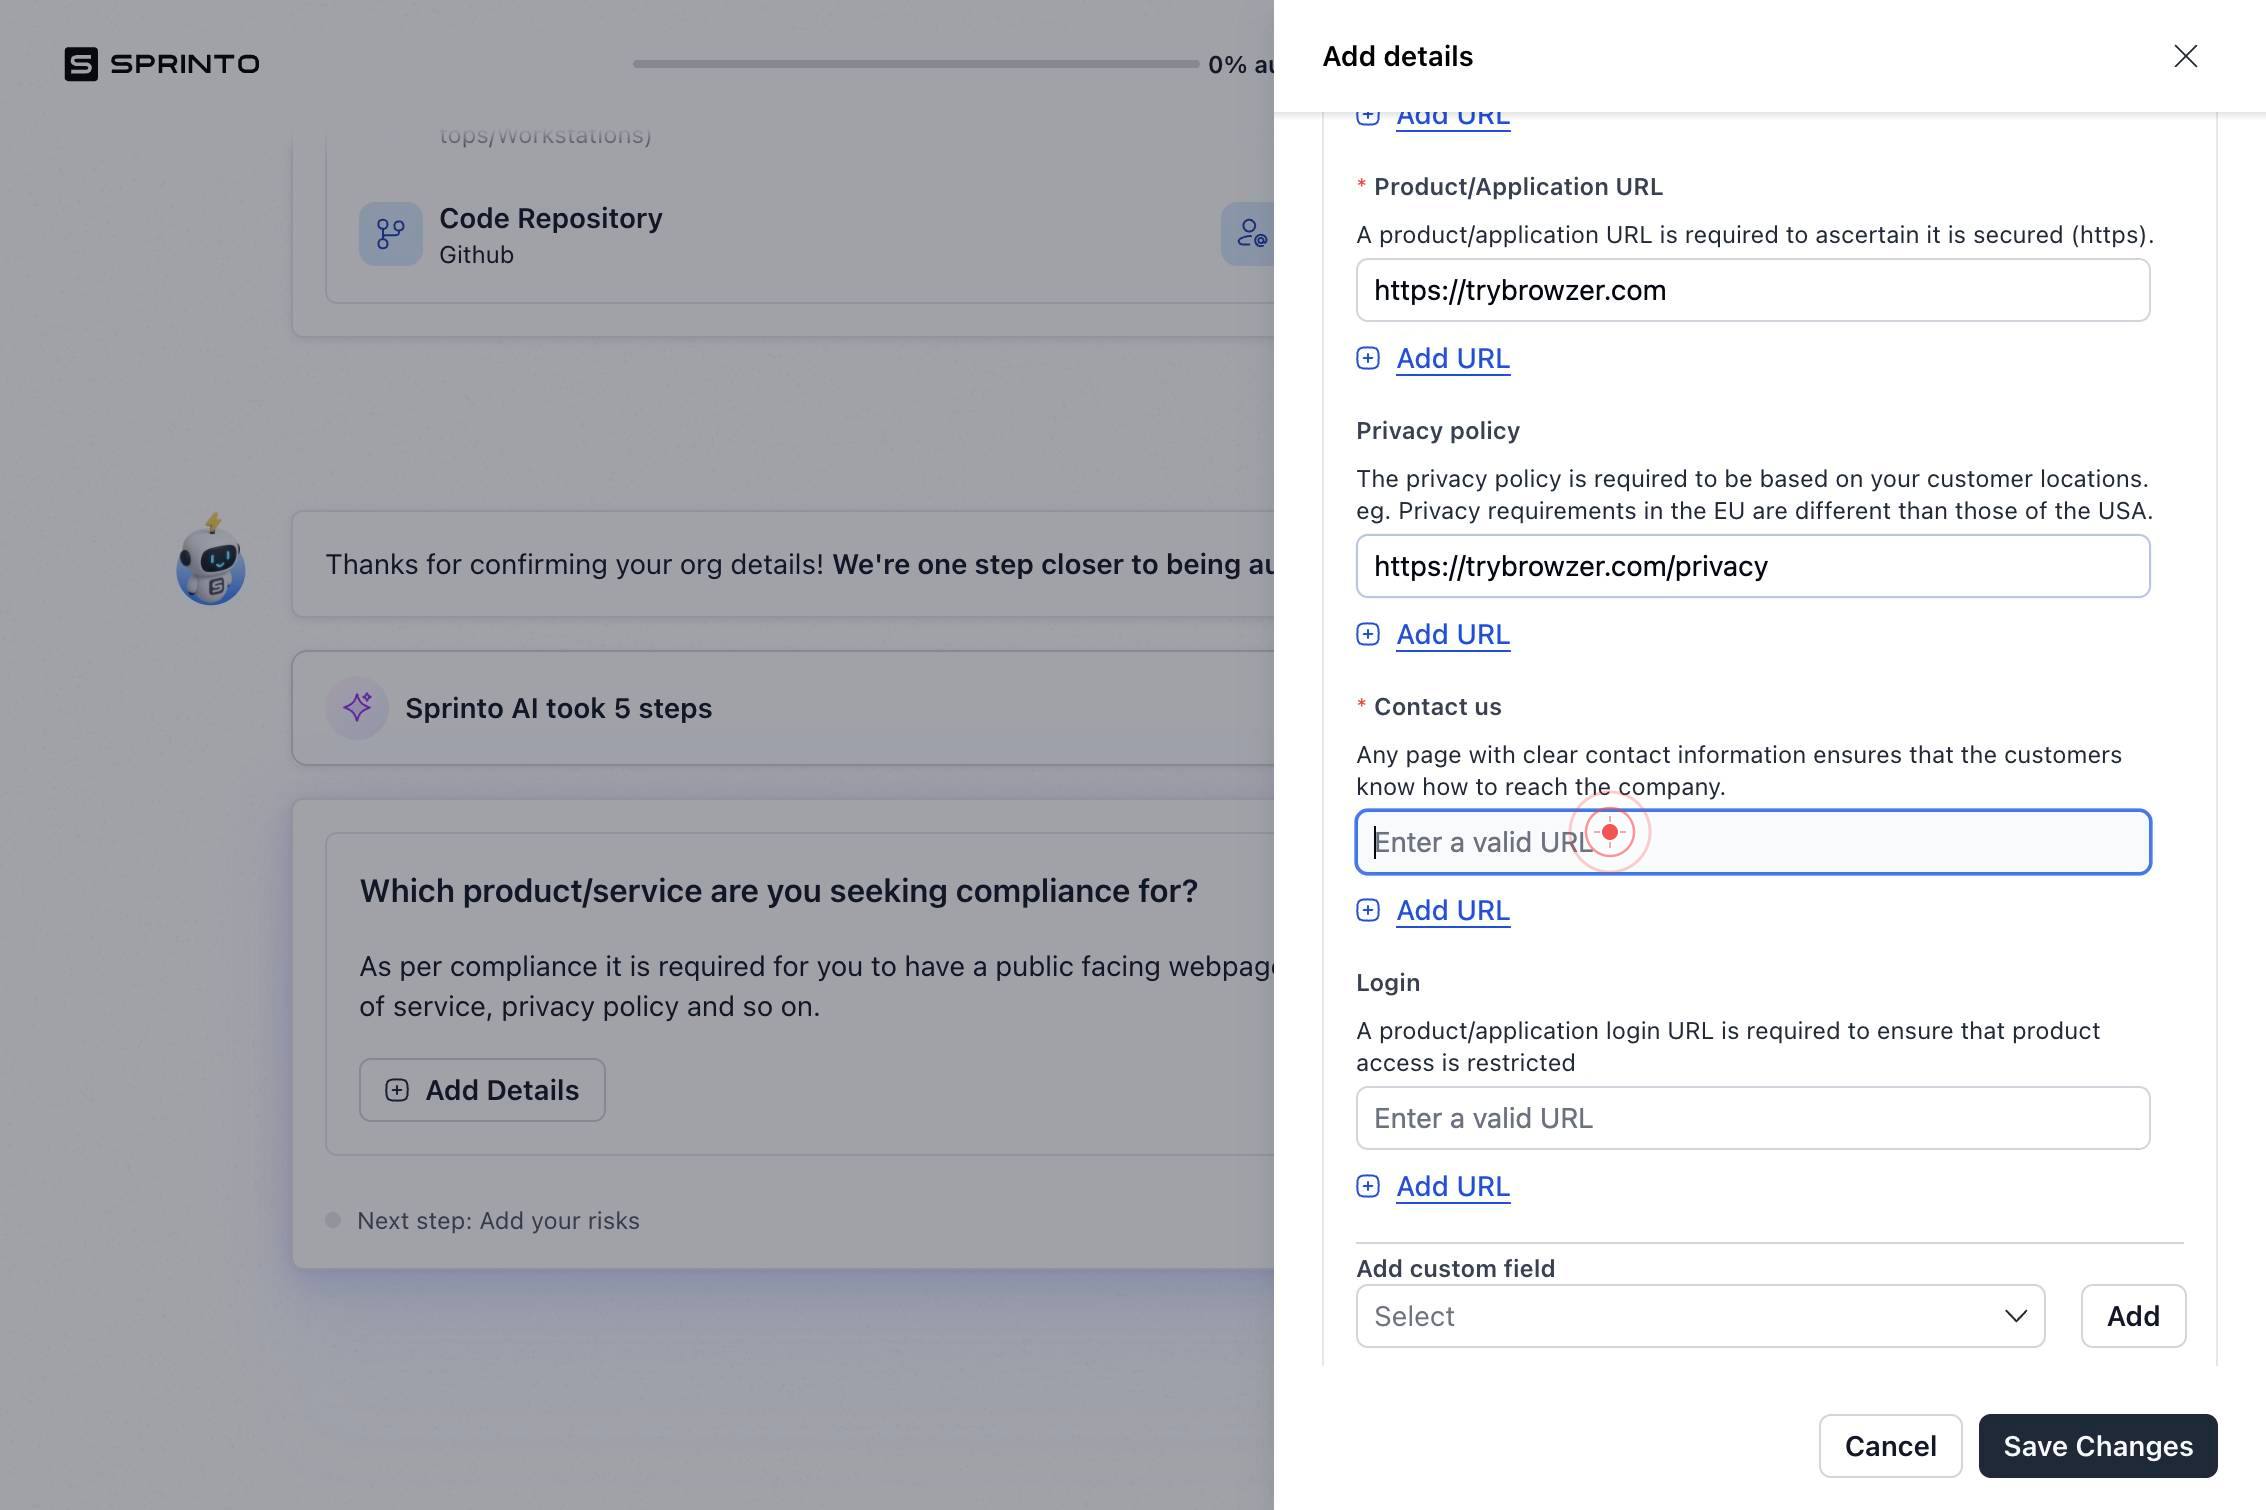
Enter a valid URLClick in the third 'Enter a valid URL' text field to add your security or architecture overview URL.
Enter a valid URLType the URL for your security, architecture, or trust information page (e.g., https://www.acme-platform.com/security).
Enter a valid URLClick in the fourth 'Enter a valid URL' text field to add another product-related URL (such as a roadmap, blog, or additional resource).
Enter a valid URLType an additional URL relevant to your product (e.g., https://blog.acme-platform.com or https://roadmap.acme-platform.com).
Enter a valid URLClick in the fifth 'Enter a valid URL' text field to add your final product URL.
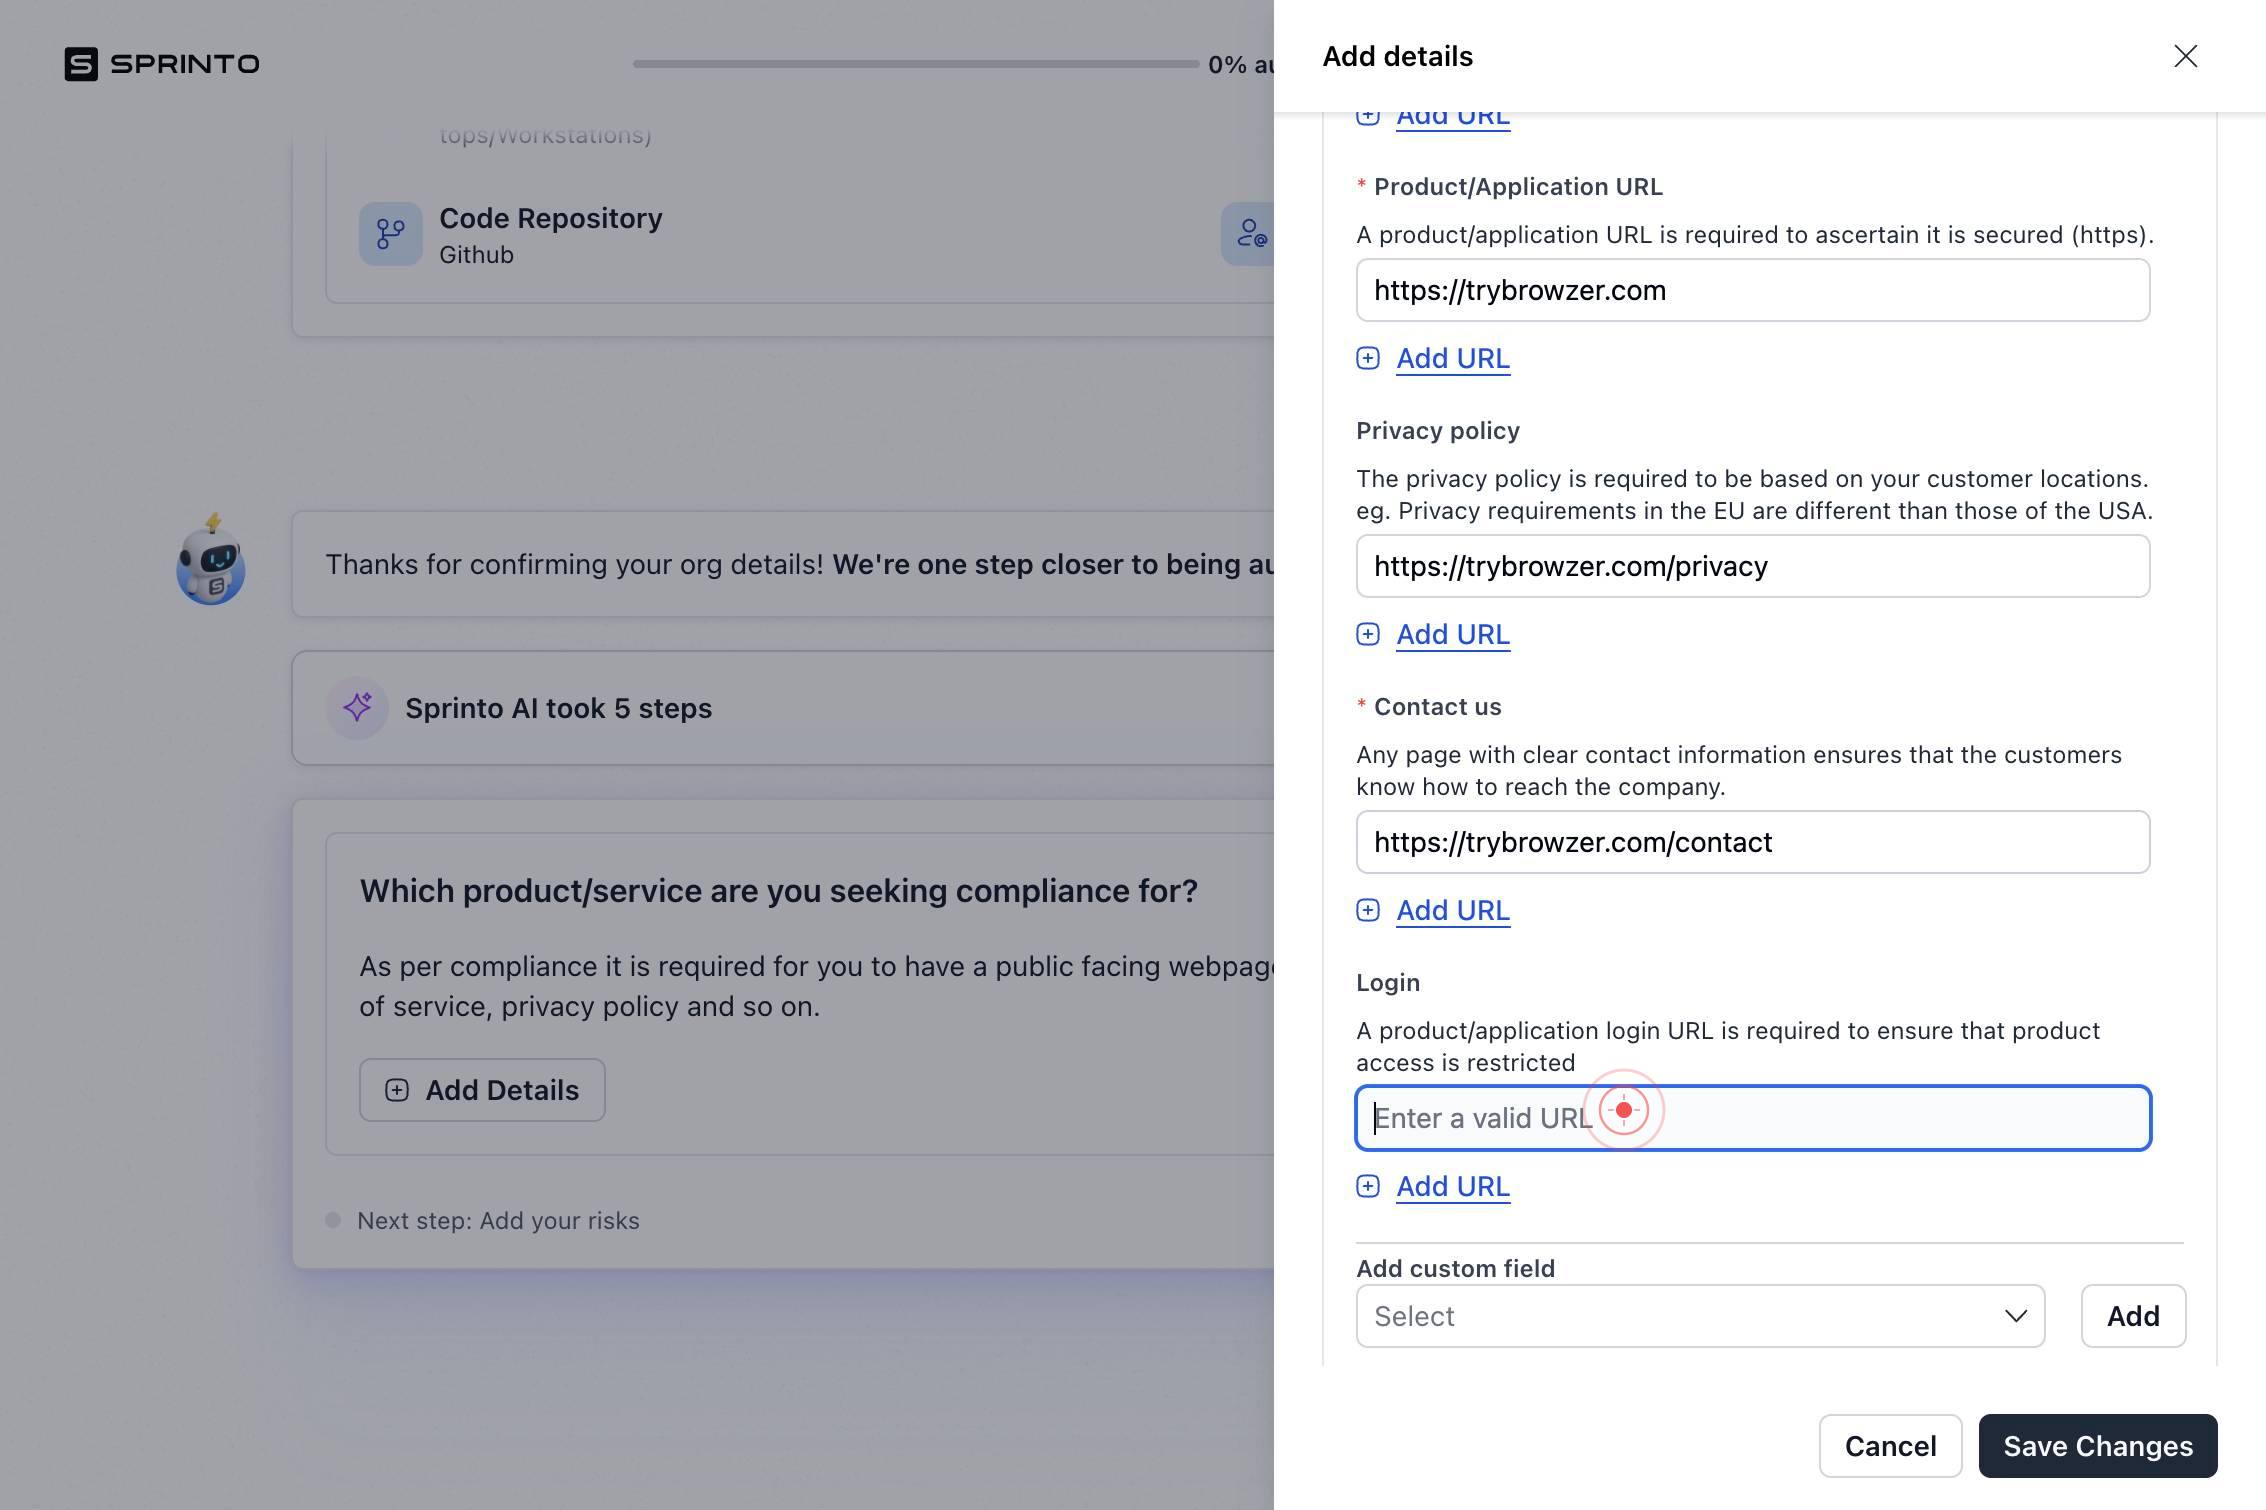
Enter a valid URLType the URL for your final product resource (this may be a secondary reference or compliance-related page).
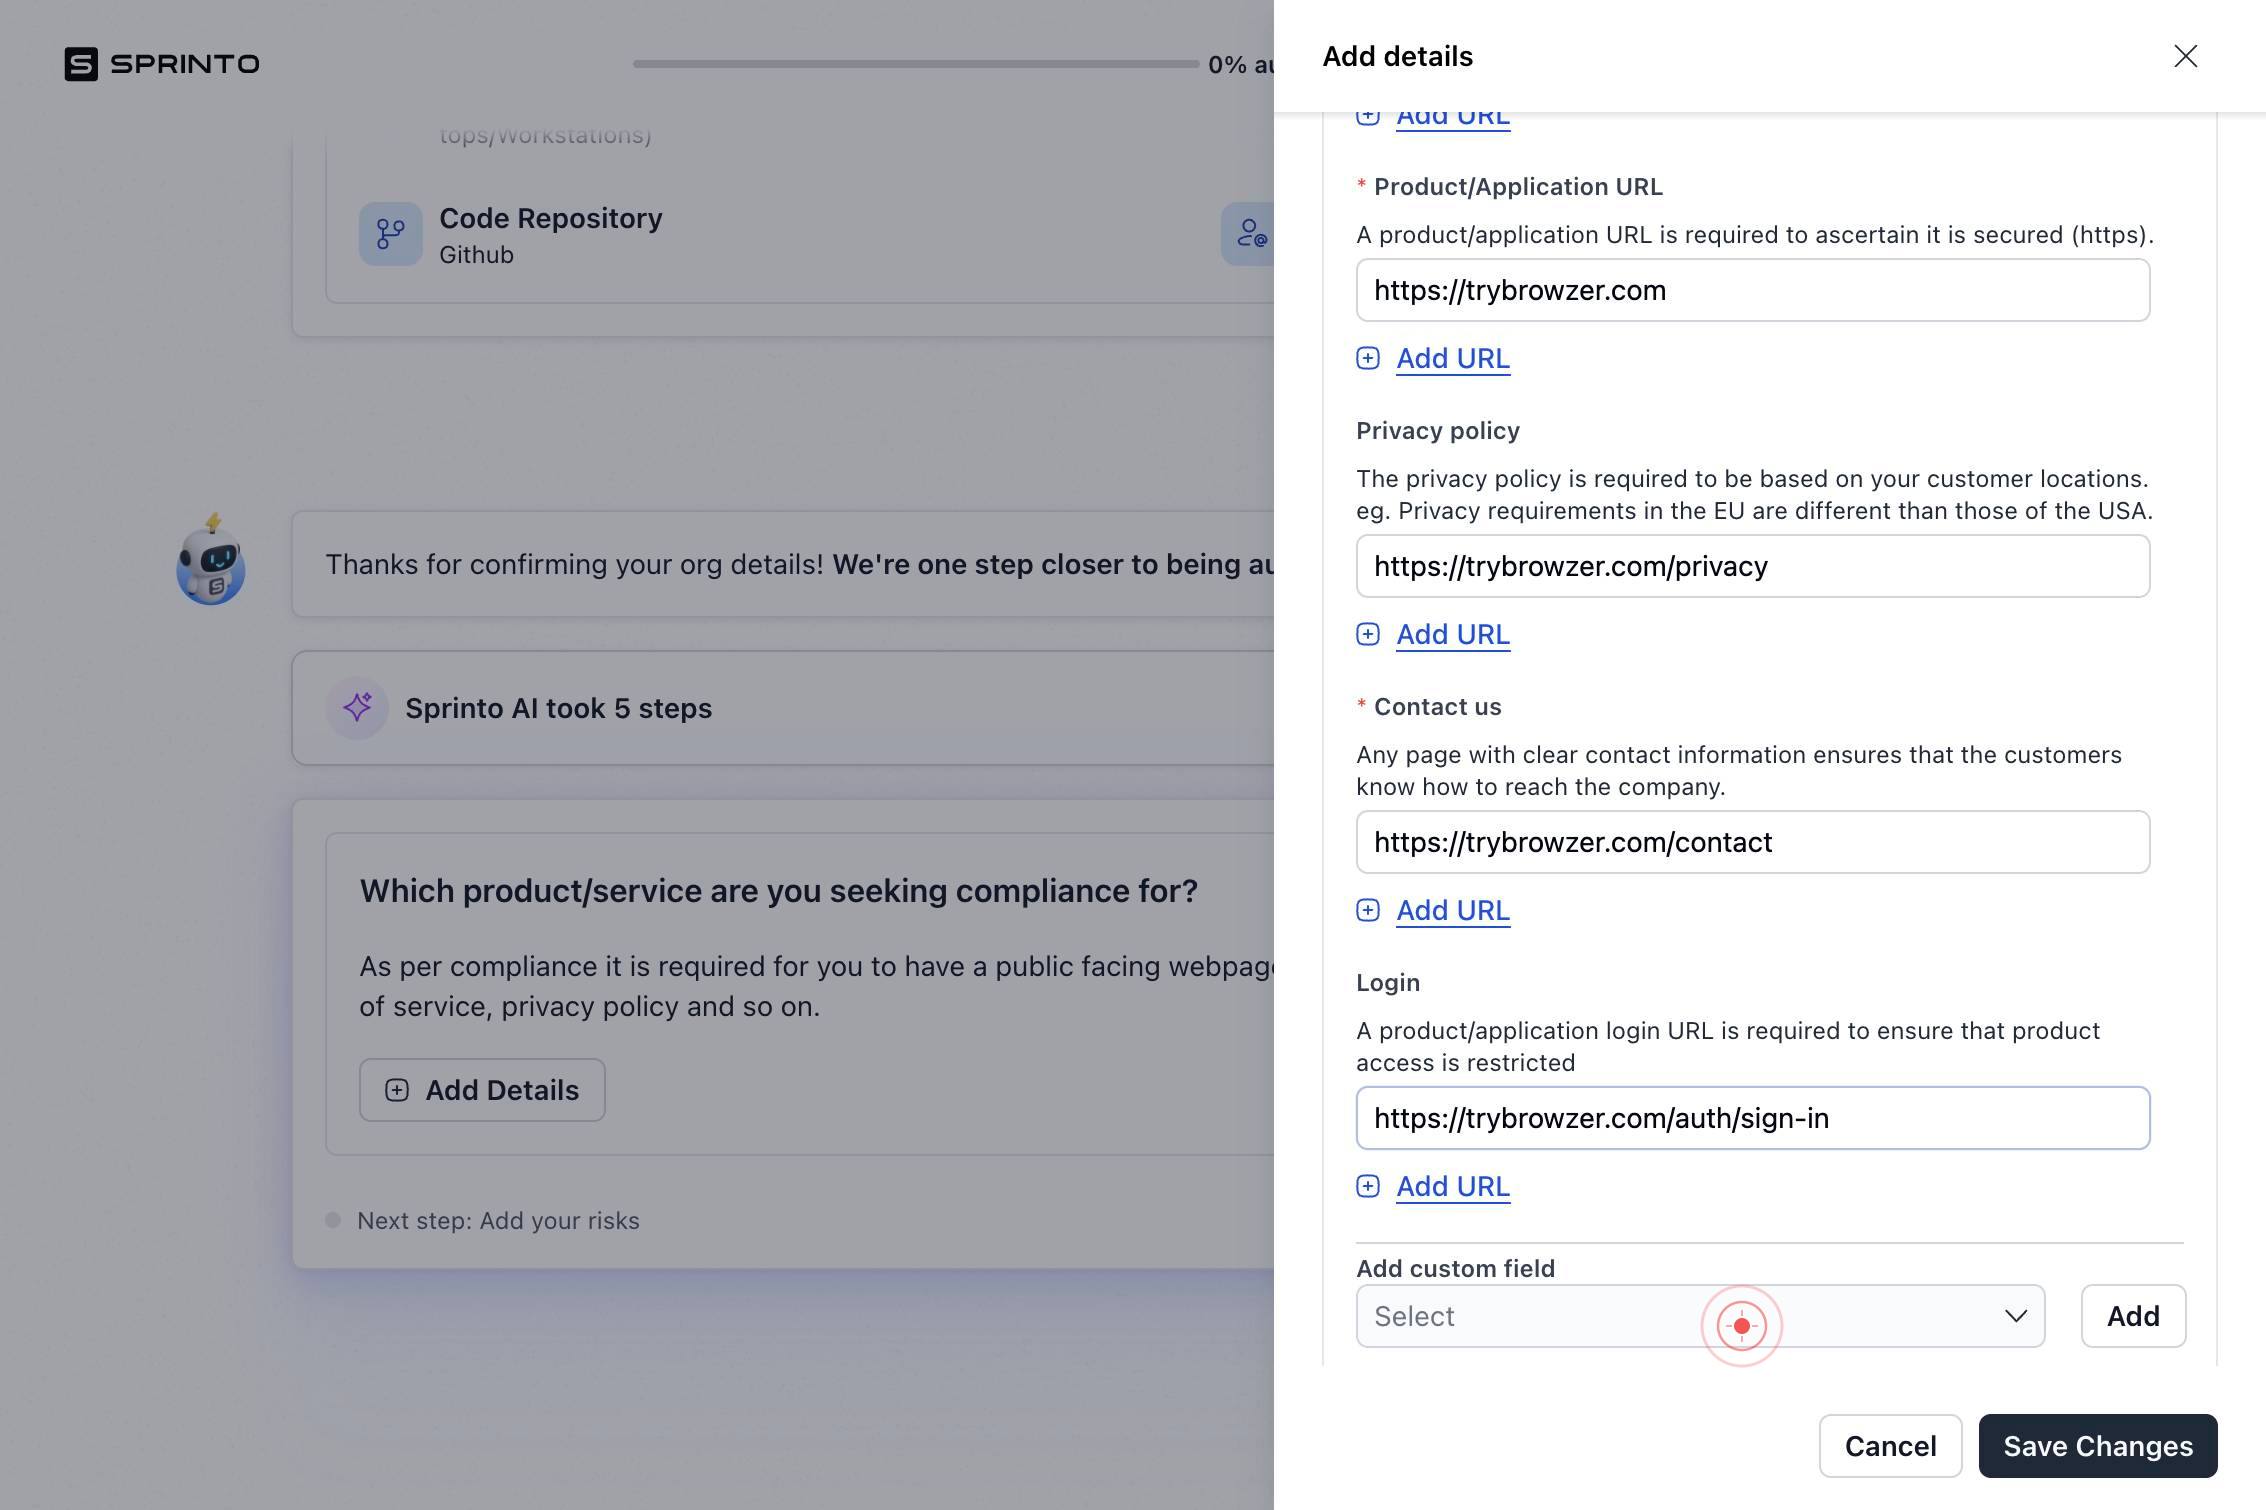
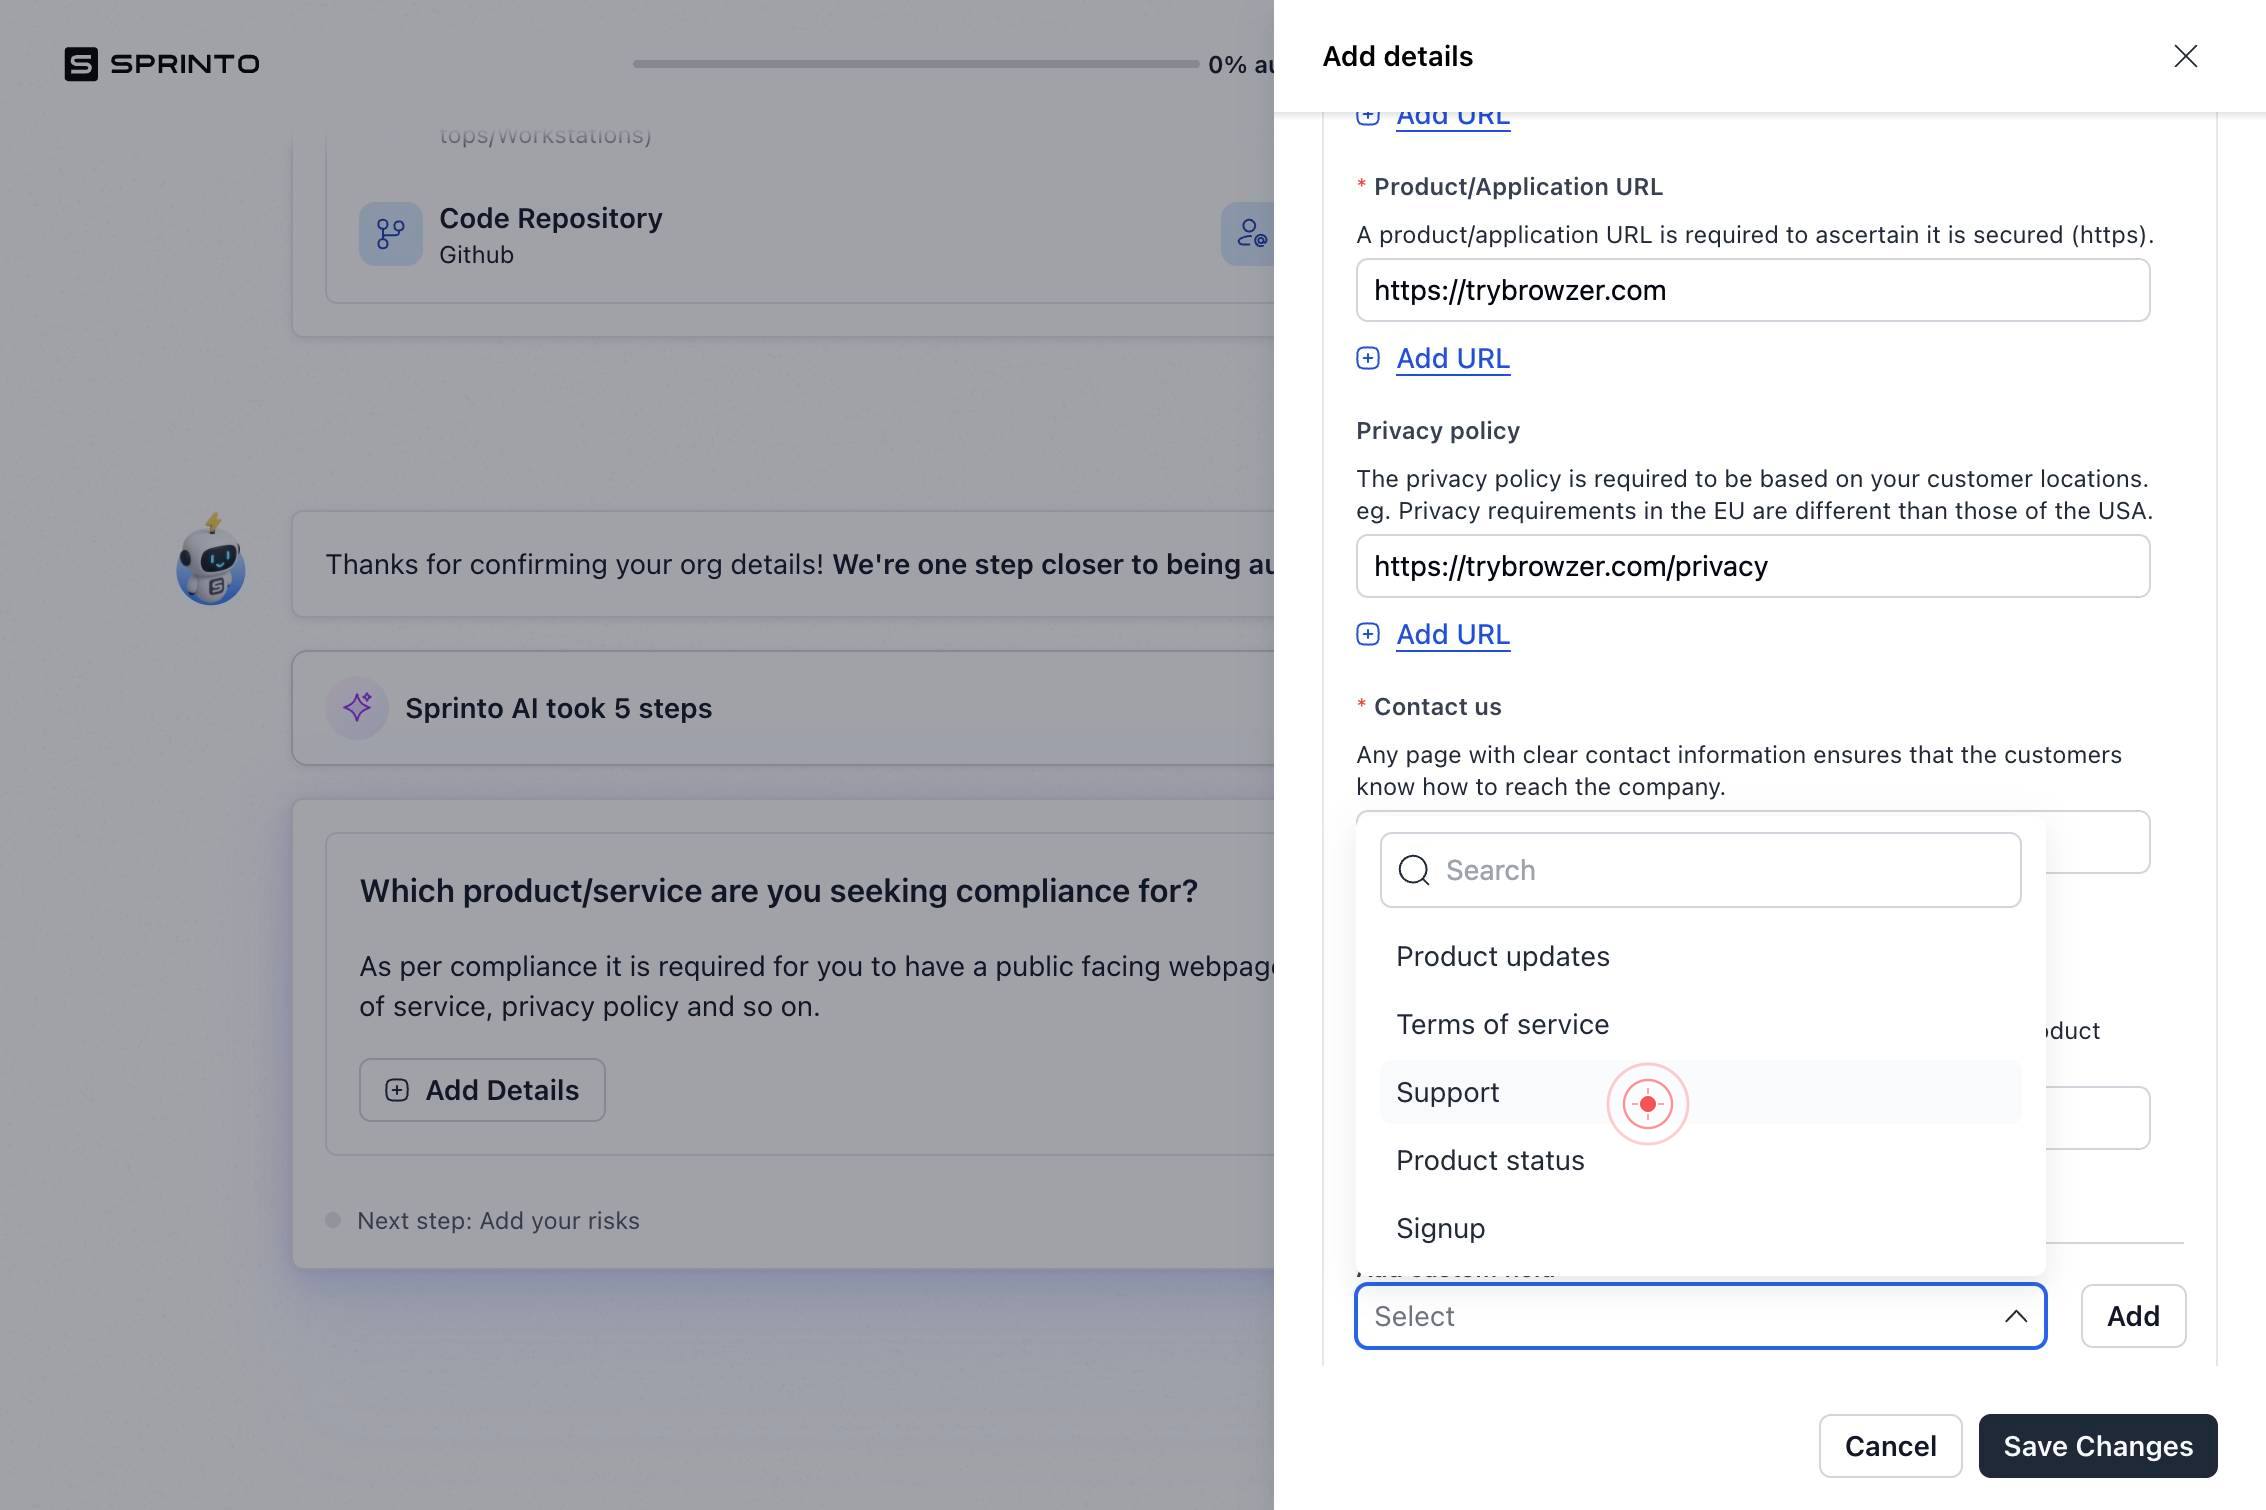
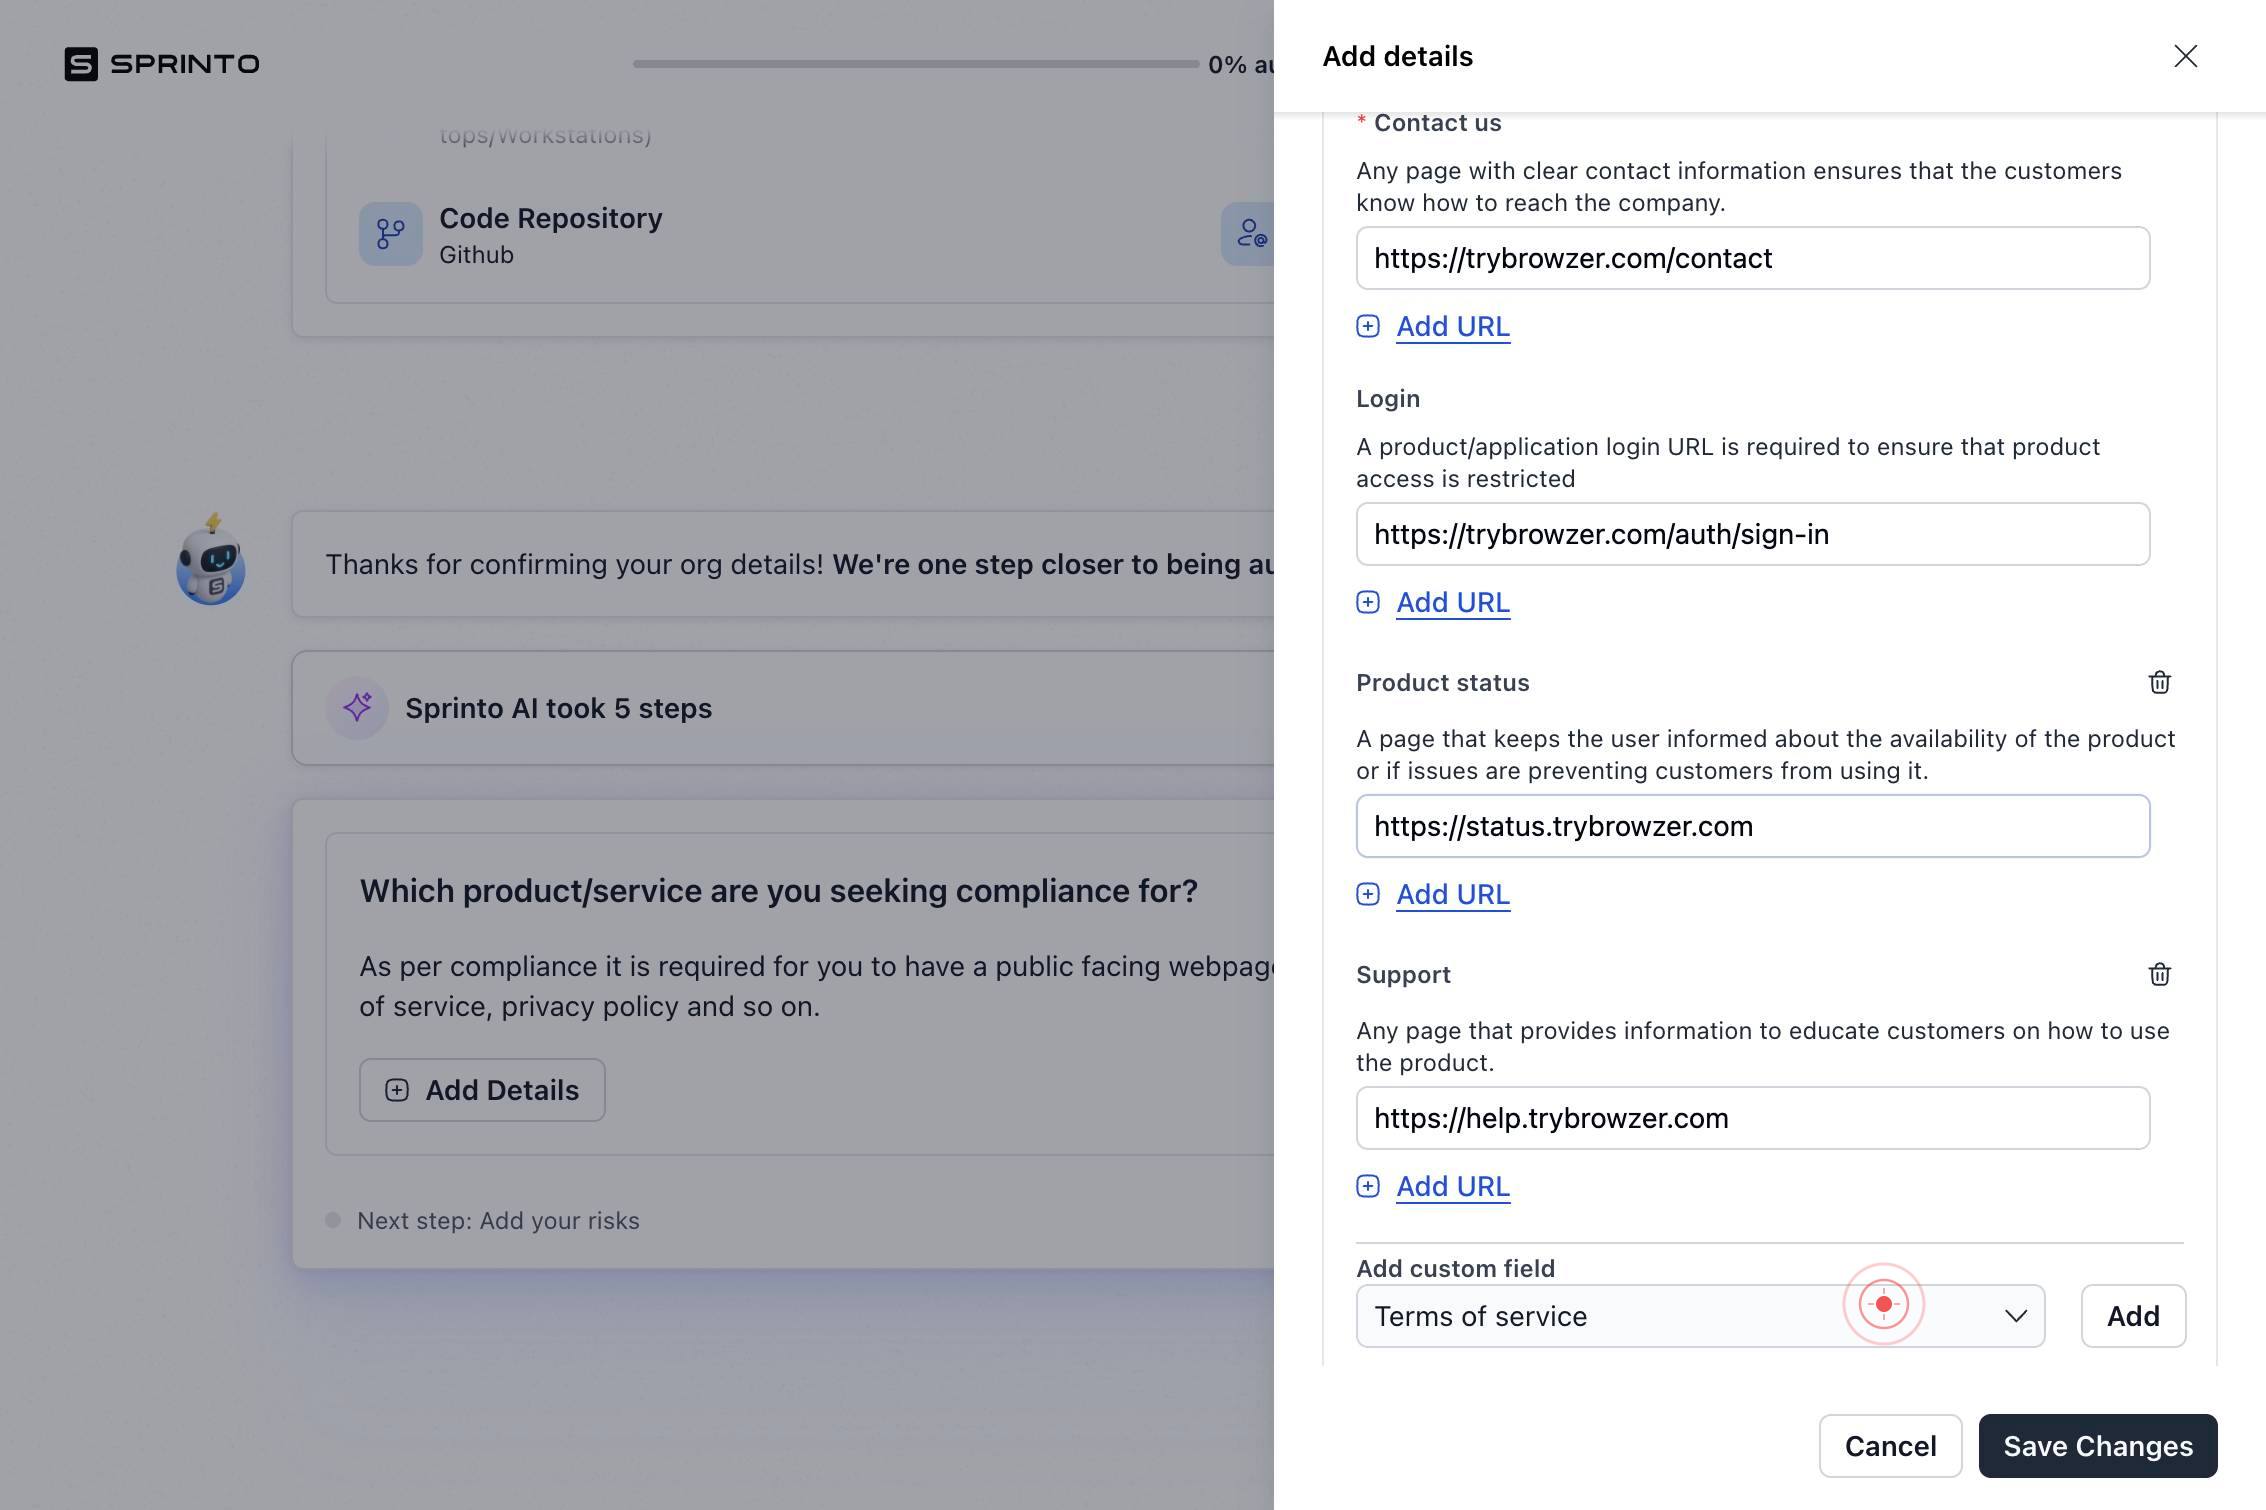
SelectClick the first 'Select' button to open a dropdown menu for classifying the first document/URL you are about to add.
SearchType 'Support' in the search field to filter document types and locate the Support document classification option.
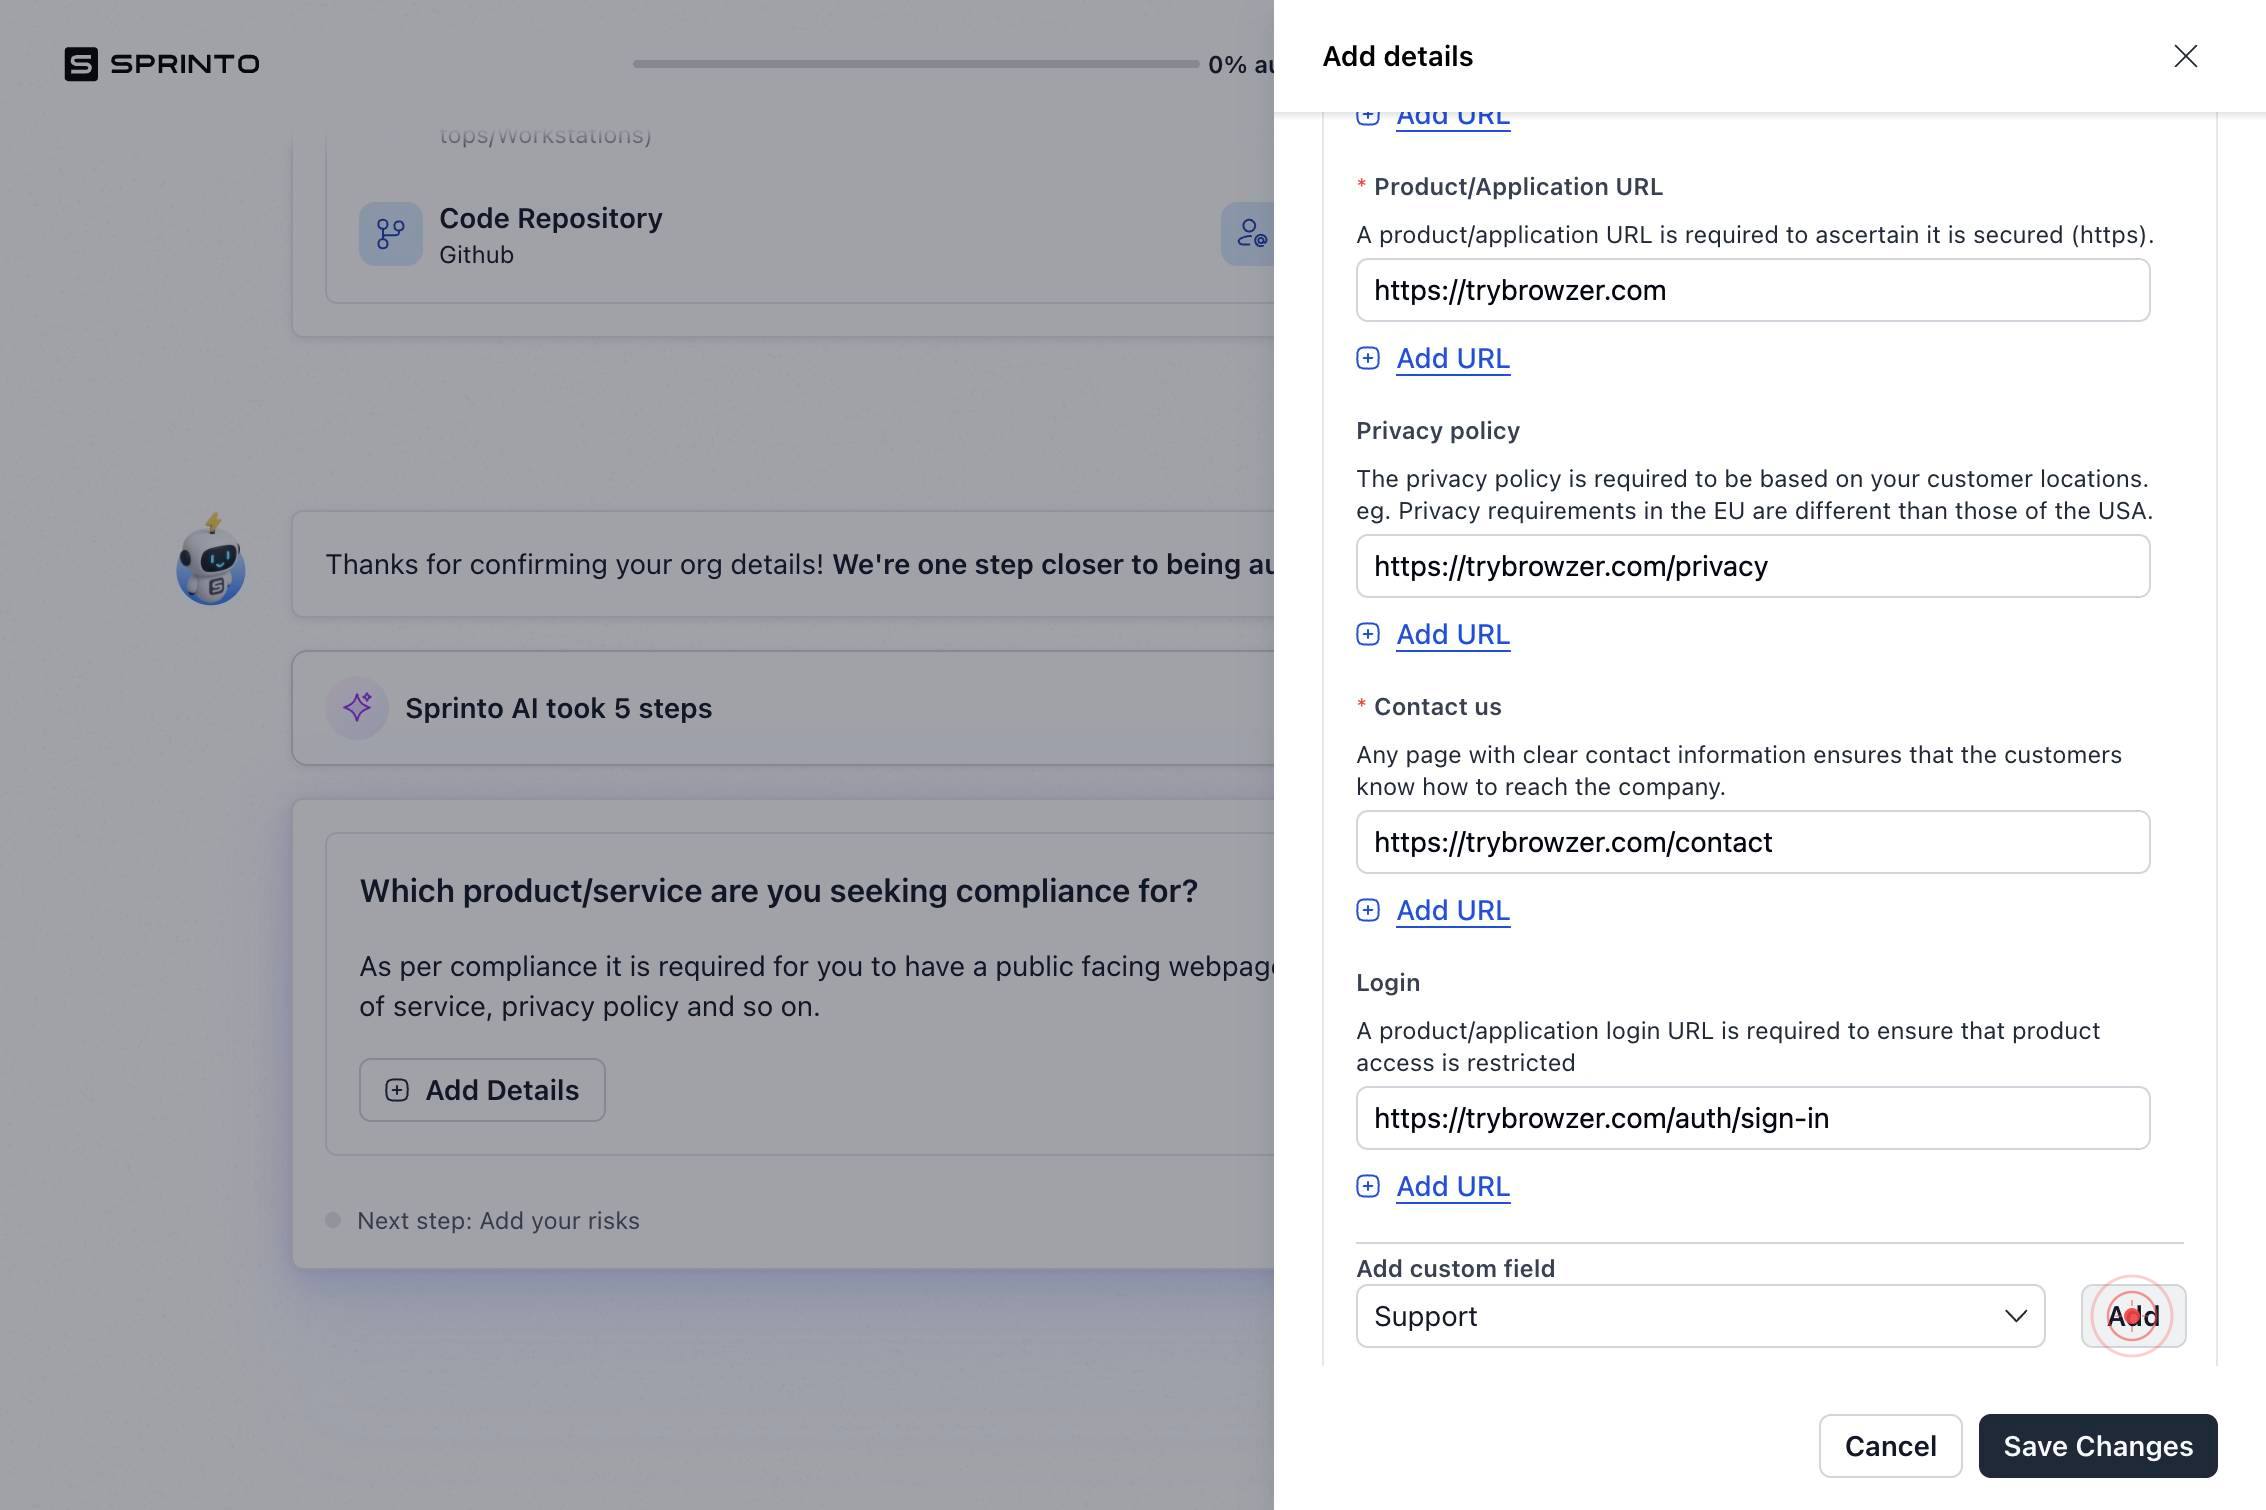
SupportClick on 'Support' from the filtered results to select it as the document type for your support page URL.
AddClick the 'Add' button to confirm and add your Support document URL to the profile.
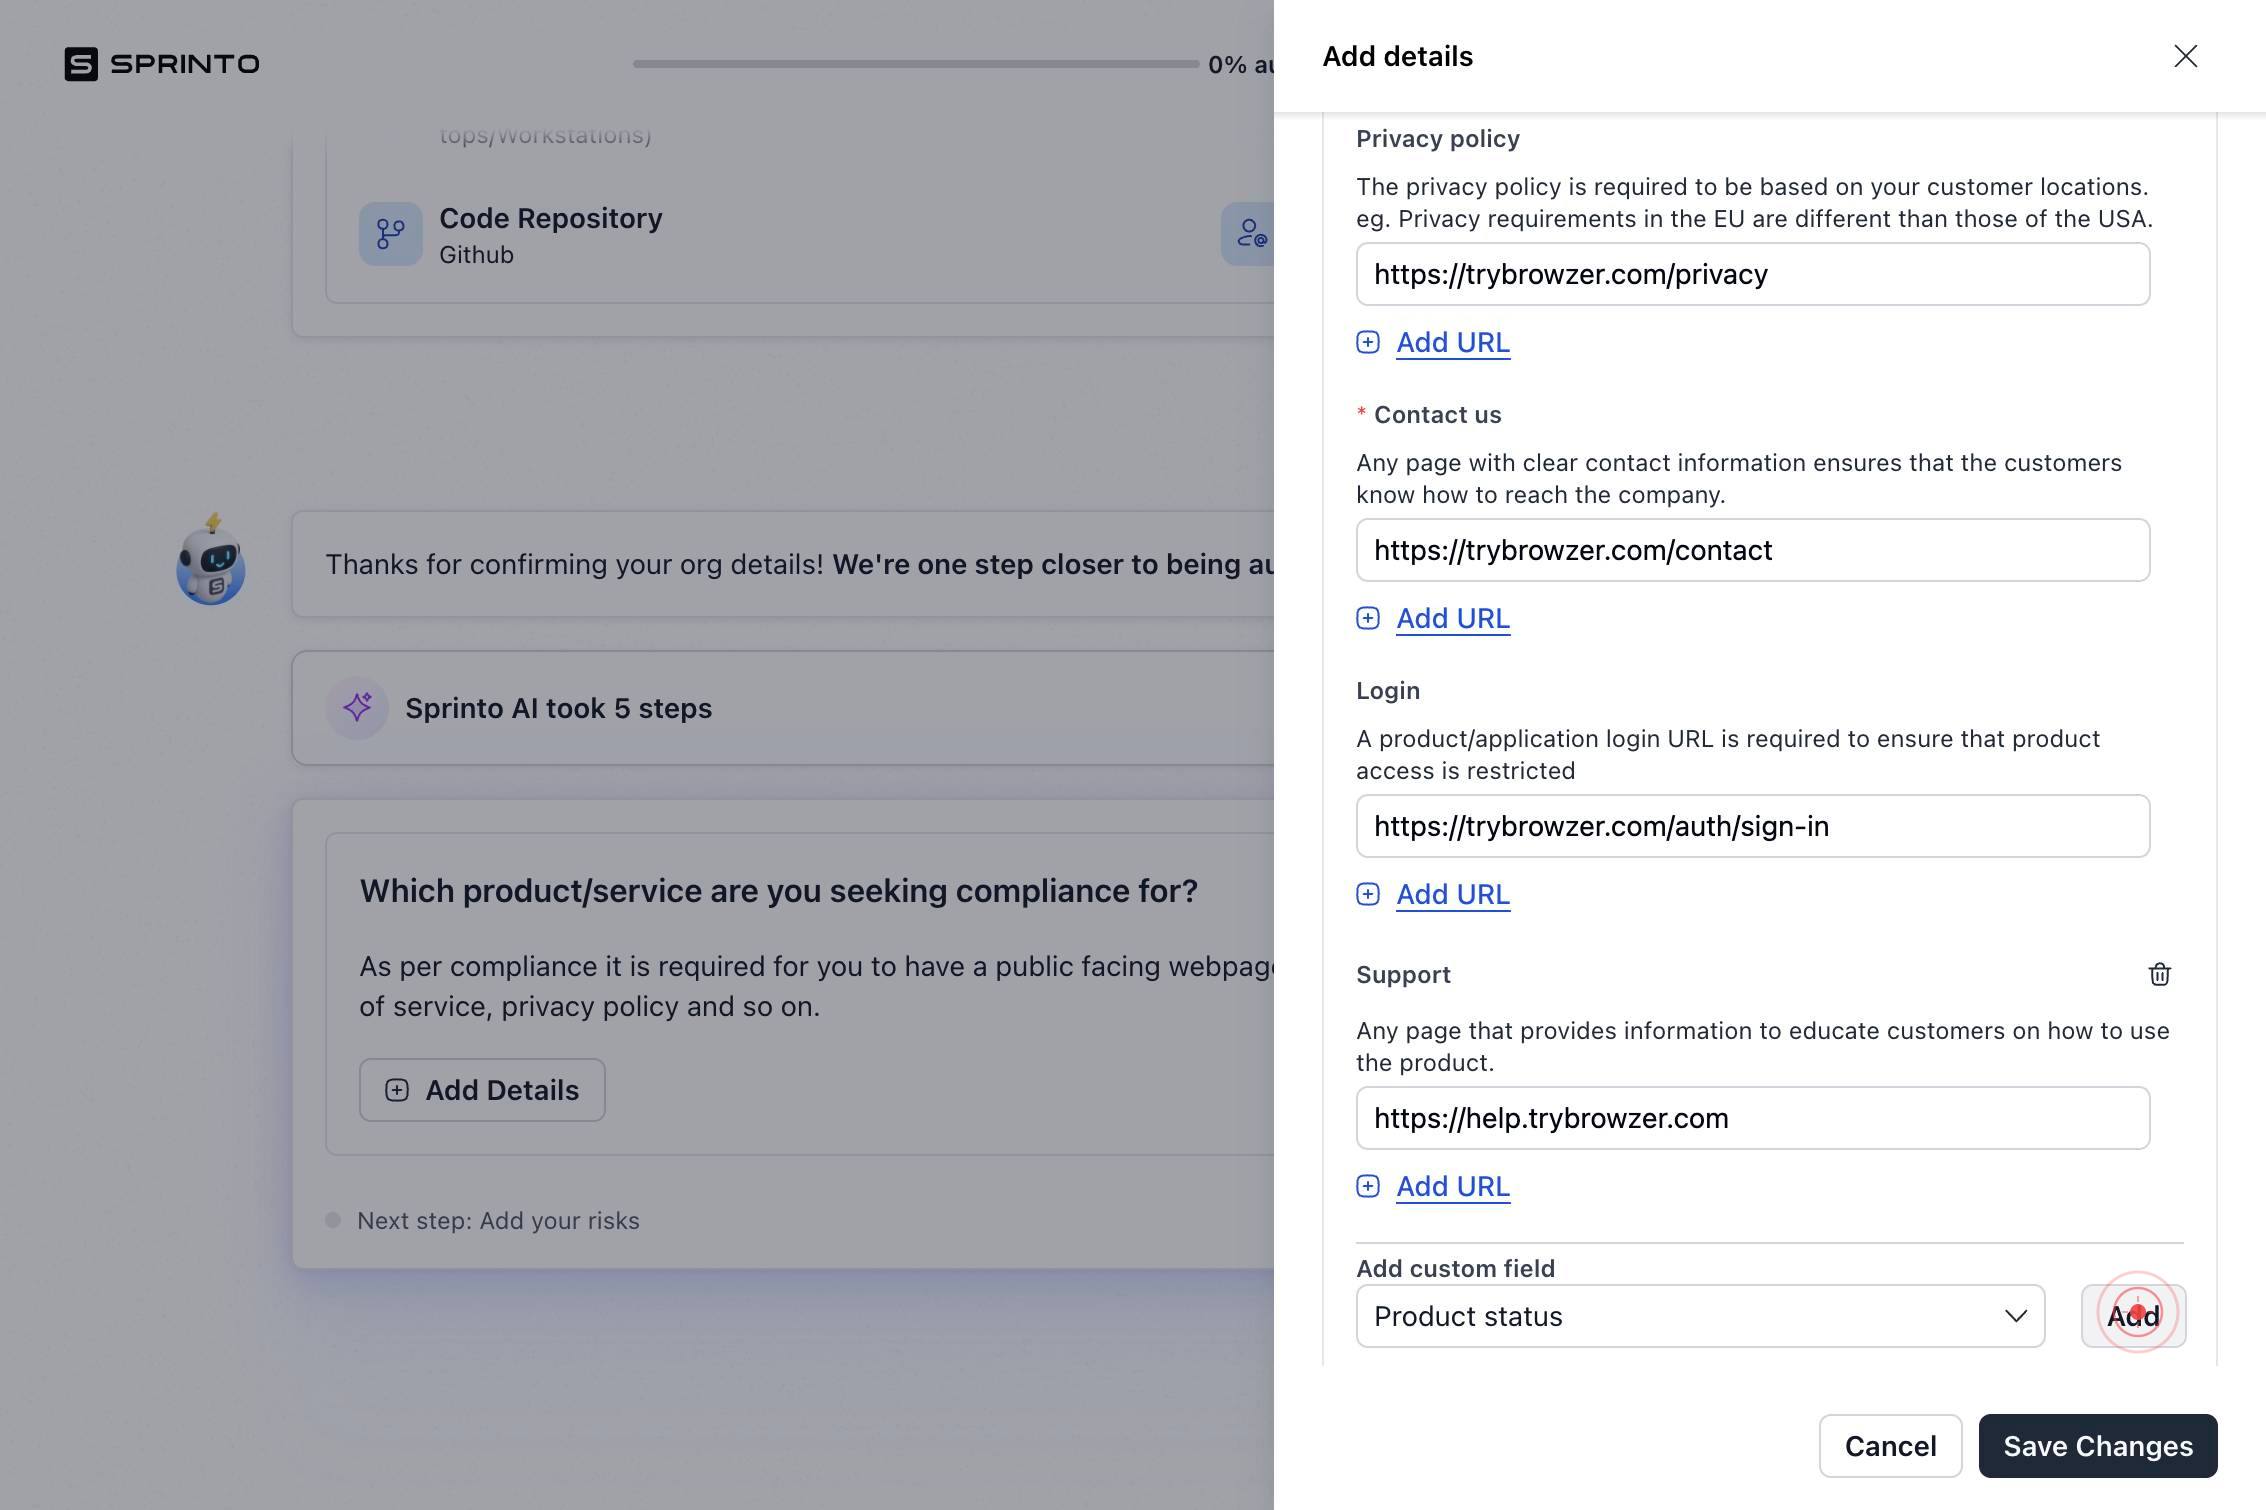
Enter a valid URLClick in the 'Enter a valid URL' text field to input your Support page URL.
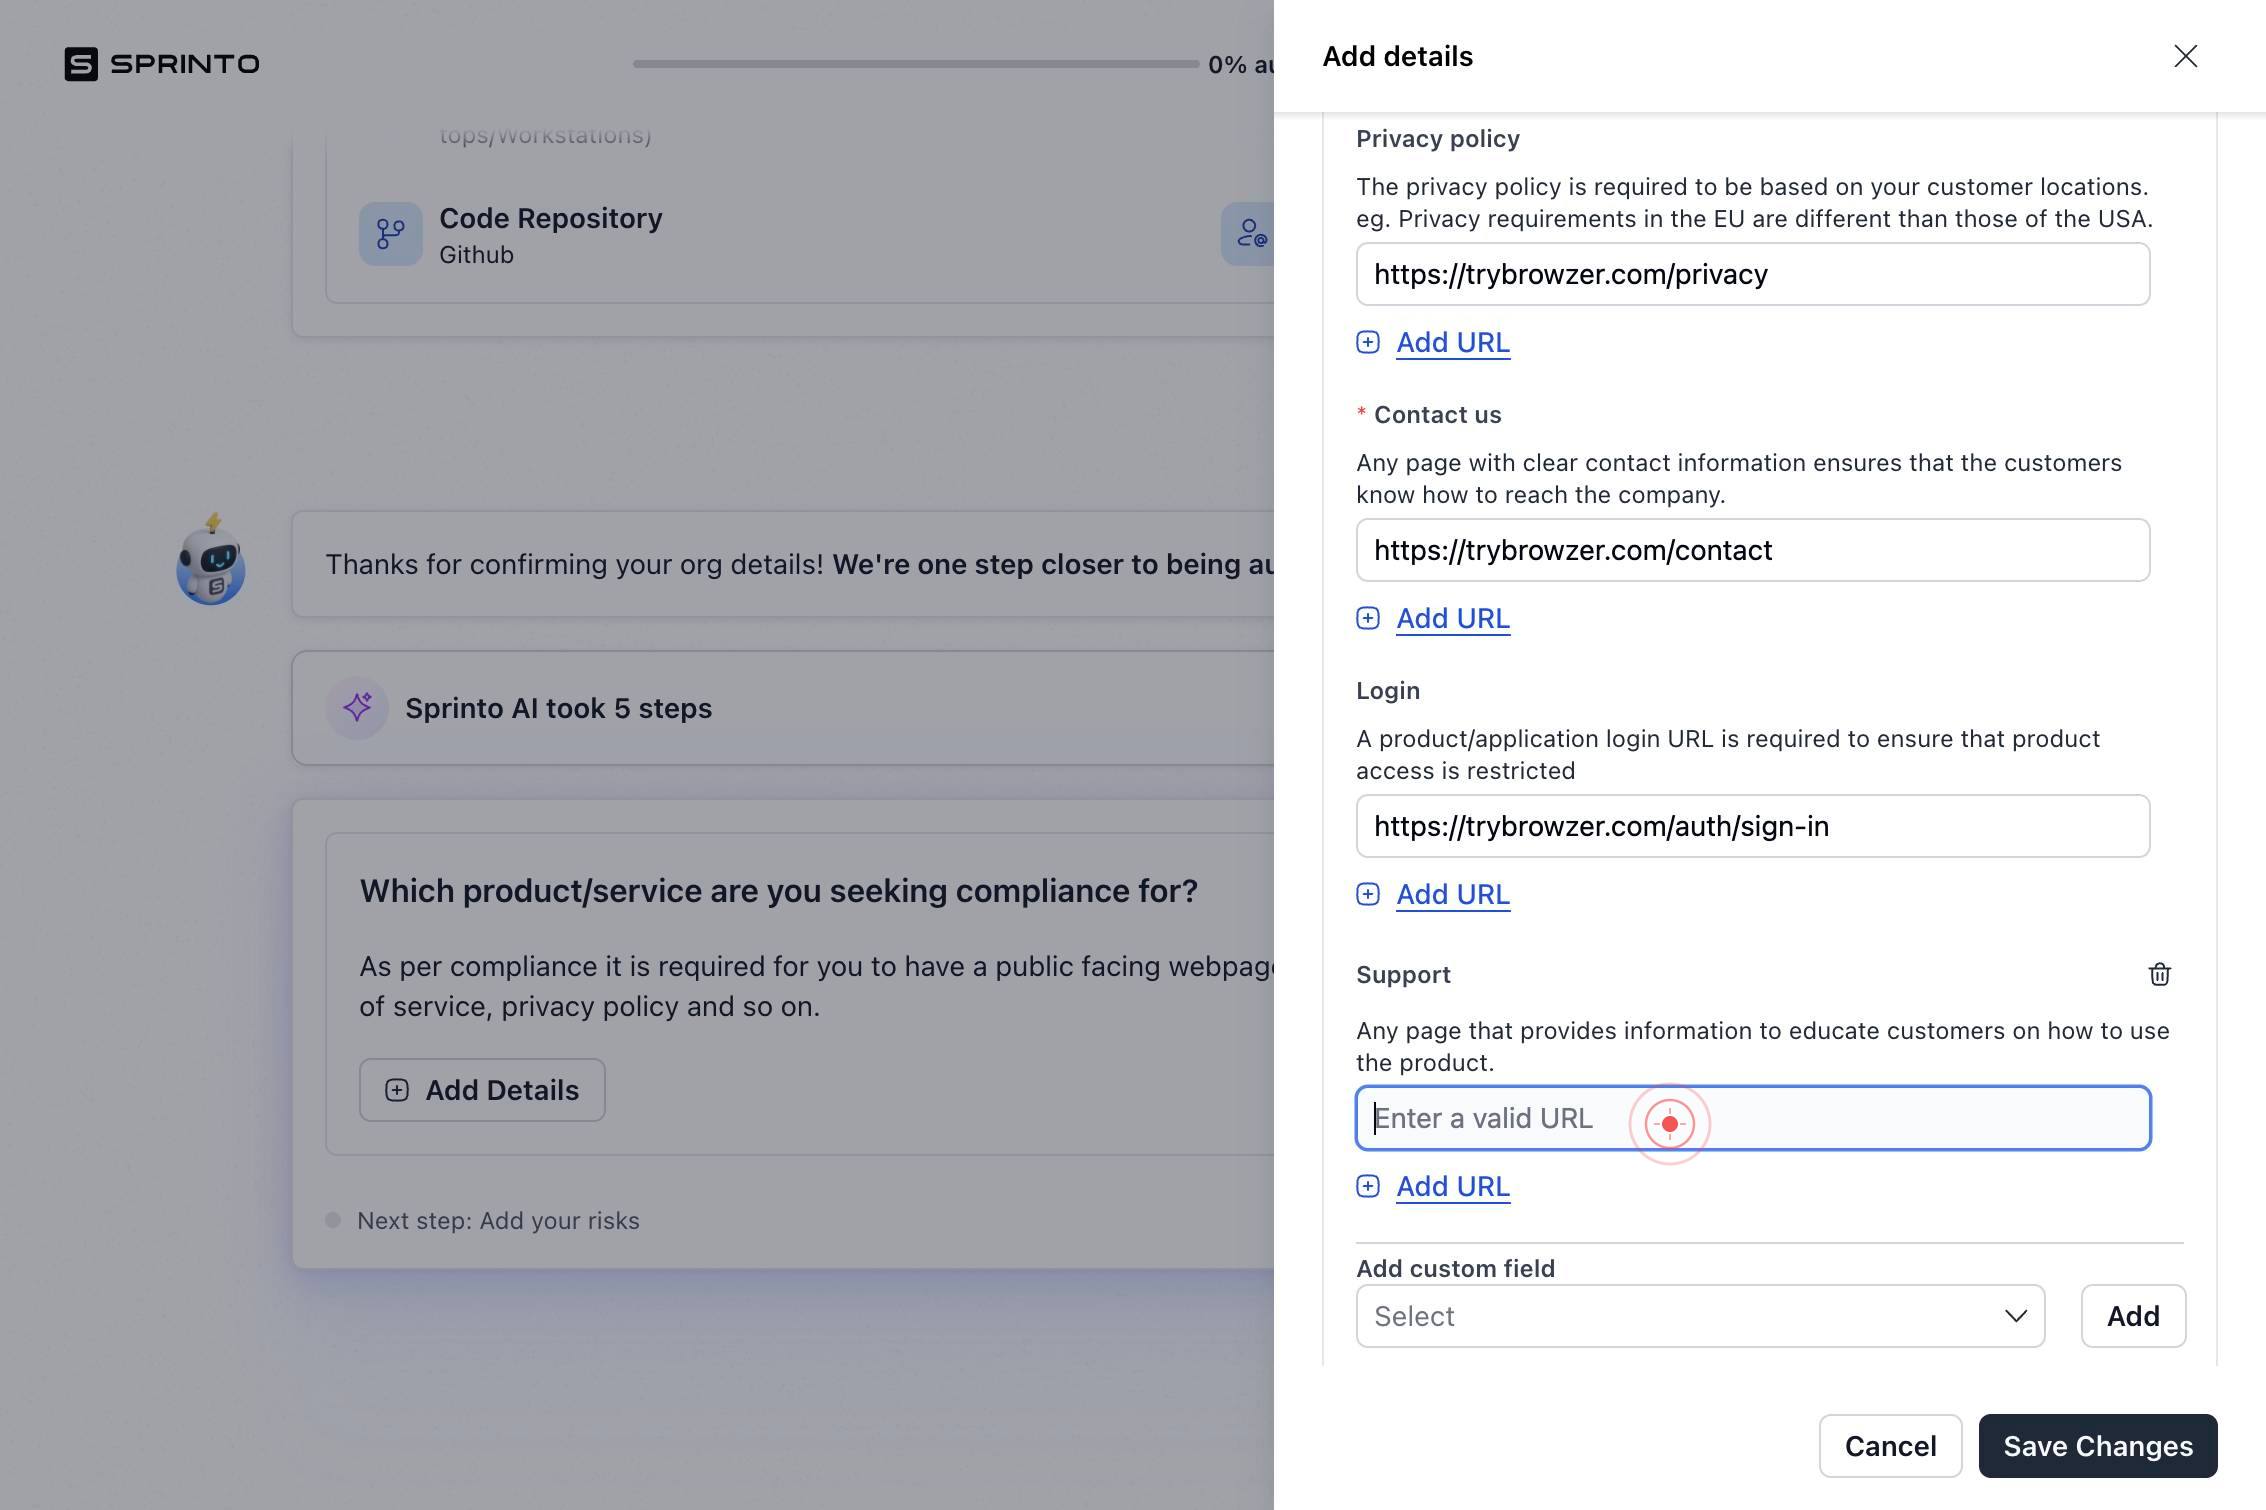
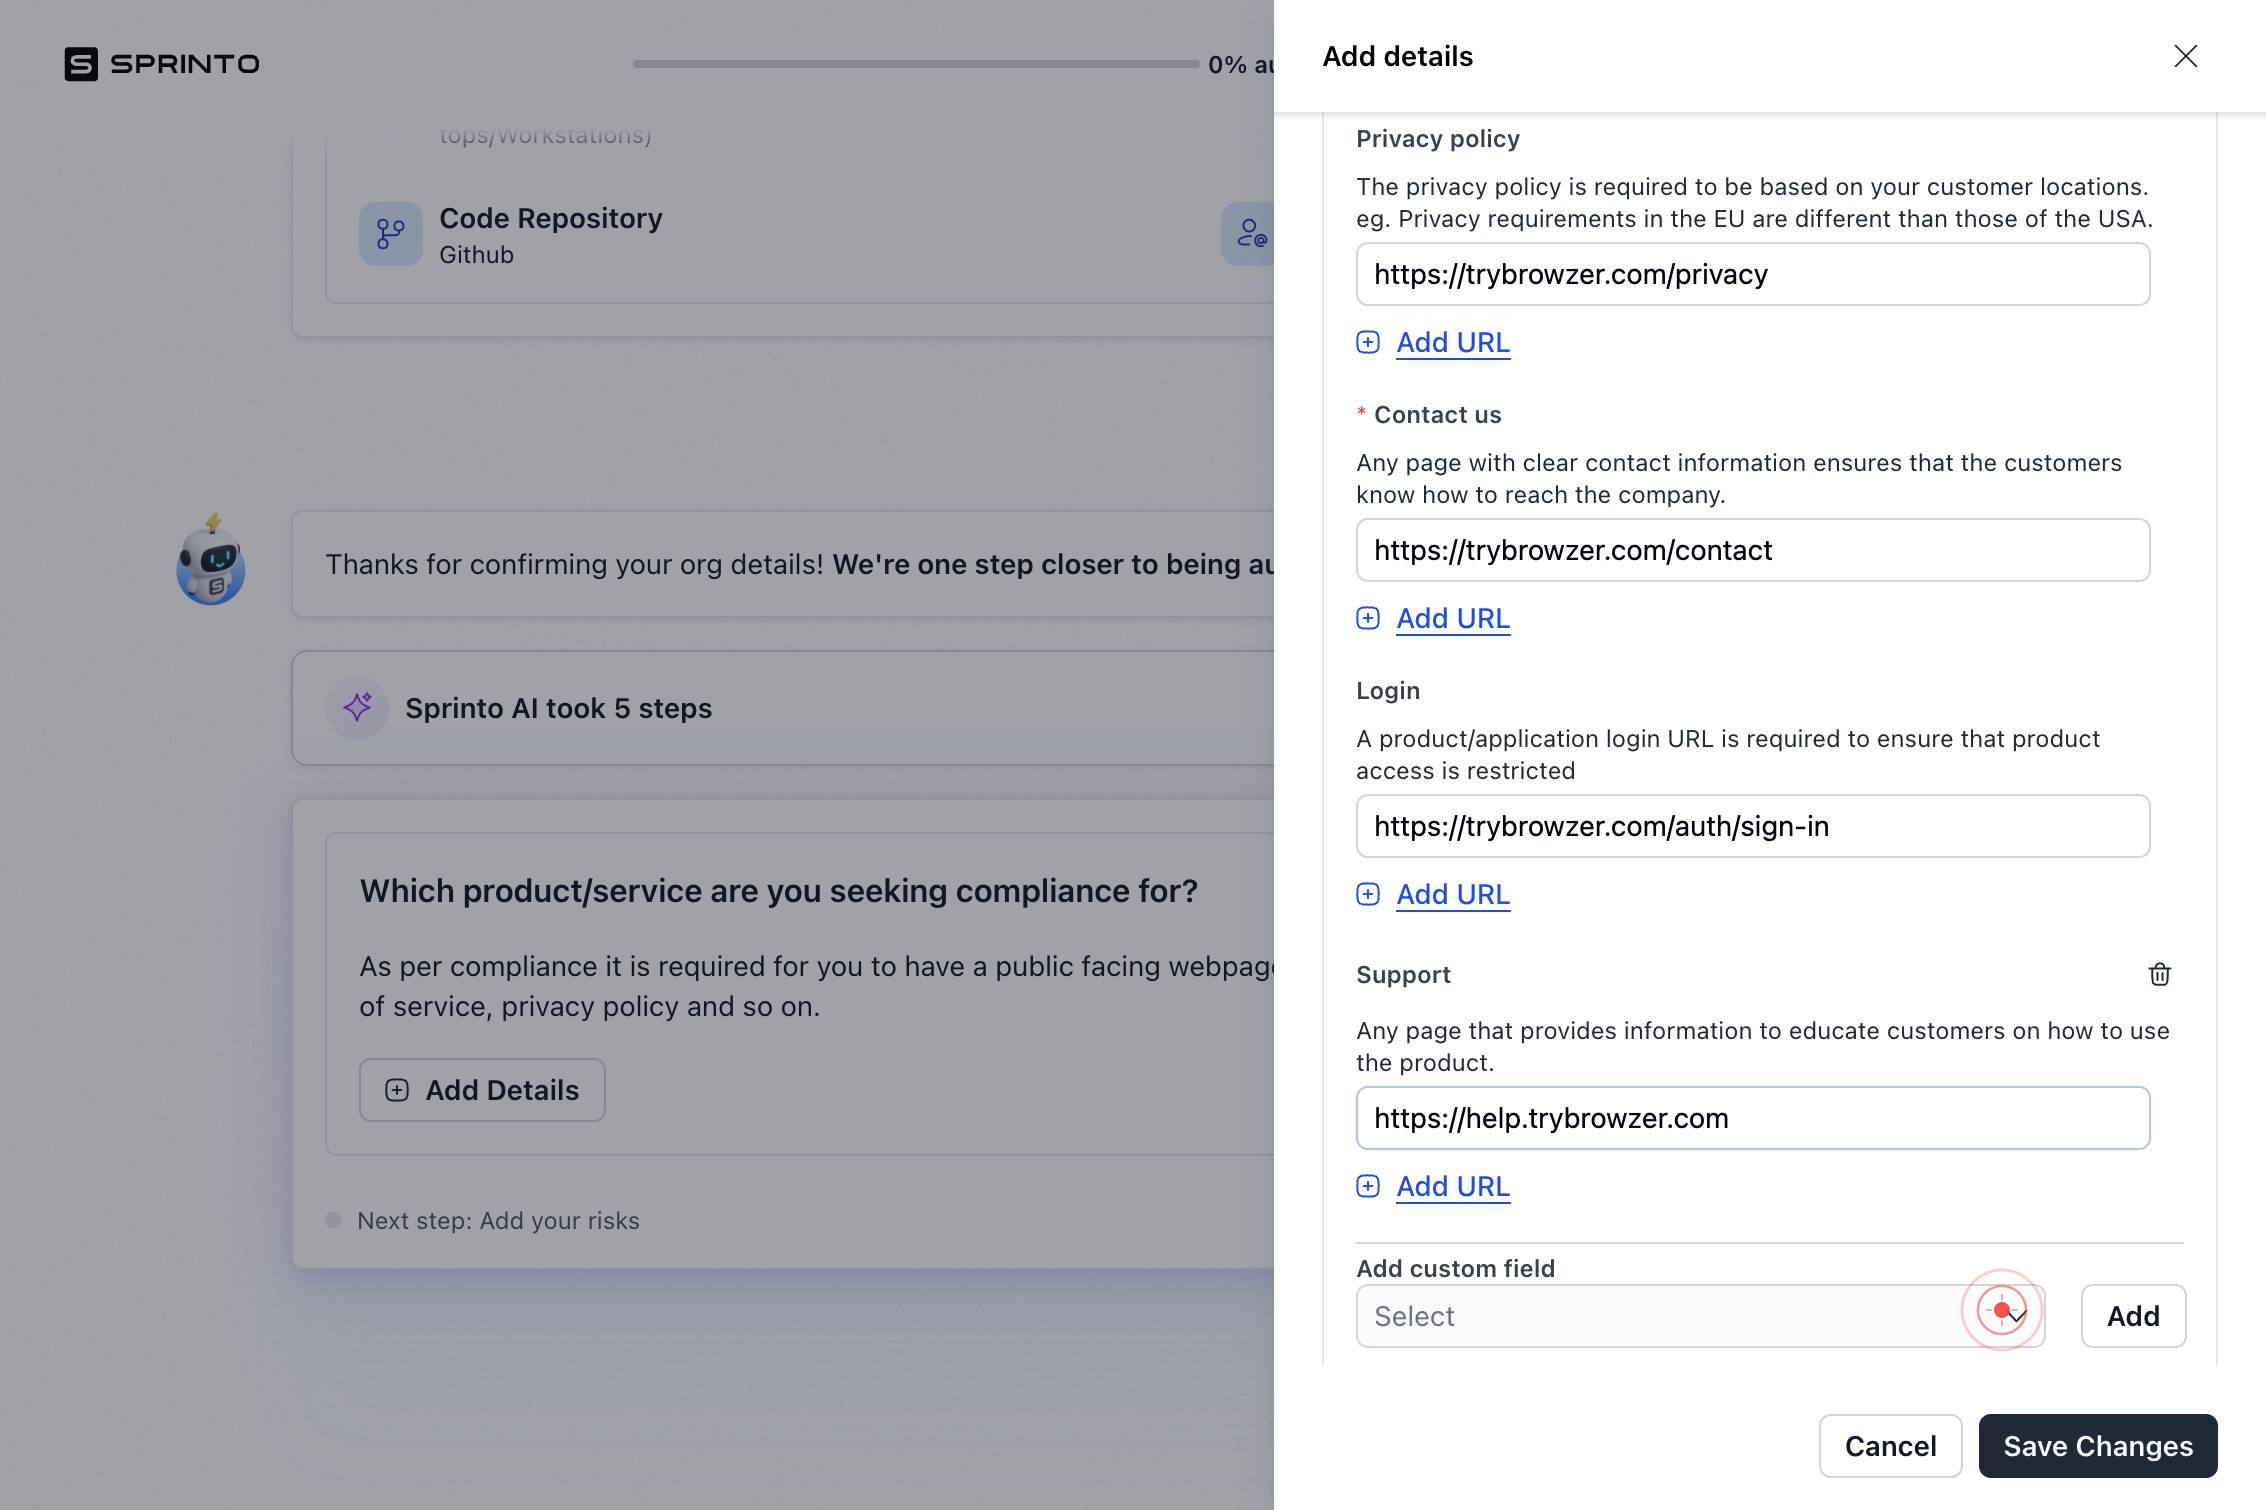
Enter a valid URLType the full URL to your Support or Help Center page (e.g., https://support.acme-platform.com).
SelectClick the second 'Select' button to open the dropdown menu for the second document type (Product Status).
SearchType 'Product status' in the search field to locate and filter for the Product Status document classification.
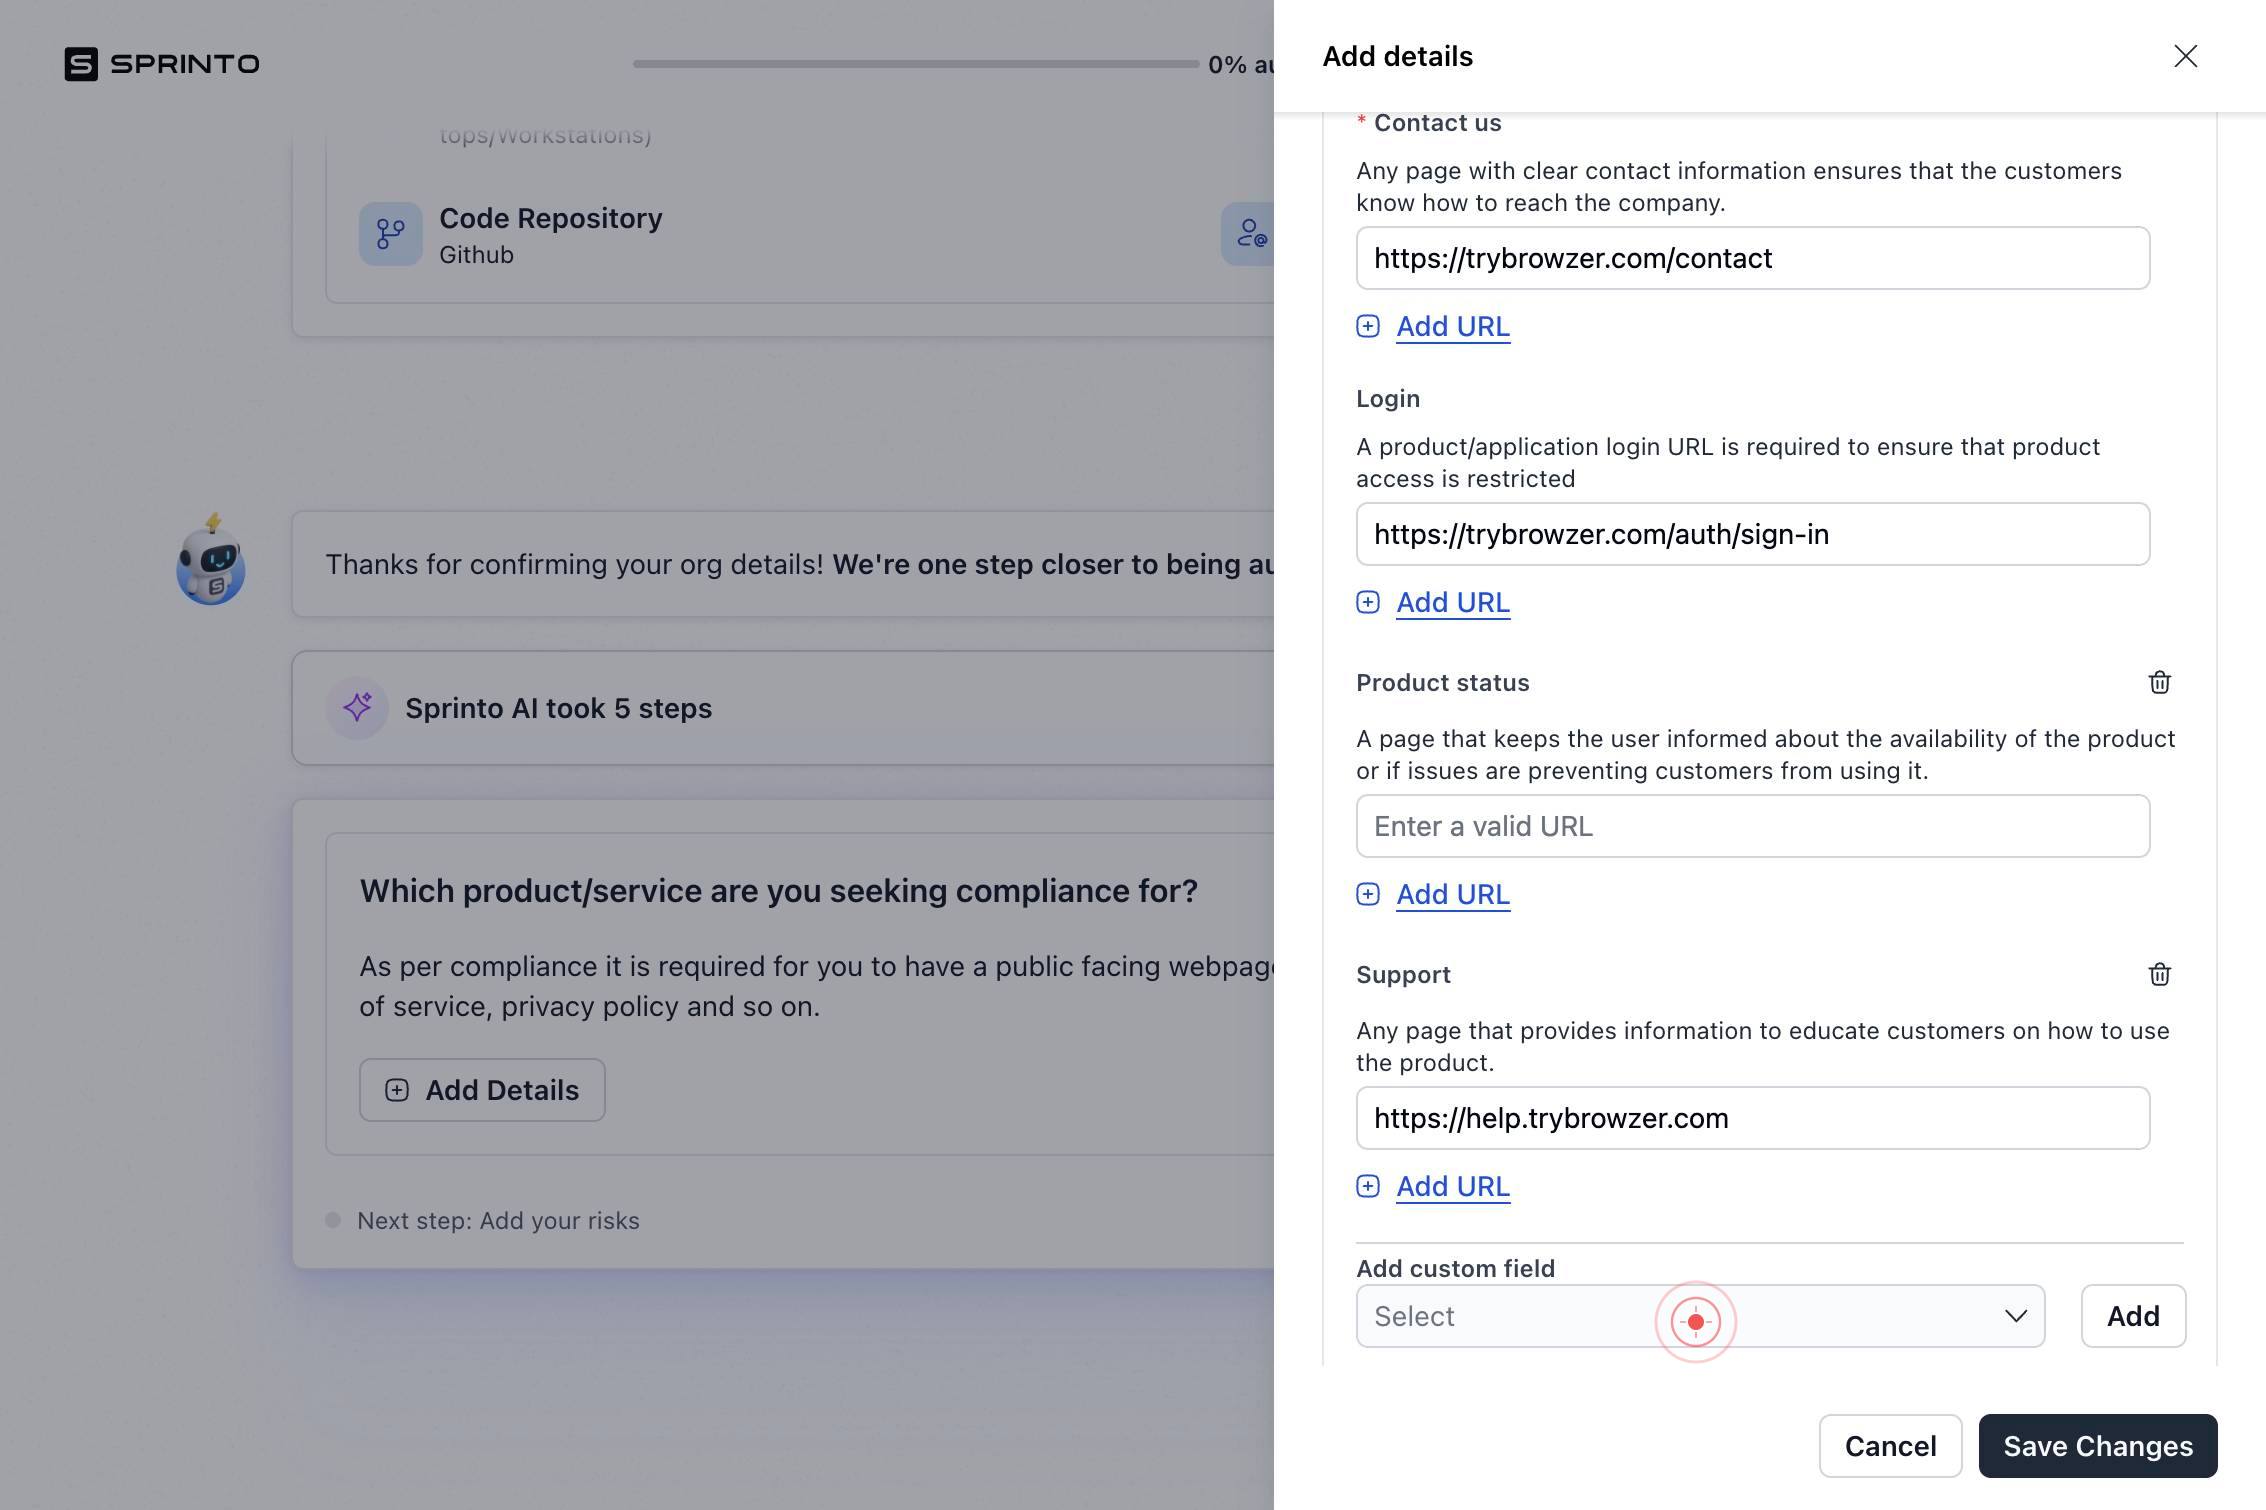
Product statusClick on 'Product status' from the search results to select it as the document type for your service status page.
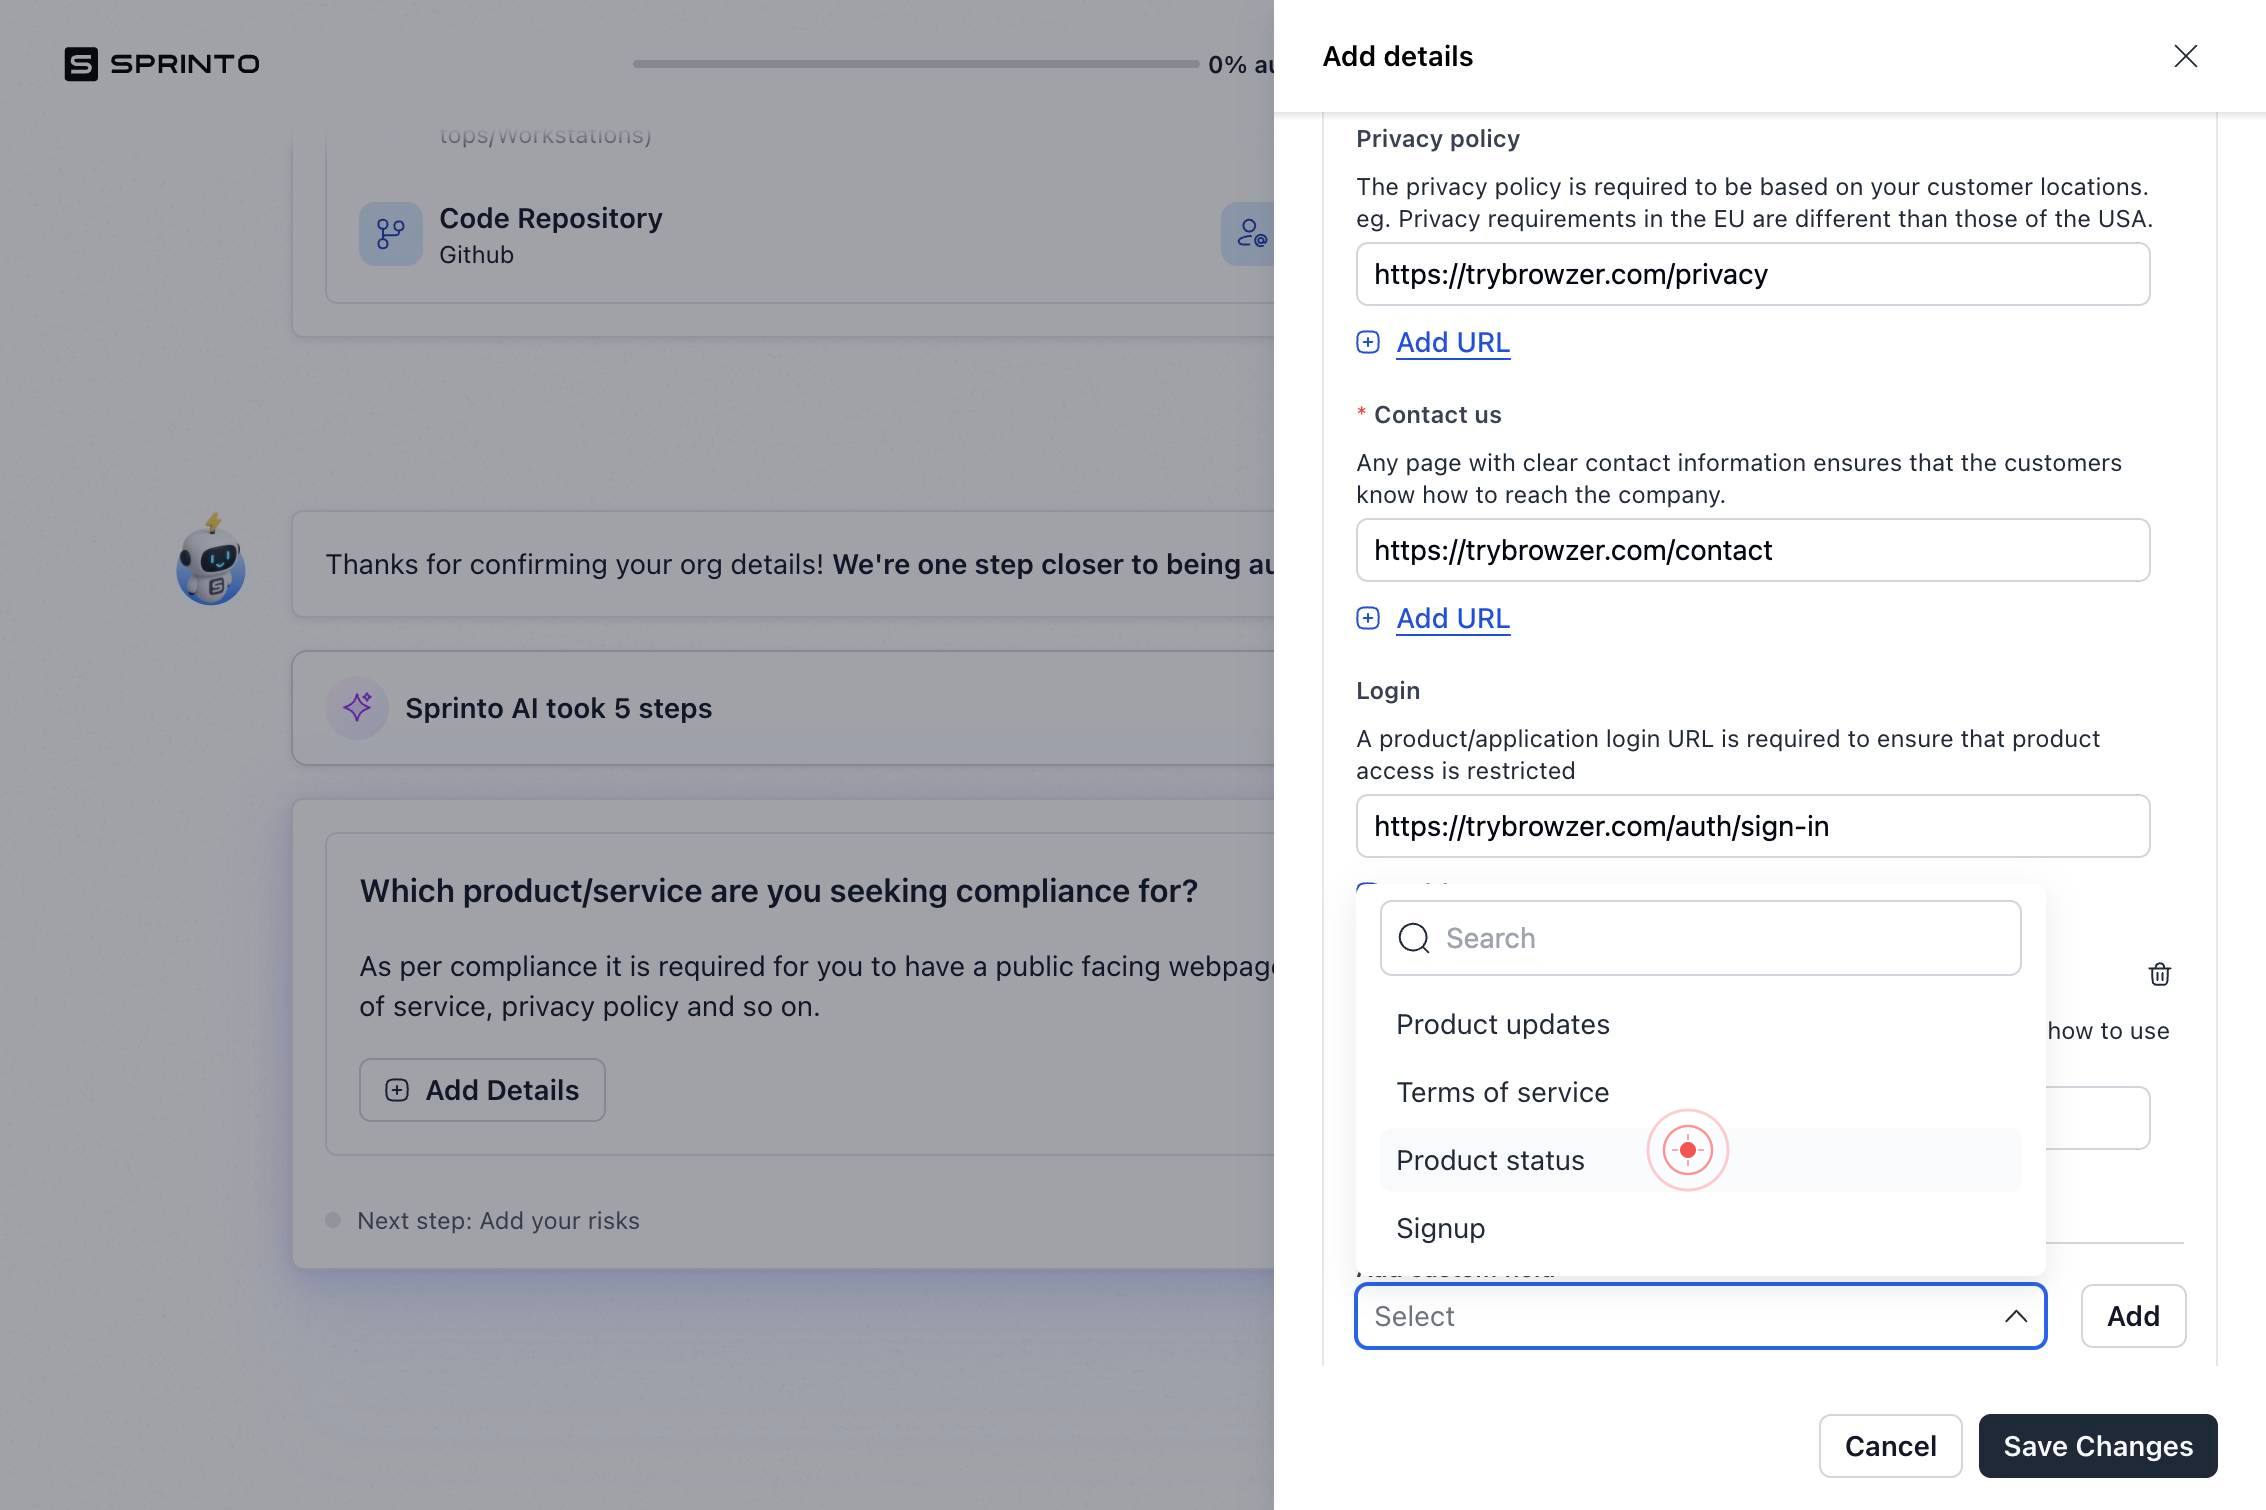
AddClick the 'Add' button to add your Product Status document to the profile.
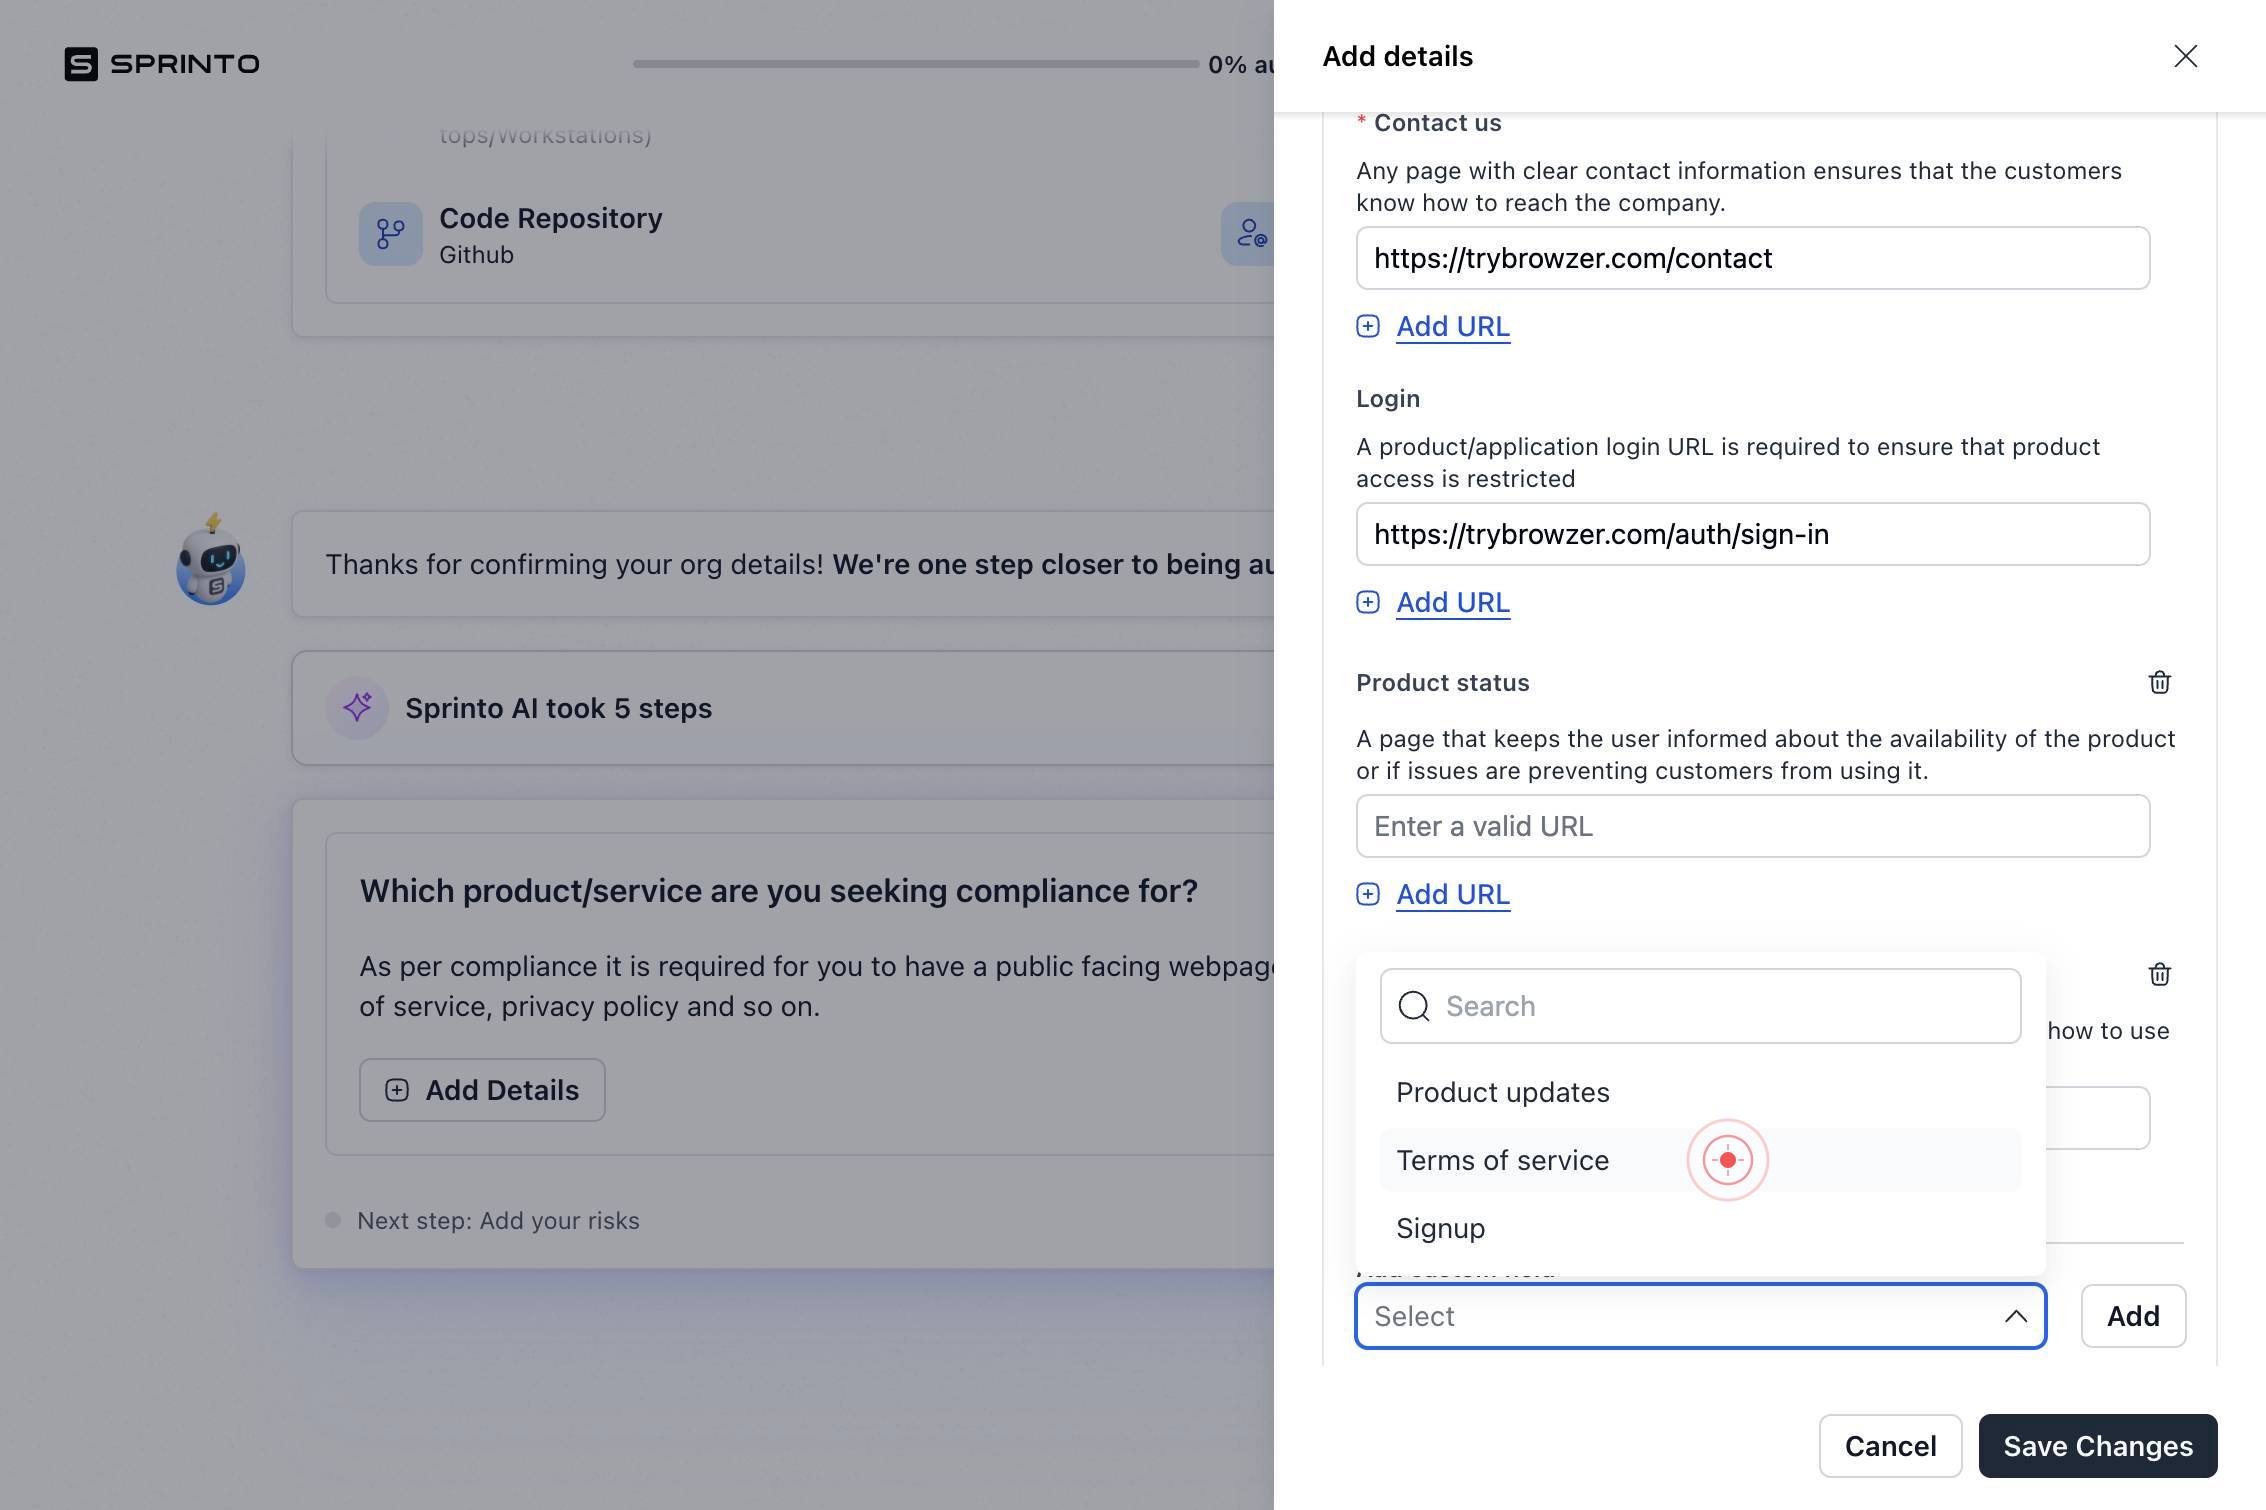
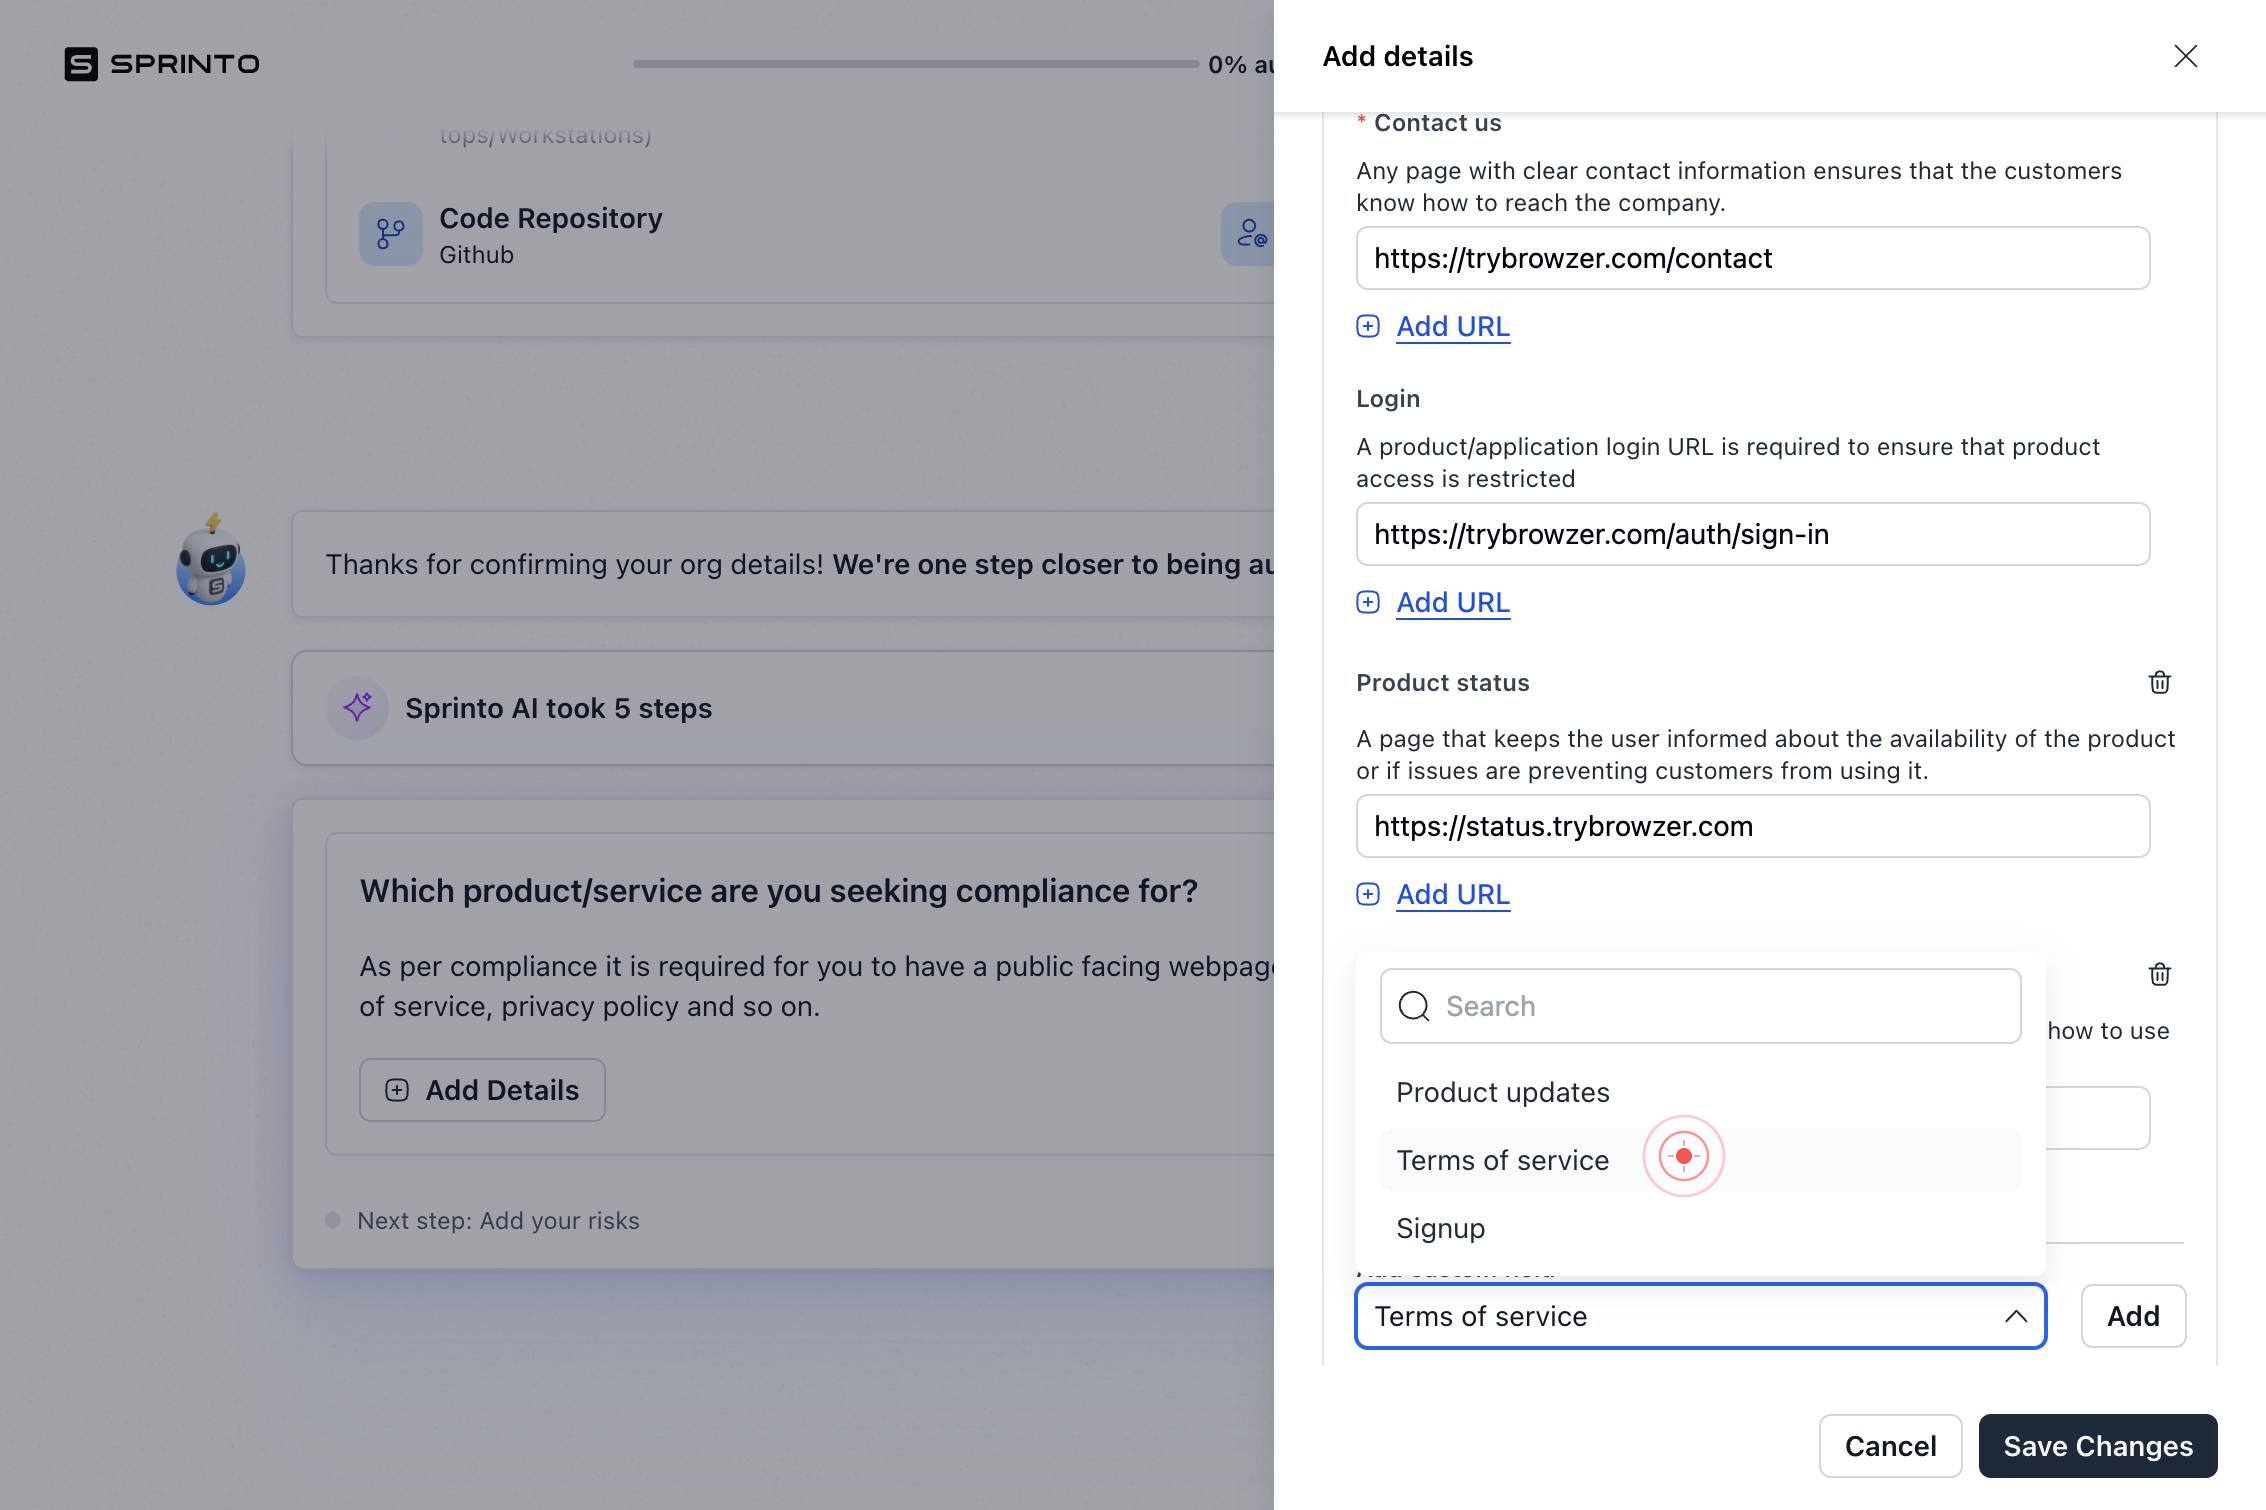
SelectClick the third 'Select' button to open the dropdown for the final document type (Terms of Service).
SearchType 'Terms of service' in the search field to locate the Terms of Service document classification.
Terms of serviceClick on 'Terms of service' from the filtered results to select it as your Terms of Service document type.
Enter a valid URLClick in the 'Enter a valid URL' text field to input the URL for your Terms of Service document.

Enter a valid URLType the full URL to your Terms of Service page (e.g., https://www.acme-platform.com/terms).
Terms of serviceClick the 'Terms of service' button to confirm the document type selection for your Terms of Service URL.
SearchType 'Terms of service' in the search field again to ensure the correct document classification is selected for final confirmation.
Terms of serviceClick on 'Terms of service' from the search results to finalize the document type assignment.
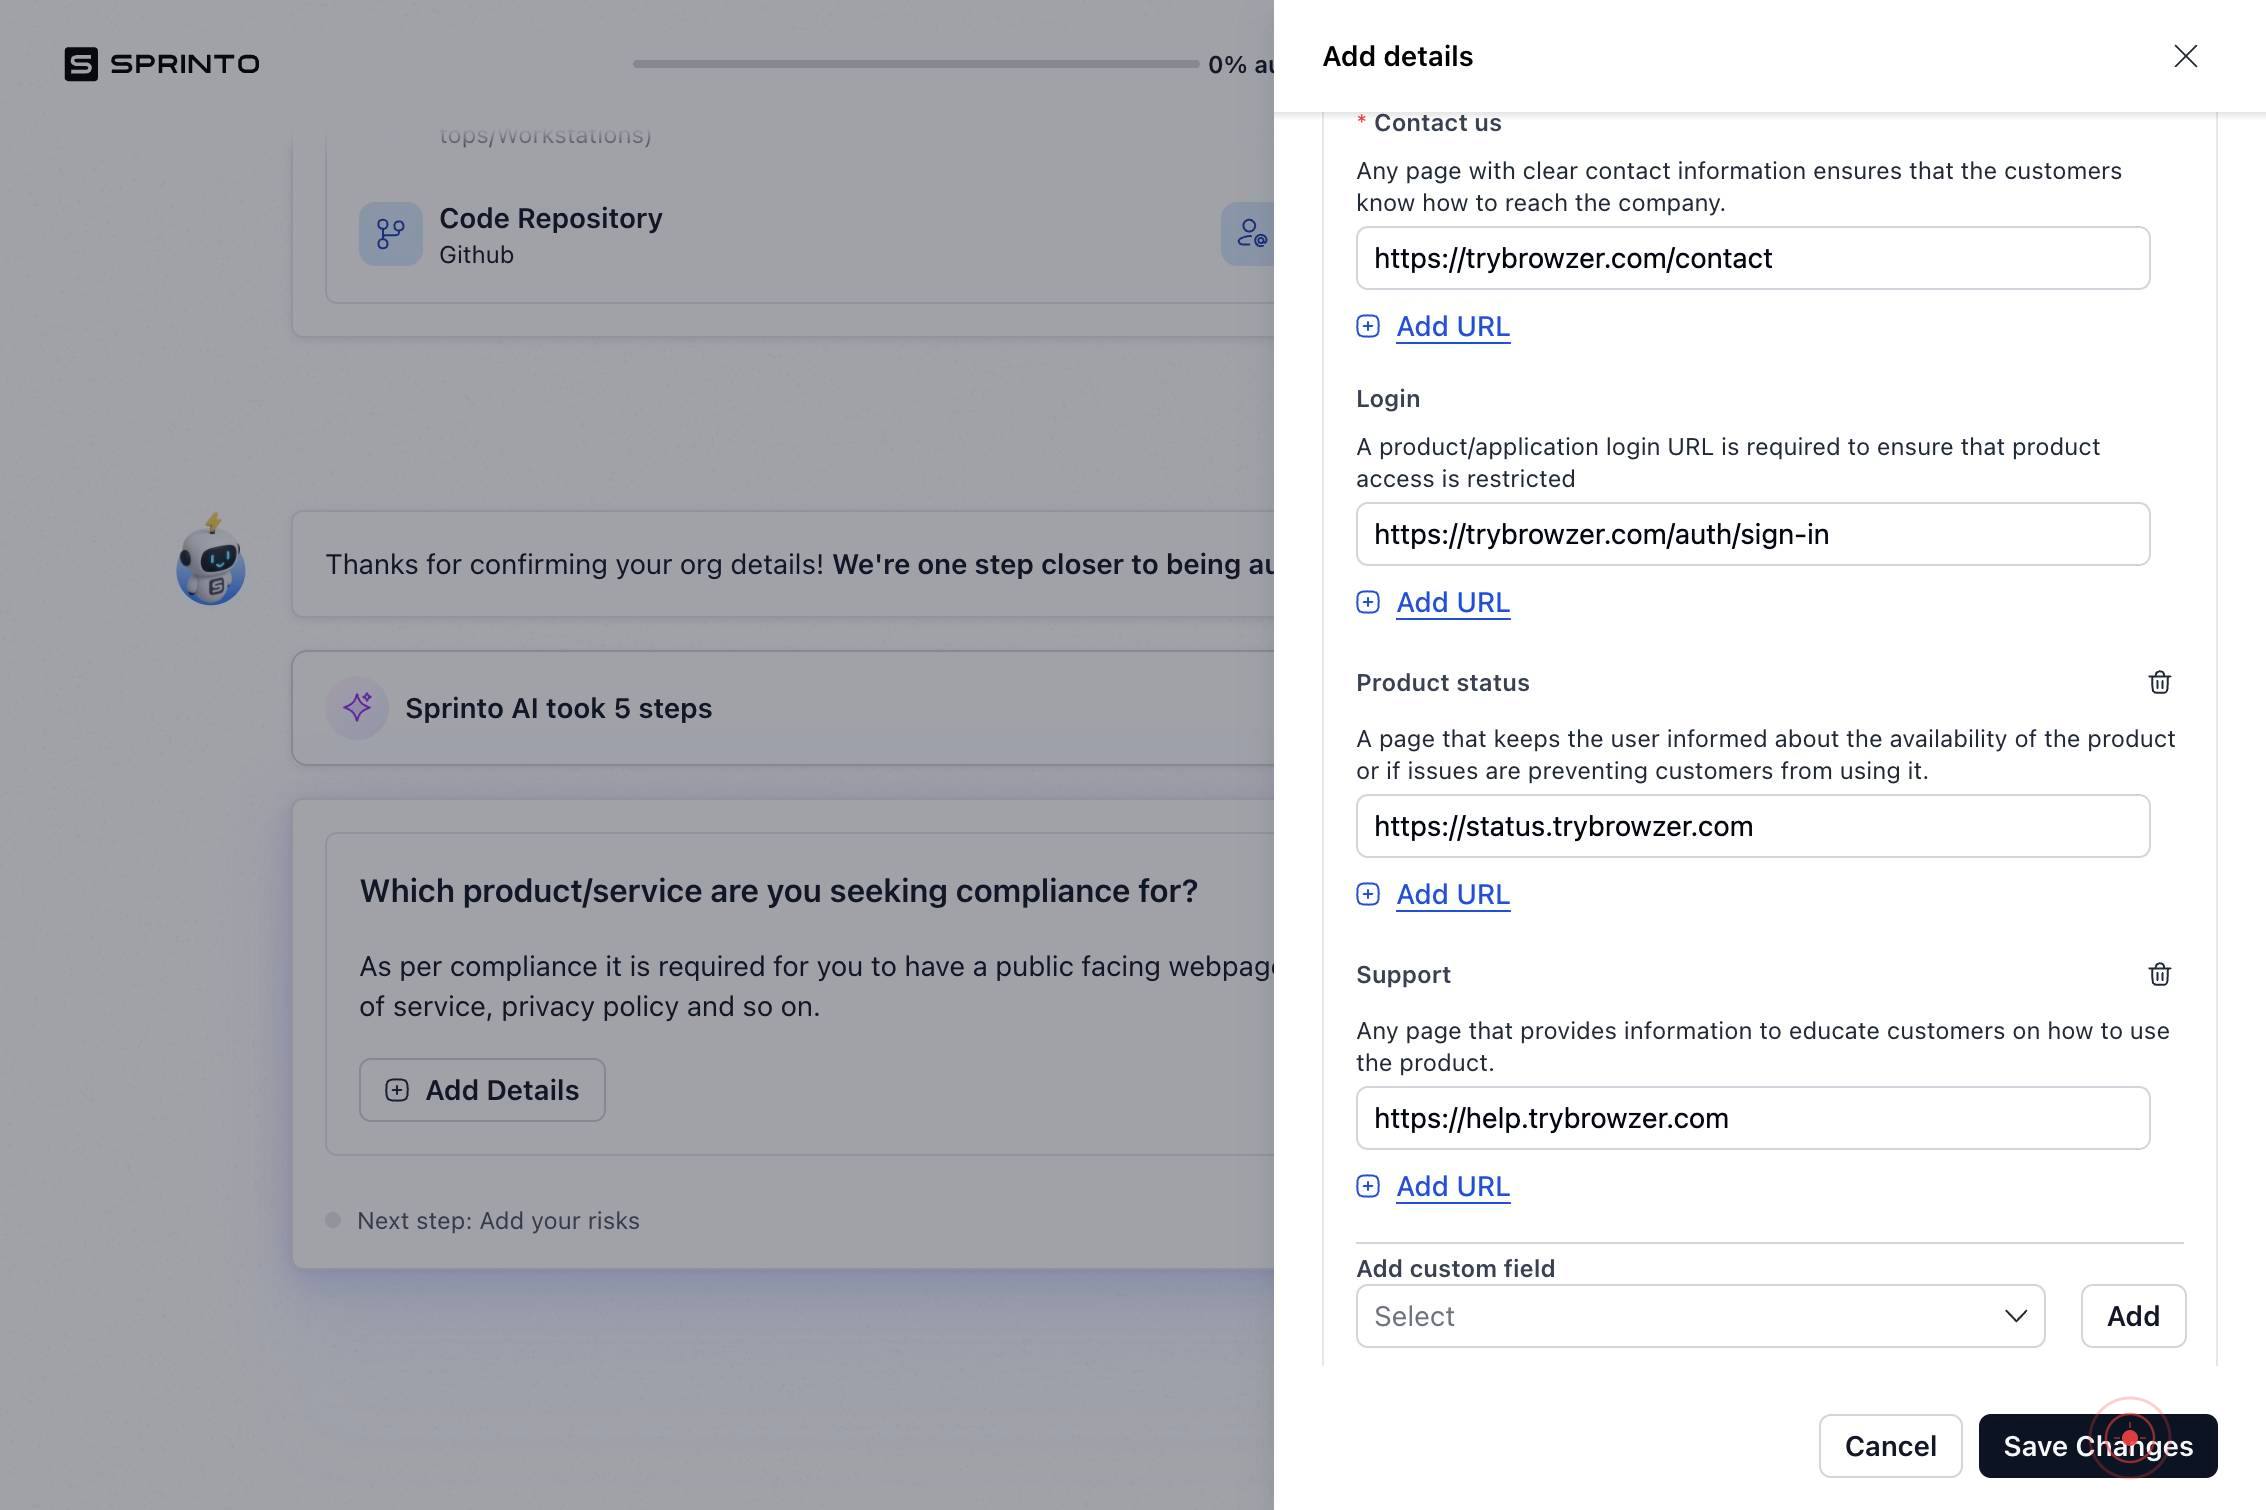
Save ChangesClick 'Save Changes' to persist all product details, URLs, and document classifications to your Sprinto profile.
ContinueClick 'Continue' to advance to the next phase of onboarding, where Sprinto will generate compliance recommendations.
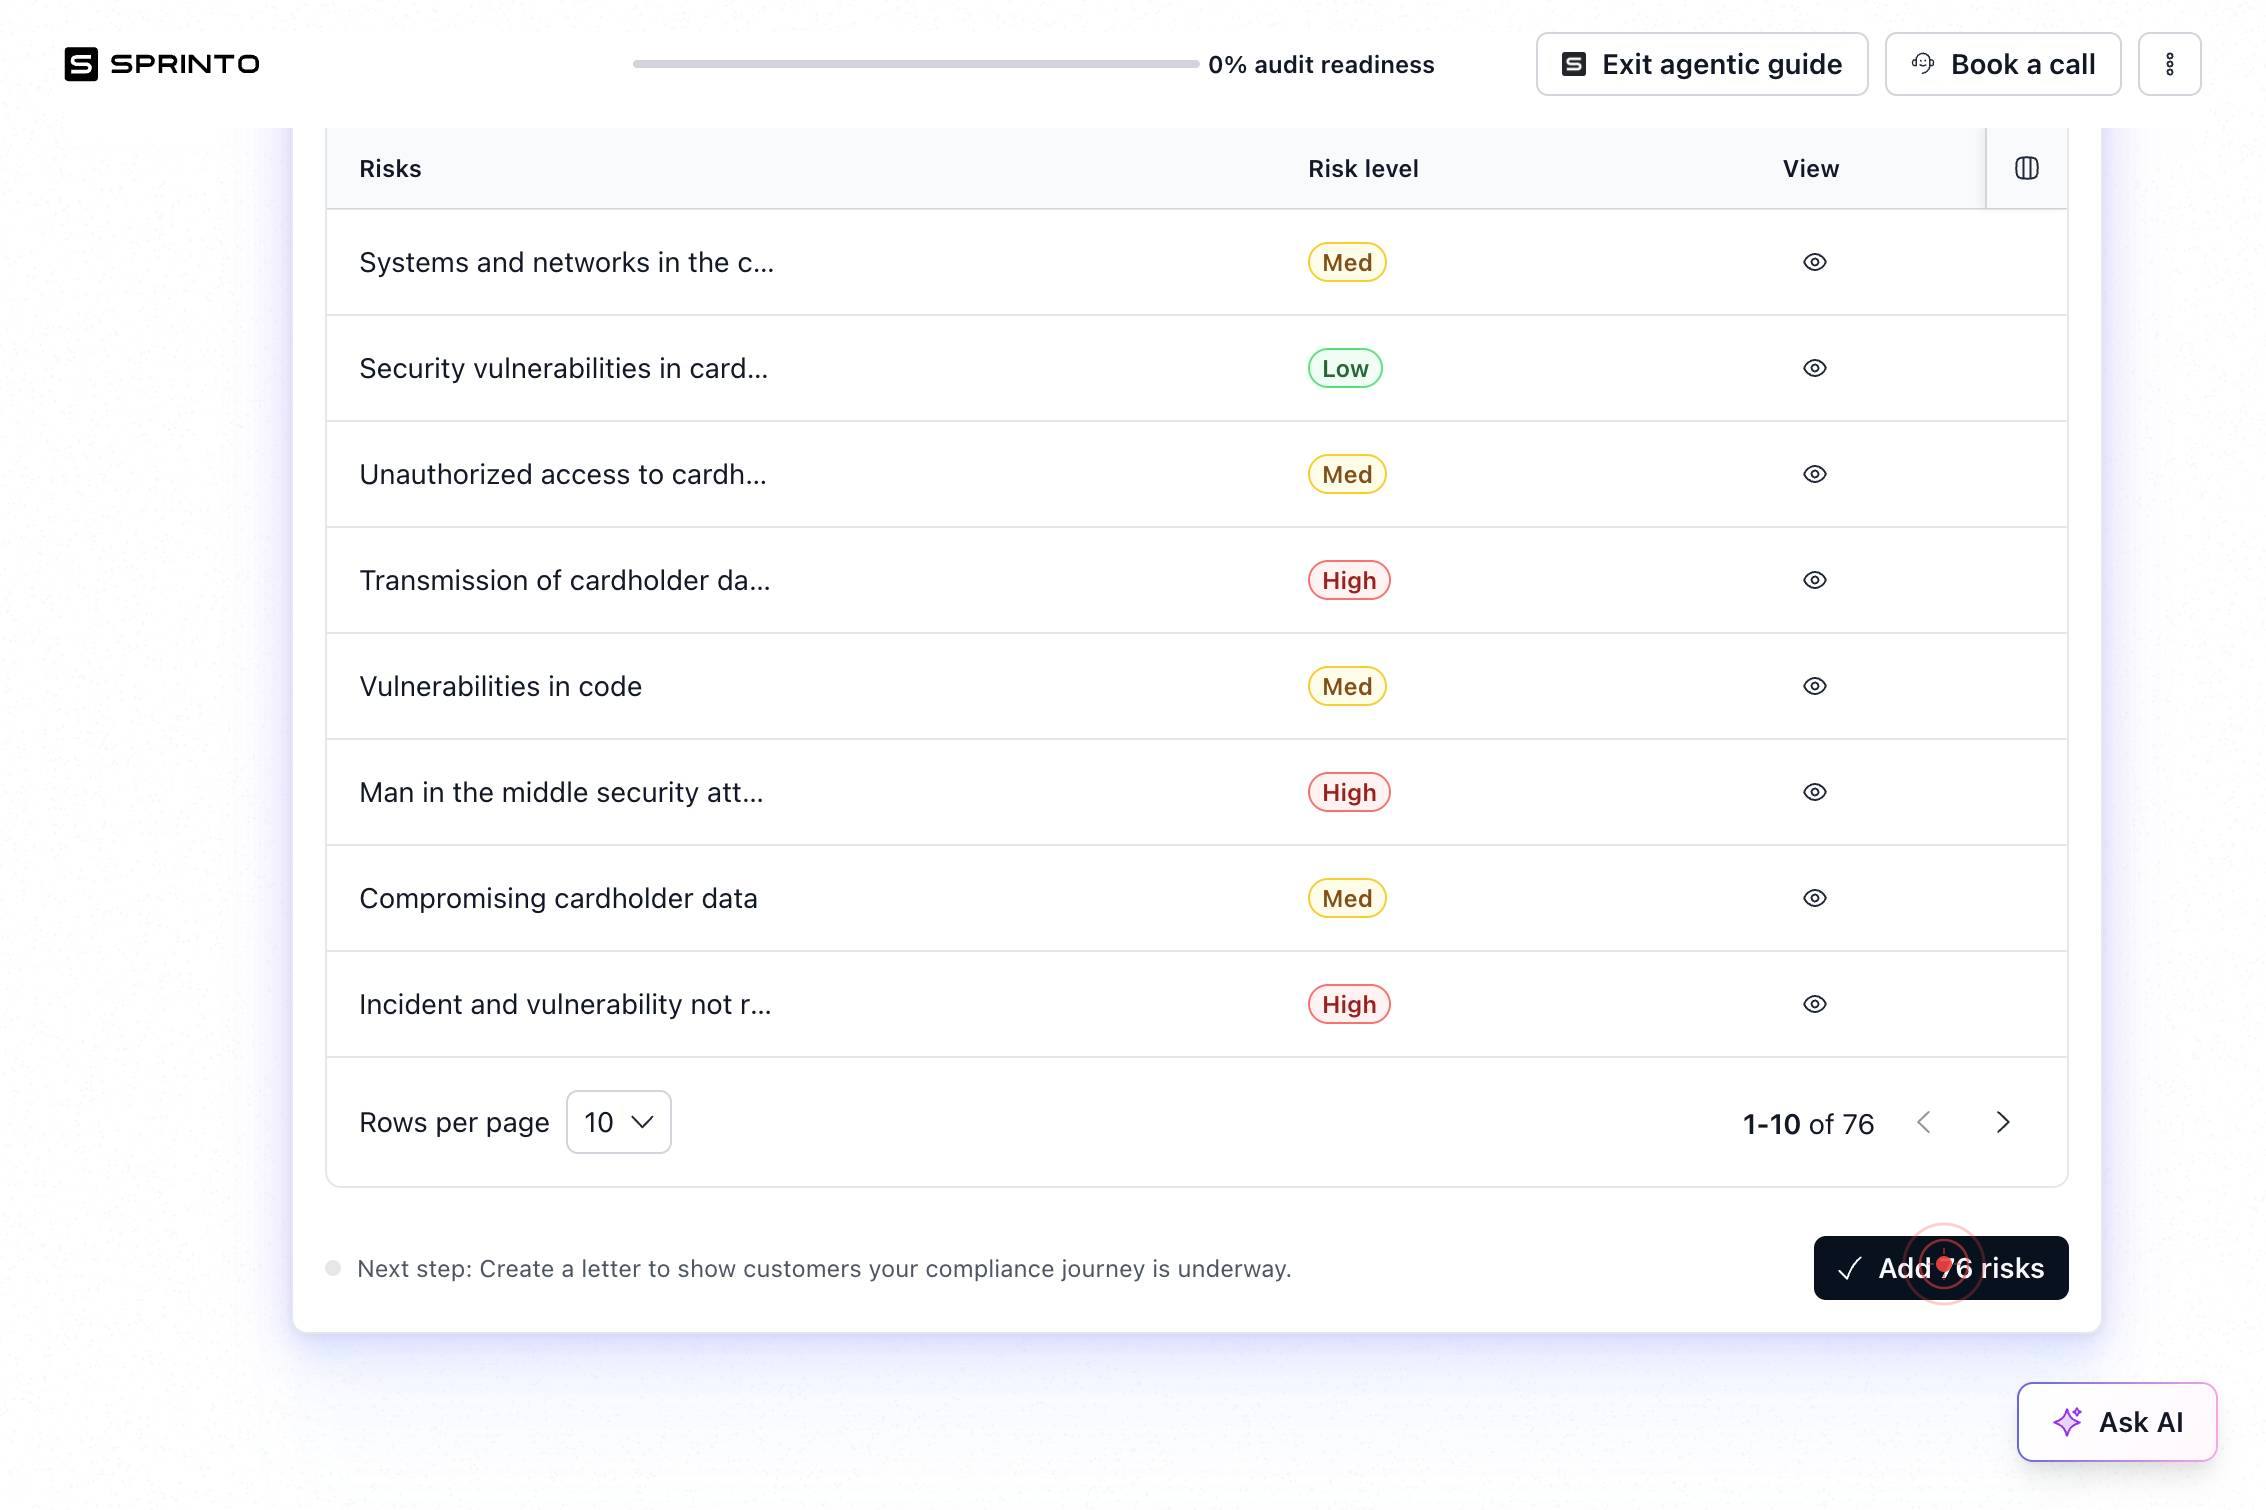
Add 76 risksClick 'Add 76 risks' to import Sprinto's recommended risk assessment framework tailored to your infrastructure and data handling practices.
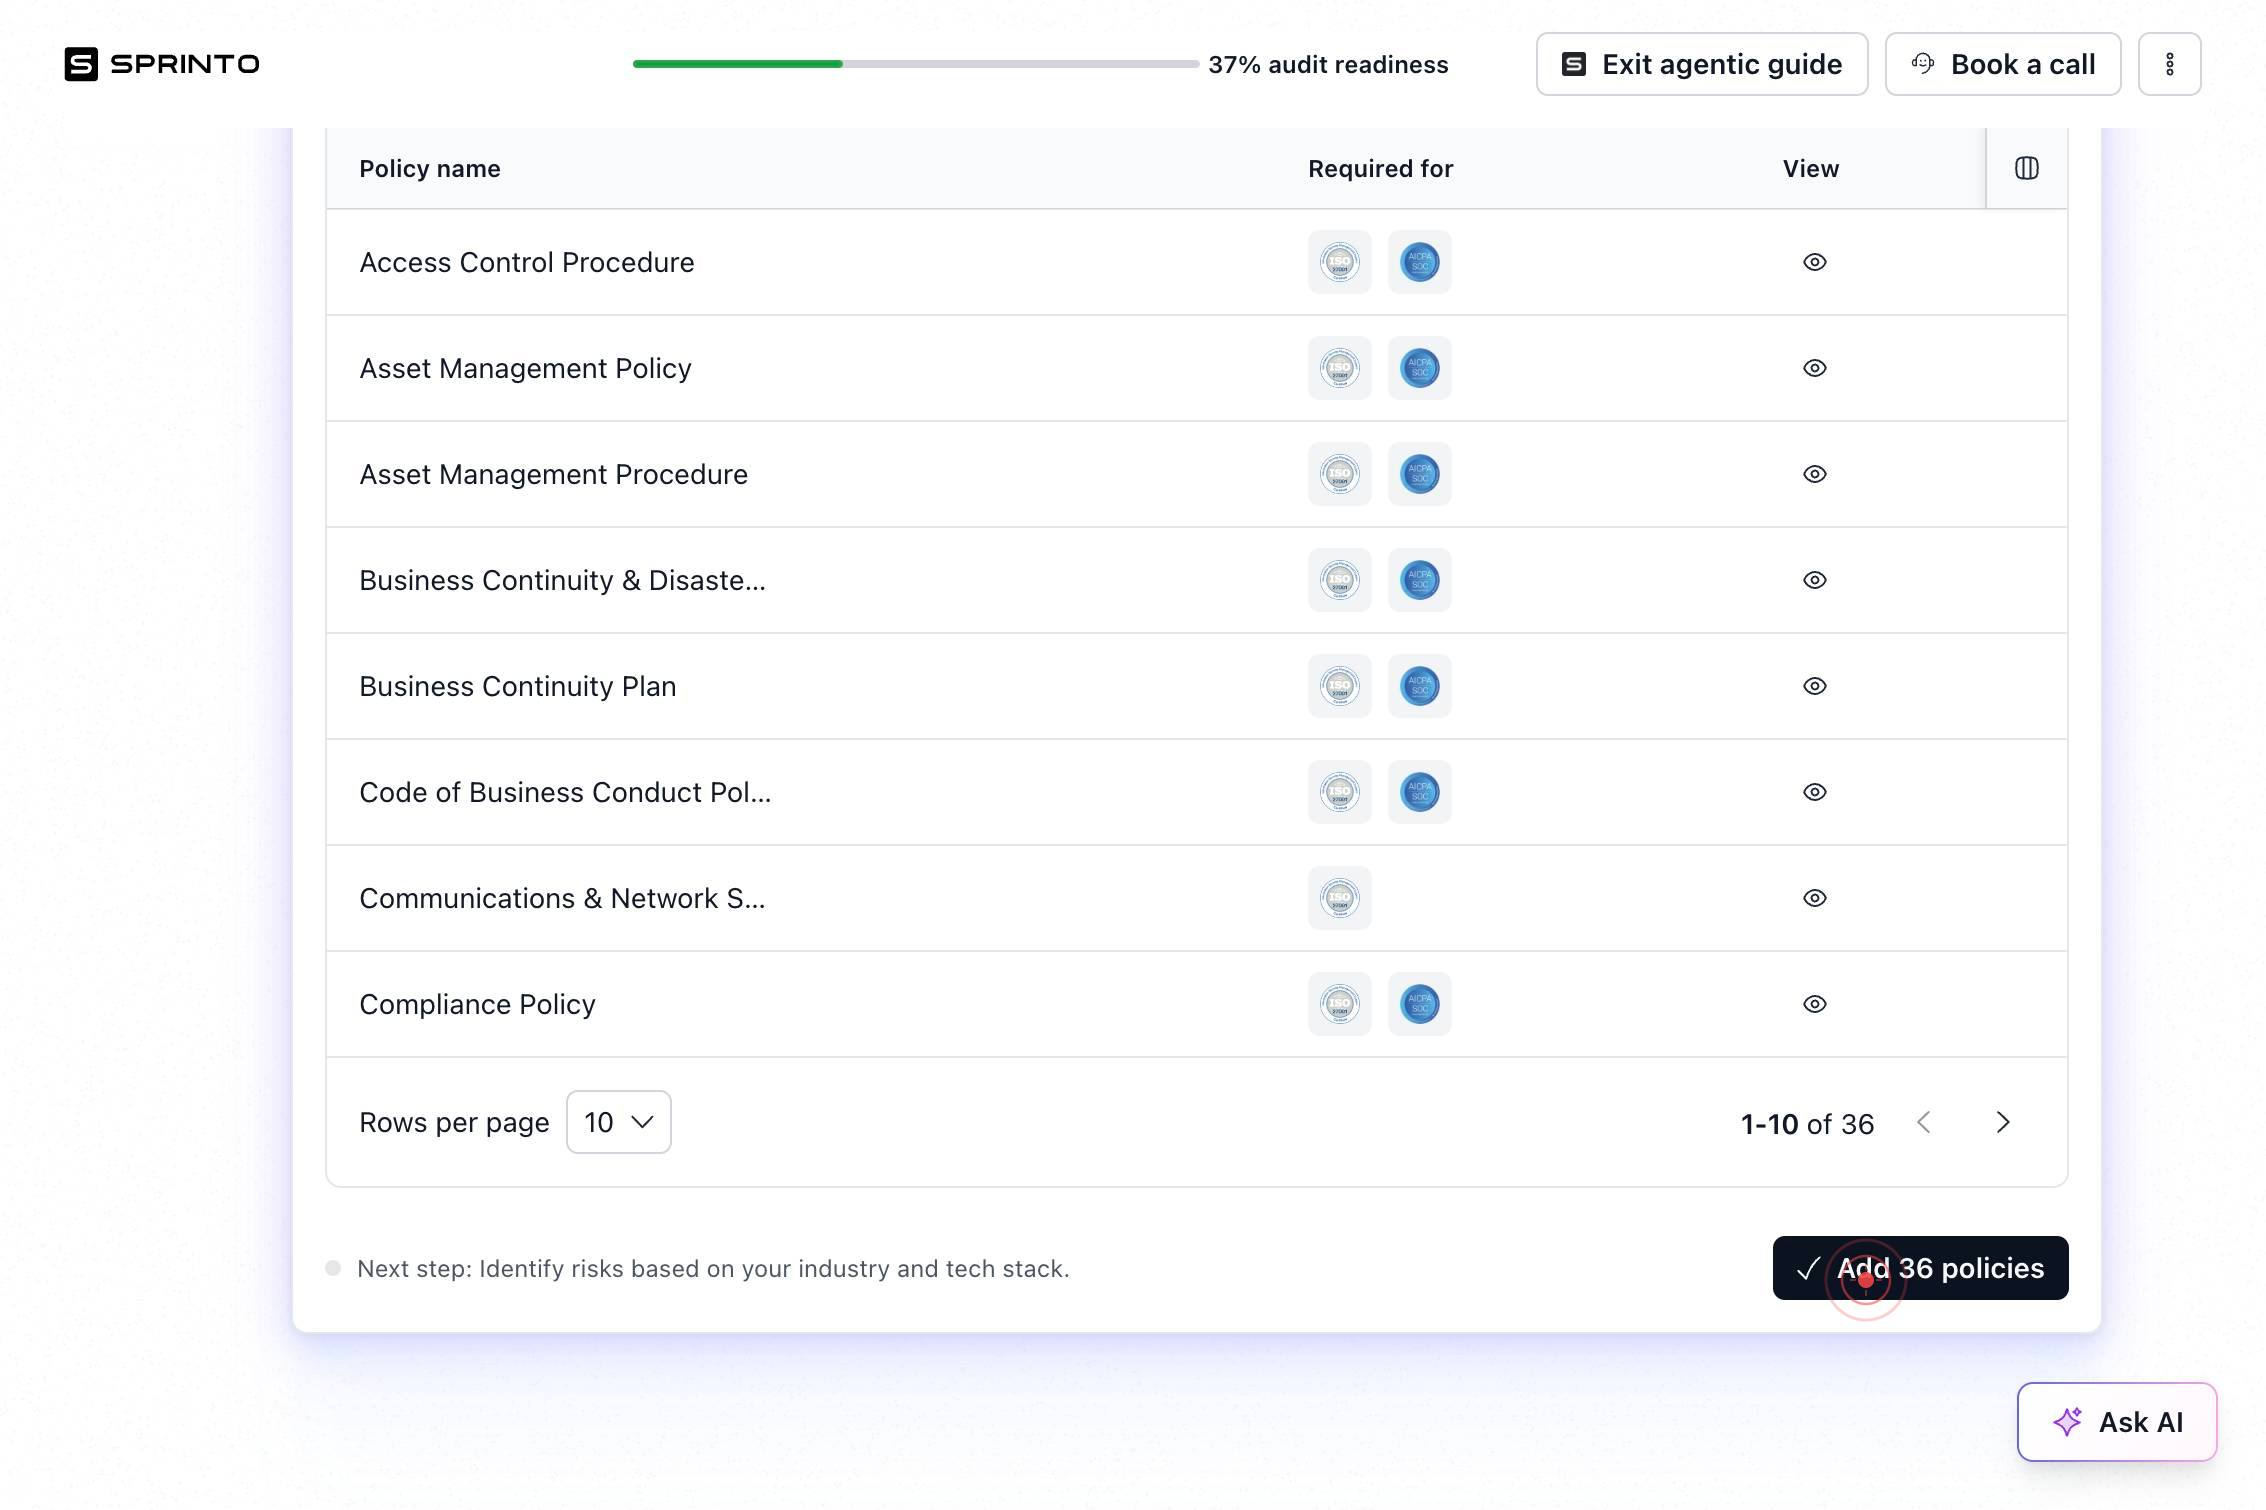
Add 36 policiesClick 'Add 36 policies' to import Sprinto's pre-configured compliance policies and security controls aligned with your organization's risk profile.
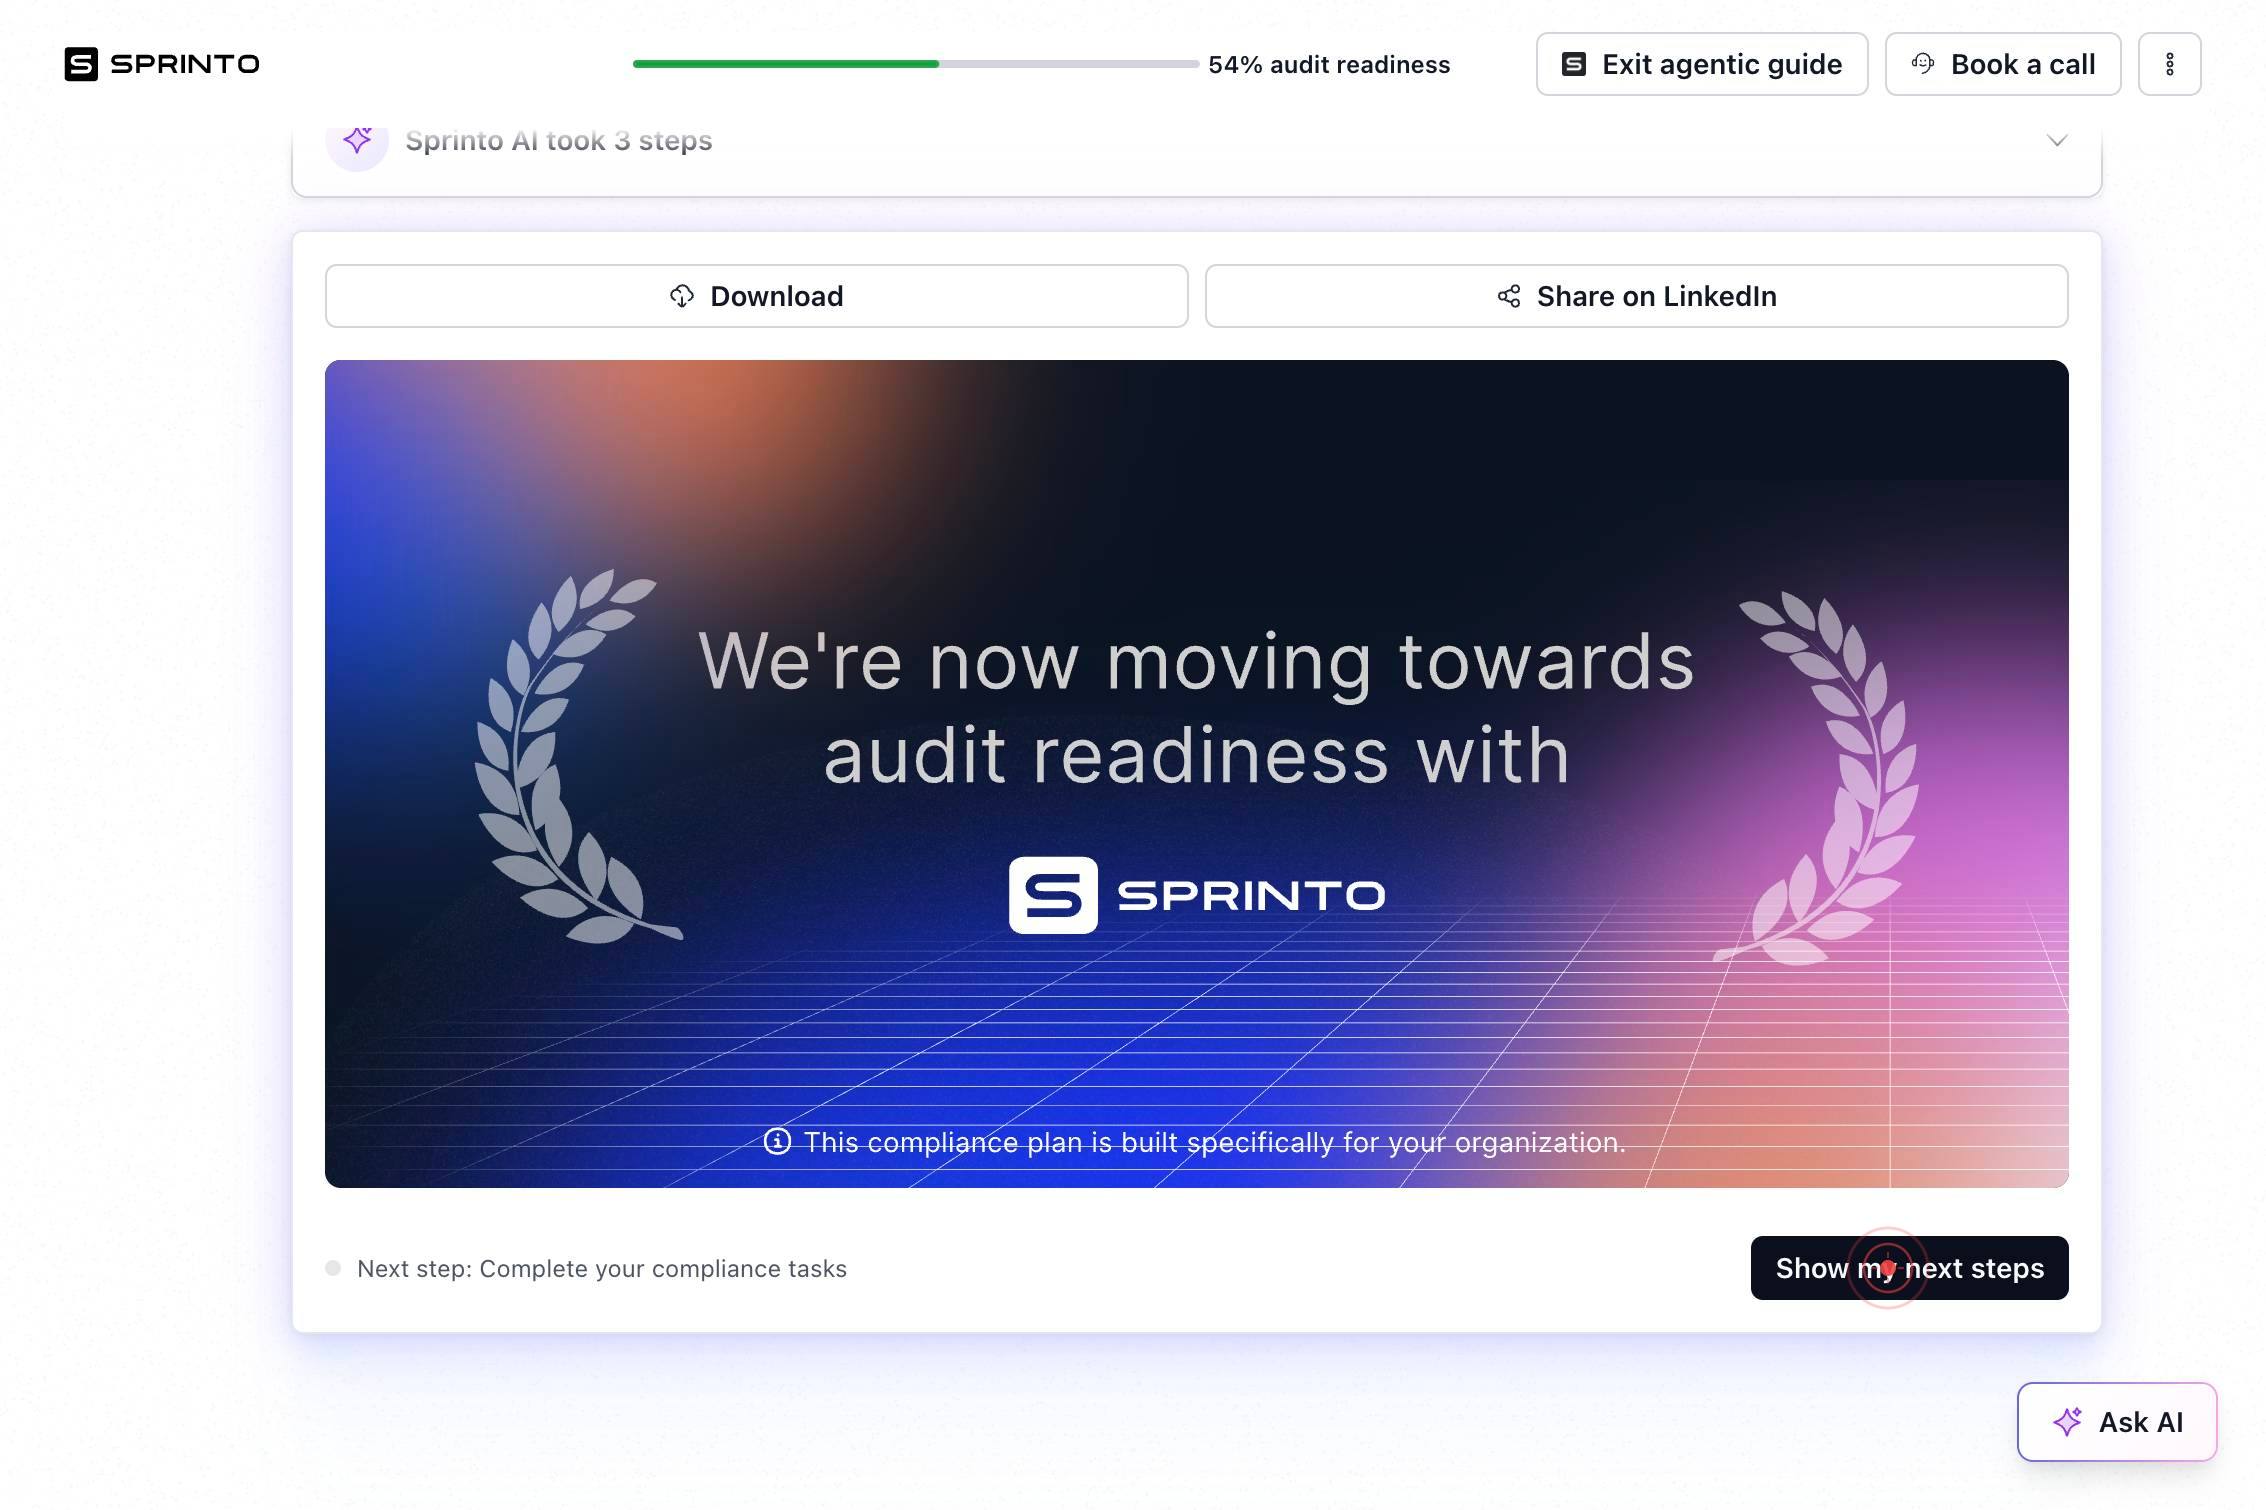
Show my next stepsClick 'Show my next steps' to view your personalized onboarding roadmap and proceed with implementing recommended security controls and compliance measures in Sprinto.
Confirm it worked
- 1After completing all questionnaire fields, you see a 'Save Changes' confirmation and a 'Continue' button becomes available
- 2The system displays options to 'Add 76 risks' and 'Add 36 policies', indicating your organization's compliance profile has been configured
- 3A 'Show my next steps' button appears, signaling the questionnaire workflow is complete and you may proceed to implementation steps
- 4Your selected infrastructure providers, data types, and product details are reflected in your Sprinto organization profile
Common issues
Keep reading
Assign Policies, Trainings, and Onboarding Actions | Sprinto Docs
# Assign Policies, Trainings, and Onboarding Actions Use the Assign actions to map compliance tasks—such as security trainings, policy acknowledgements, and onboarding workflows—to individual staff o
docs.sprinto.comSprint CV Onboarding Guide for Recruiters - Sprint CV
Sprint CV Onboarding Guide for Recruiters - Sprint CV ## Upgrade your job search, upgrade your CV! We’re dedicated to your success and ready to support your IT career journey. Subscribe to our blog
sprintcv.comQuestionnaires | Sprinto Docs
# Questionnaires A security questionnaire is a structured list of security, compliance, and risk-related questions typically sent by prospects, partners, auditors, or customers. It is used to assess
docs.sprinto.com