Guide
Add Connector Github
Overview
Airbyte is a data integration platform that allows you to connect various data sources to your workflows. By adding a GitHub connector credential, you enable Airbyte's Agent Engine to fetch, search, and work with data from your GitHub repositories in real time. This is essential if you want your agents to have access to GitHub issues, commits, or repository metadata as part of their context. The connector acts as a secure bridge between Airbyte and GitHub, handling authentication once so you can reuse it across multiple connections without re-entering credentials.
Before you begin
- An active Airbyte account with access to app.airbyte.ai
- A GitHub account (personal or organization) with repositories you wish to sync
- GitHub account owner or admin permissions to authorize third-party applications
- Access to the Credentials section in Airbyte (typically available in all workspace roles)
Step by step
CredentialsNavigate to the Credentials section of Airbyte by clicking the Credentials link in the left navigation menu. This is where all stored credential configurations across your workspaces are managed.
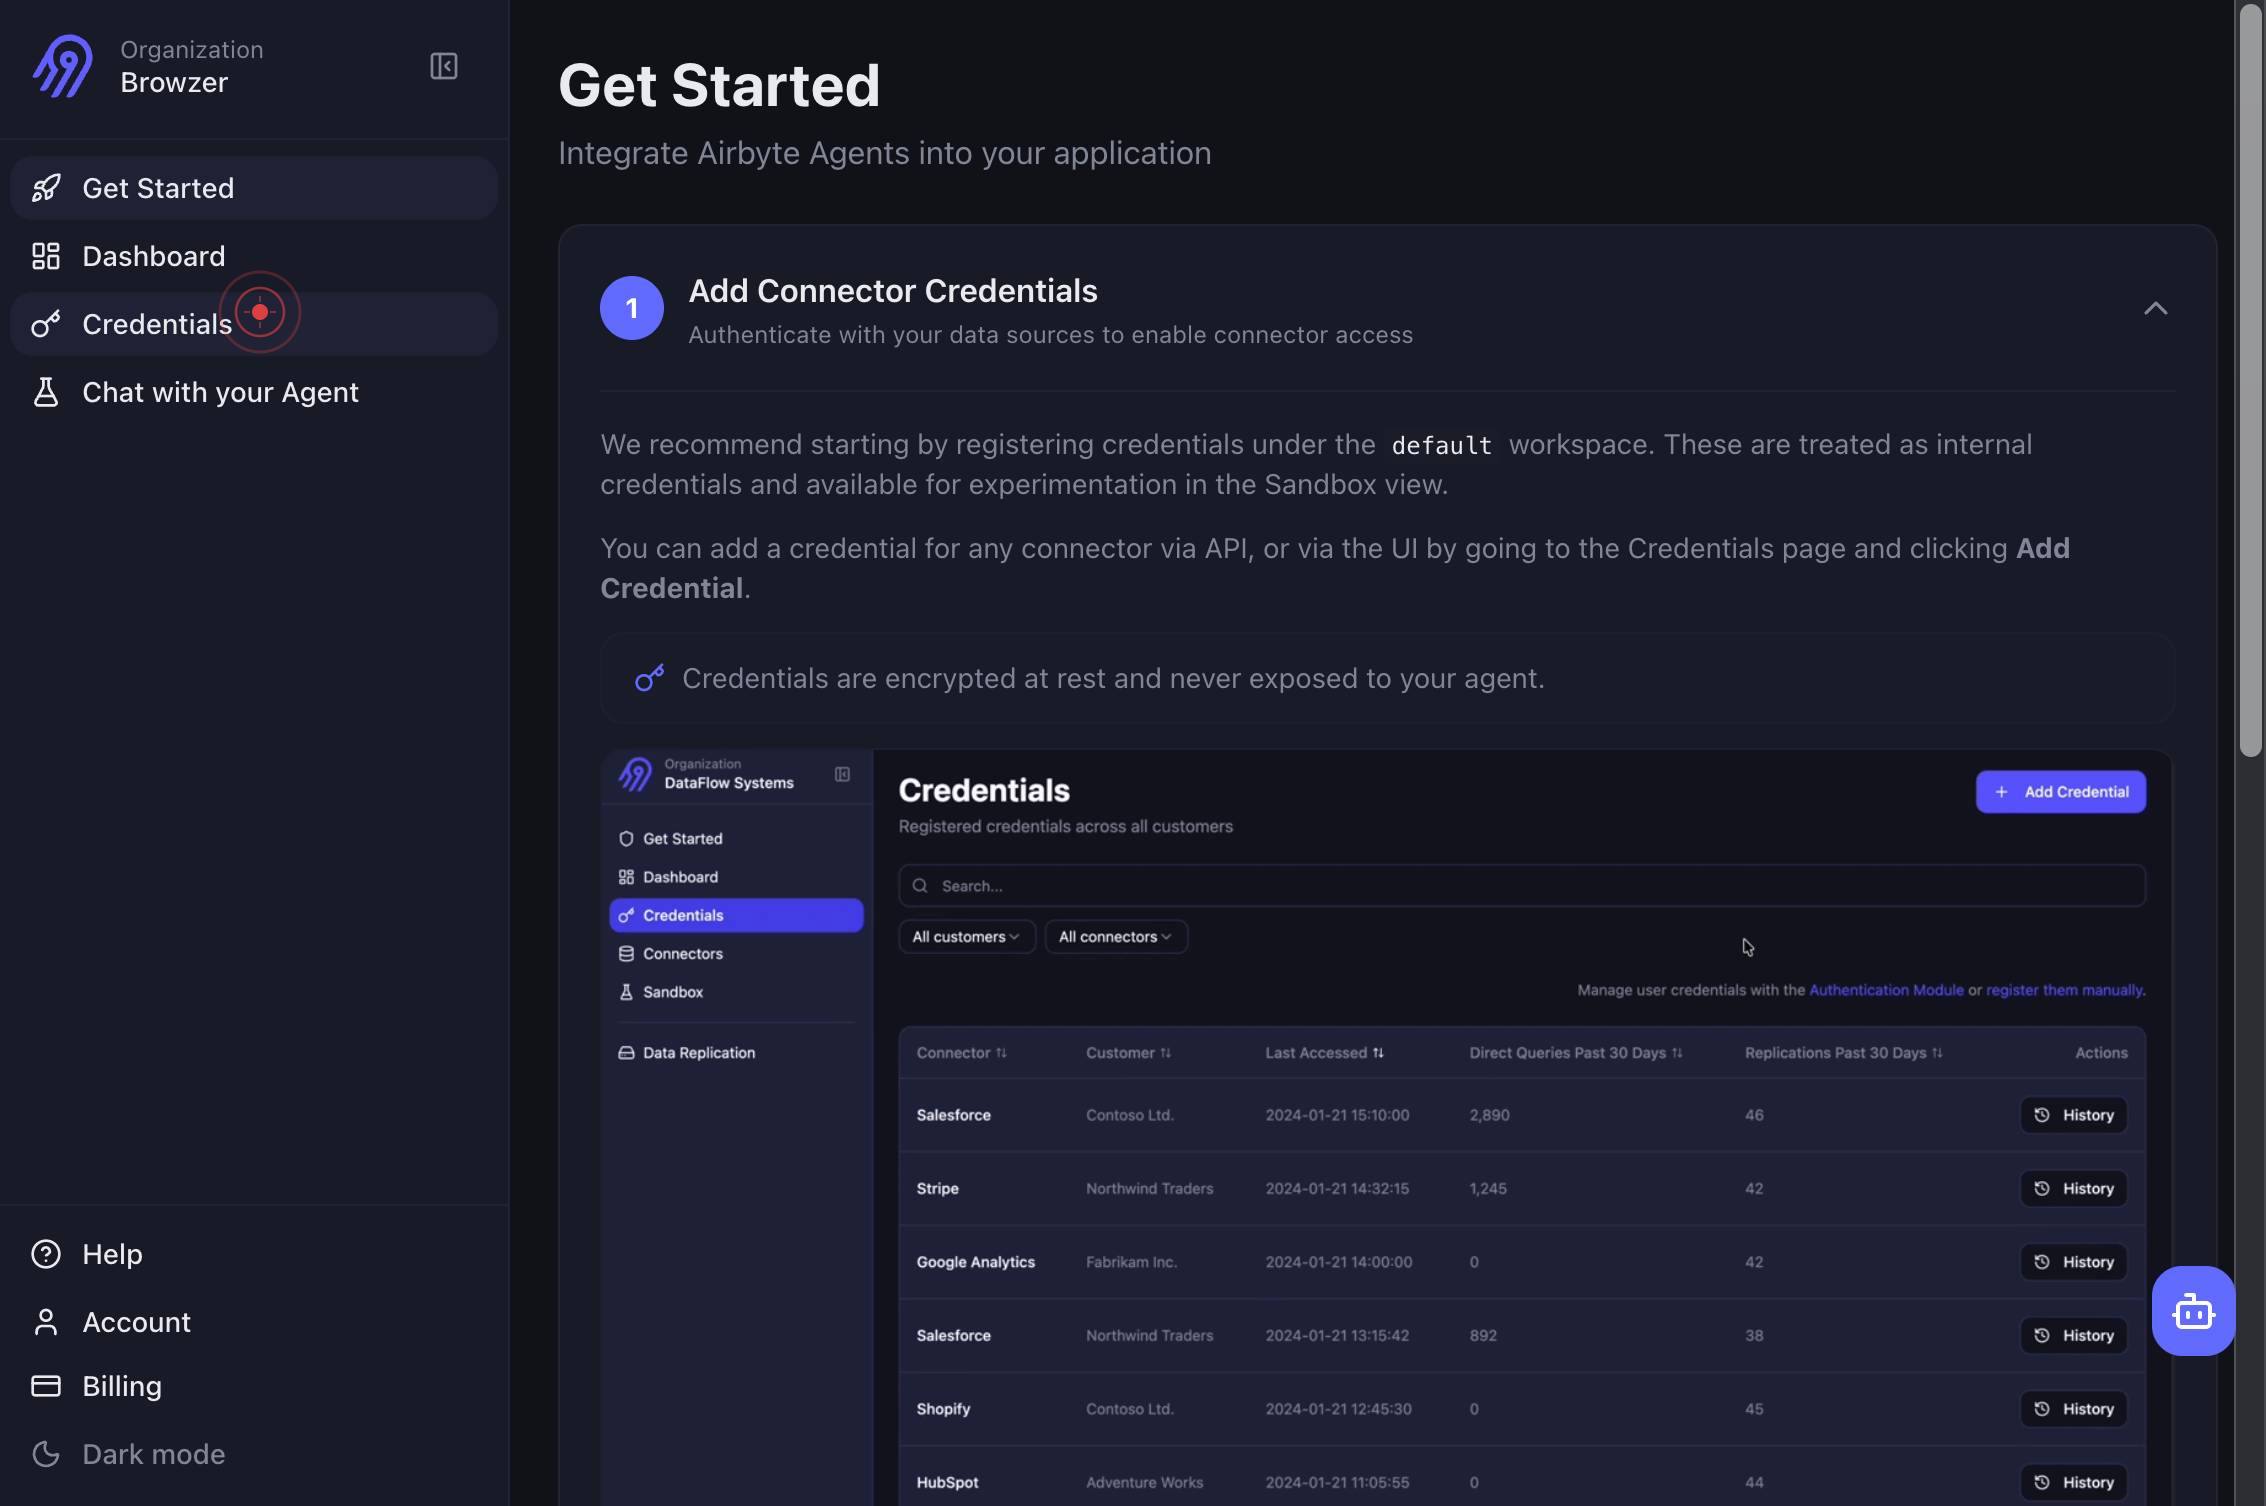
Add CredentialClick the 'Add Credential' button to begin creating a new connector credential. This opens the connector selection interface.
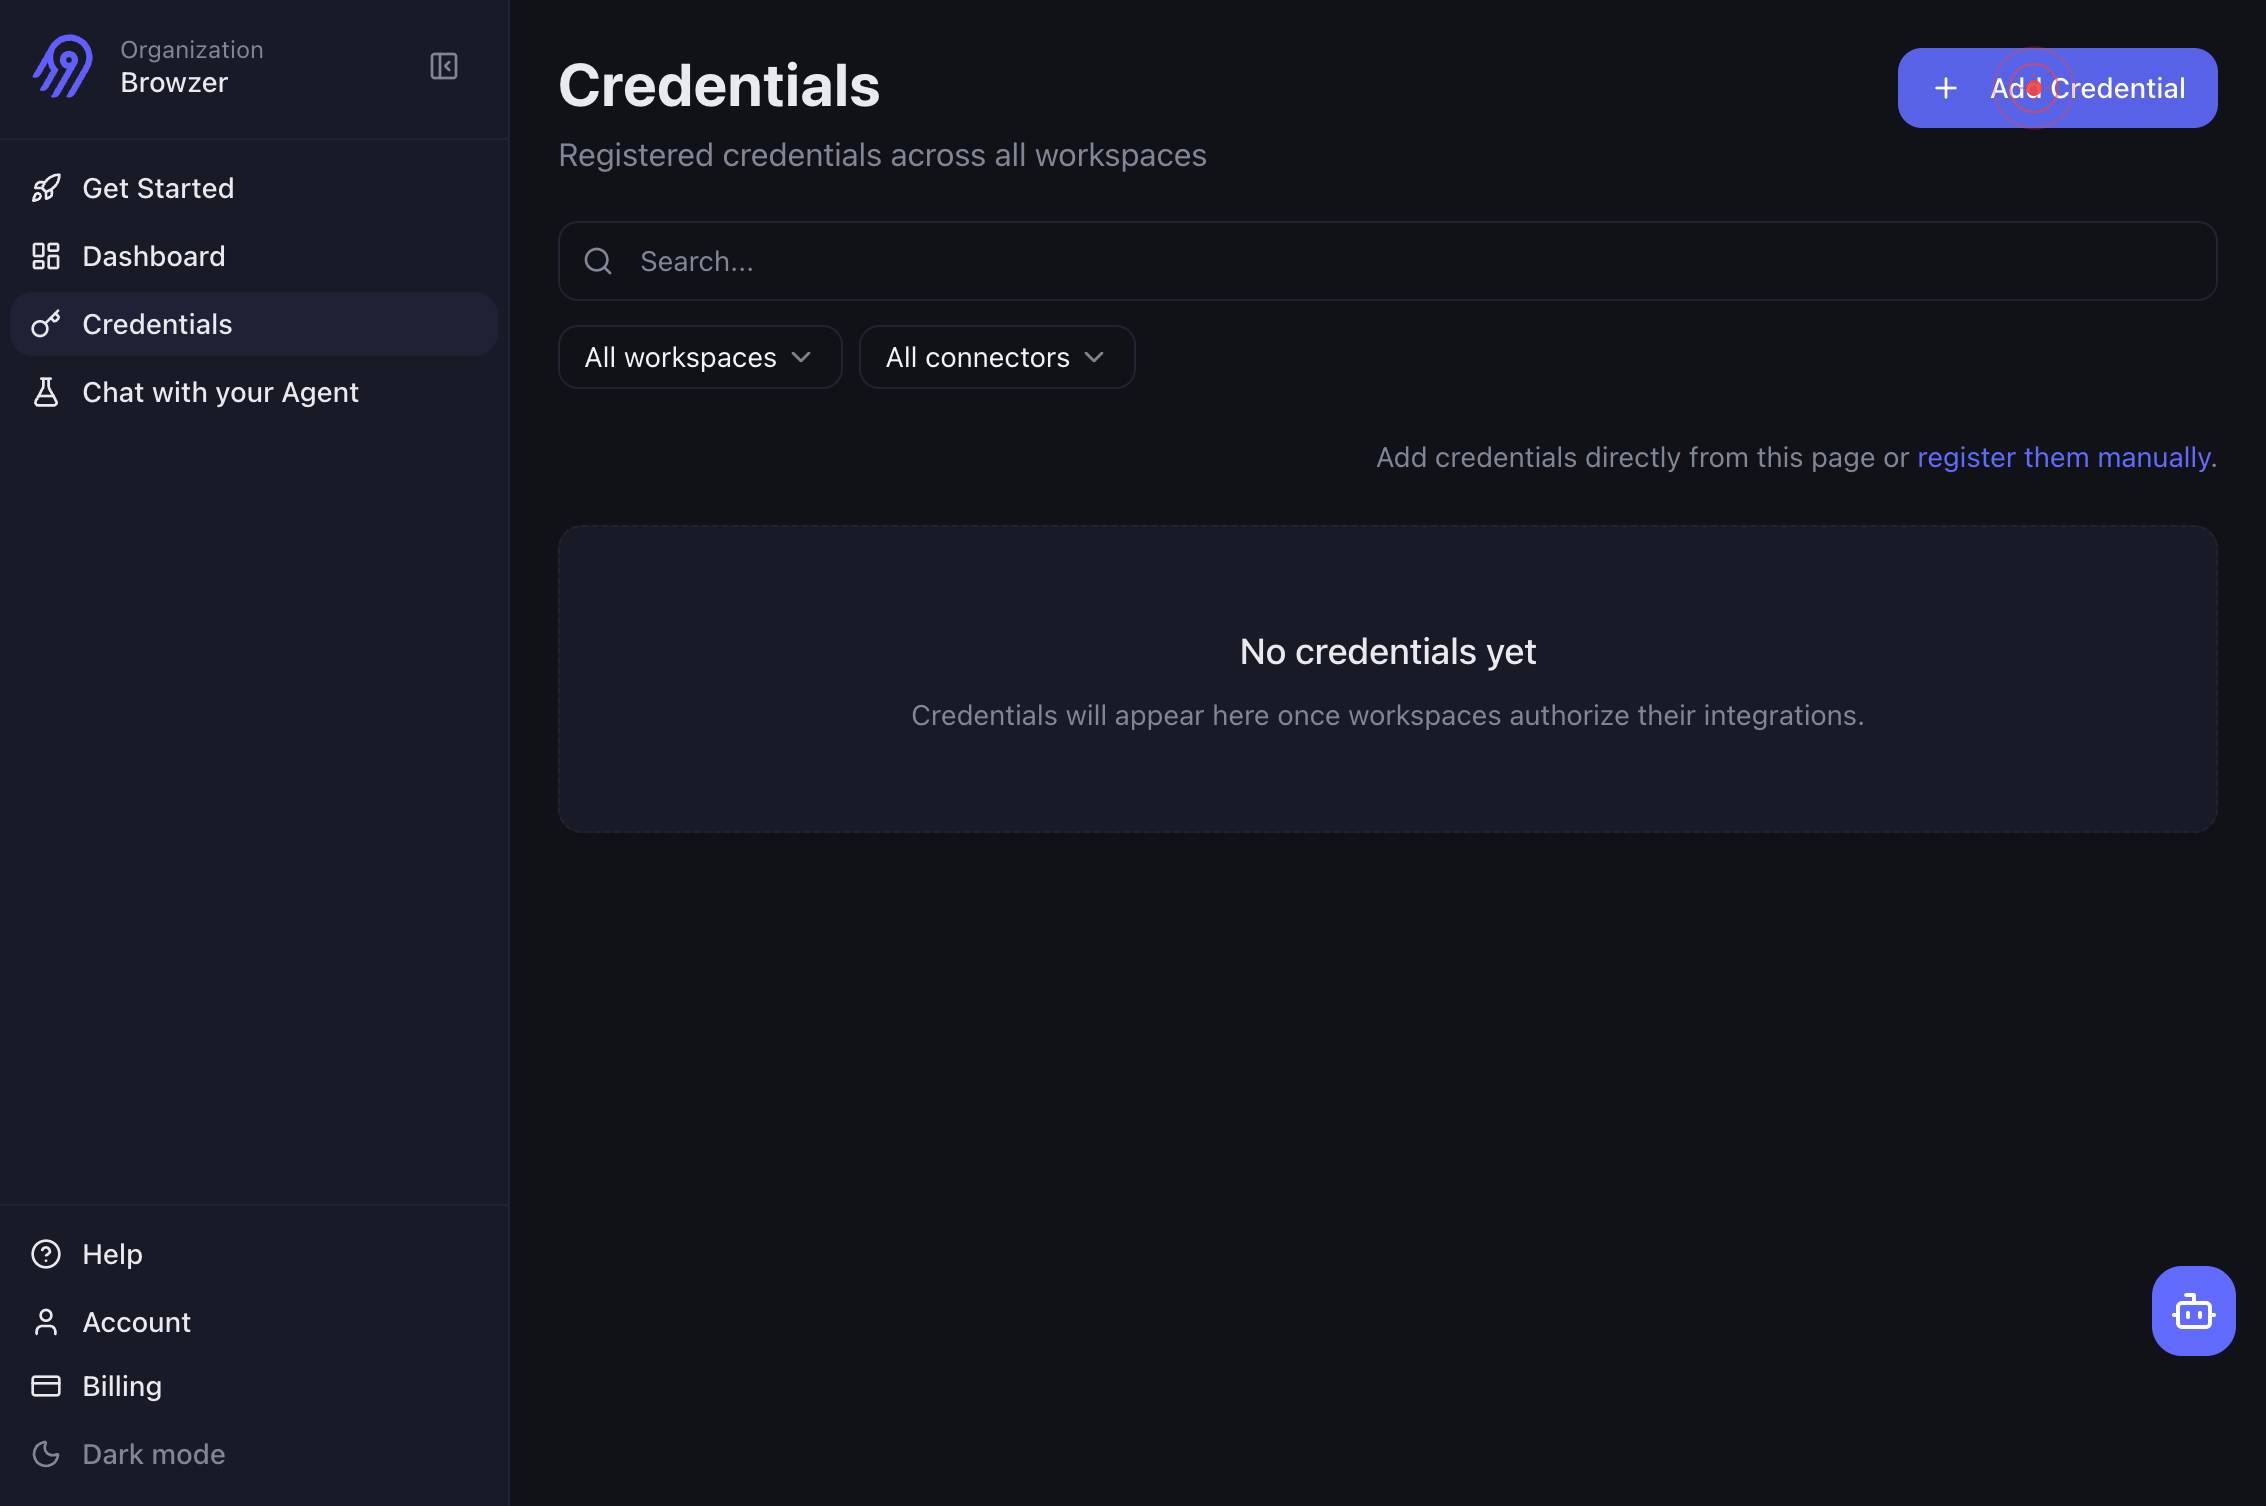
Organization Browzer Get Started Dashboard Credentials Chat with your Agent Help Account Billing Dark mode Credentials Registered credentials across all workspaces Add Credential All workspaces All connectors Add credentials directly from this page oWait for the credential creation page to fully load, which displays all available connector options and a workspace filter. This ensures the interface is ready for your selection.
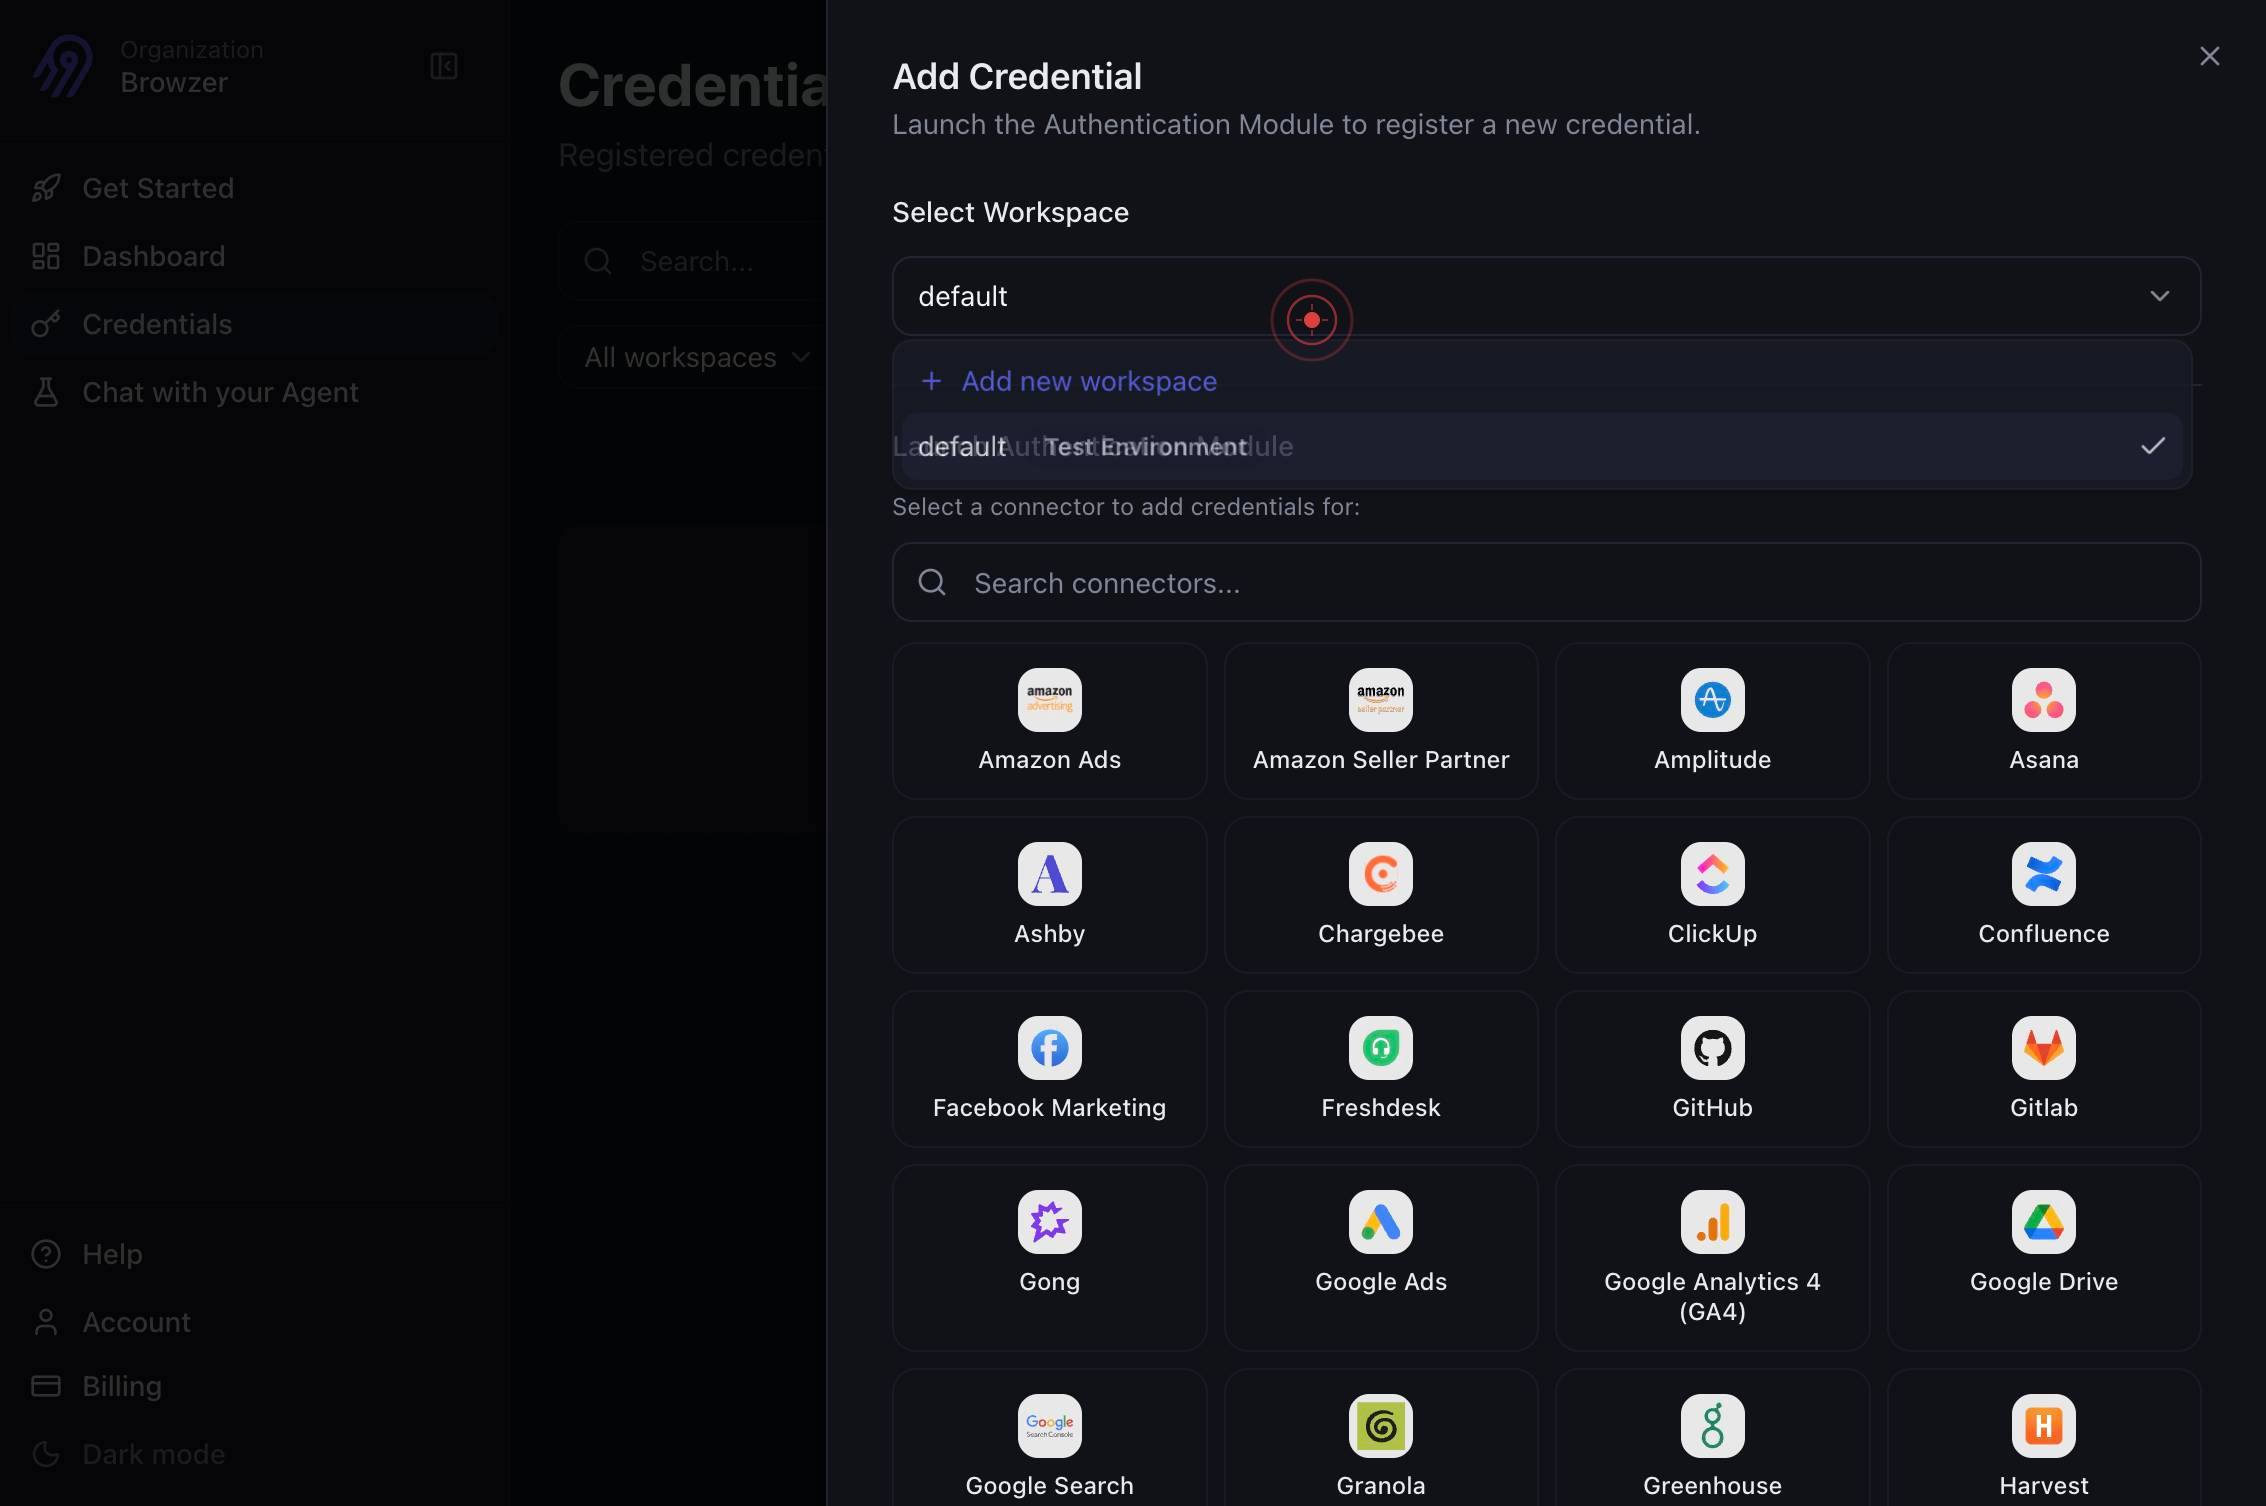
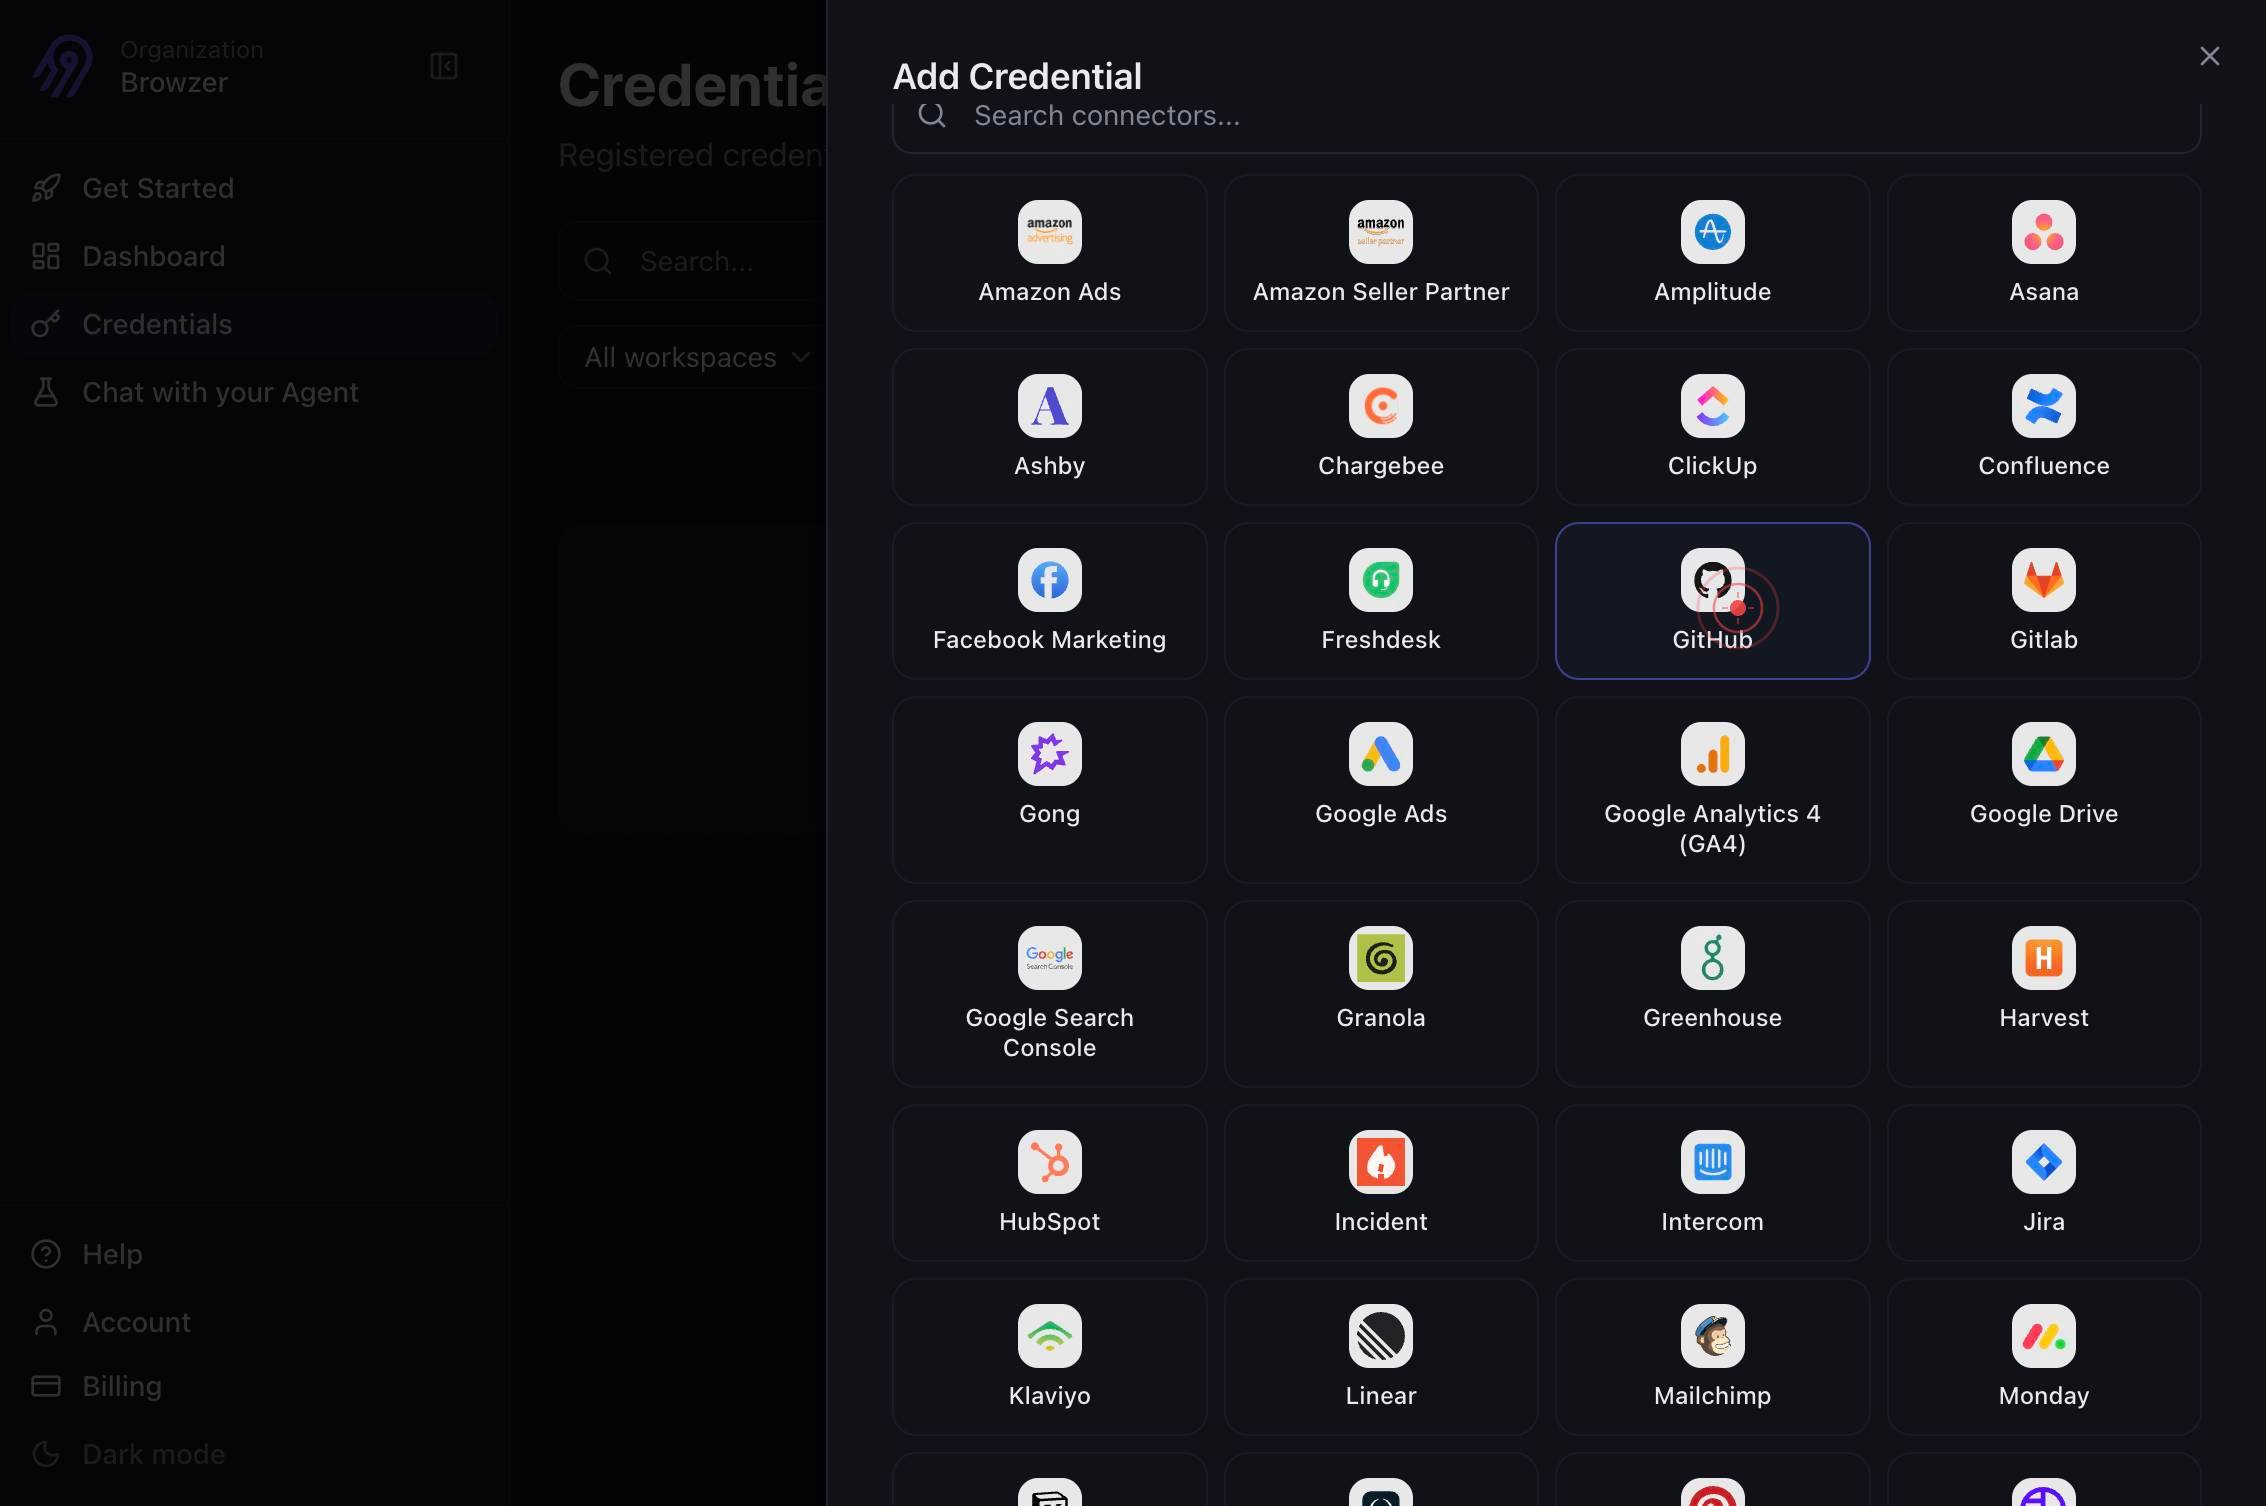
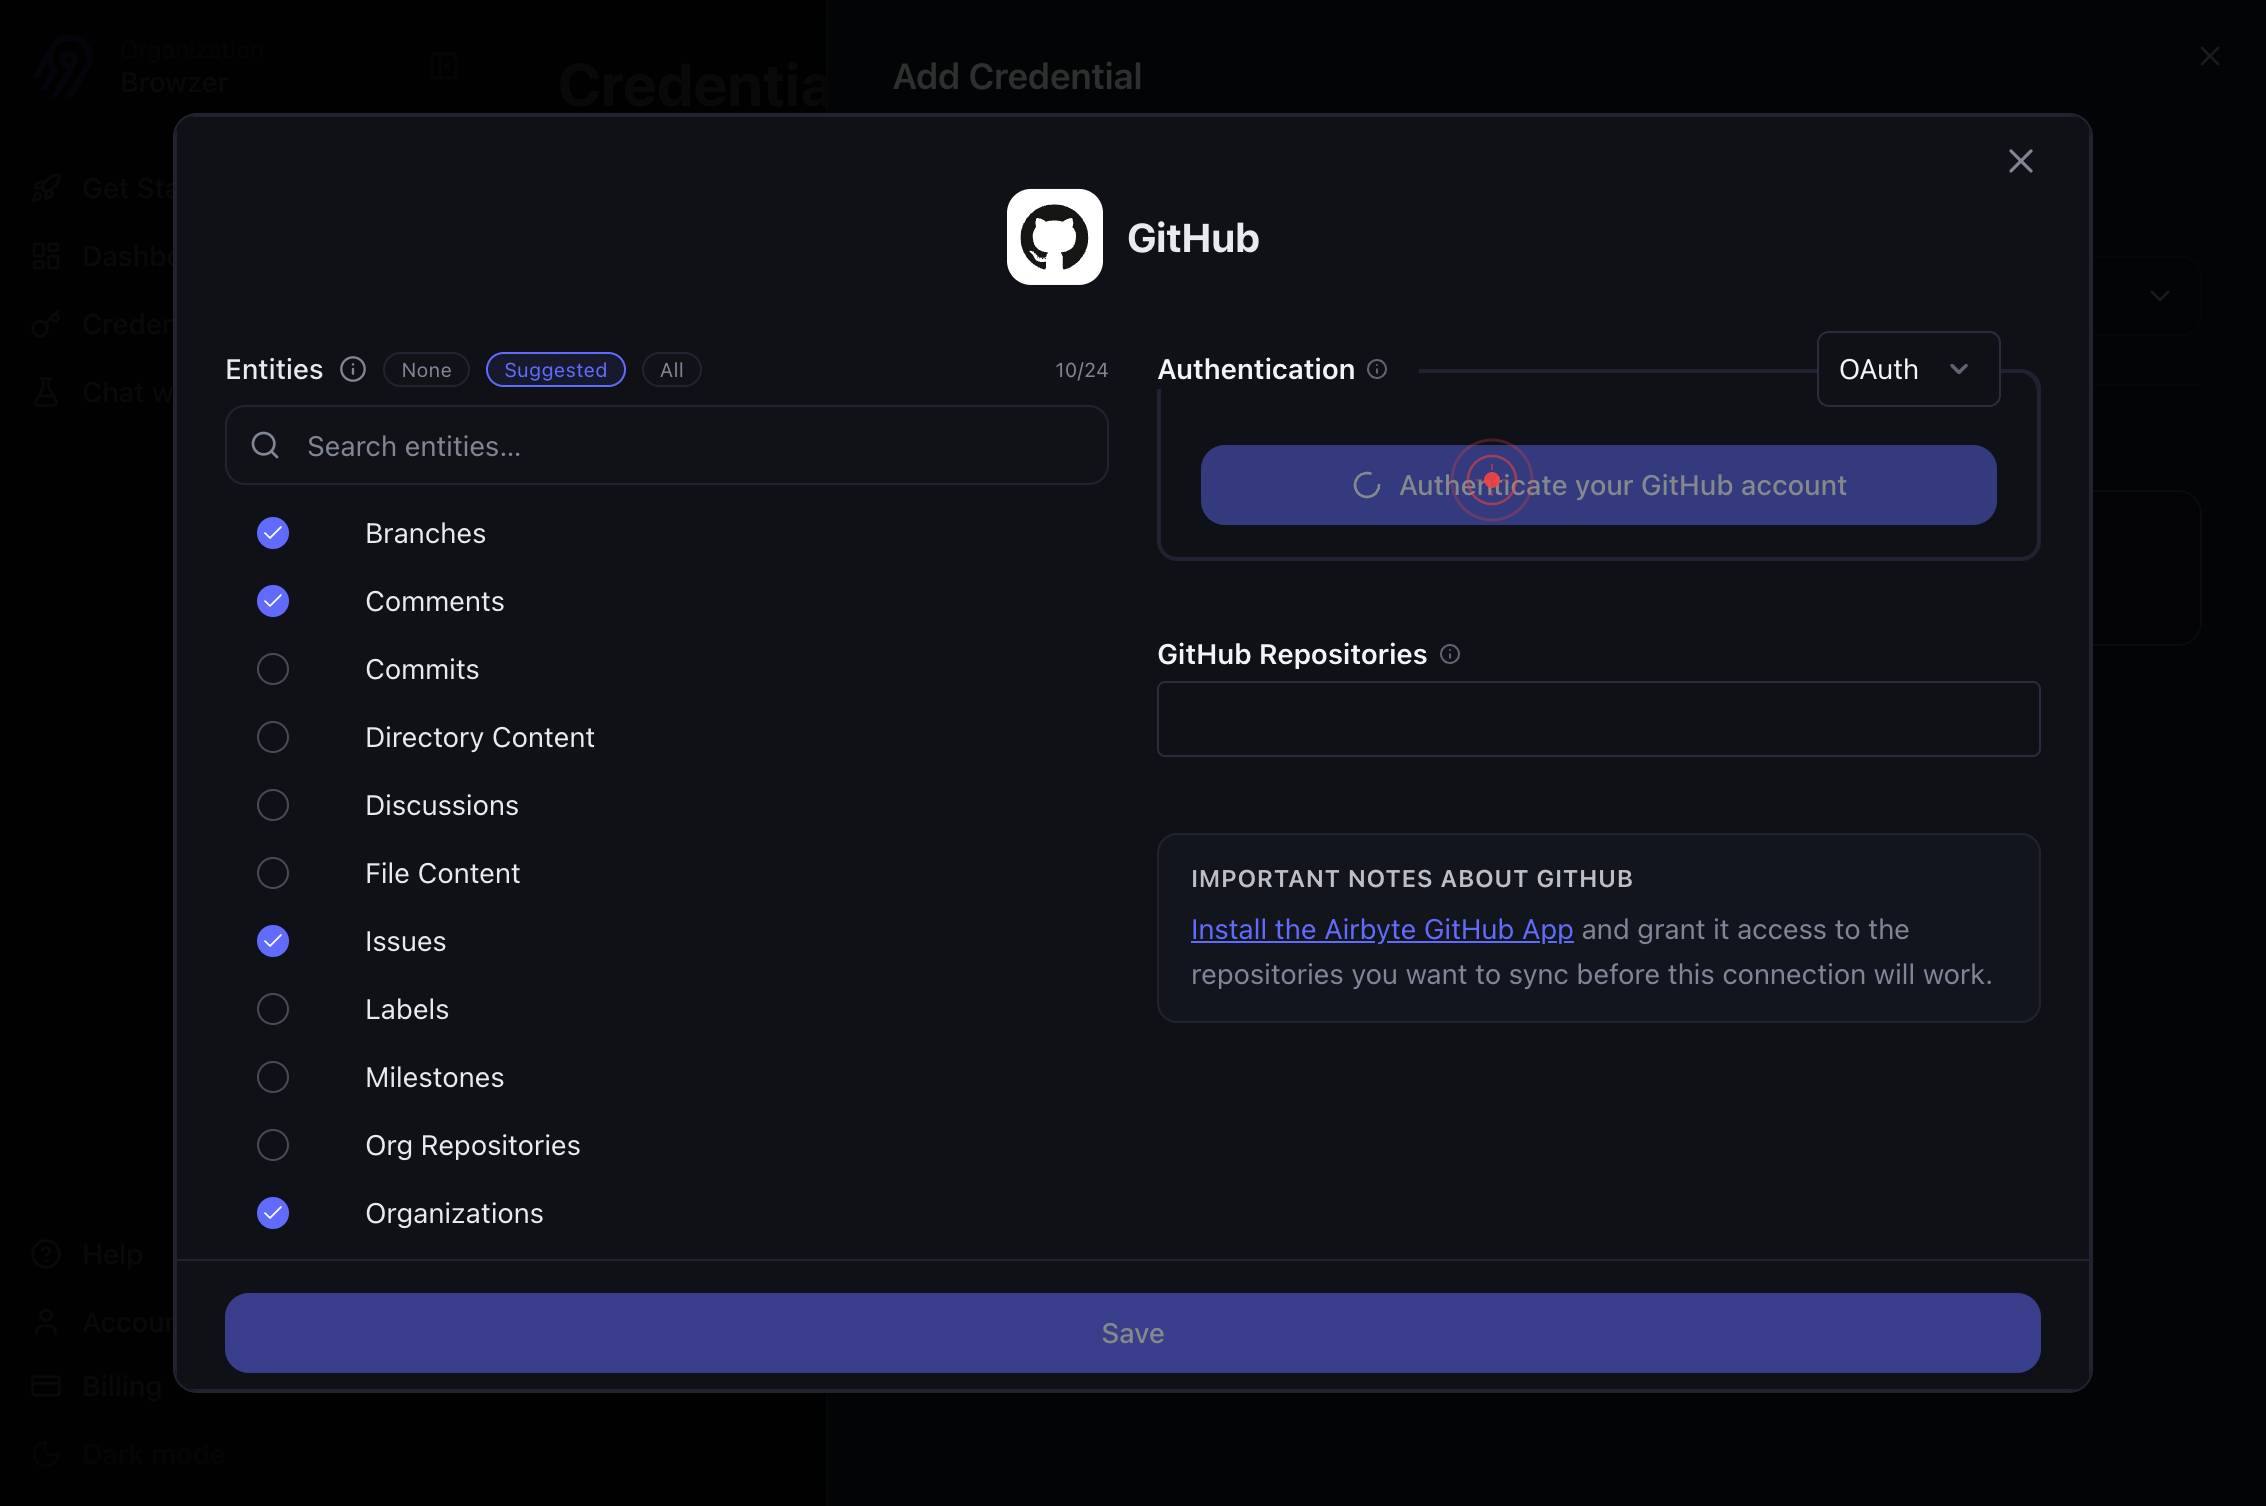
GitHubClick the 'GitHub' button to select GitHub as the connector type you want to add. This initiates the GitHub-specific credential workflow.
Authenticate your GitHub accountClick the 'Authenticate your GitHub account' button to start the OAuth authentication flow. This redirects you to GitHub to grant Airbyte permission to access your account and repositories.
Your browser switches to the GitHub authentication tab. This tab contains the GitHub login form and authorization request from Airbyte.
The page navigates to github.com, where you are prompted to log in (if not already logged in) or to review the permissions Airbyte is requesting. Verify the account name and organization memberships shown.
AuthorizeClick the 'Authorize' button on the GitHub authorization page to grant Airbyte permission to access your GitHub account and repositories. This completes the OAuth handshake.
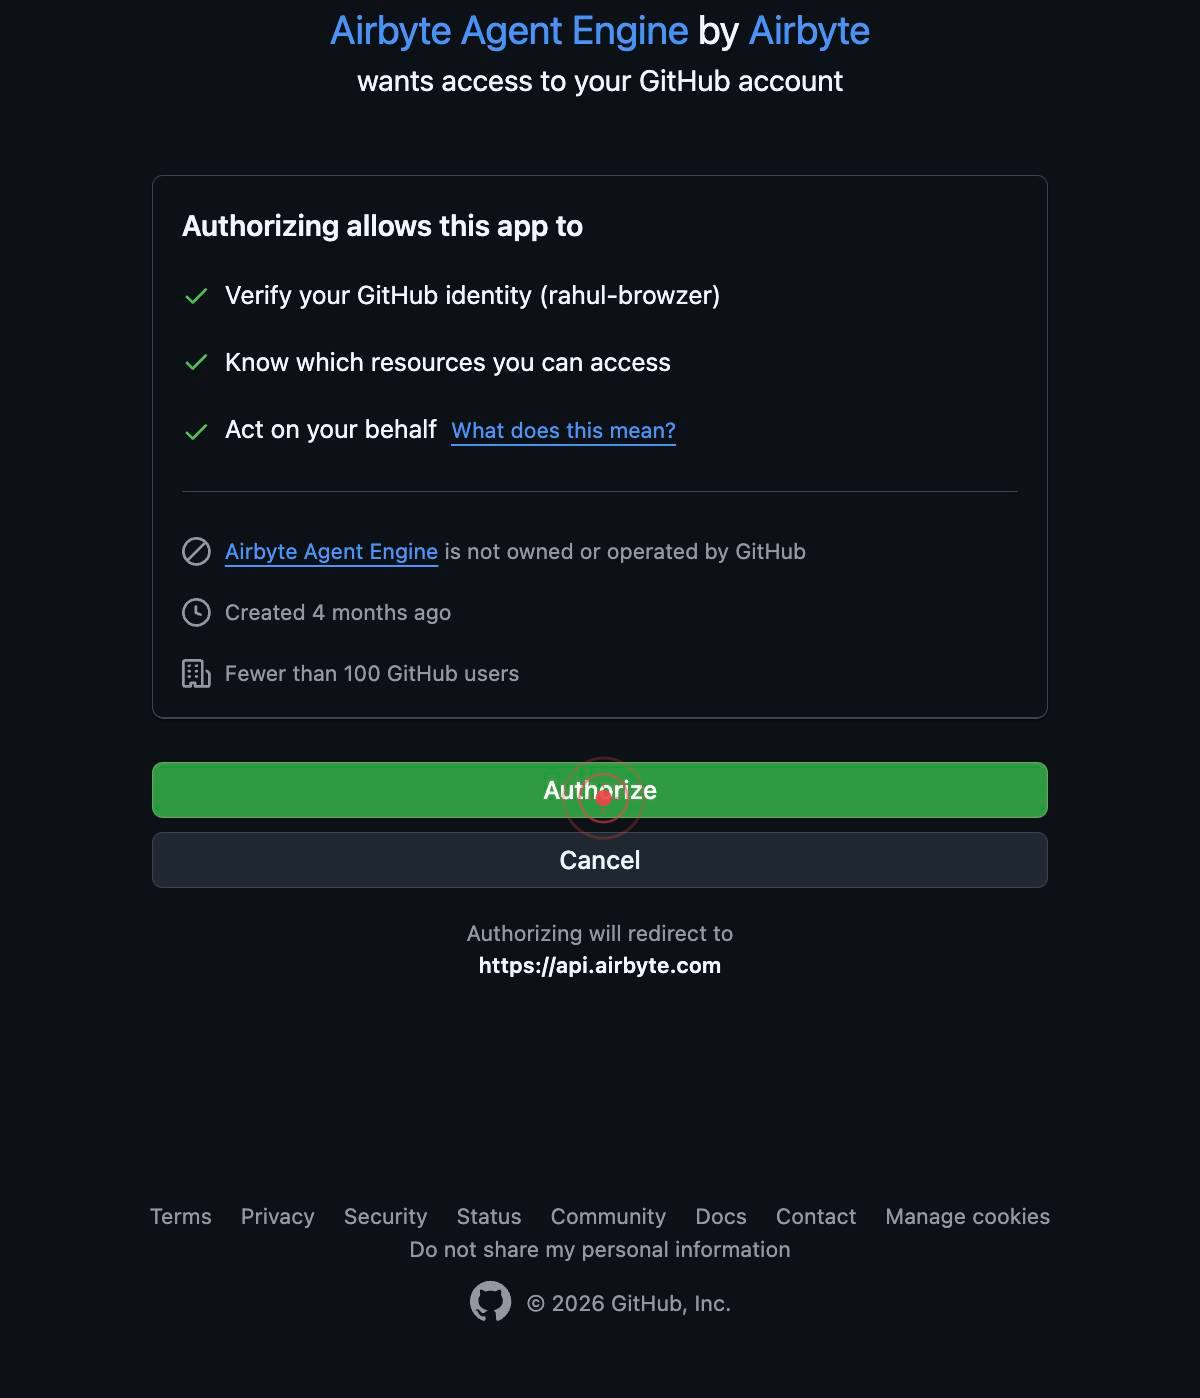
GitHub processes your authorization and prepares to redirect you back to Airbyte. The page may show a success message or brief redirect screen.
You are automatically redirected back to app.airbyte.ai after GitHub confirms your authorization. The page now displays the connector configuration form with your GitHub account linked.
genericThe connector configuration panel is now visible and ready for input. This panel allows you to select repositories and configure sync behavior.
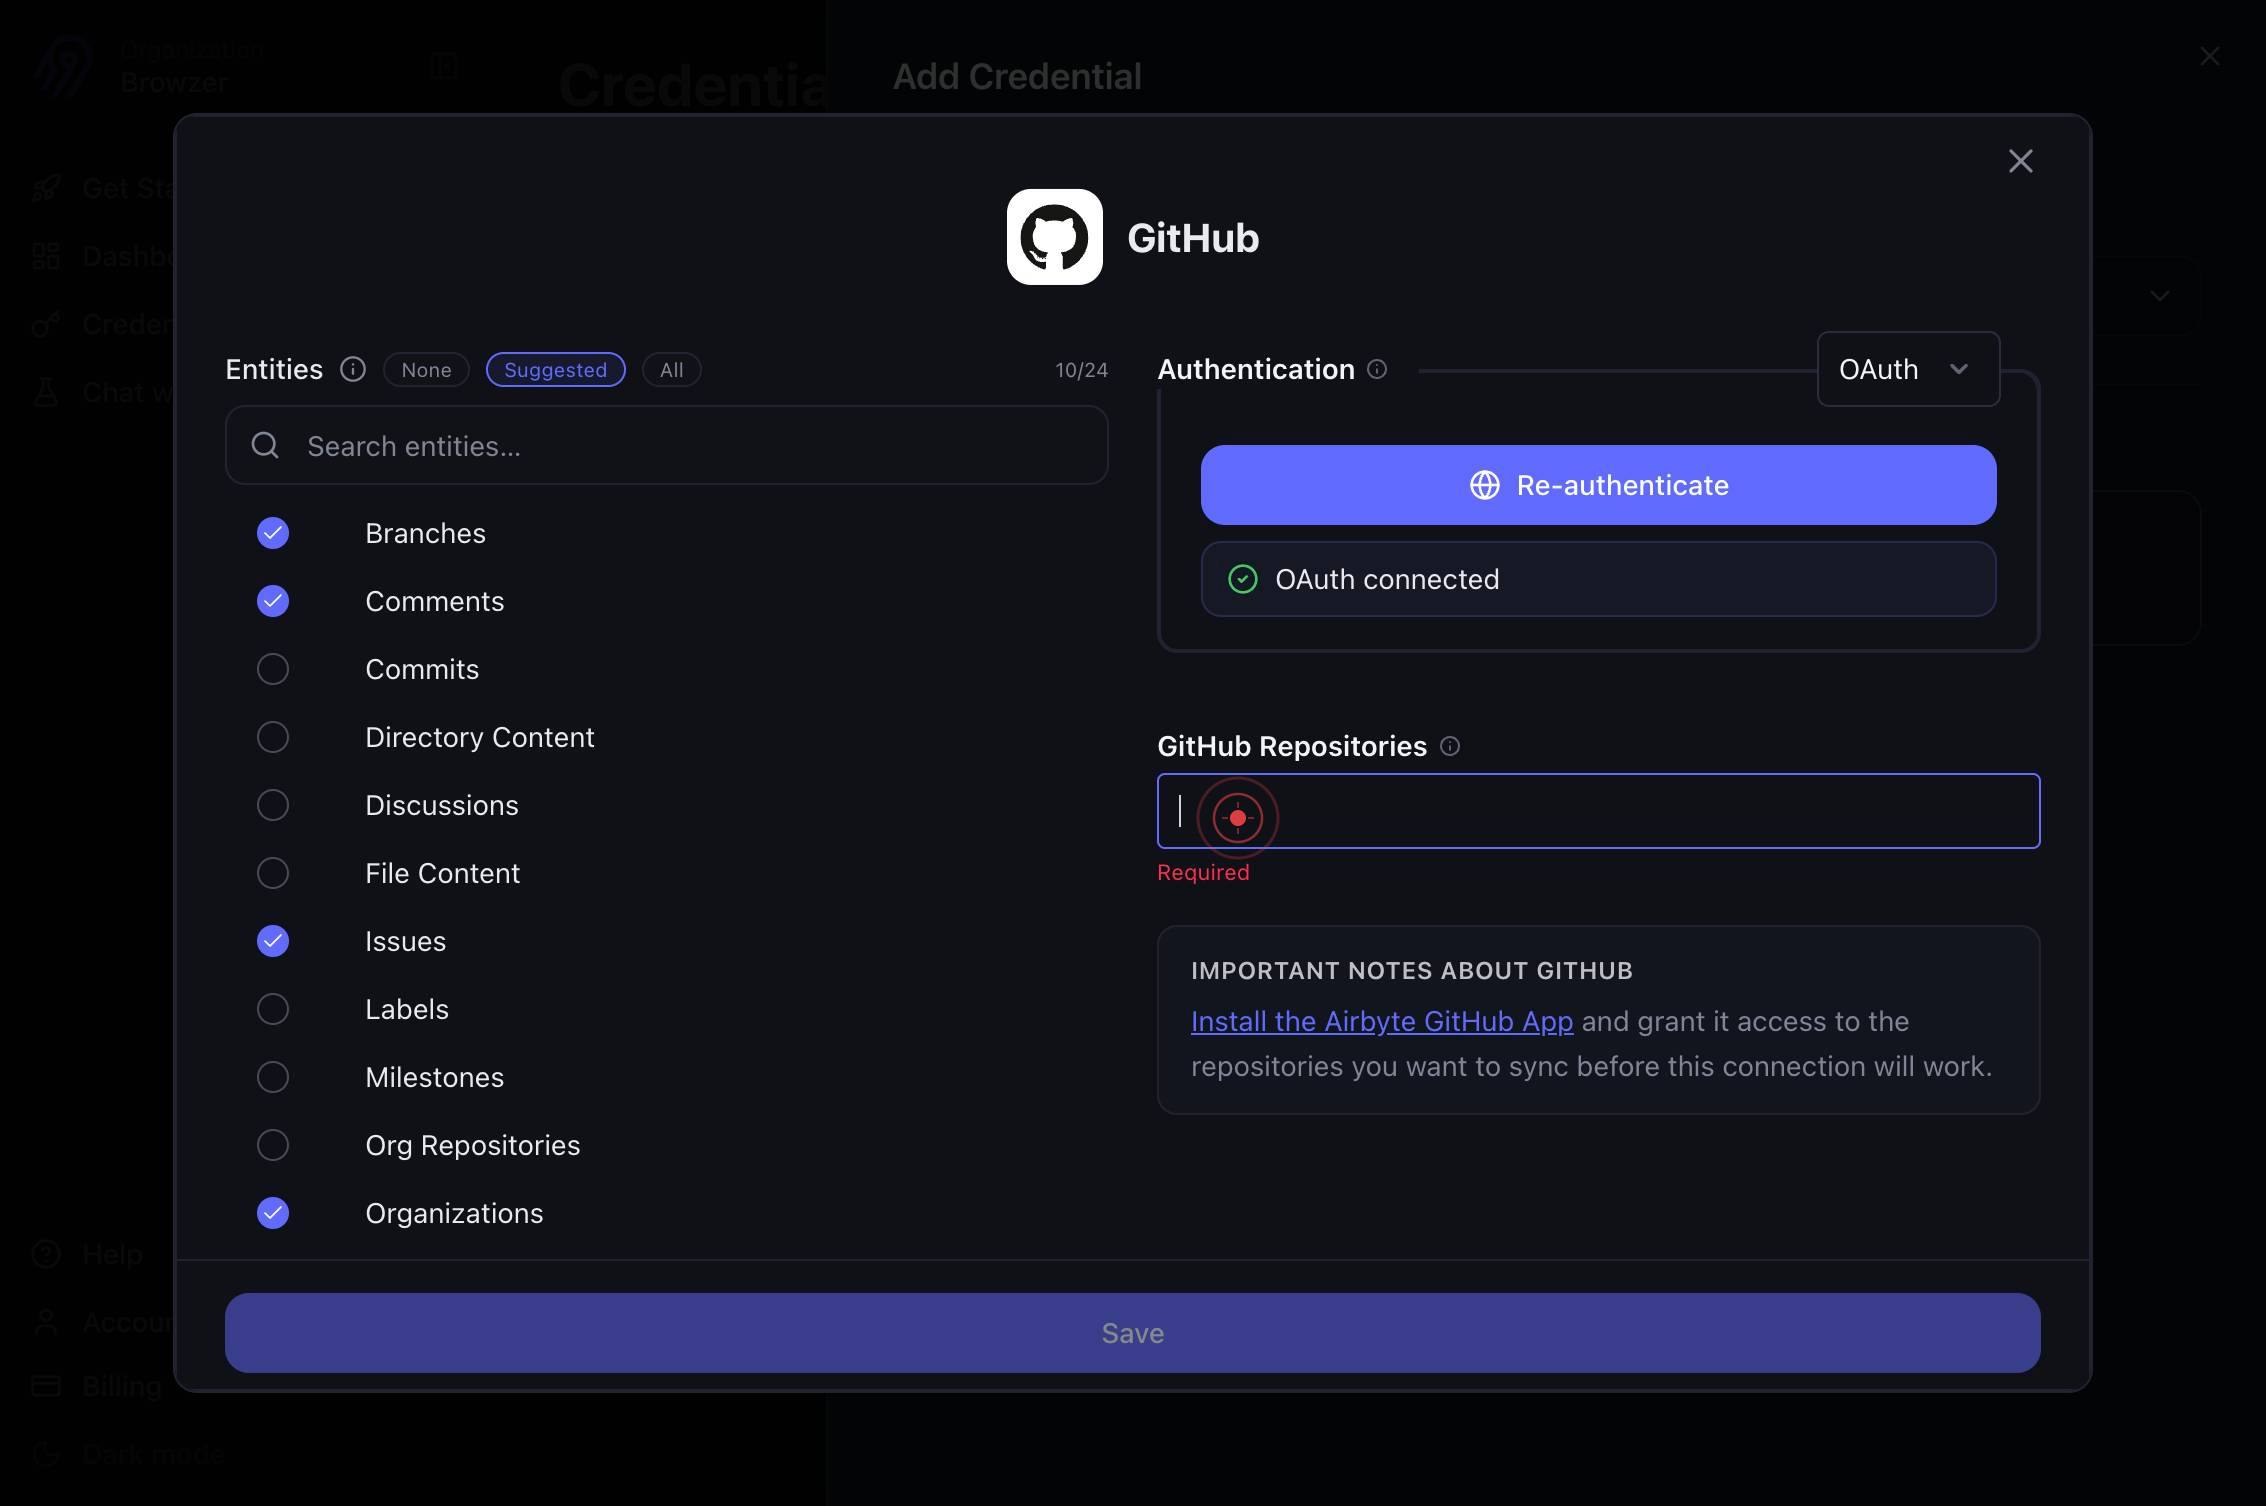
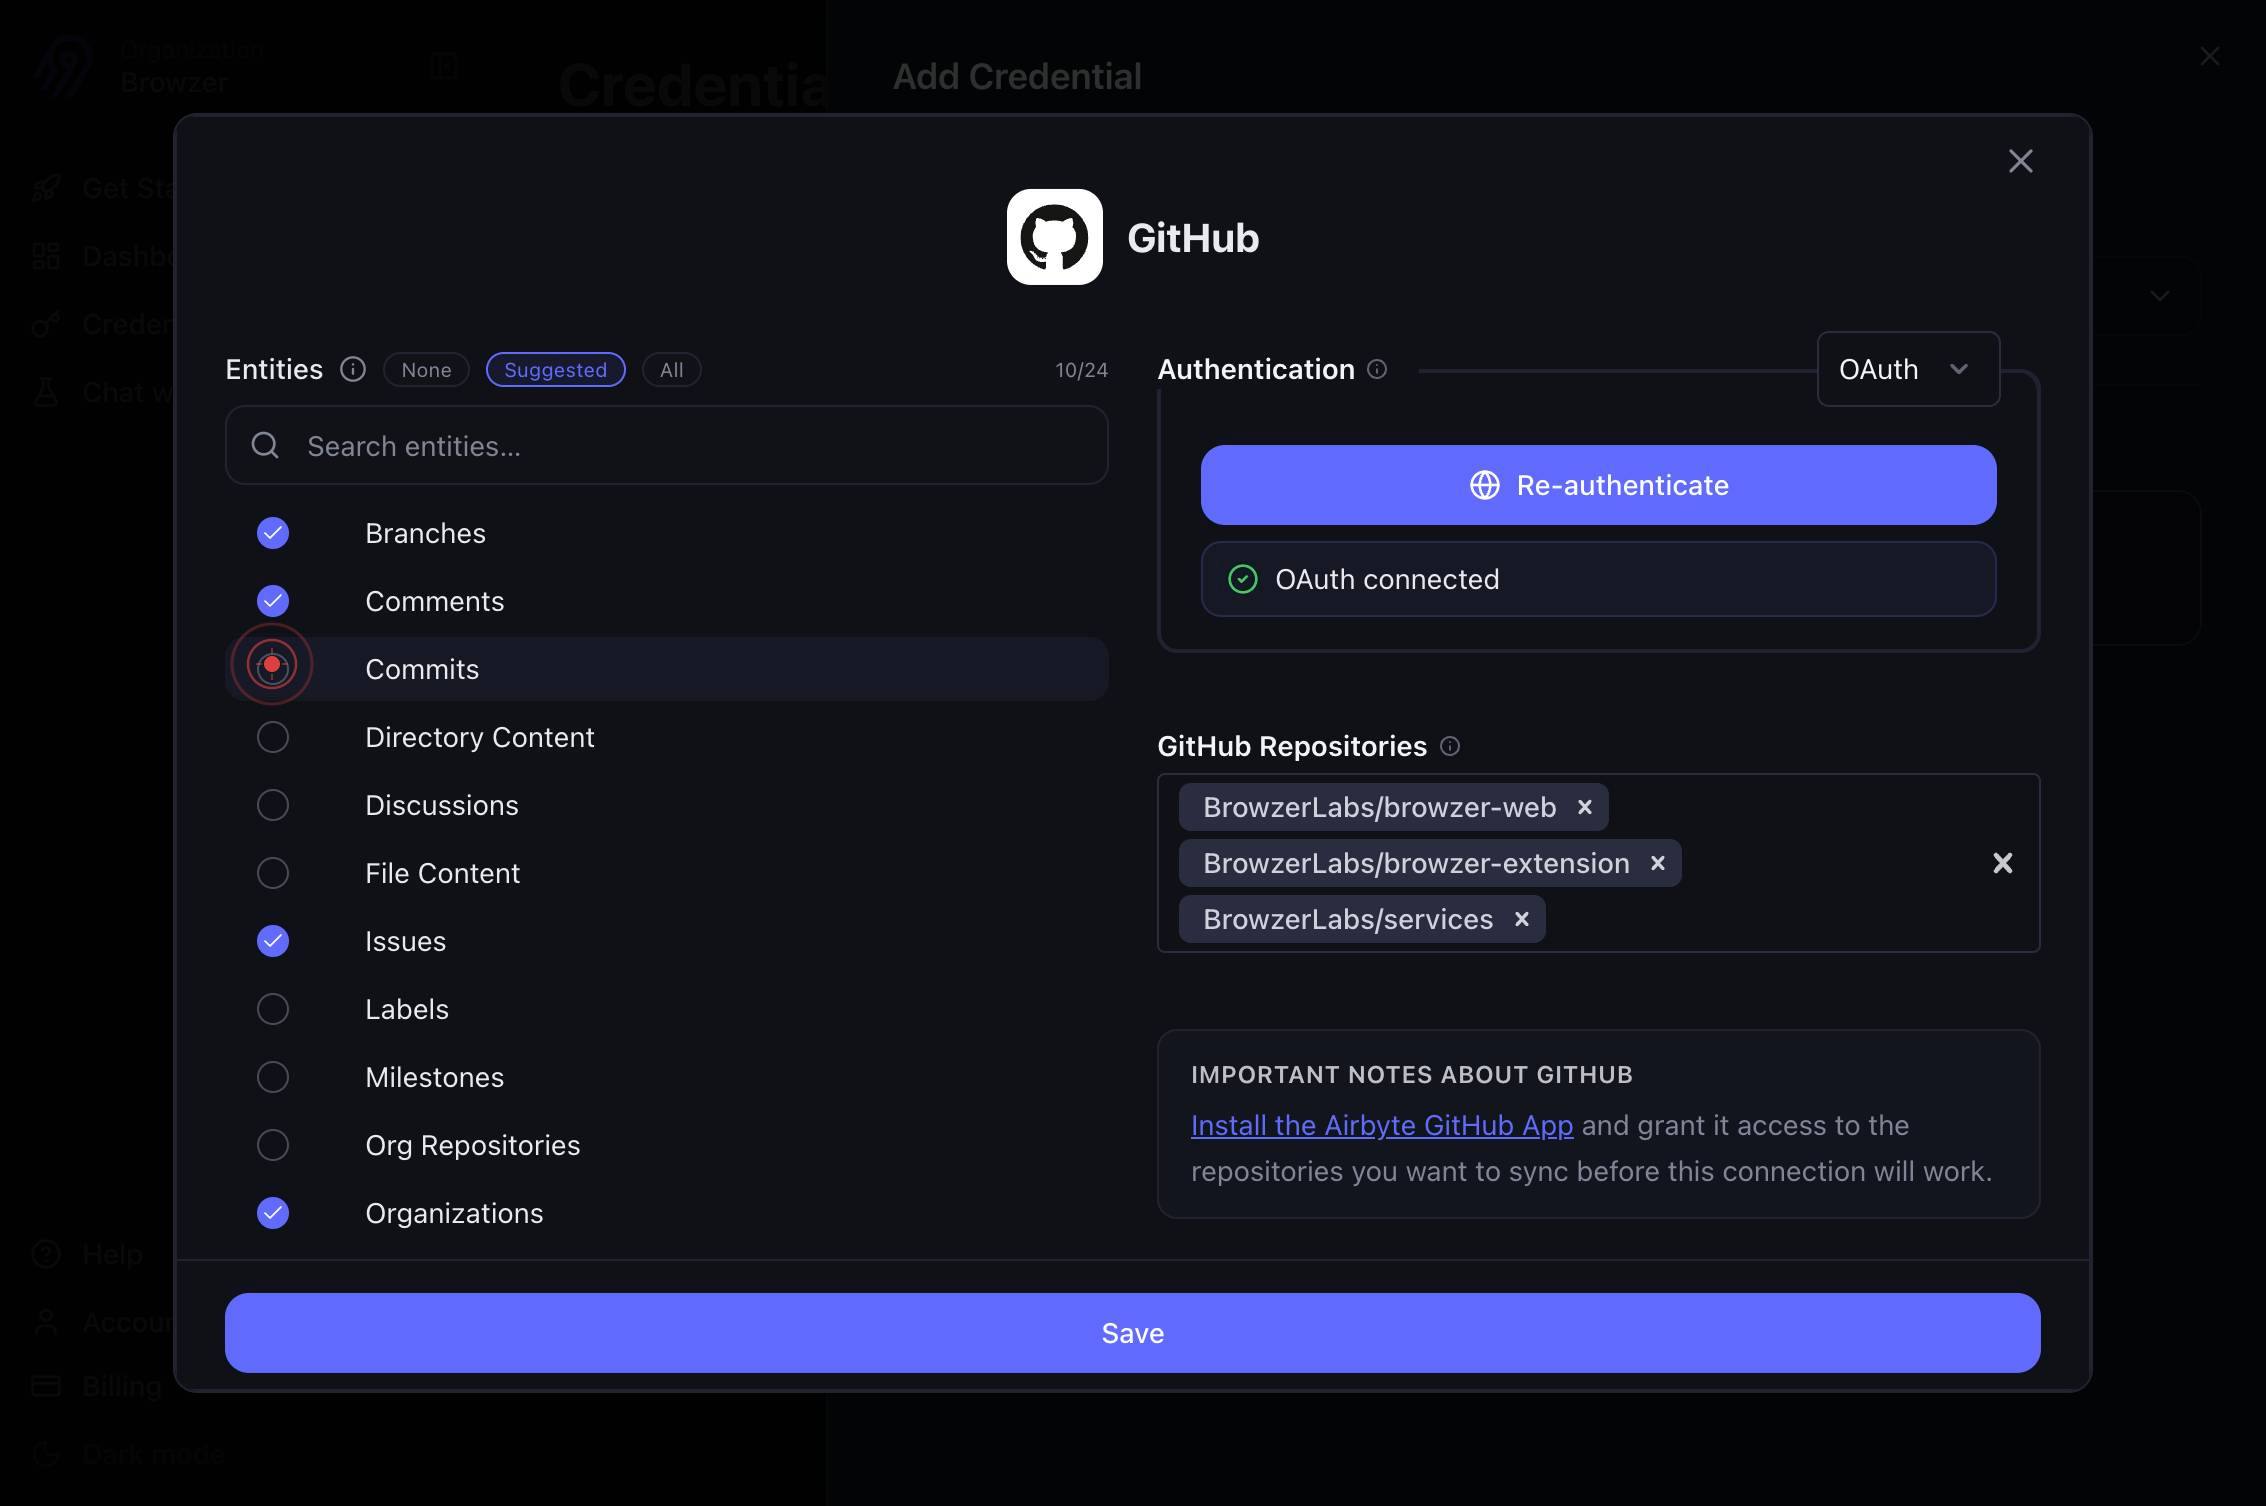
GitHub RepositoriesClick on the 'GitHub Repositories' dropdown menu (combobox) to view and select which repositories you want to sync through this connector. You can select one or multiple repositories.
genericAfter selecting your desired repositories from the dropdown, confirm the selection by clicking in the designated area or pressing Enter. The selected repositories are now active for this connector.
Include CommitsCheck the 'Include Commits' checkbox to enable syncing of commit history from your selected repositories. This allows Airbyte to fetch commit metadata and messages alongside repository data.

Org RepositoriesClick on 'Org Repositories' to filter the repository list to show only repositories that belong to organizations you are a member of, rather than personal repositories. This narrows your selection scope.
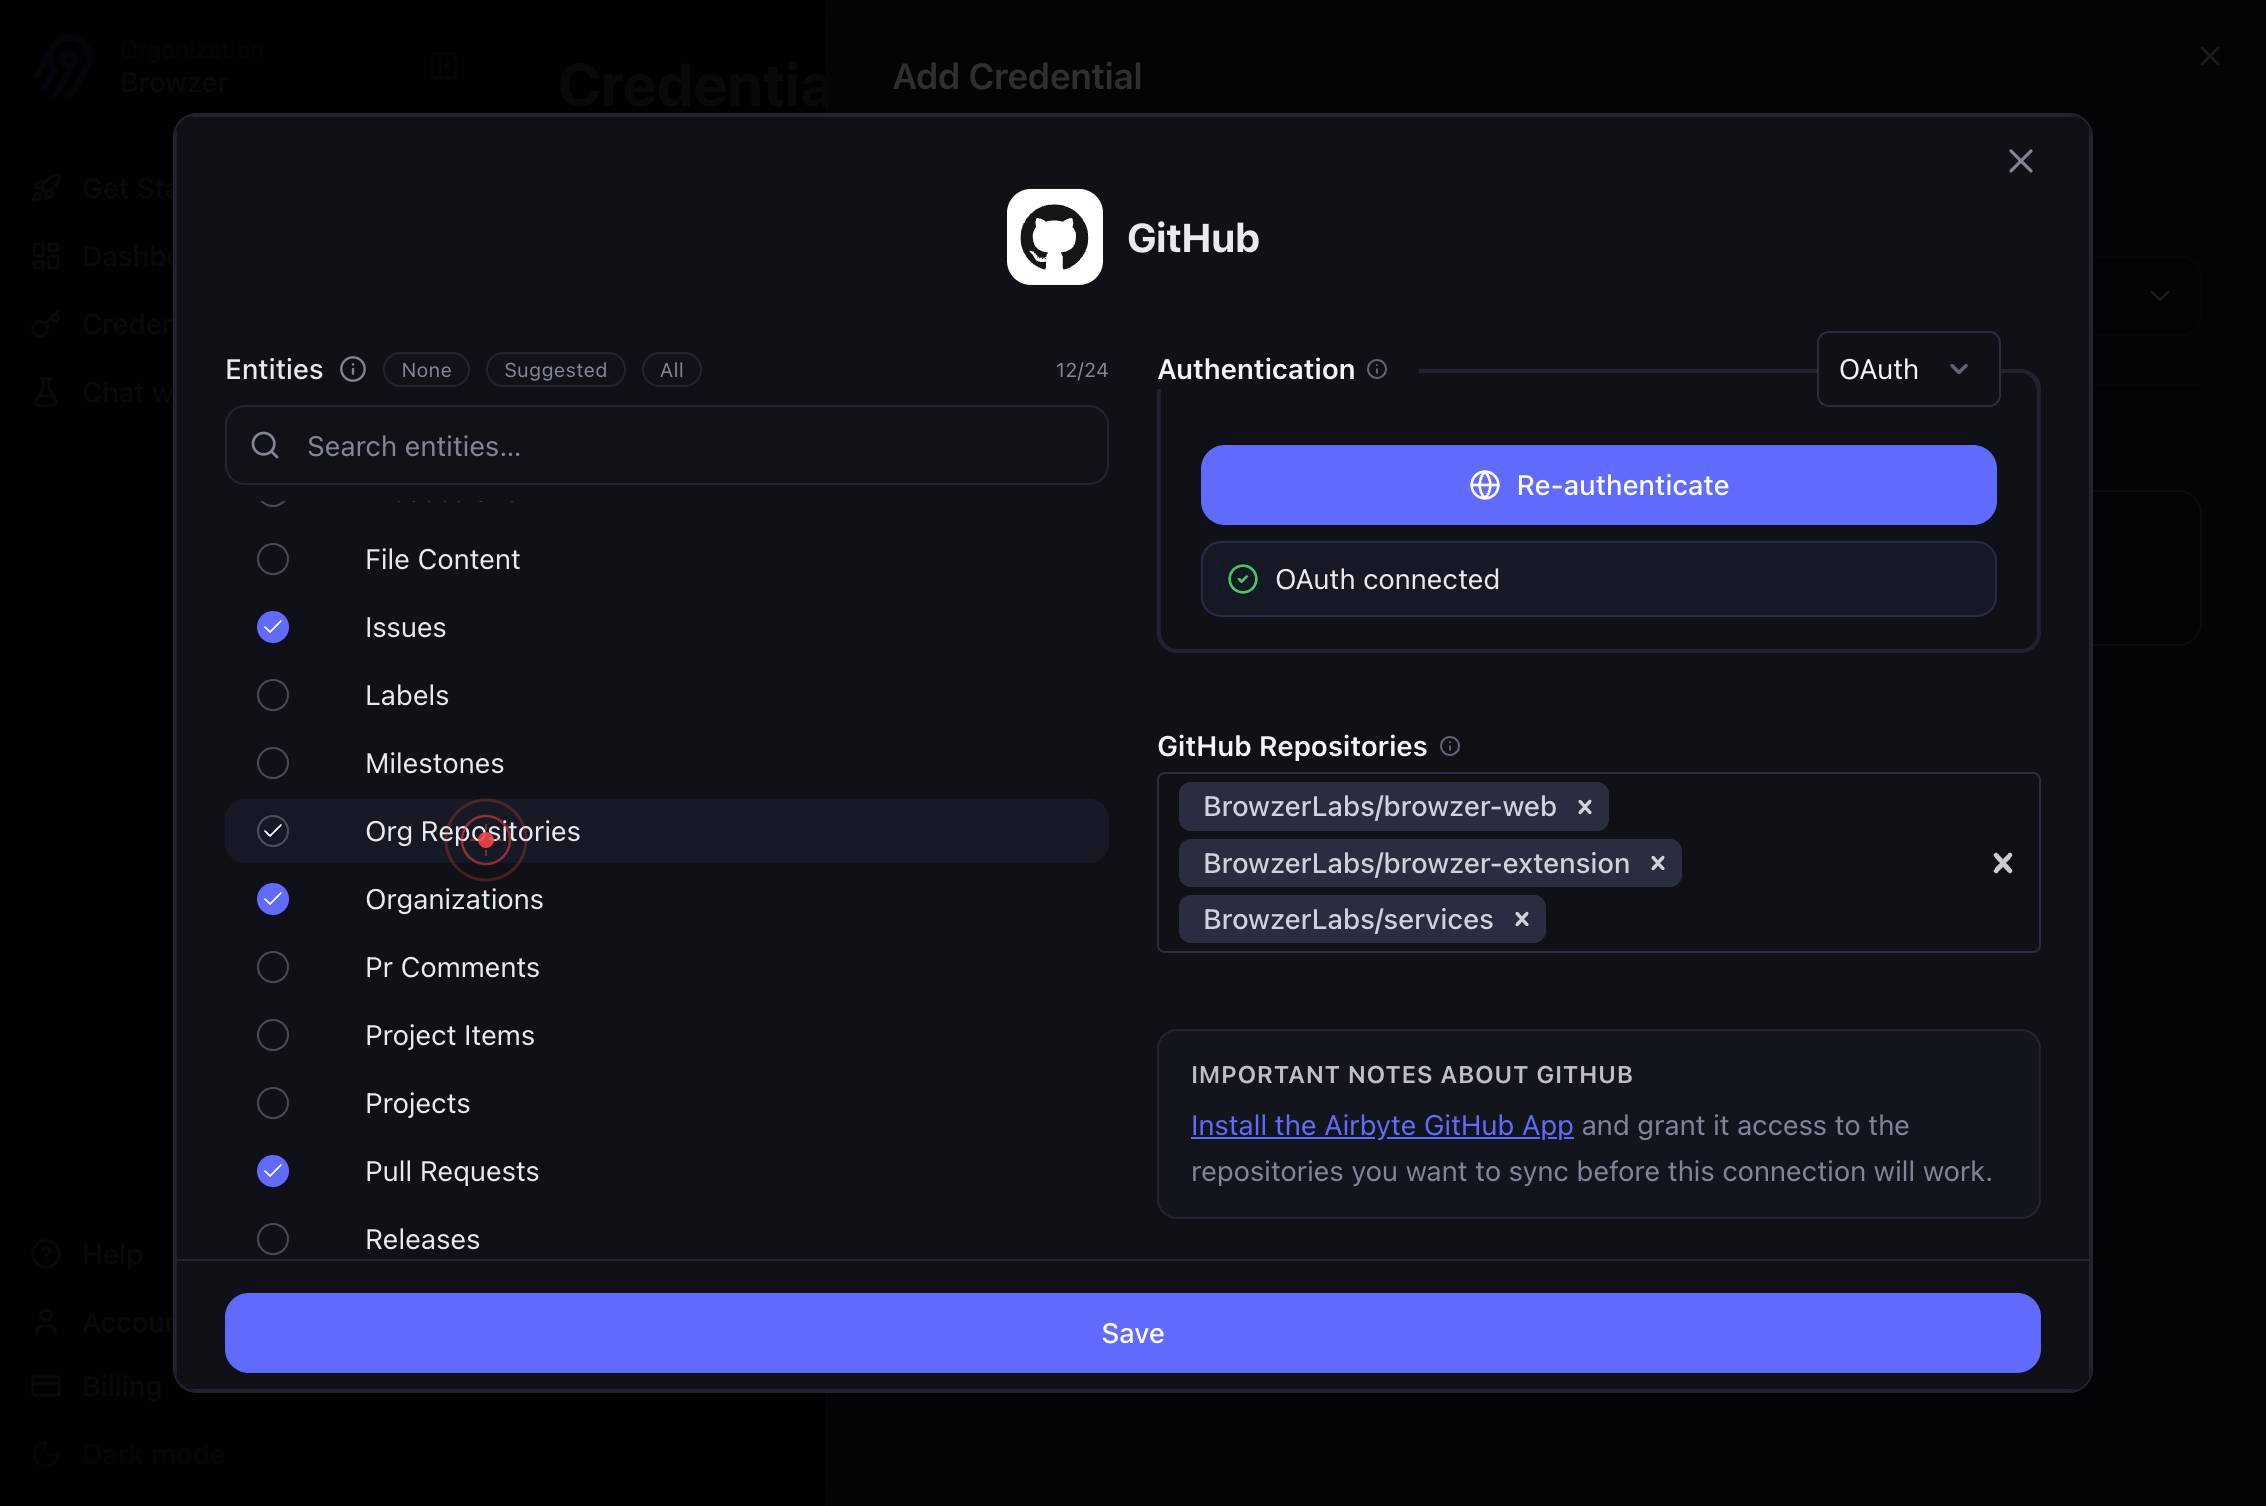
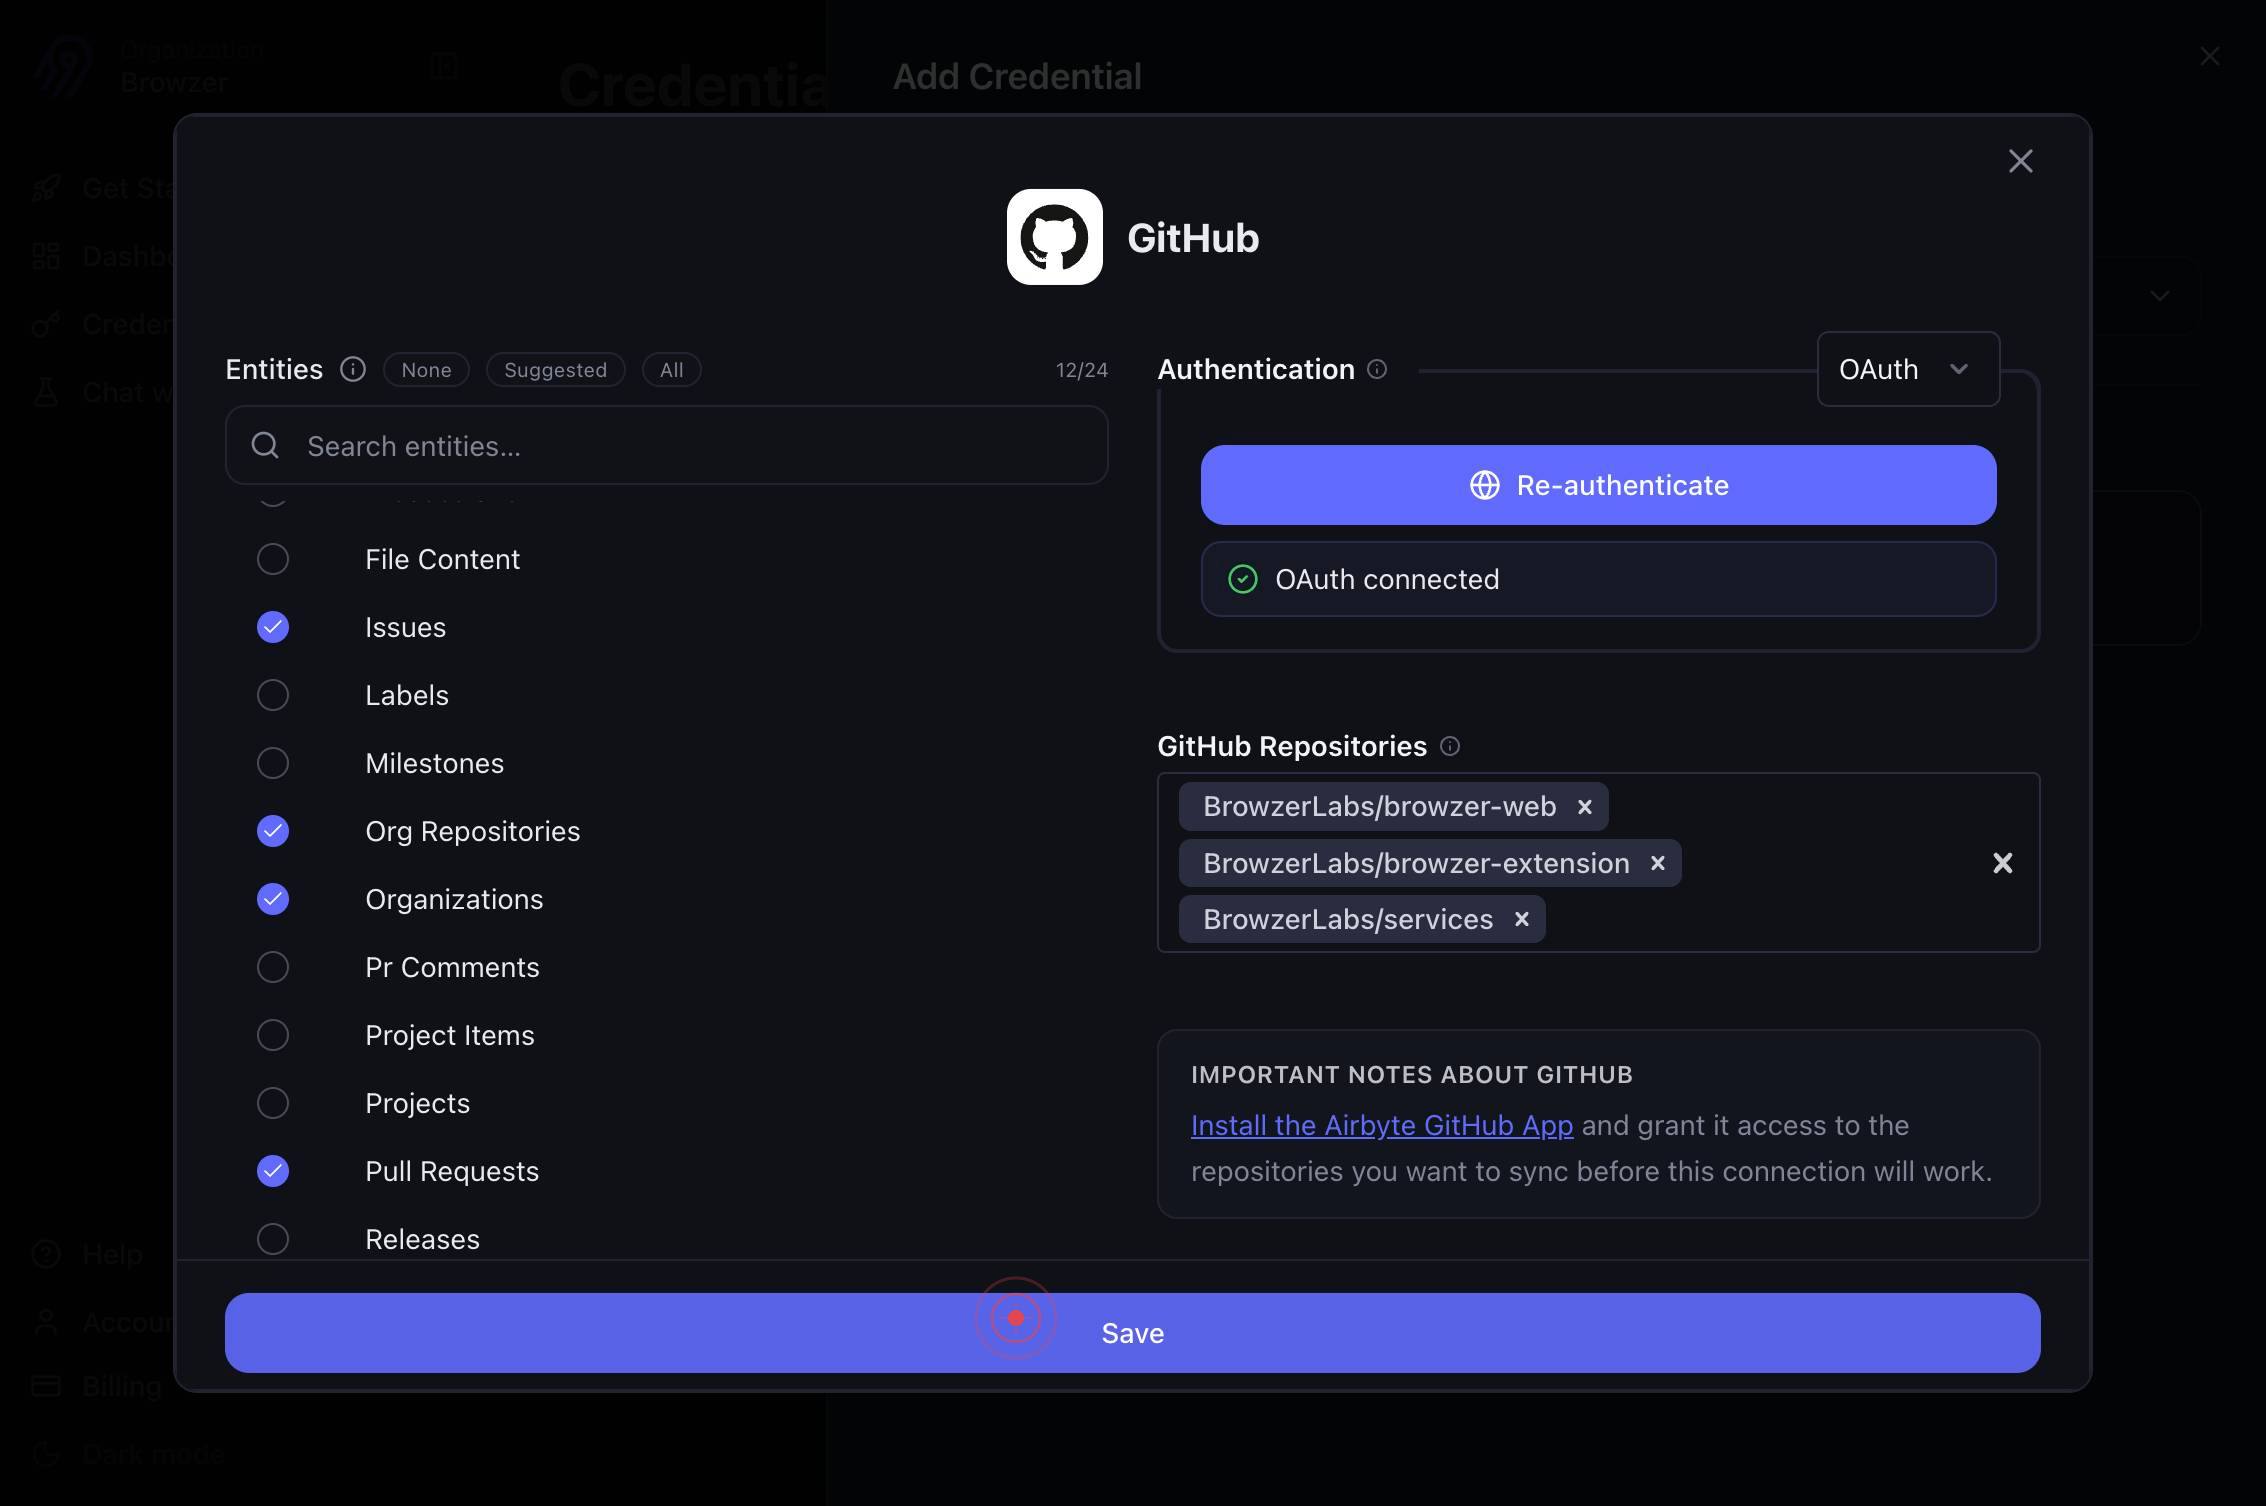
SaveClick the 'Save' button to finalize and store your GitHub connector credential configuration. This saves your authentication token and repository selections for future use.
Confirm it worked
- 1After saving, the GitHub connector credential appears in the Credentials list on app.airbyte.ai with a success status
- 2You can create a new source connection using the saved GitHub credential without re-authenticating
- 3The configured repositories are selectable in subsequent connection setup steps
- 4Commits are flagged as included in the connector settings if you enabled the 'Include Commits' option
Common issues
Keep reading
Add a Custom Connector
Add a Custom Connector | Prompt Mixer Docs [Skip to main content](#__docusaurus_skipToContent_fallback) On this page # Add a Custom Connector ## Installing a Custom Connector for Prompt Mixer[](#inst
docs.promptmixer.devadd_connector.md at main · BrianMillsJr/hyperswitch
# File: BrianMillsJr/hyperswitch/add_connector.md - Repository: BrianMillsJr/hyperswitch | An open source payments switch written in Rust to make payments fast, reliable and affordable | 0 stars - Br
github.comadd_connector.md at main · sameemcodes/hyperswitch
# File: sameemcodes/hyperswitch/add_connector.md - Repository: sameemcodes/hyperswitch | An open source payments switch written in Rust to make payments fast, reliable and affordable | 0 stars - Bran
github.com