Guide
Add Connector - Slack
Overview
Airbyte is a data integration platform that enables AI agents to read from and write to your business applications in real-time. Adding a Slack connector allows your Airbyte-powered agents to interact with Slack—sending messages, updating channels, and performing other write operations. This authentication workflow establishes a secure, permission-scoped connection between Airbyte and your Slack workspace, ensuring your agent has the correct access level while maintaining security best practices.
Before you begin
- An active Airbyte account with admin or developer access (you must be logged in to app.airbyte.ai)
- A Slack workspace admin or app manager account with permission to authorize third-party applications
- Access to your Slack workspace's OAuth authorization screen (you will be redirected to Slack during this process)
- Clarity on which Slack workspace you want to connect if you manage multiple workspaces
Step by step
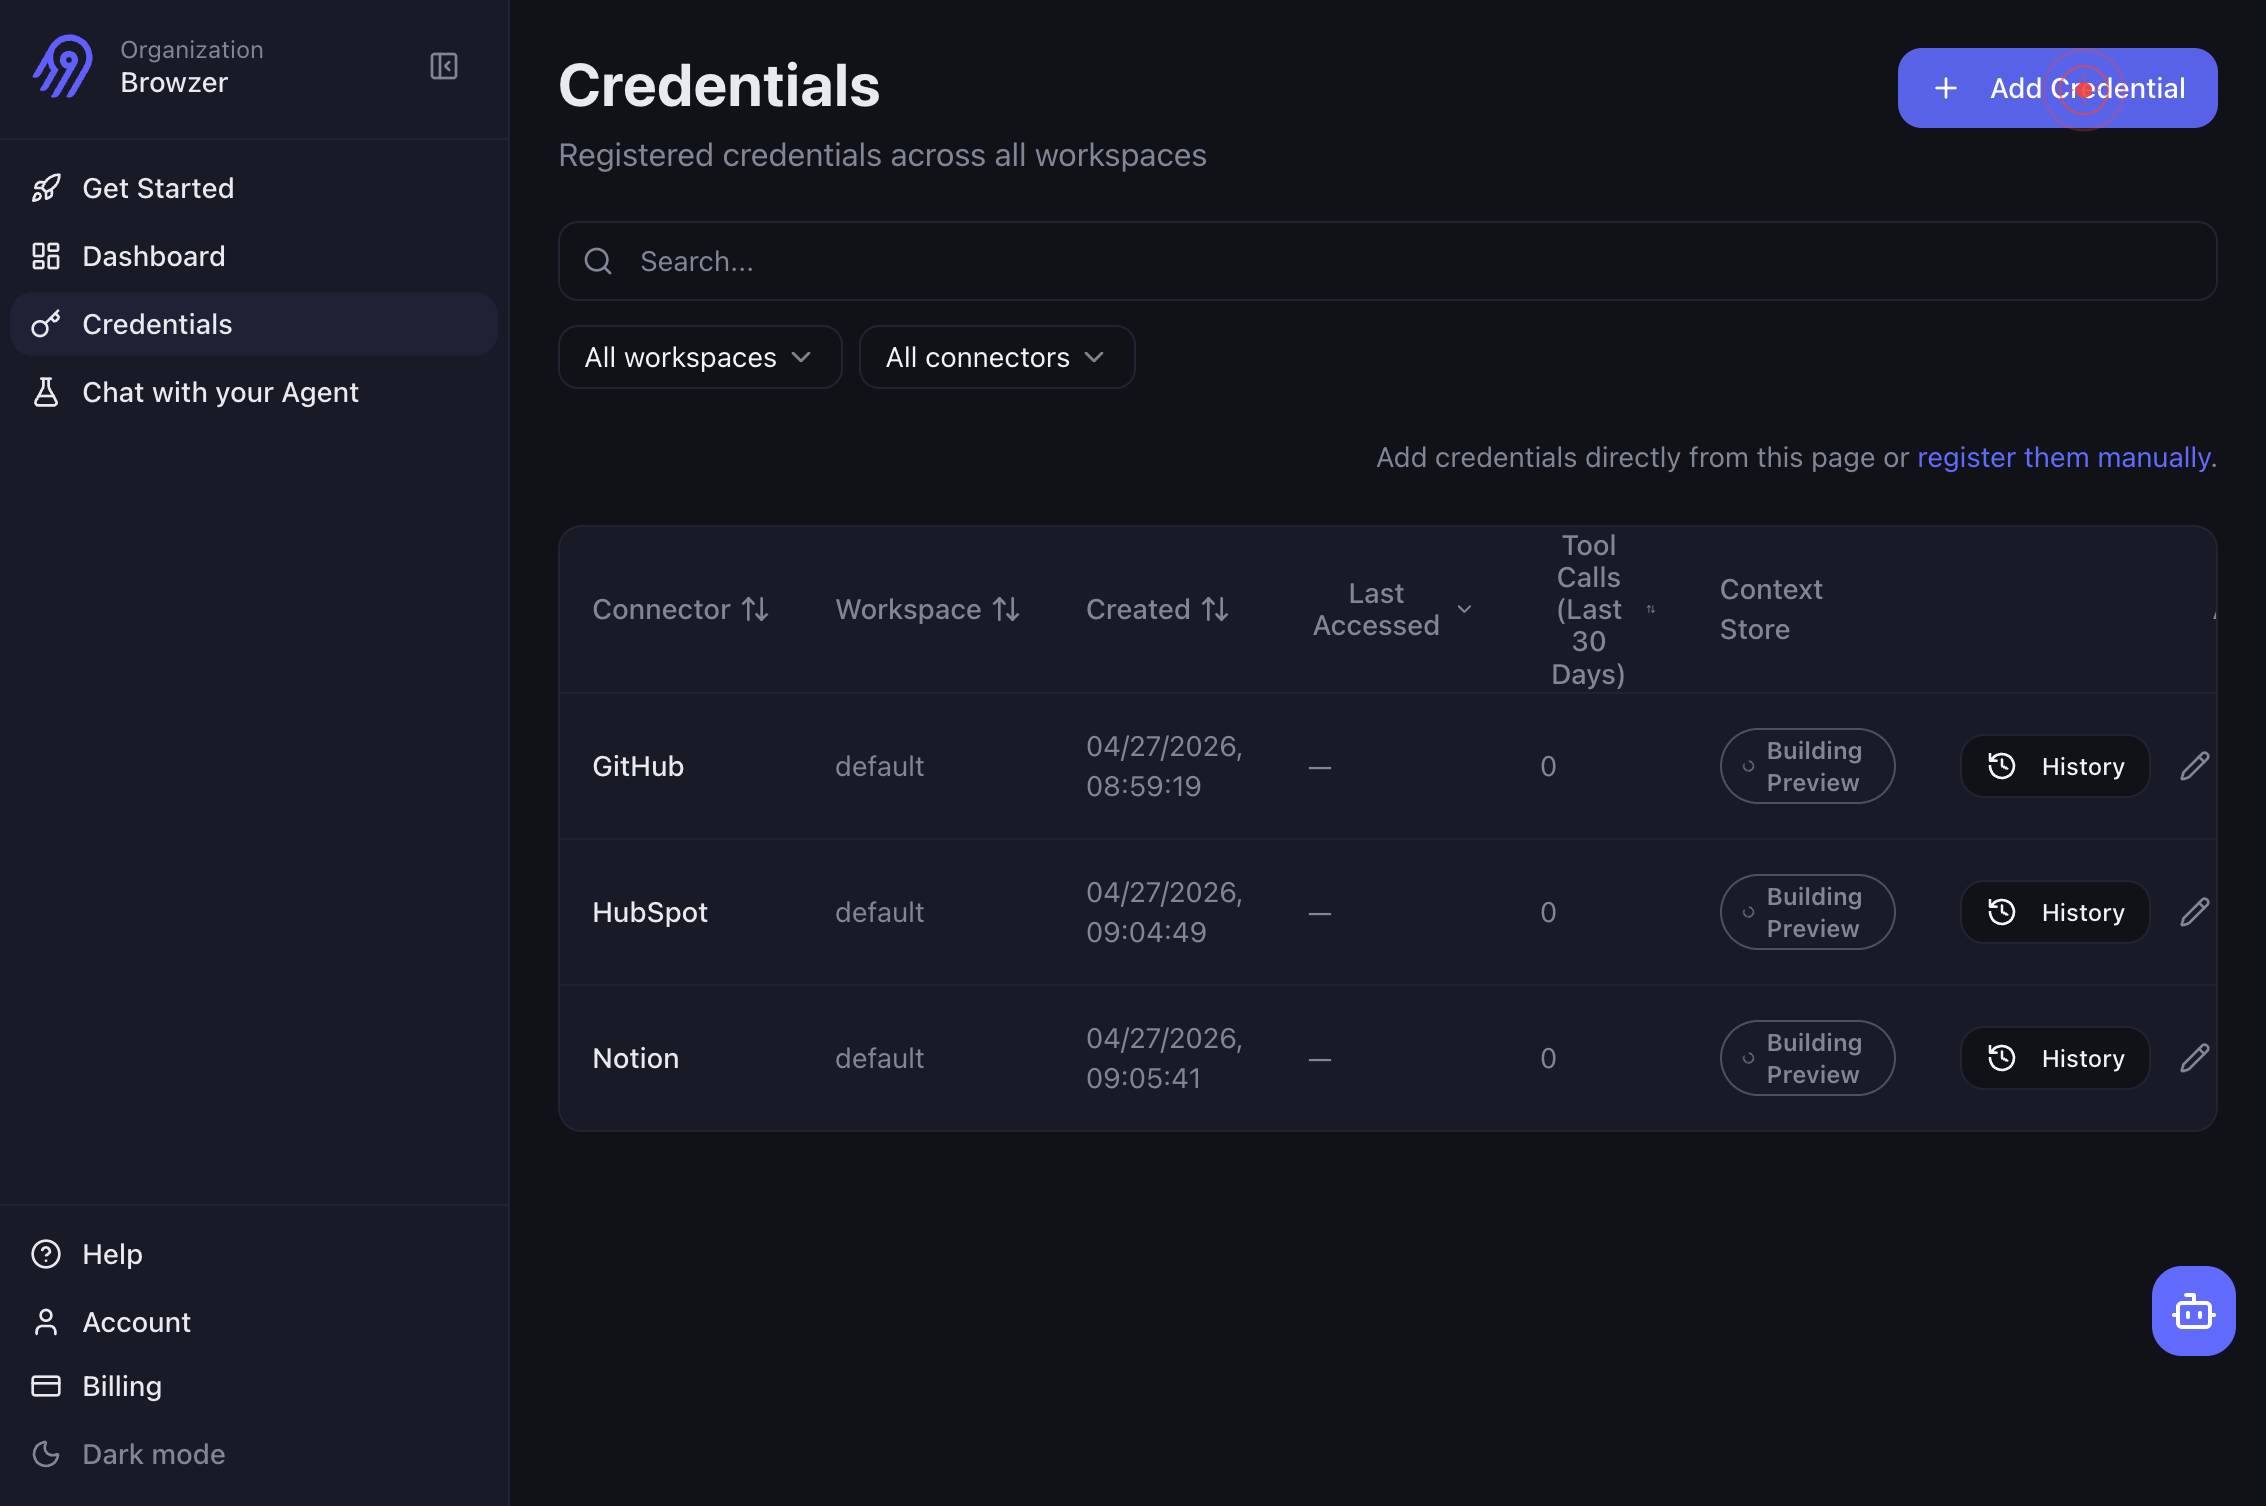
CredentialsNavigate to the Credentials section of Airbyte by clicking the 'Credentials' link in the main navigation. This is where you manage all authenticated data source and destination connections.
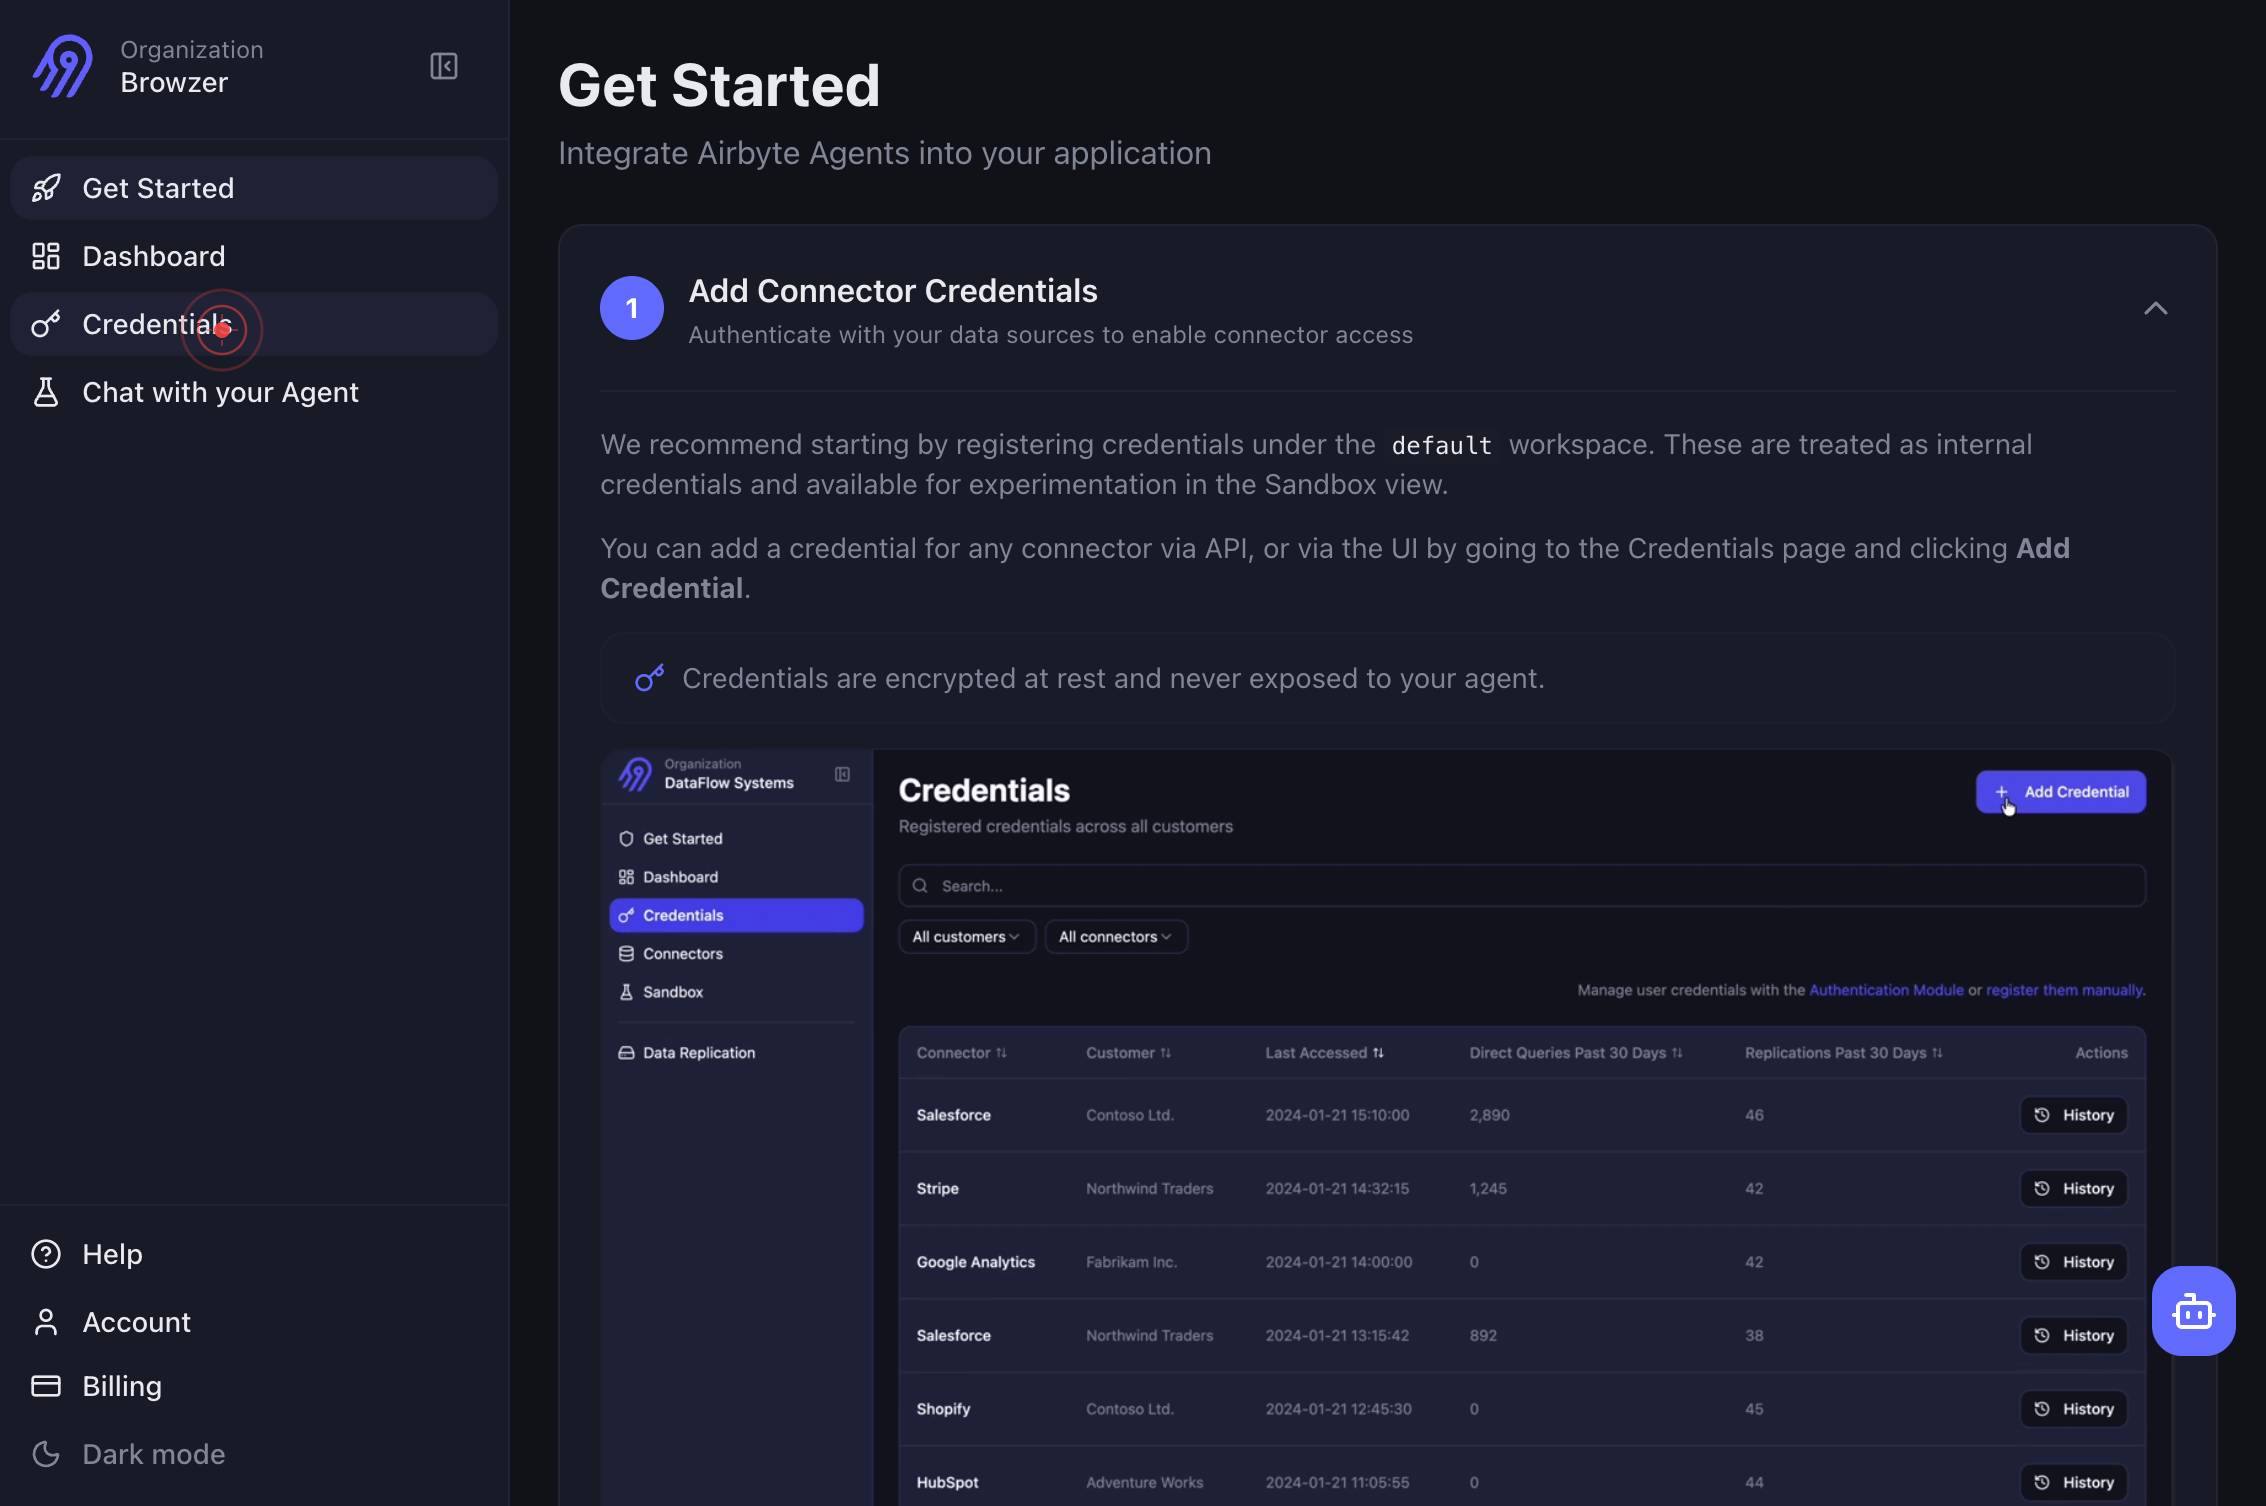
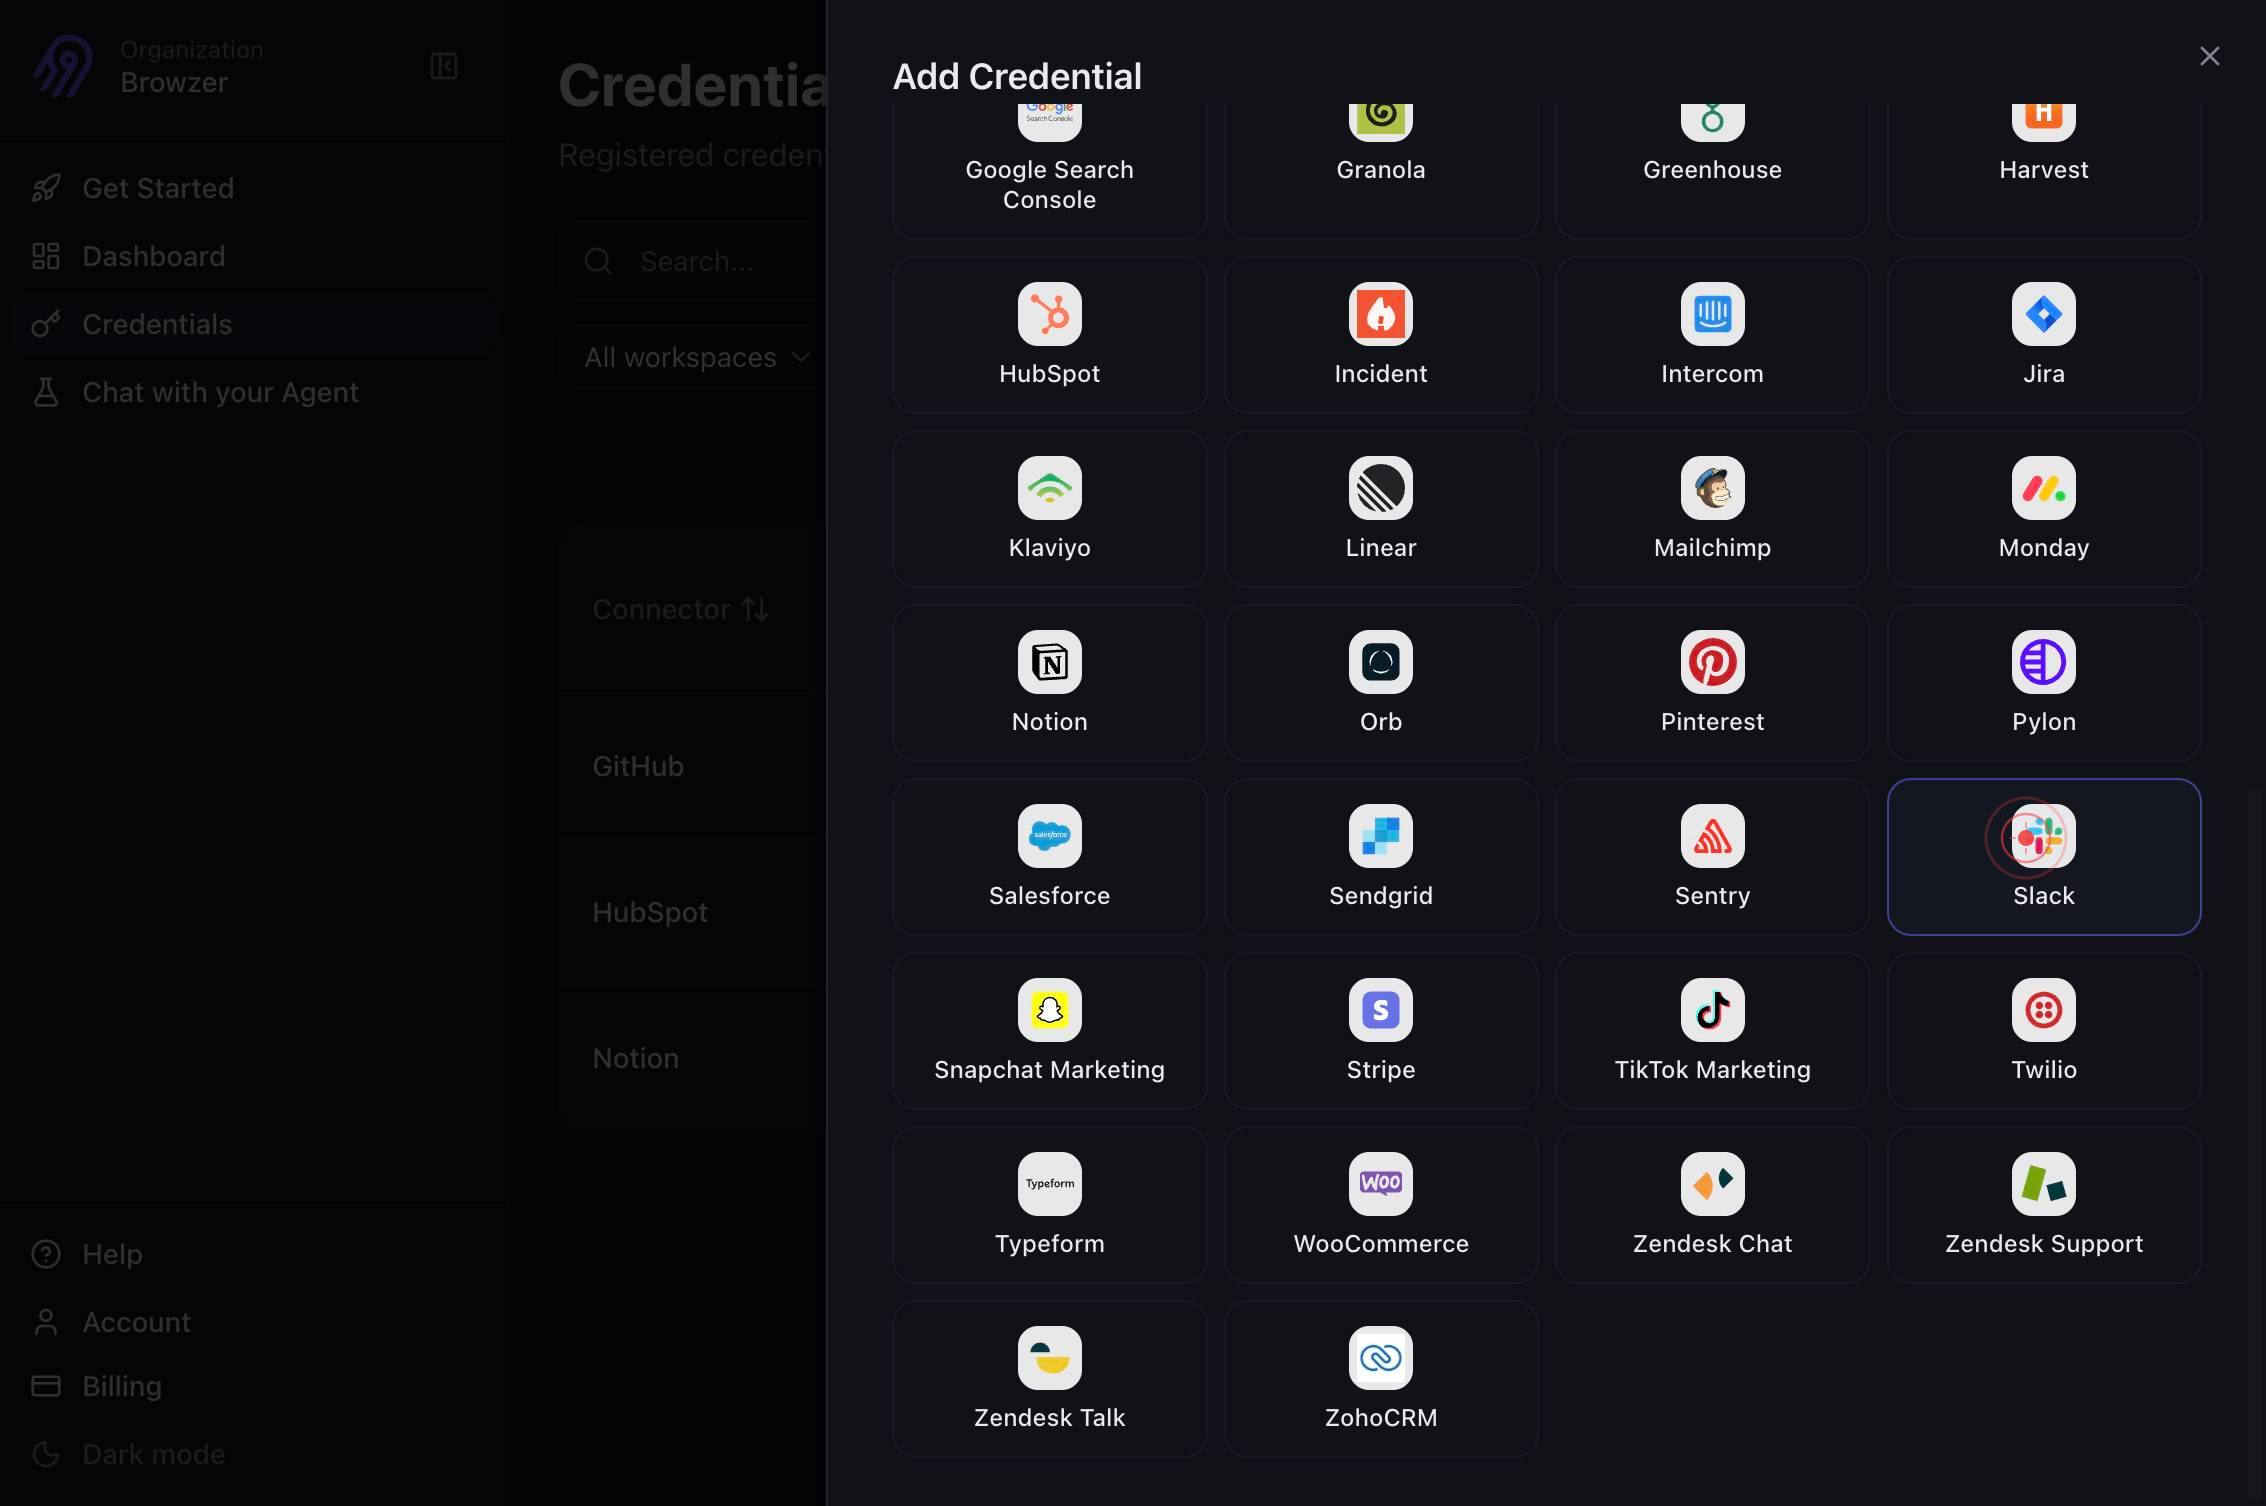
Add CredentialClick the 'Add Credential' button to begin adding a new connector. This opens a list of available data sources and destinations you can authenticate with Airbyte.
SlackSelect 'Slack' from the list of available connectors. This tells Airbyte that you want to add a Slack workspace as a credential.
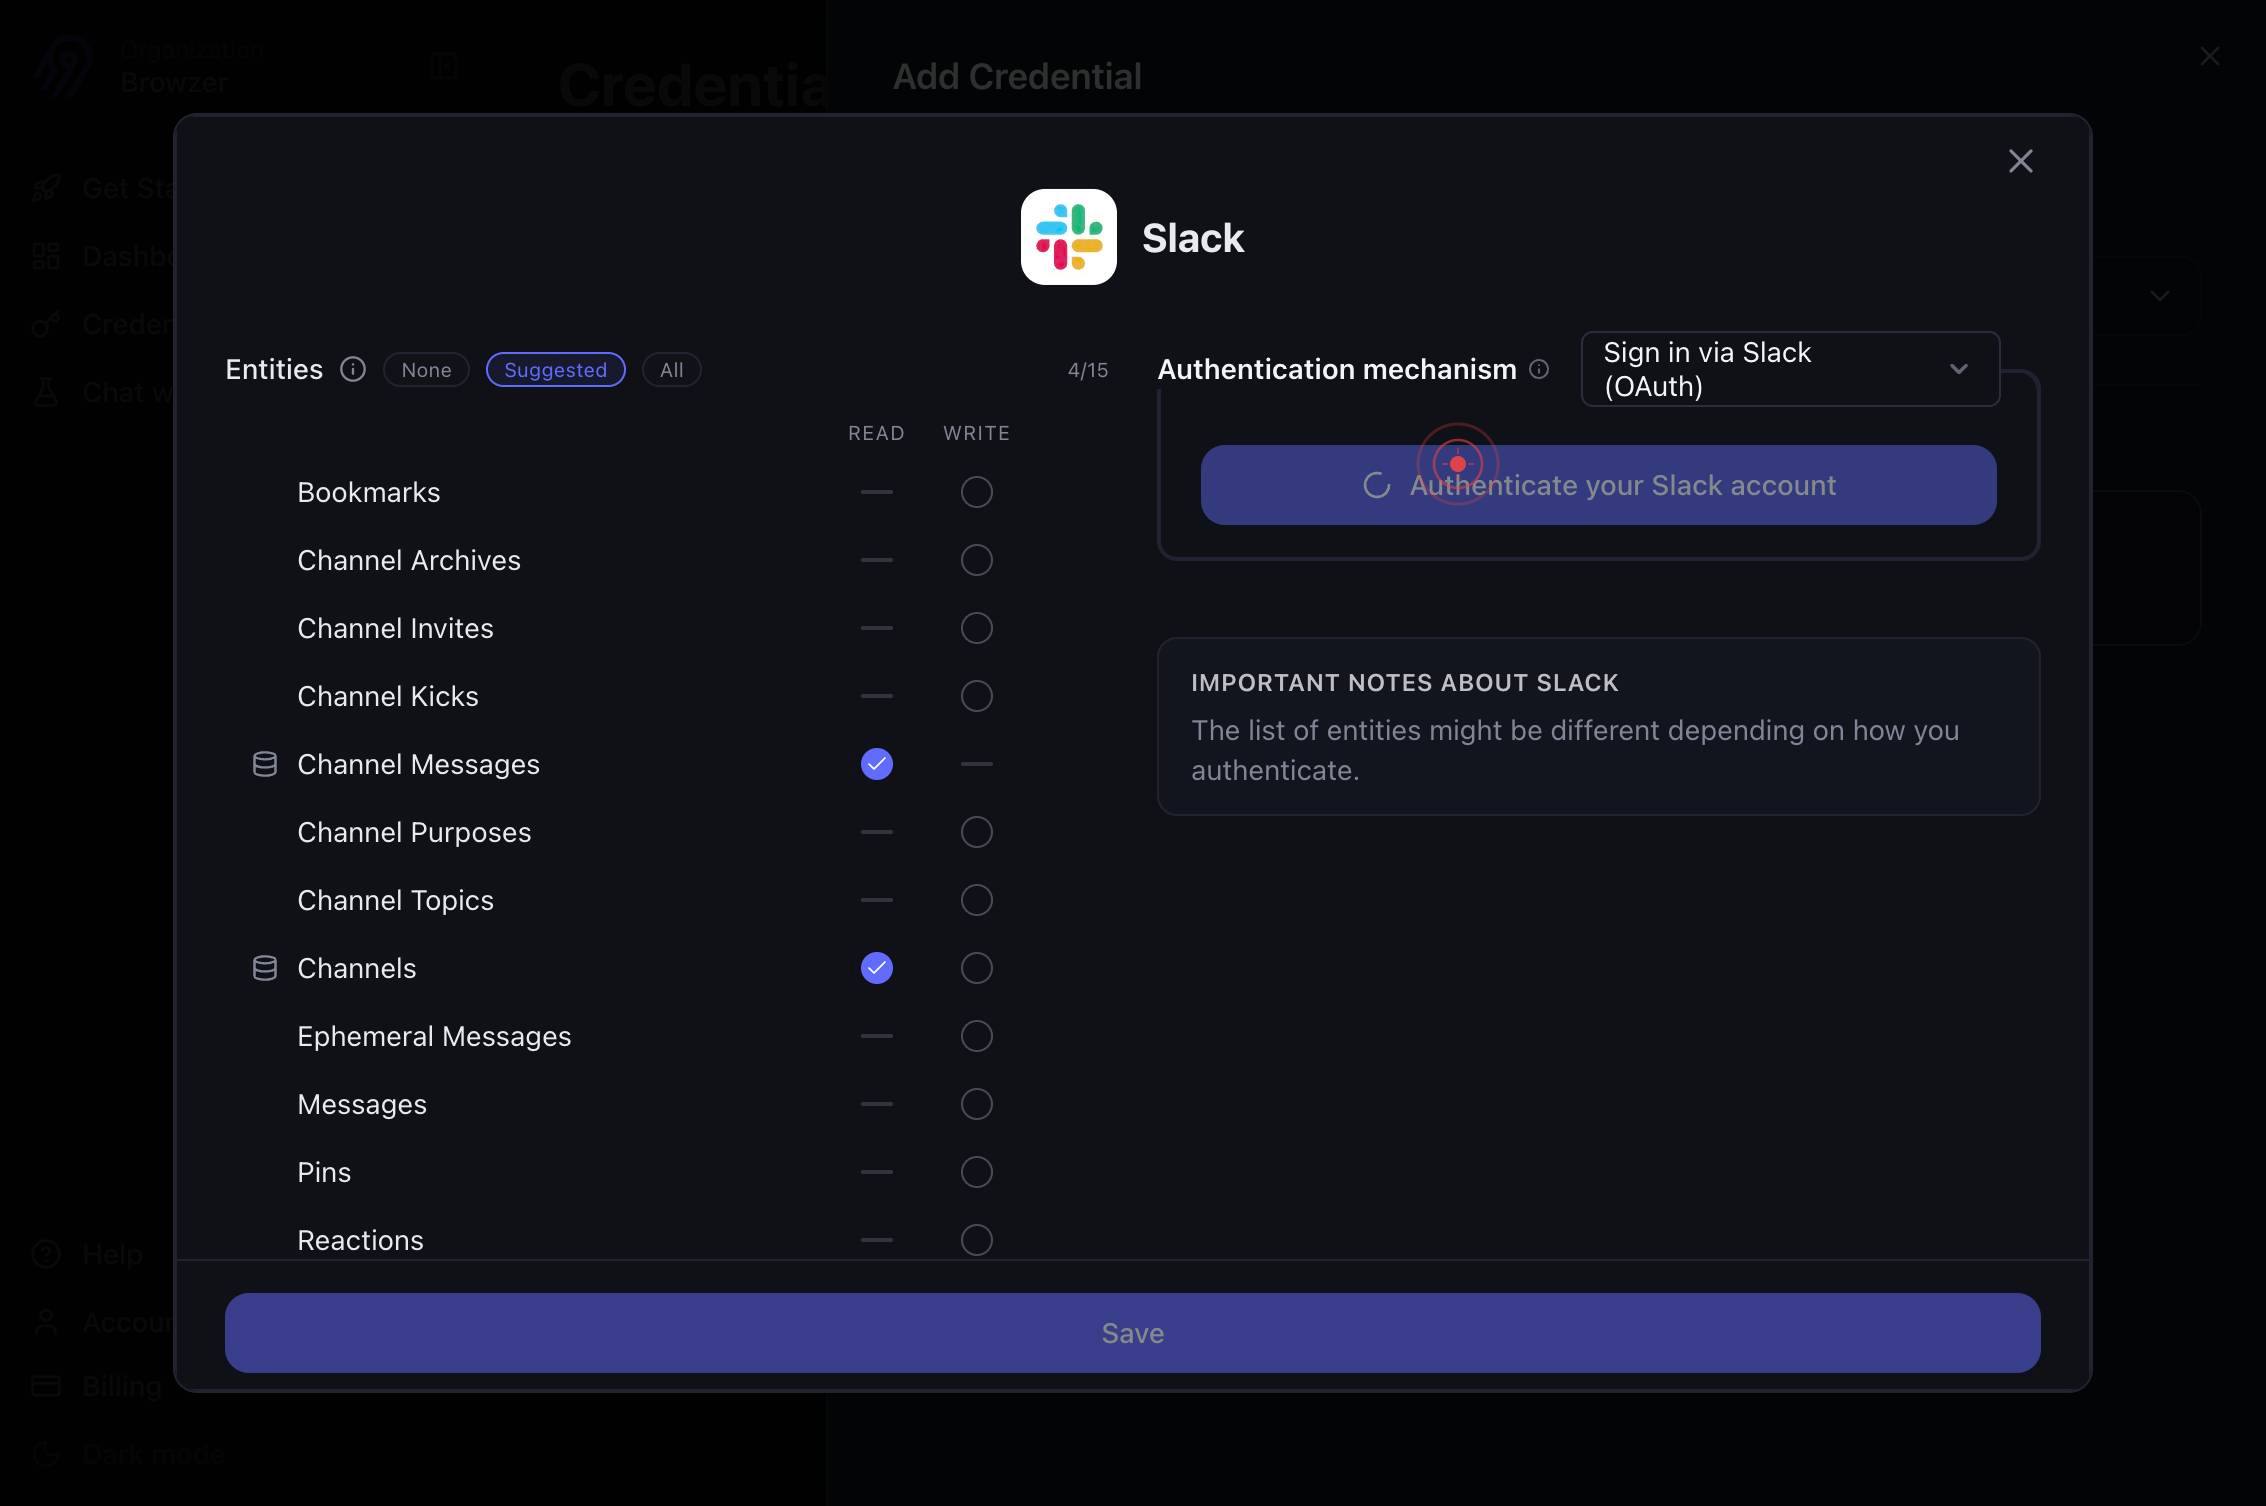
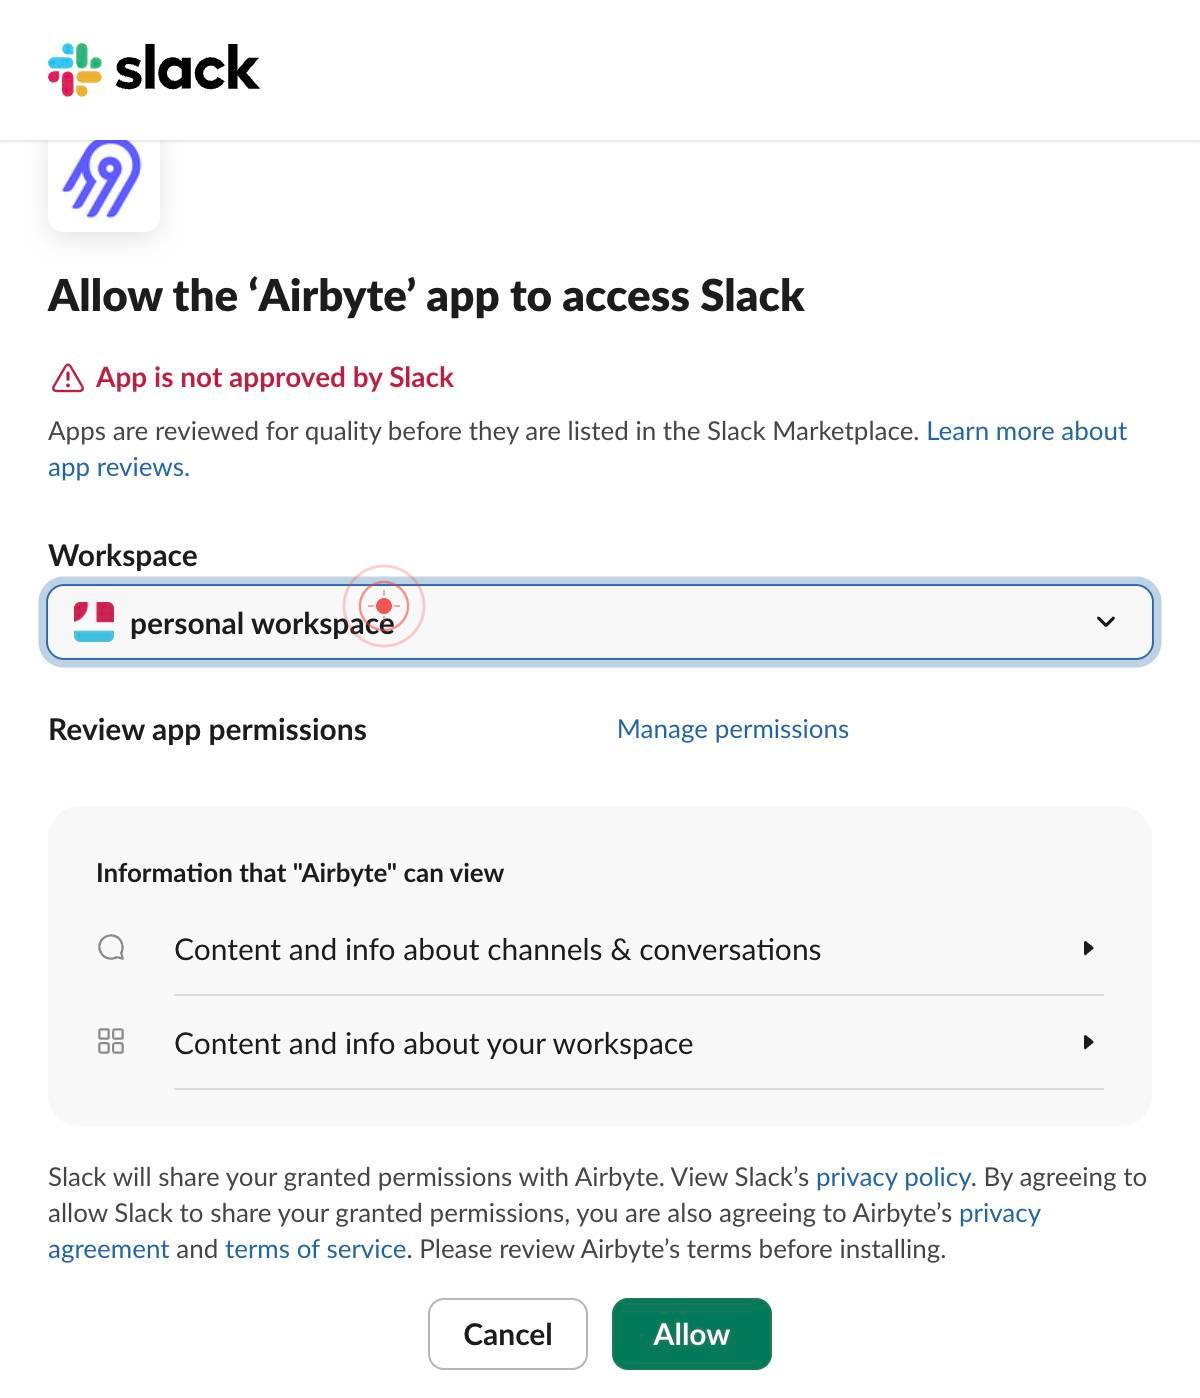
Authenticate your Slack accountClick the 'Authenticate your Slack account' button to start the OAuth authorization flow. This will redirect you to Slack's authorization screen where you grant Airbyte permission to access your workspace.
Your browser will automatically switch to a new tab or window that opens the Slack authorization page. This is part of the standard OAuth flow and happens automatically.
You will be taken to slack.com, the Slack login and authorization portal. If you are not already logged in, enter your Slack credentials here.
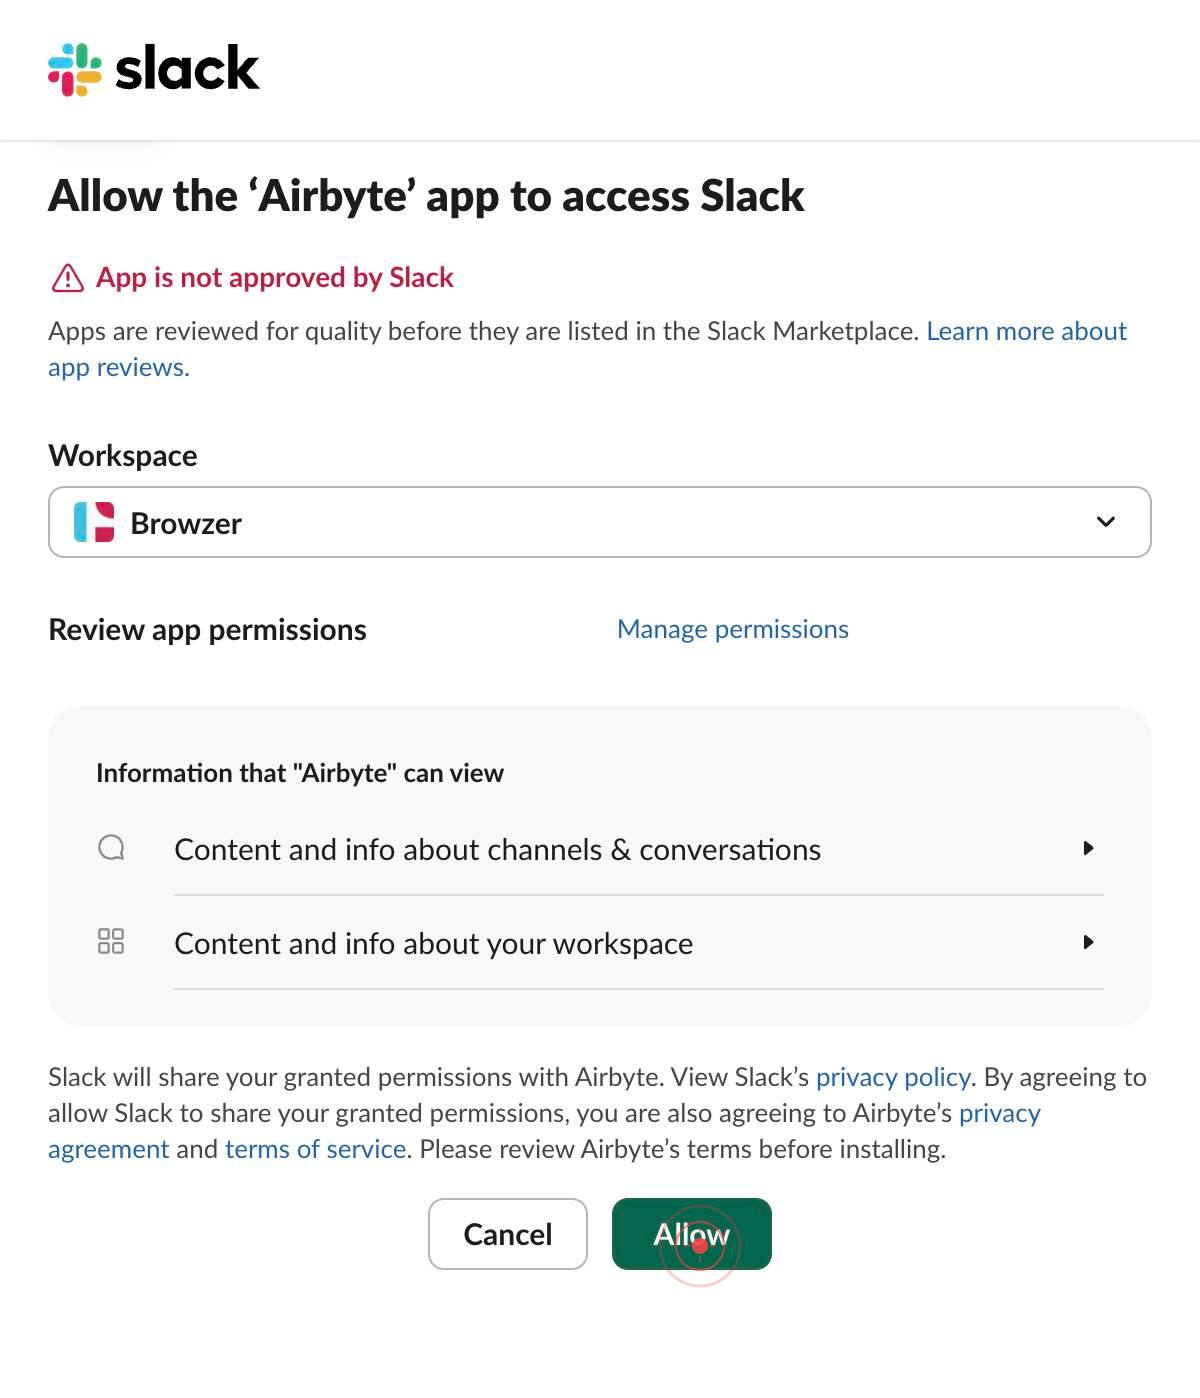
You will be redirected to your Slack workspace domain (e.g., browzerlabs.slack.com). This confirms you are authorizing the correct workspace.
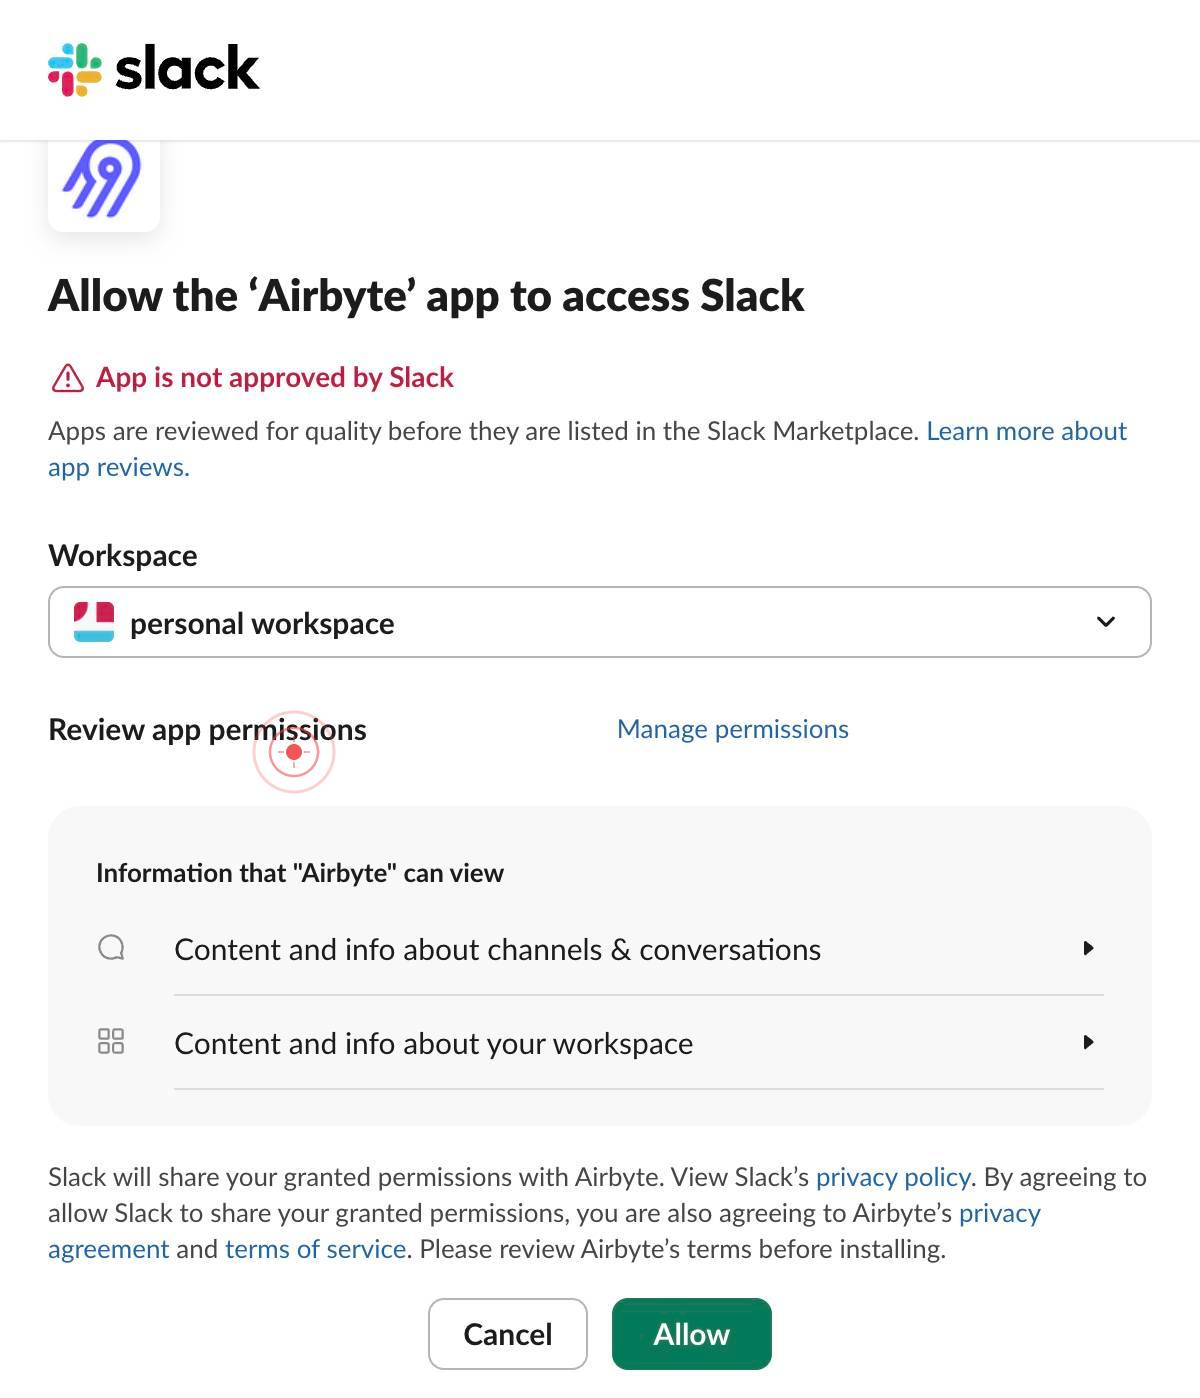
Select a teamIf you manage multiple Slack workspaces, click the 'Select a team' dropdown to choose the workspace you want to connect to Airbyte. Select the appropriate workspace from the list.
BrowzerFrom the dropdown menu, click on the workspace name (e.g., 'Browzer') that you want to authorize. This confirms your selection and prepares the authorization page for that specific workspace.
You will be navigated to the authorization page for your selected workspace (e.g., browzerlabs.slack.com). This is where you will review and approve Airbyte's requested permissions.
AllowClick the 'Allow' button to grant Airbyte permission to access and interact with your Slack workspace. This authorizes the OAuth token that Airbyte will use for all future Slack operations.
After authorization, your browser will automatically return to app.airbyte.ai with your OAuth token securely saved. You should now see the credentials configuration screen.
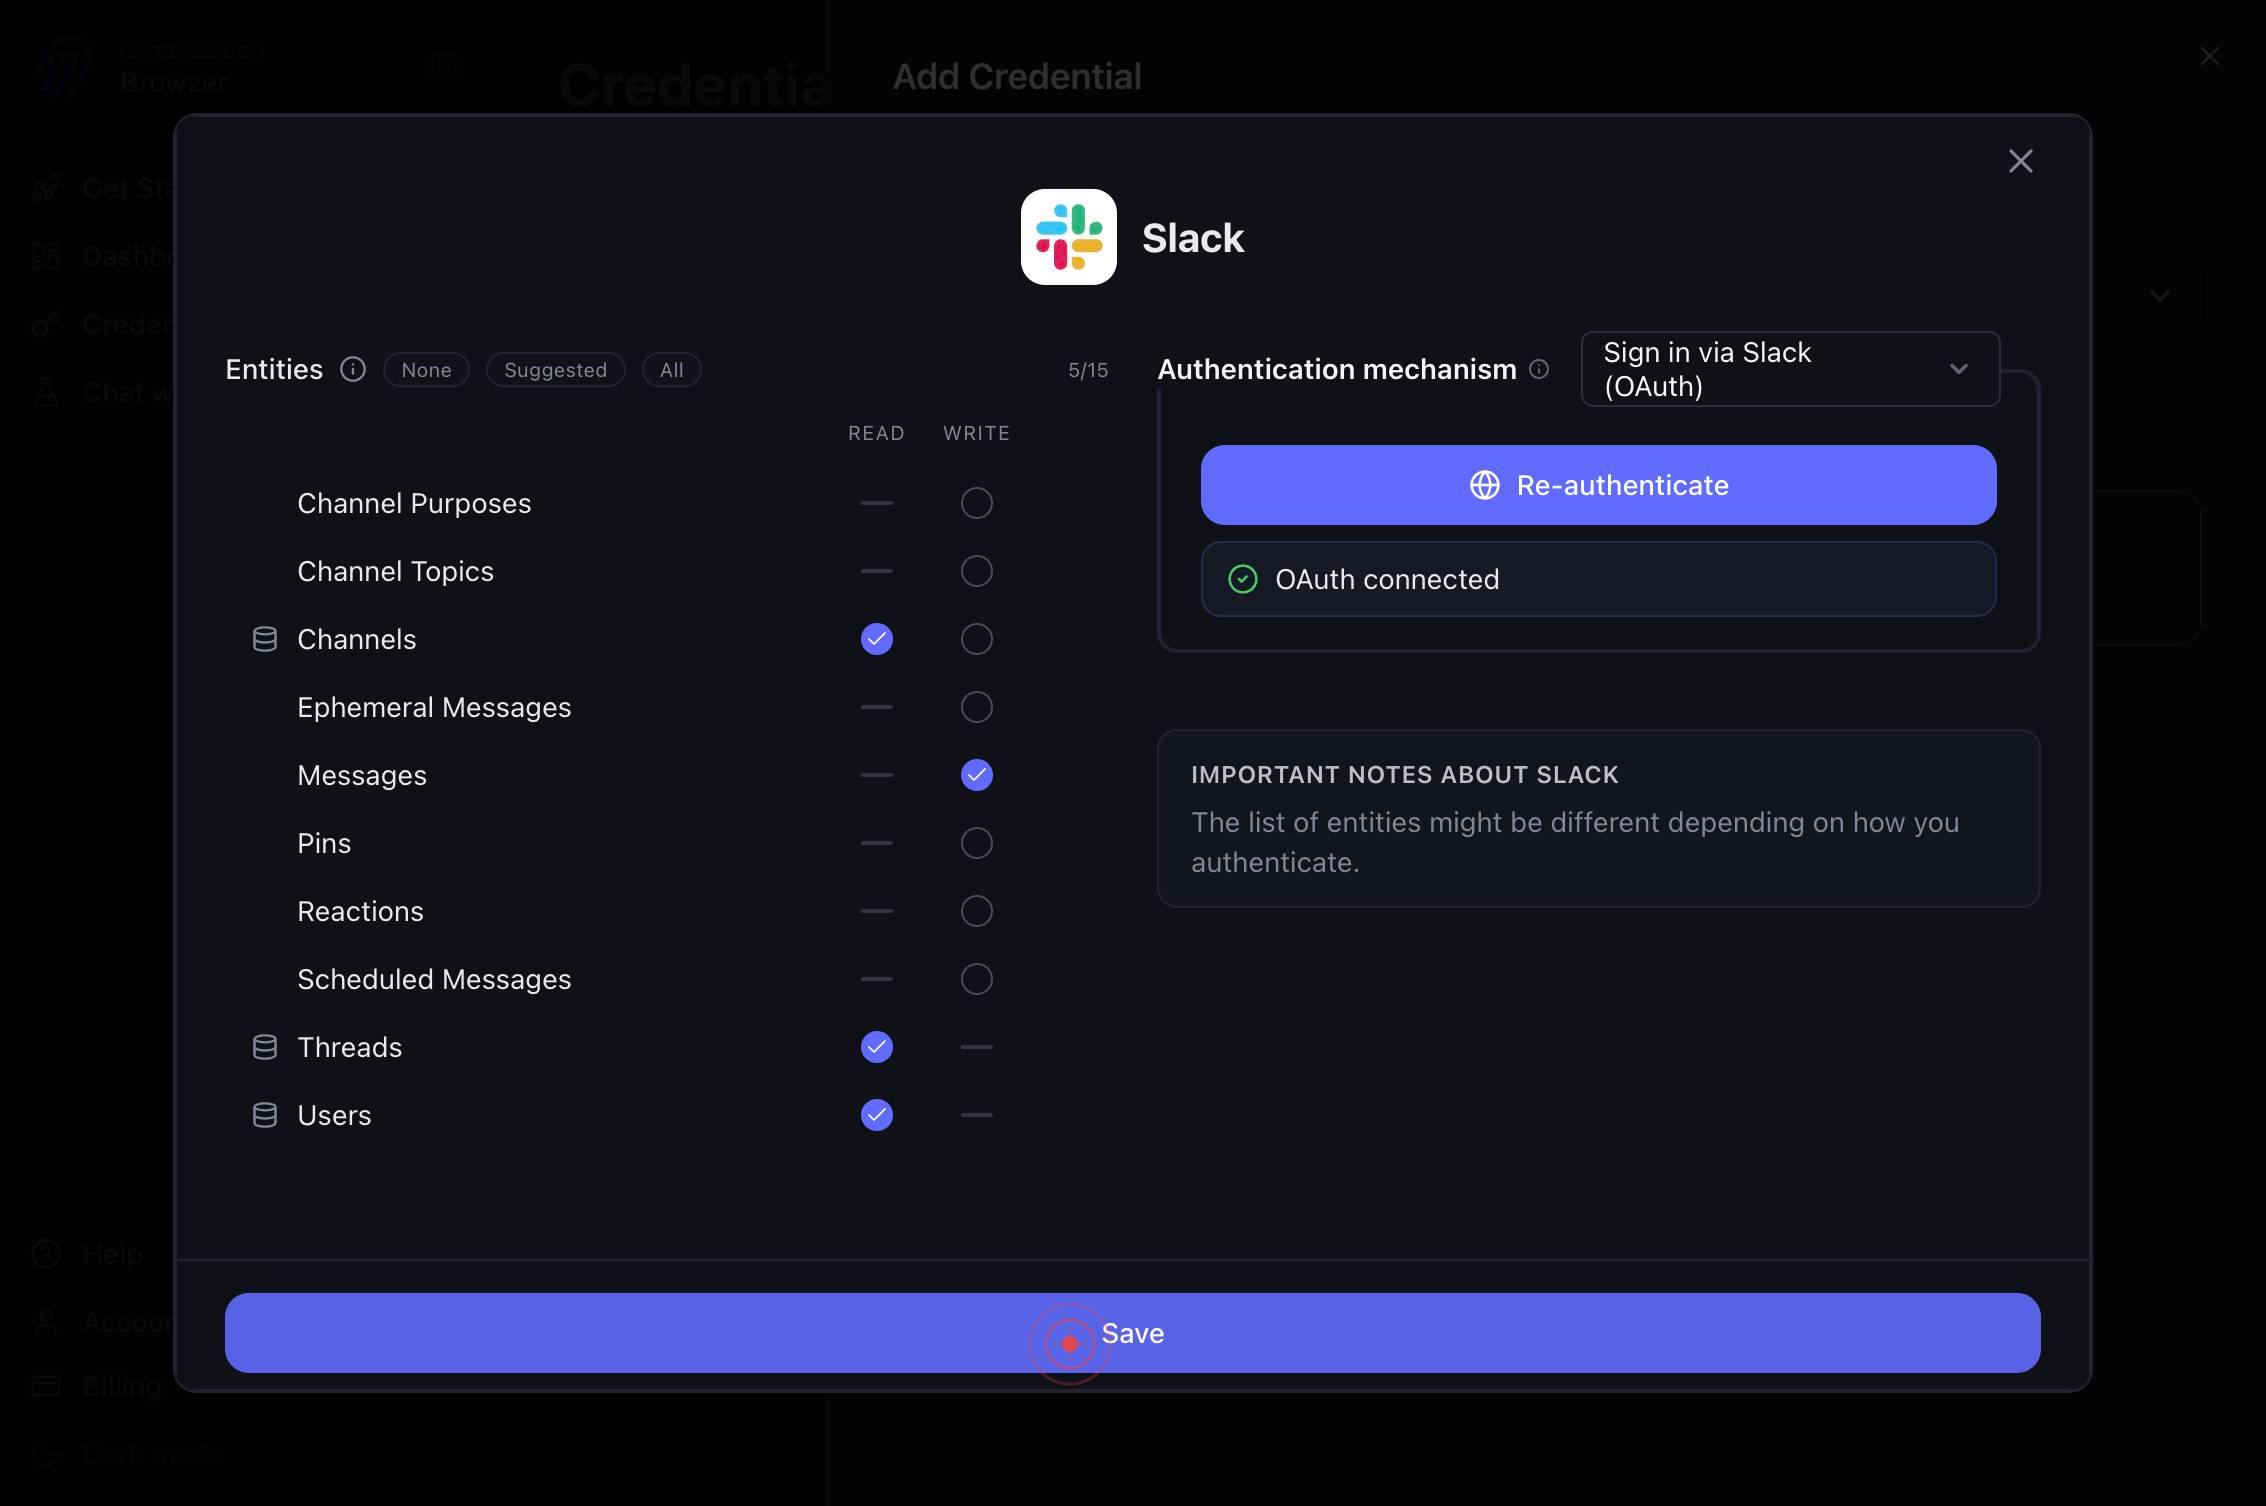
genericClick in the main content area of the credentials configuration form to ensure it is active and ready for input. This prepares the form for the next step.

Write access for MessagesEnable the 'Write access for Messages' checkbox to grant your Airbyte agents the ability to send and modify messages in Slack. This permission is required if you plan to use Slack as a destination for agent-generated content.
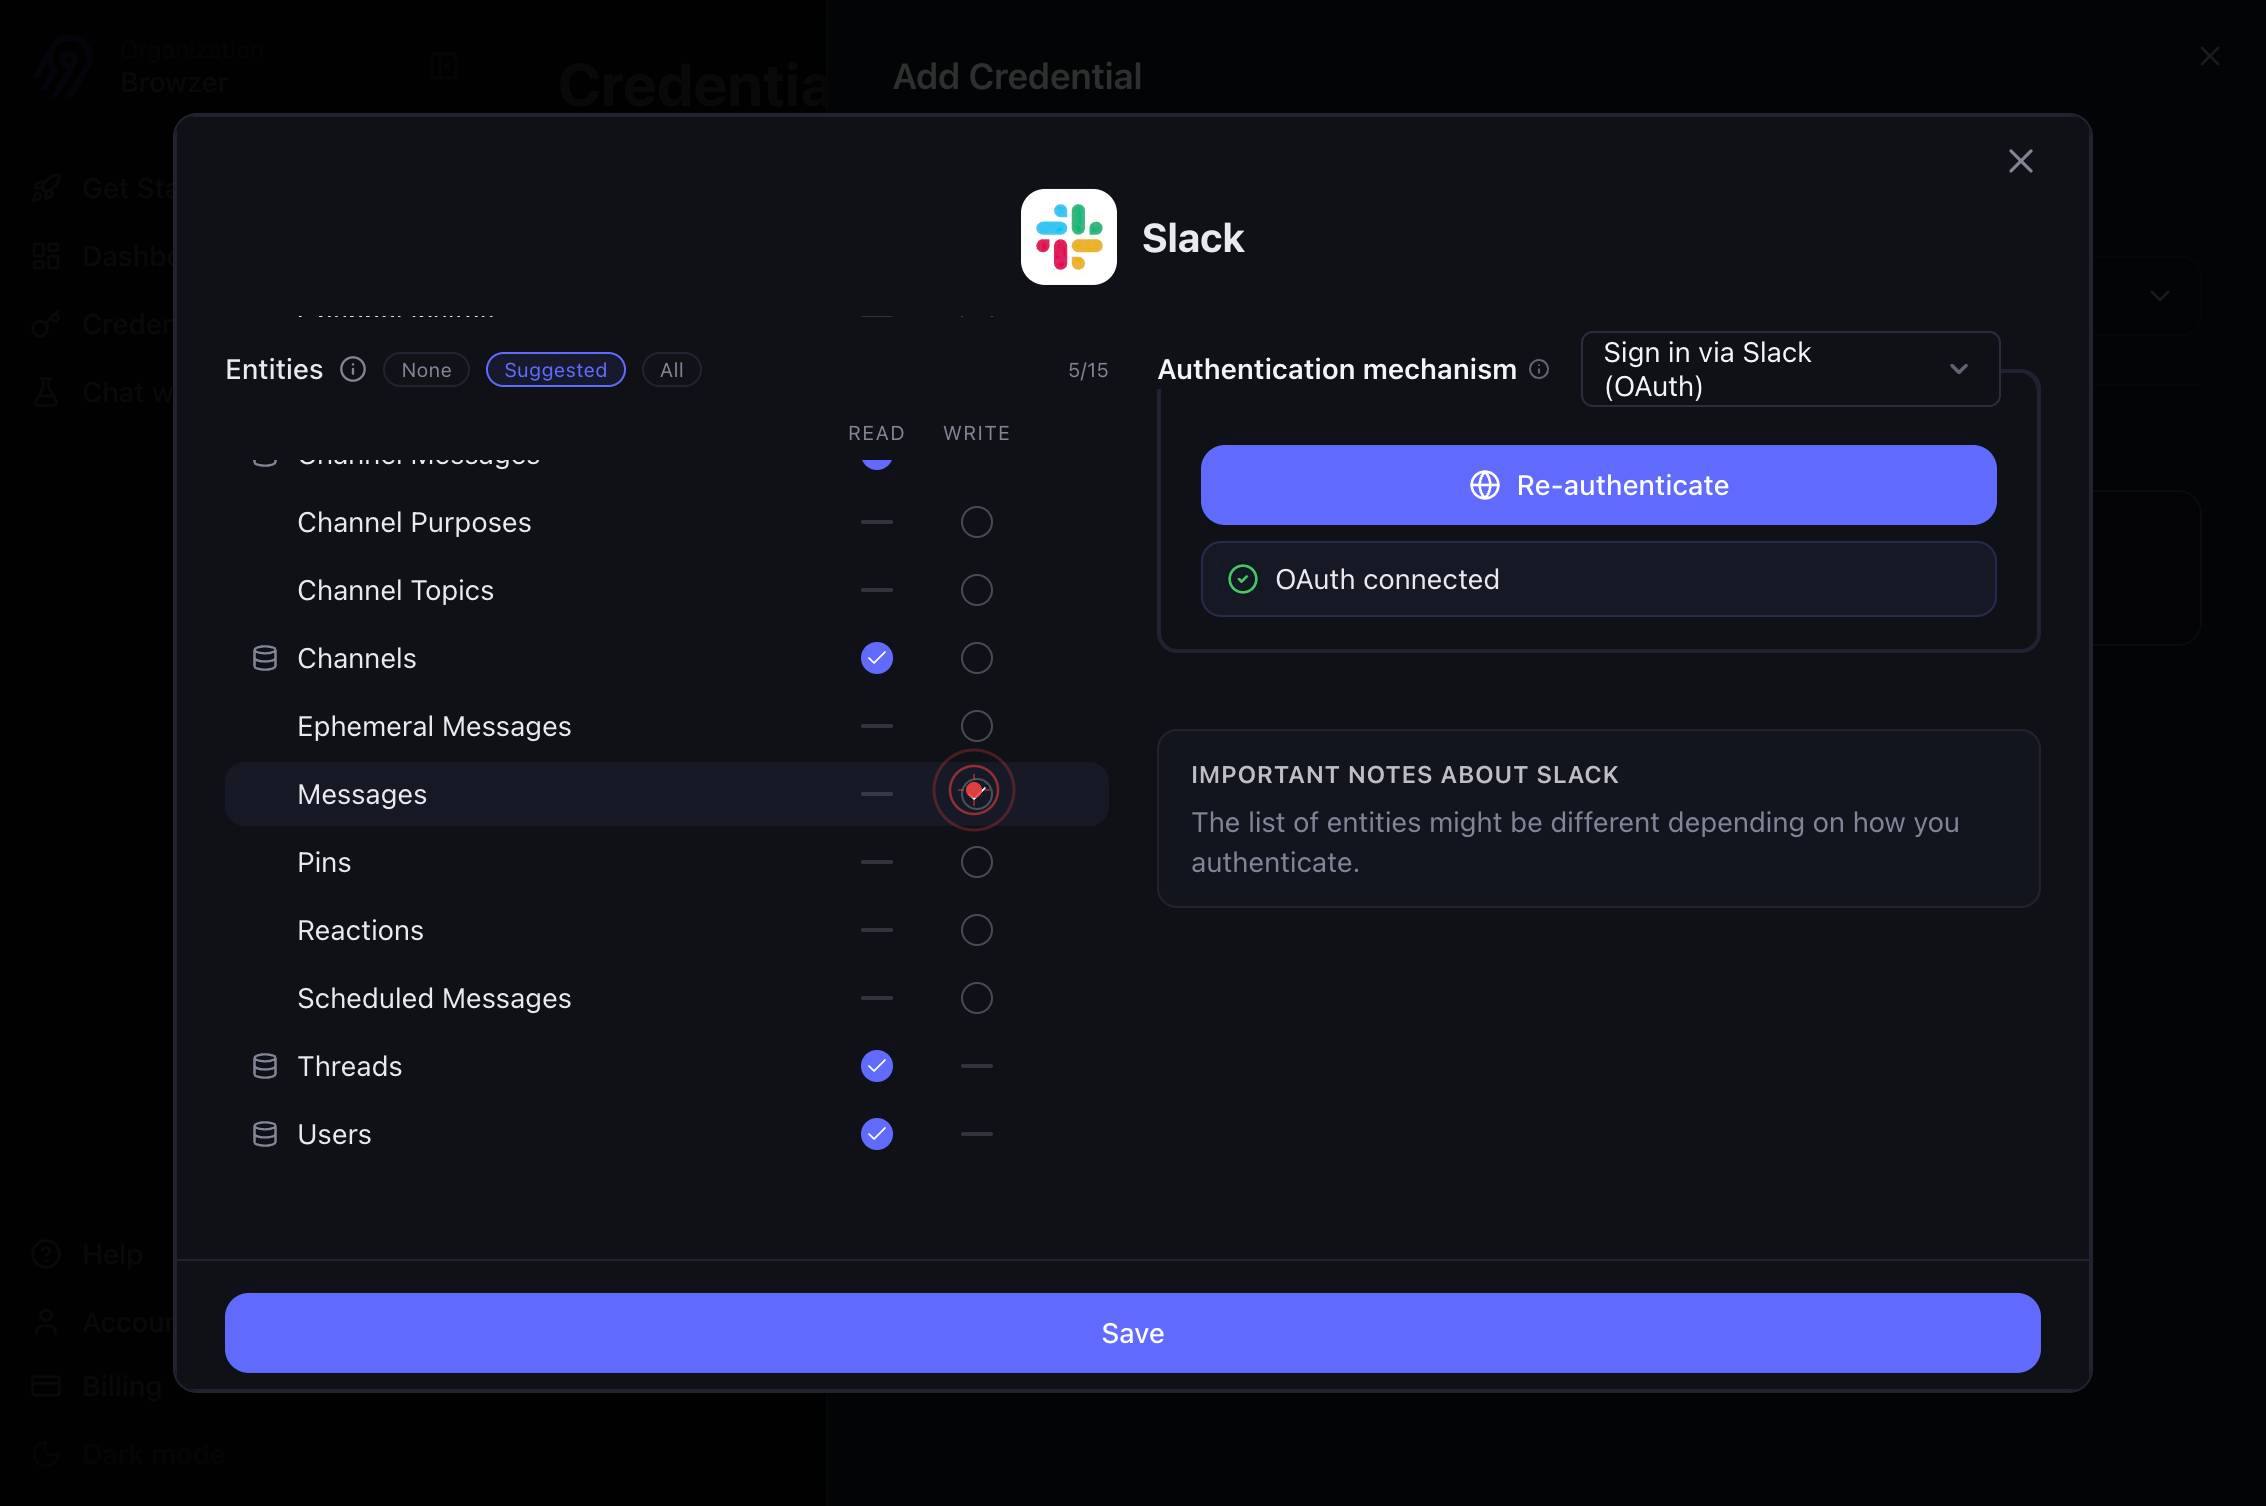
SaveClick the 'Save' button to finalize and store your Slack credential in Airbyte. This completes the authentication process and makes Slack available as a destination for your agent workflows.
Confirm it worked
- 1After saving, you should see the Slack credential listed in the Credentials section of Airbyte with a status of 'Connected' or 'Active'
- 2The credential card should display 'Write access for Messages' as enabled (checkbox checked)
- 3When creating a new Airbyte connection or agent, the Slack connector should appear as an available destination option
- 4No error messages or permission warnings appear on the credentials page
Common issues
Keep reading
Build a workflow: Authenticate third-party accounts to use connector steps | Slack
Build a workflow: Authenticate third-party accounts to use connector steps | Slack Articles and guides NextPrevious actions,activity,access logs,accessibility,add,add an app,add members,add to Slac
slack.comSlack | Integration Connectors | Google Cloud
Slack | Integration Connectors | Google Cloud[Skip to main content](#main-content) [![Google Cloud](https://www.gstatic.com/devrel-devsite/prod/v18af98722840dca56faefae94257d94871f07ae68e6f6225c2963b4
cloud.google.comManage access to Slack Workflow Builder connectors | Slack
Manage access to Slack Workflow Builder connectors | Slack Articles and guides NextPrevious Actions,activity,access logs,accessibility,add,add an app,Add members,Add to Slack,administrators,all pas
slack.com