Guide
Create API Key
Overview
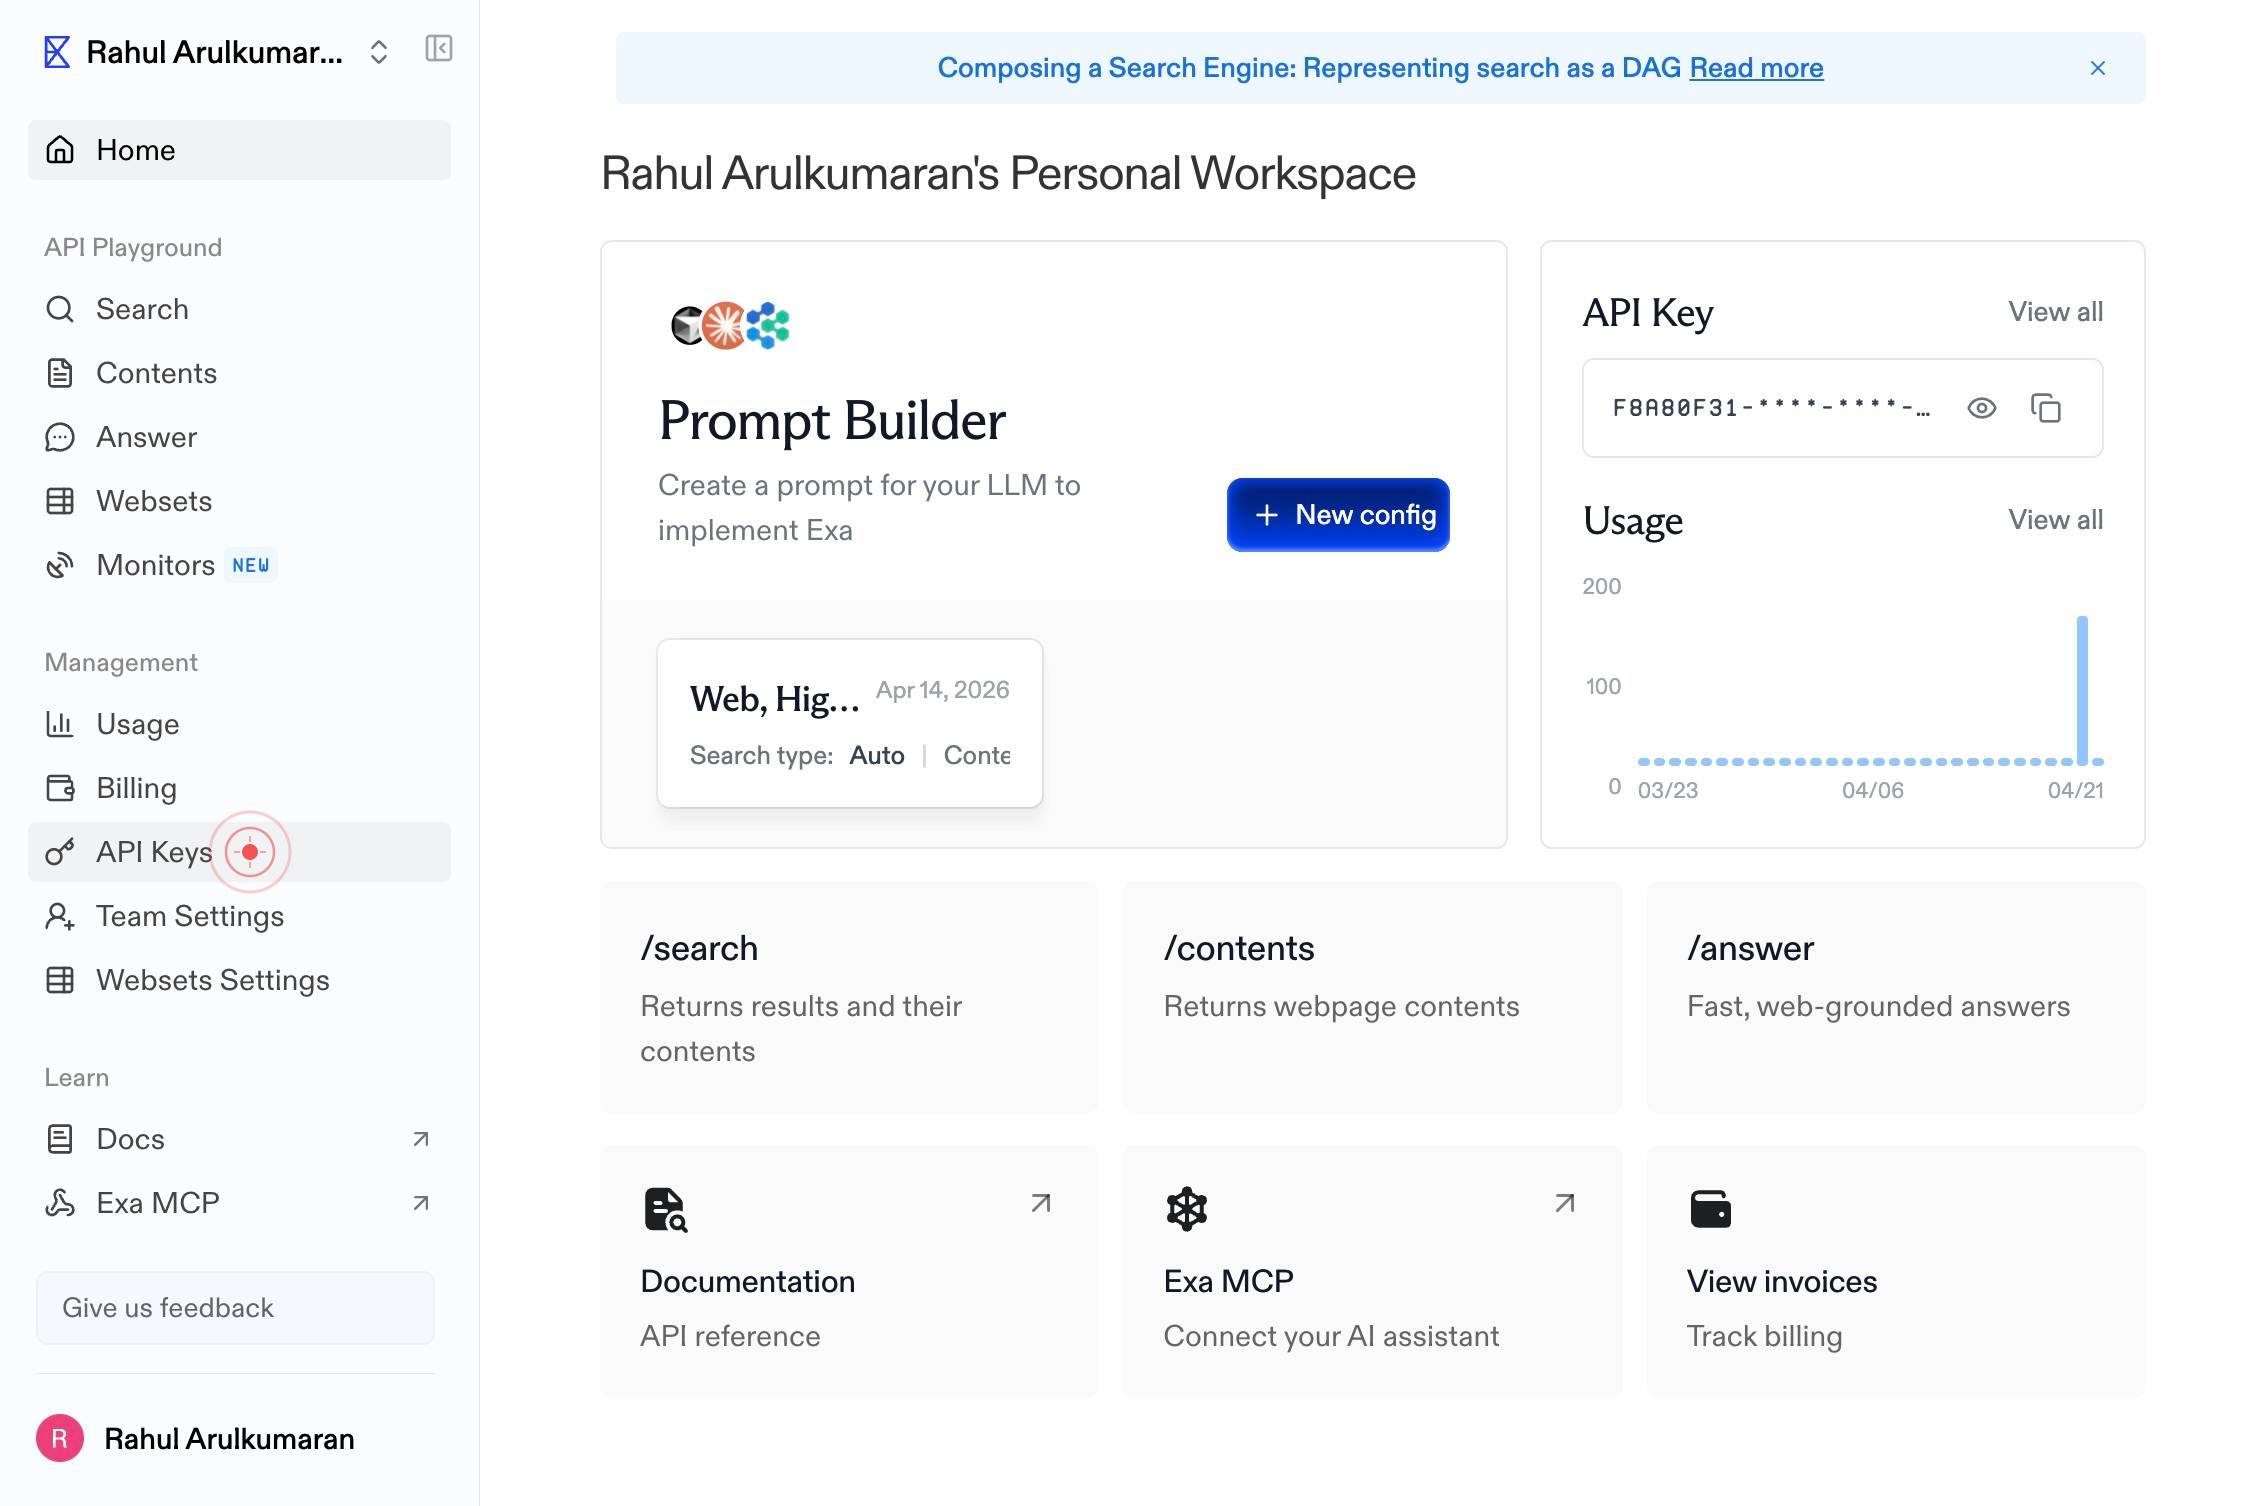
Exa provides live web data integration for AI applications through its API. To use Exa's search and data-fetching capabilities in your application, you must first generate an API key from your dashboard account. This key serves as your authentication credential for all API requests and can be scoped to specific projects for better organization and security. Creating an API key is a one-time setup step that you'll complete before making your first API call.
Before you begin
- An active Exa account with access to dashboard.exa.ai
- Dashboard login completed (you should see the main dashboard homepage)
- A chosen name or identifier for your project (e.g., 'production-search', 'ai-assistant-v1')
Step by step
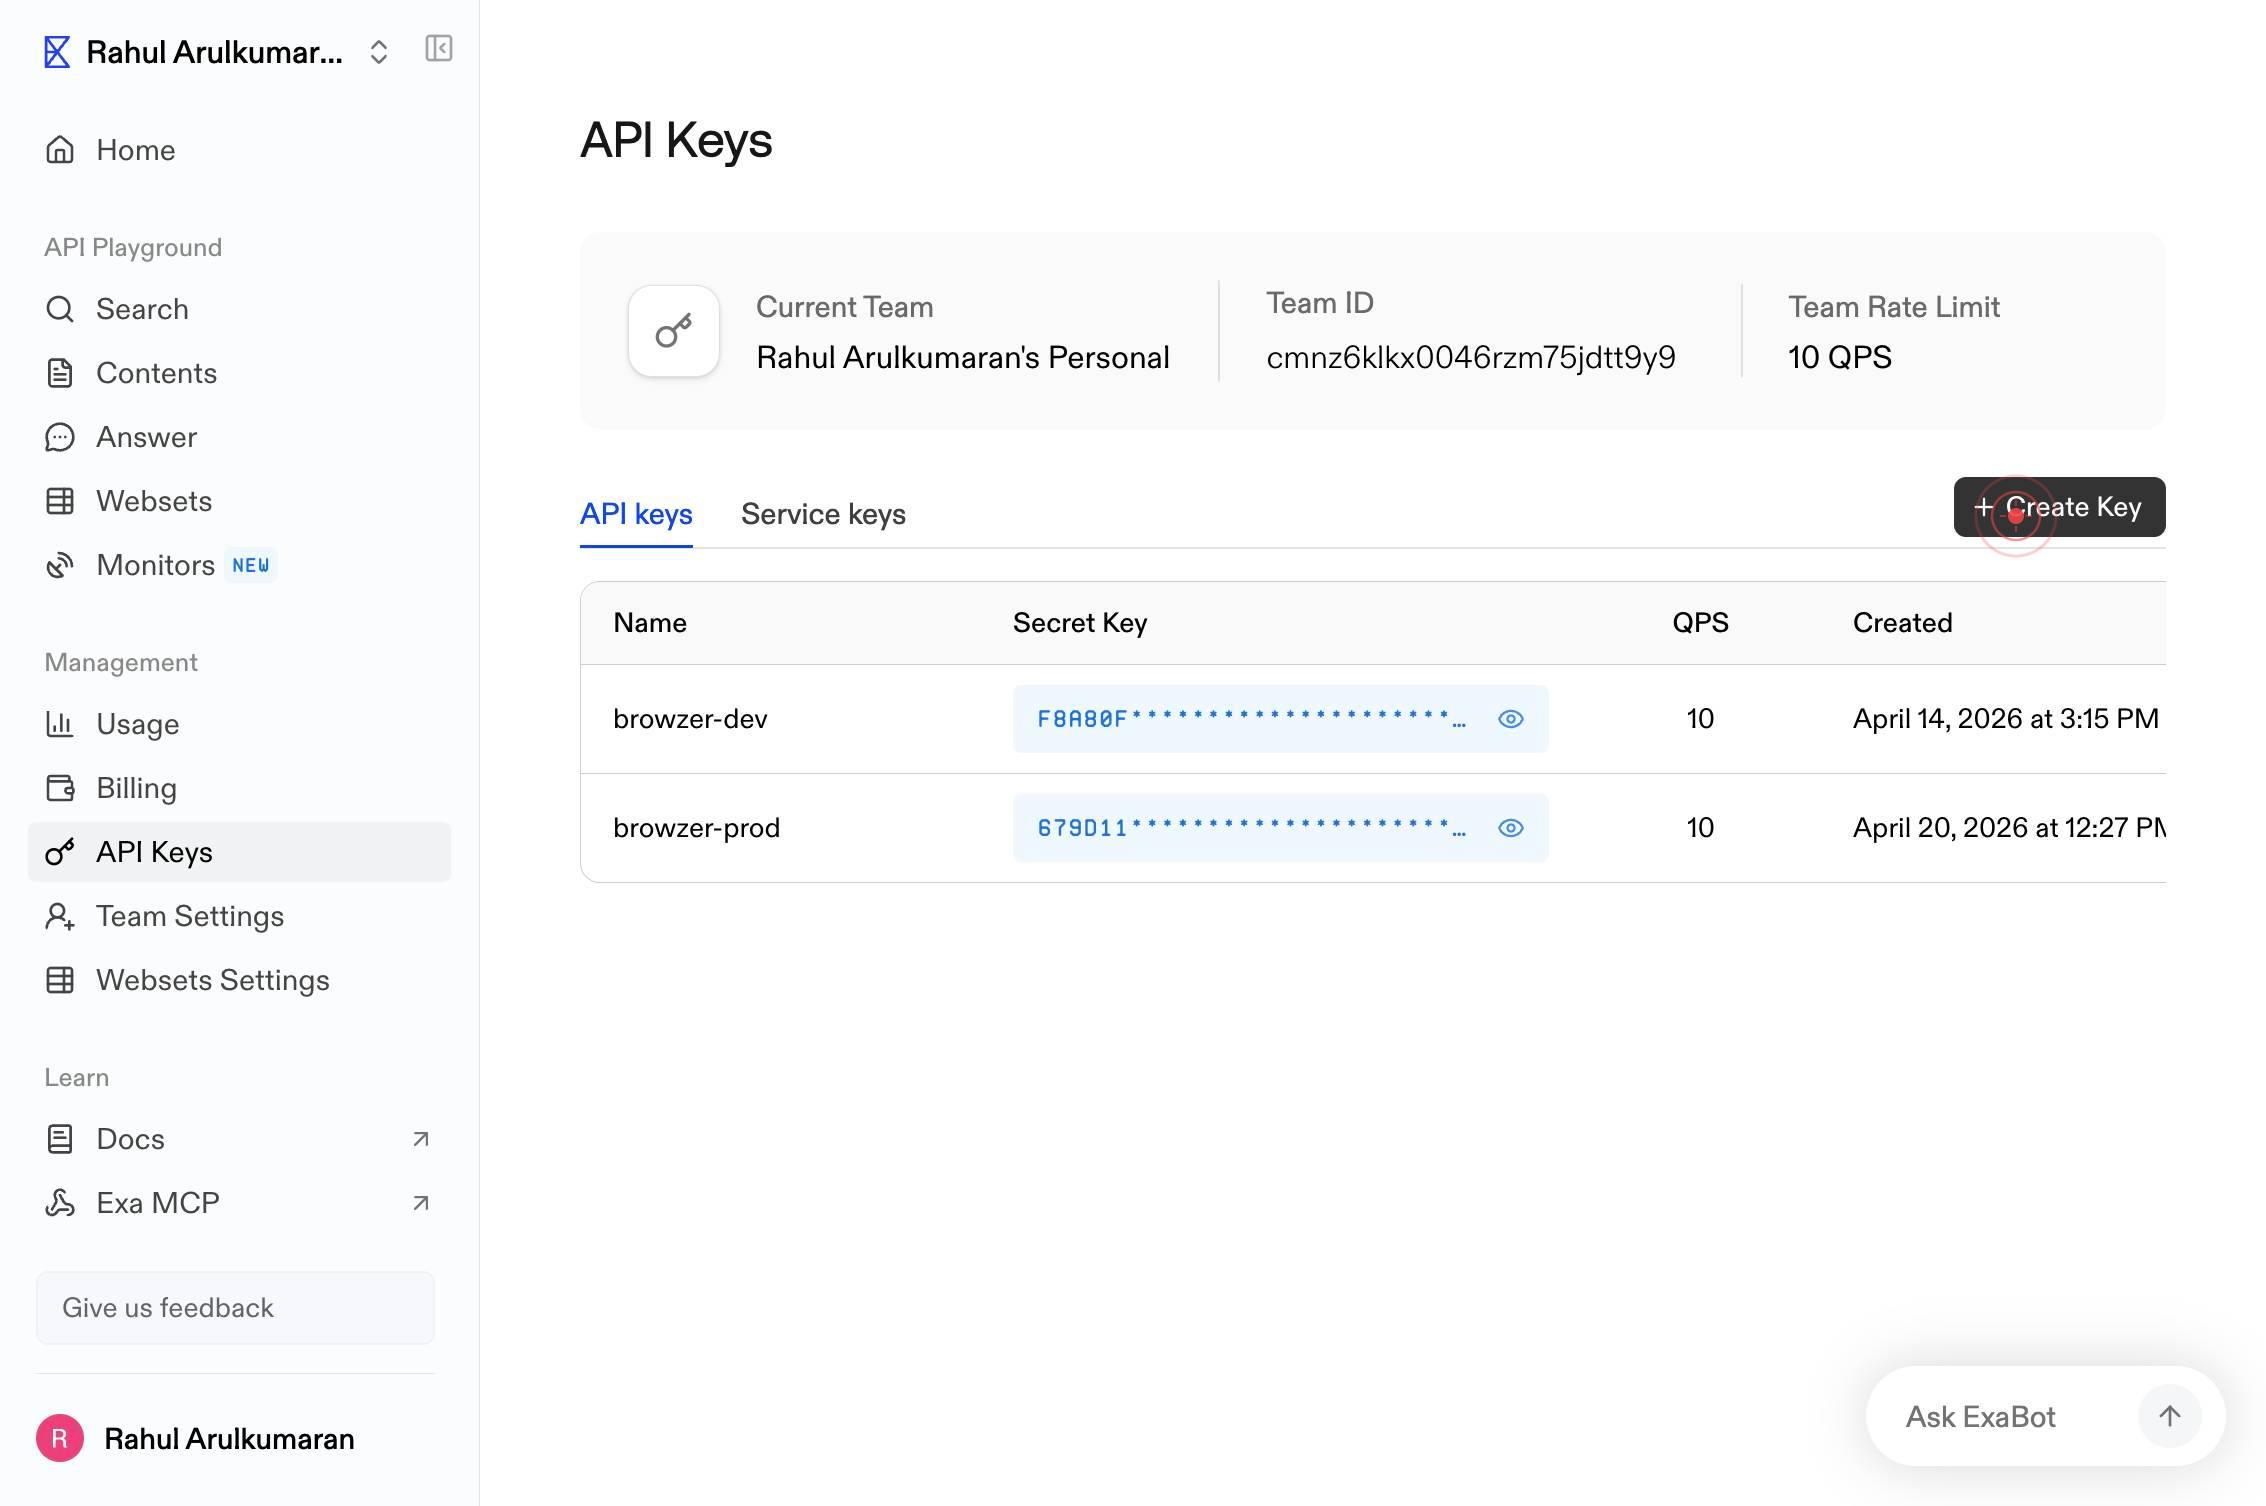
API KeysNavigate to the API Keys section of your Exa dashboard by clicking the 'API Keys' link in the main navigation. This takes you to the key management interface where you can view and create new keys.
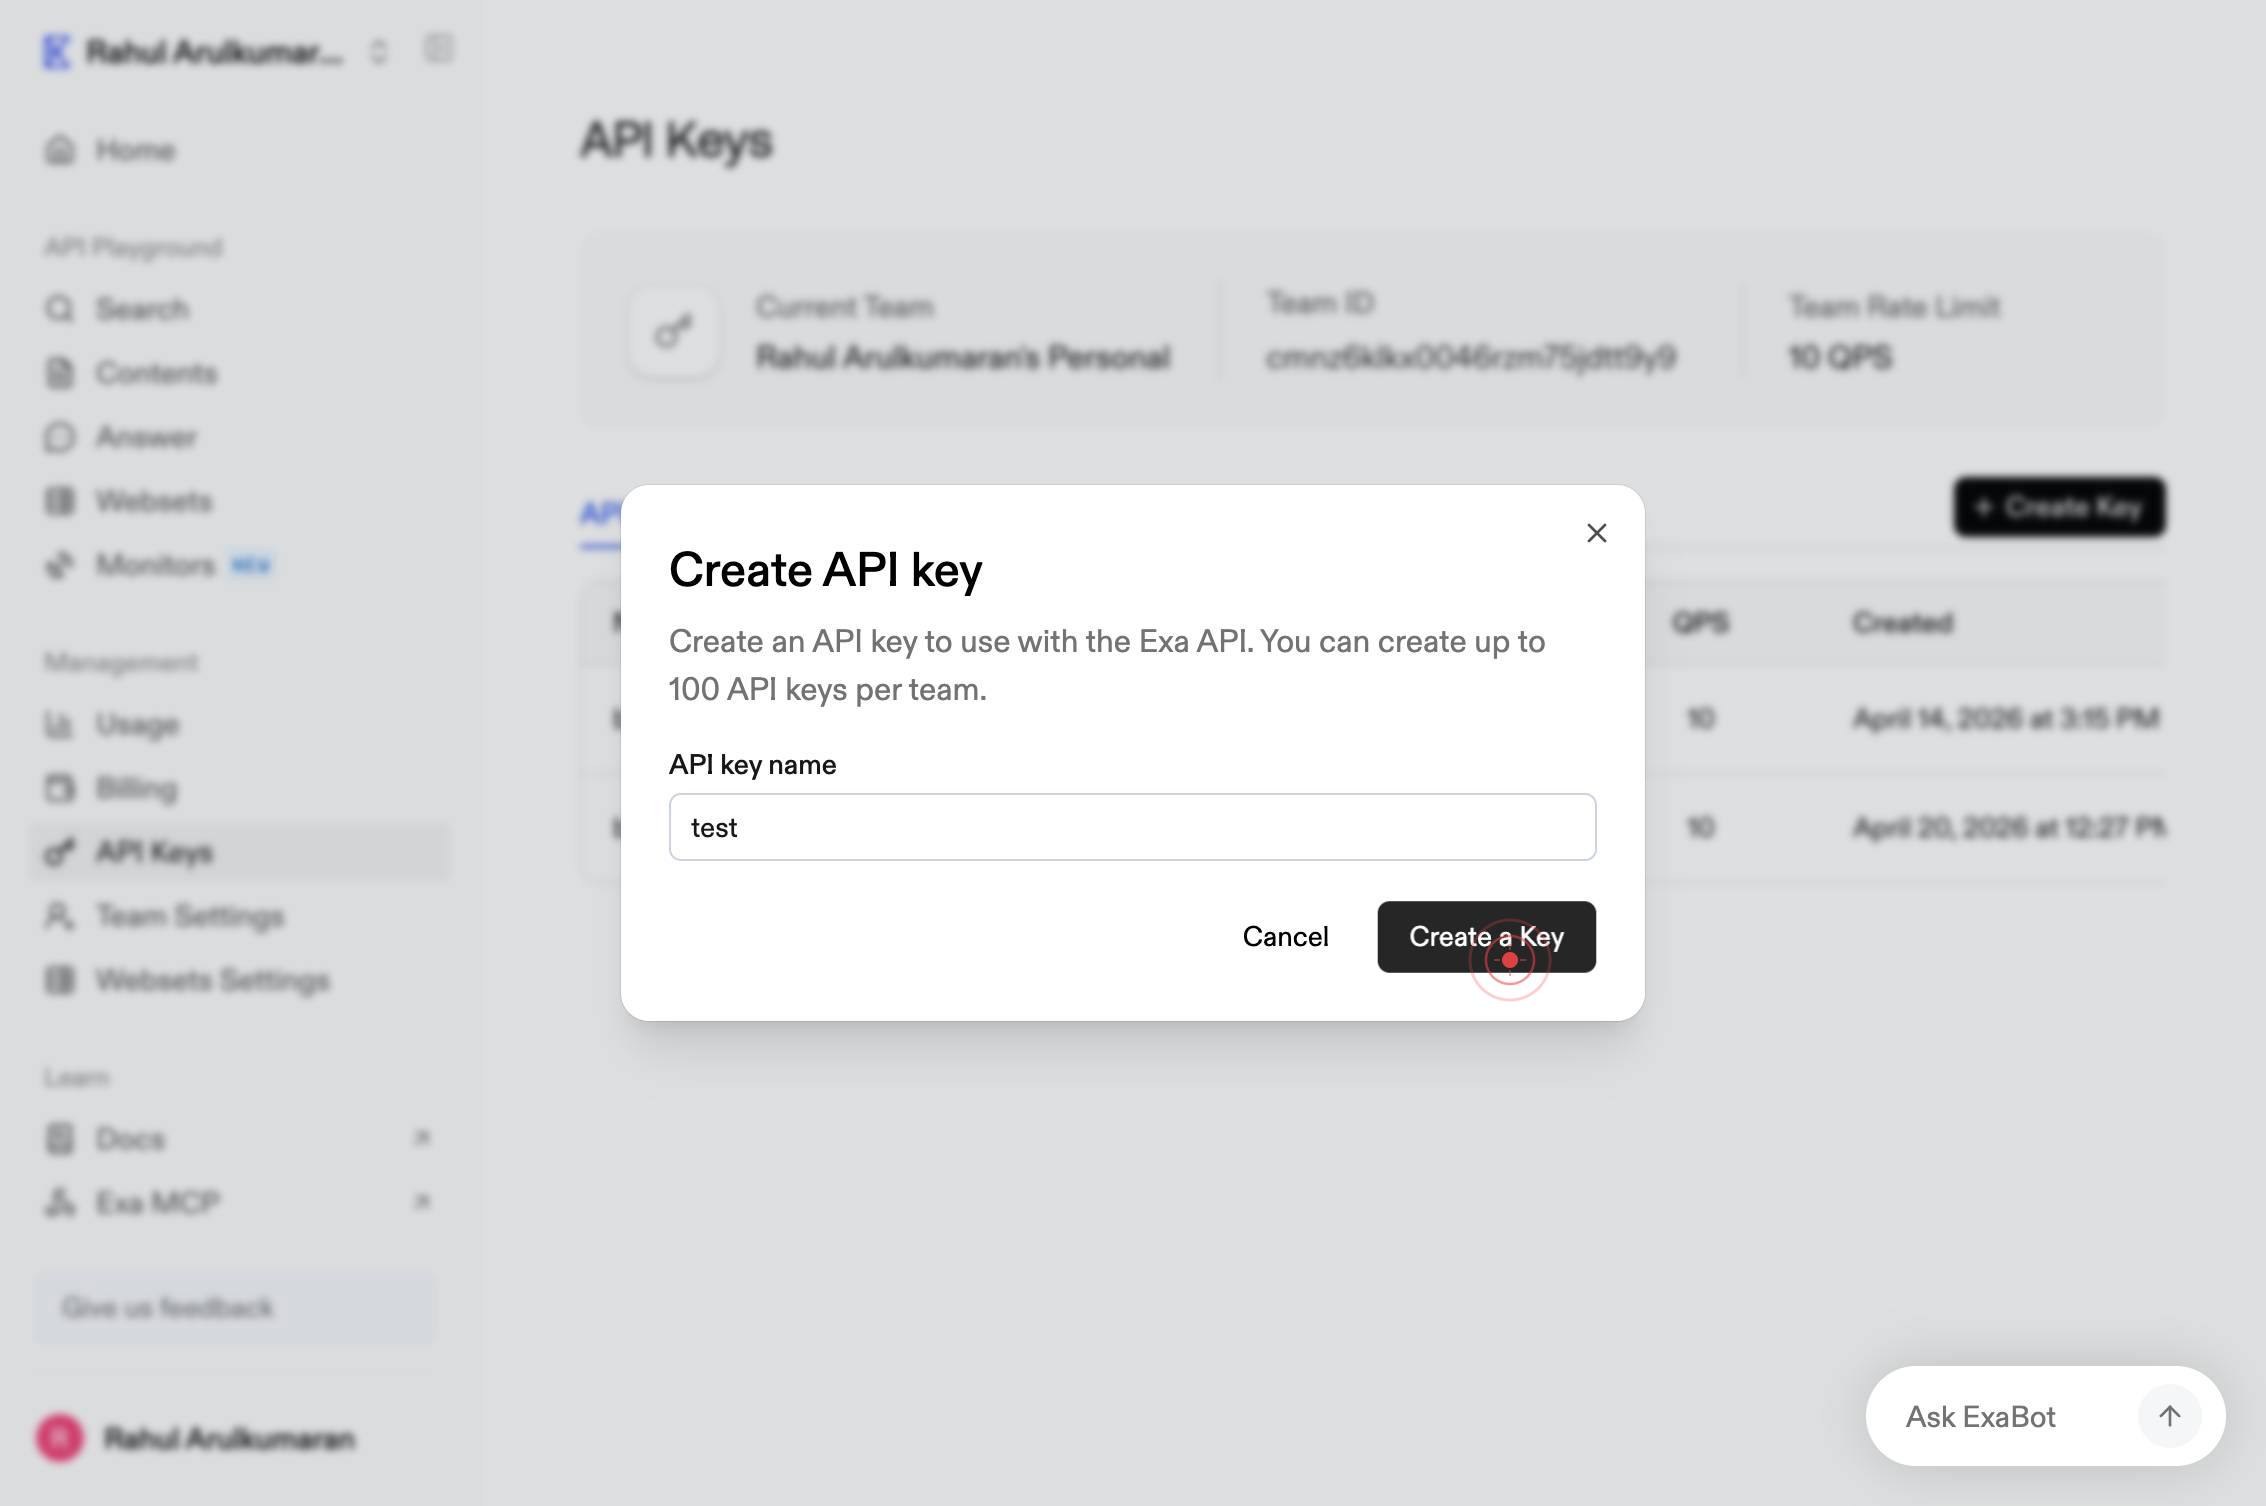
Create KeyInitiate the key creation process by clicking the 'Create Key' button. This opens a form or modal dialog where you'll provide details for your new key.
Project nameEnter a descriptive project name in the 'Project name' text field. Use a name that identifies the purpose or environment of this key, such as 'production-api', 'staging-app', or 'ai-agent-demo'.
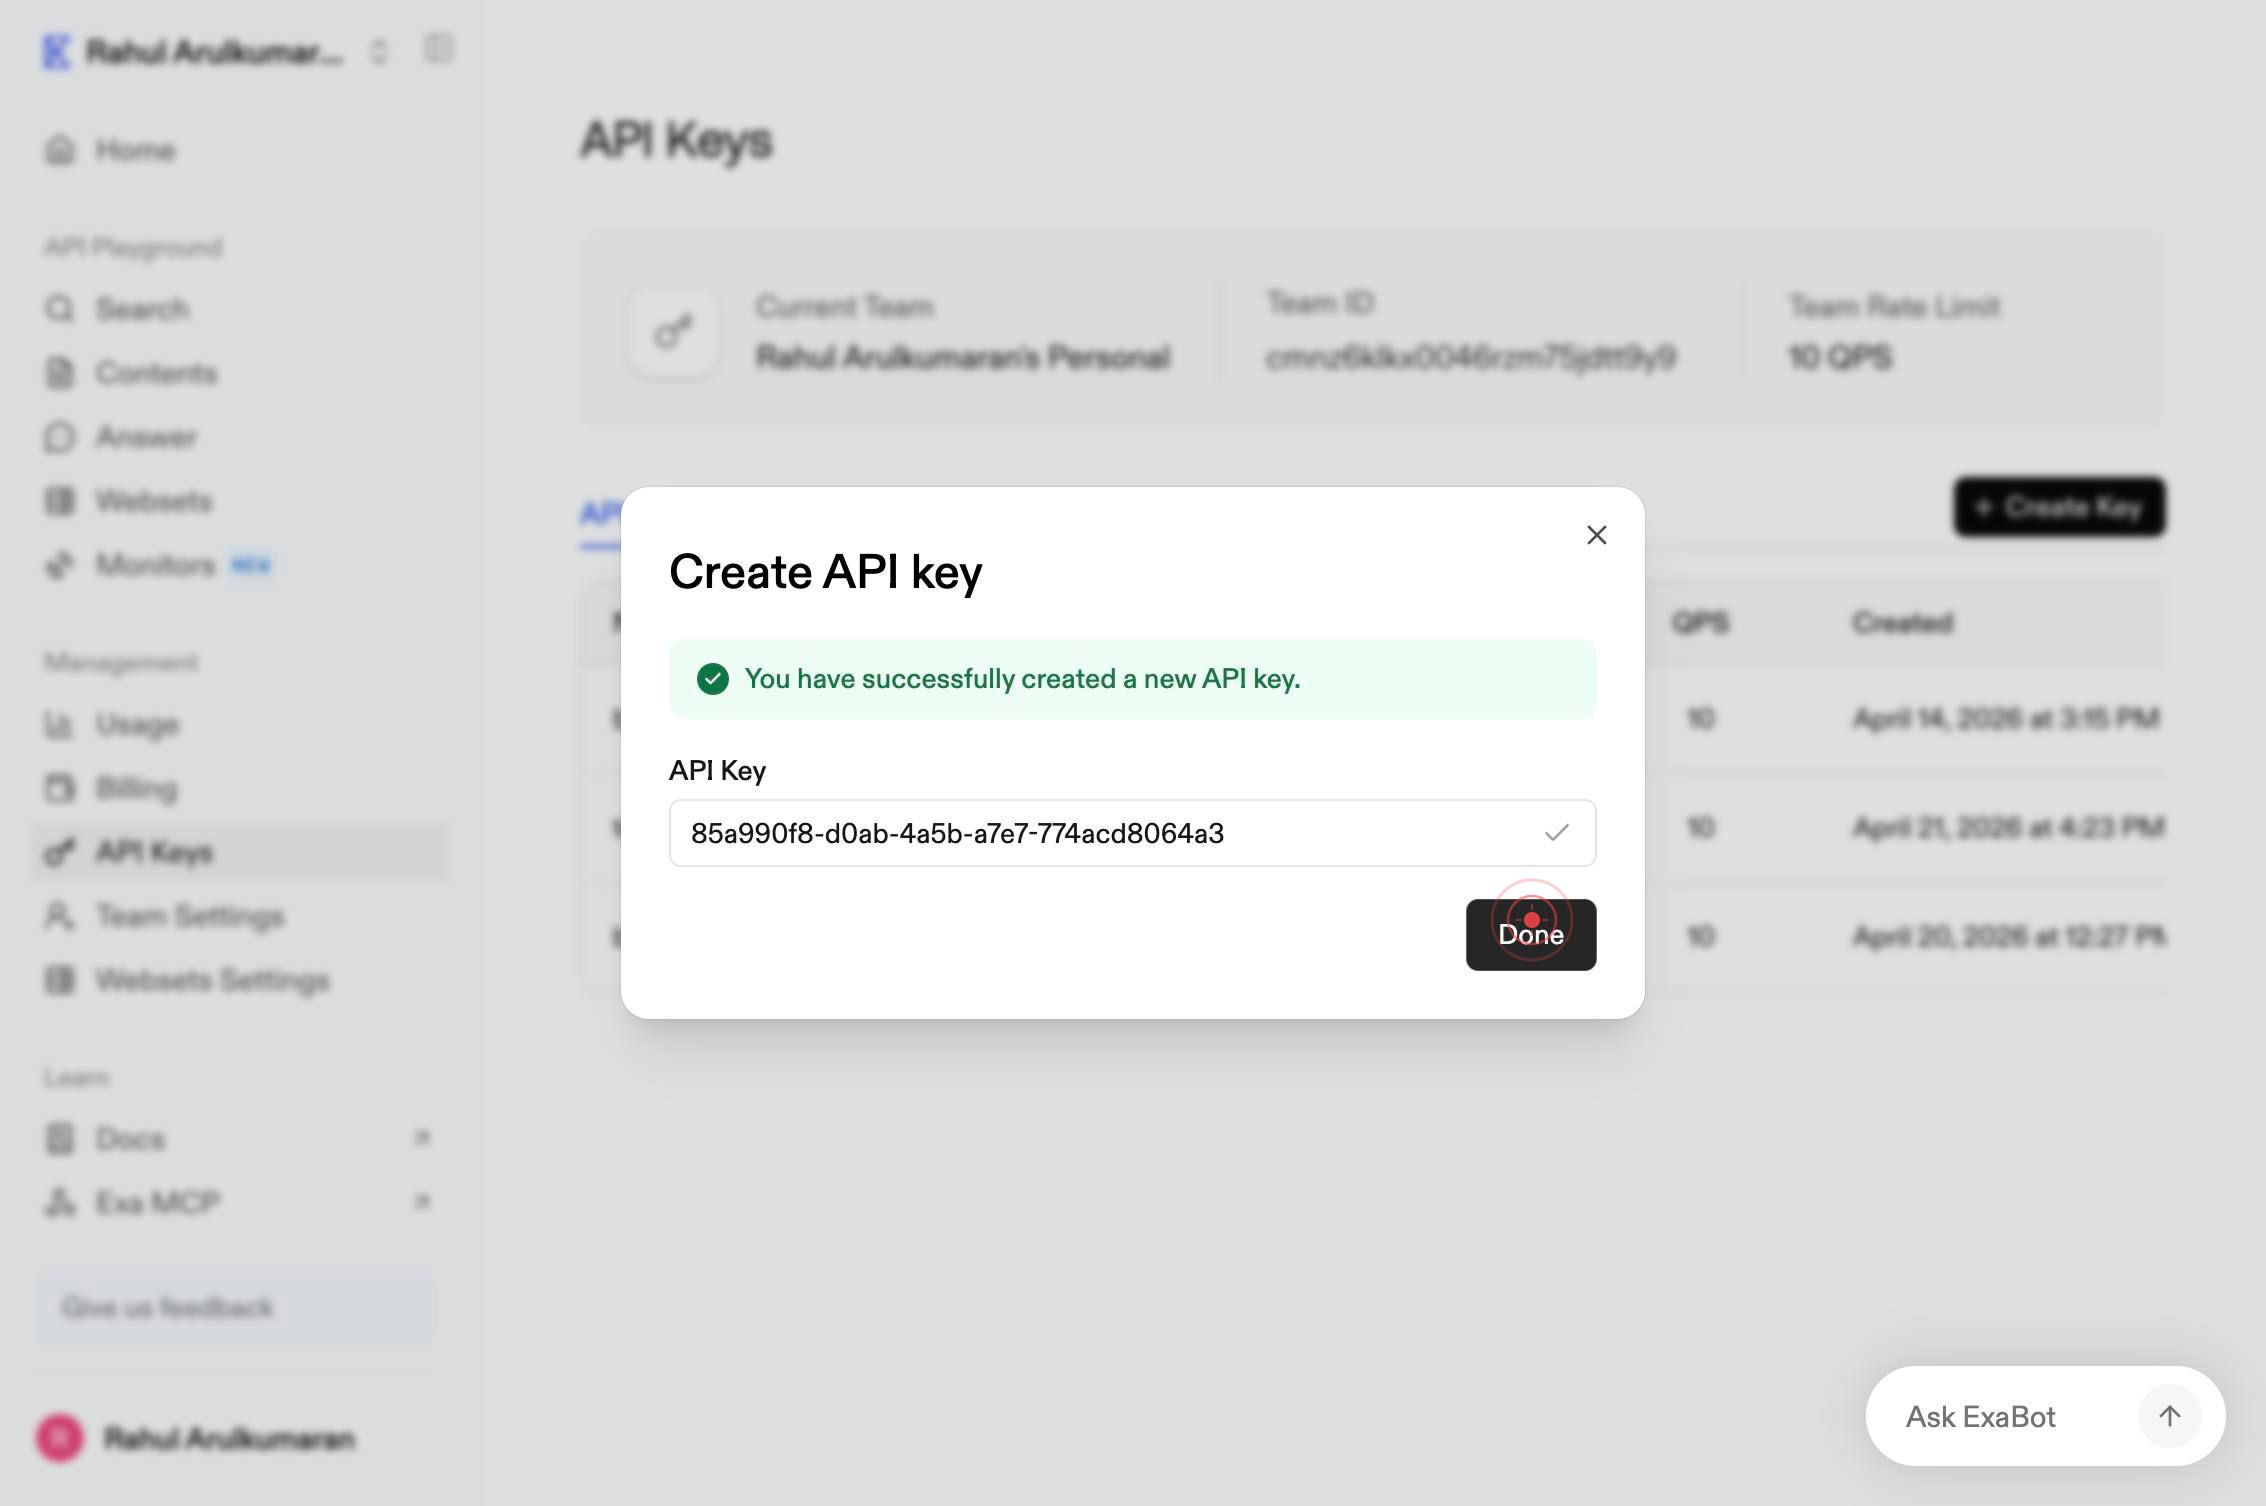
Create a KeyConfirm the creation of your new API key by clicking the 'Create a Key' button. The system will generate the key and display it for you to copy.
buttonA button action occurs on the dashboard (likely copying the key to clipboard or revealing the full key value). Perform this action to prepare your key for use or secure storage.

DoneComplete the workflow by clicking the 'Done' button. This closes the key creation dialog and returns you to the API Keys list, where your new key is now visible.
Confirm it worked
- 1You see the API Keys section of the dashboard with your newly created key listed
- 2A confirmation message or key display appears showing your API key string
- 3The new project name is visible in the API Keys list alongside the key
- 4You can copy or view the full key value for use in your application
Common issues
Keep reading
Creating and managing API keys | API Keys API Documentation | Google Cloud Documentation
Creating and managing API keys | API Keys API Documentation | Google Cloud Documentation # Creating and managing API keys This page explains how to create and manage API keys using the API Keys API.
cloud.google.comCreating and managing API keys | API Keys API Documentation | Google Cloud Documentation
Creating and managing API keys | API Keys API Documentation | Google Cloud Documentation # Creating and managing API keys This page explains how to create and manage API keys using the API Keys API.
docs.cloud.google.comTutorial: Create an API key | Documentation | Esri Developer
Tutorial: Create an API key | Documentation | Esri Developer Skip to content [API key authentication](https://developers.arcgis.com/documentation/security-and-authentication/api-key-authentication/)
developers.arcgis.com