Guide
Create Full Access Nia API Key
Overview
Nia is a Search & Index API platform for autonomous agents and AI applications. To authenticate your requests to Nia's API endpoints, you need an API key with appropriate permissions. This workflow guides you through creating a full-access API key via the Nia dashboard (app.trynia.ai) and immediately copying it to your clipboard for secure storage or integration setup. Full-access keys allow you to perform all operations available through Nia's API, including skill installation, search configuration, and advanced indexing. Your API key is sensitive—treat it like a password and never commit it to version control or expose it in client-side code.
Before you begin
- An active account on app.trynia.ai. If you don't have one, create an account at app.trynia.ai.
- Administrator or Owner role in your Nia organization to access API key management.
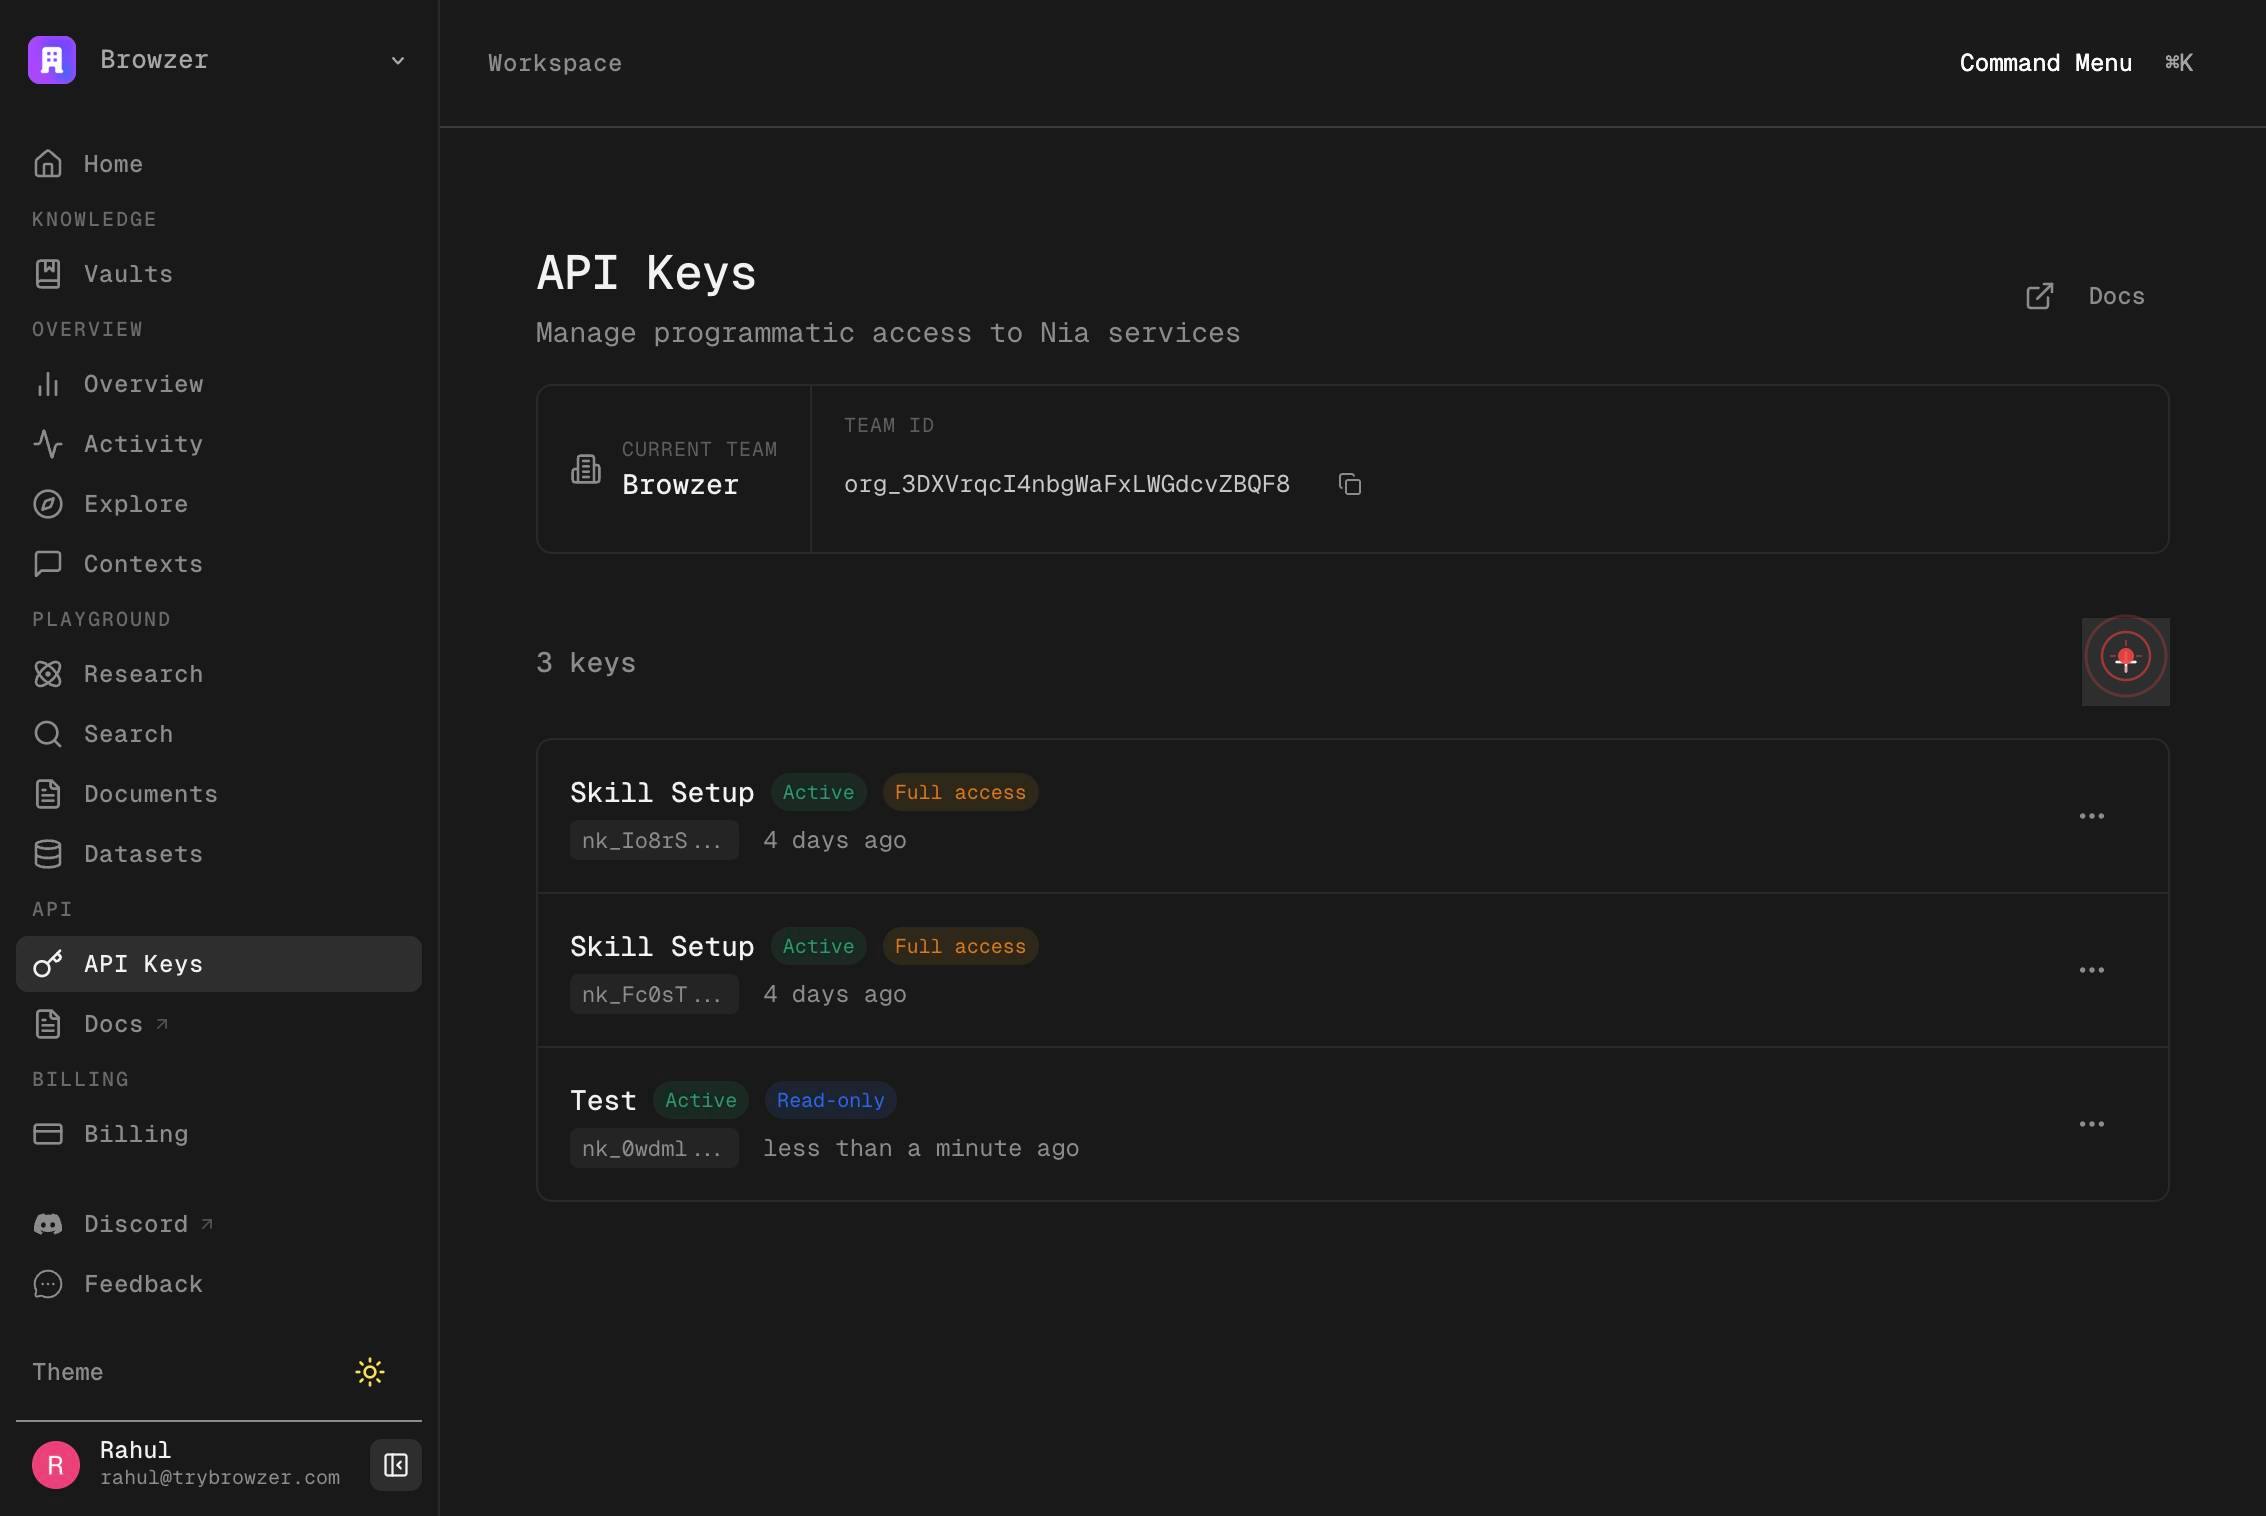
- Access to the Nia dashboard Settings section via the sidebar menu.
Step by step
Create API keyNavigate to the API key management section and initiate key creation by clicking the 'Create API key' button. This button is typically found in Settings > API Keys on the Nia dashboard sidebar.
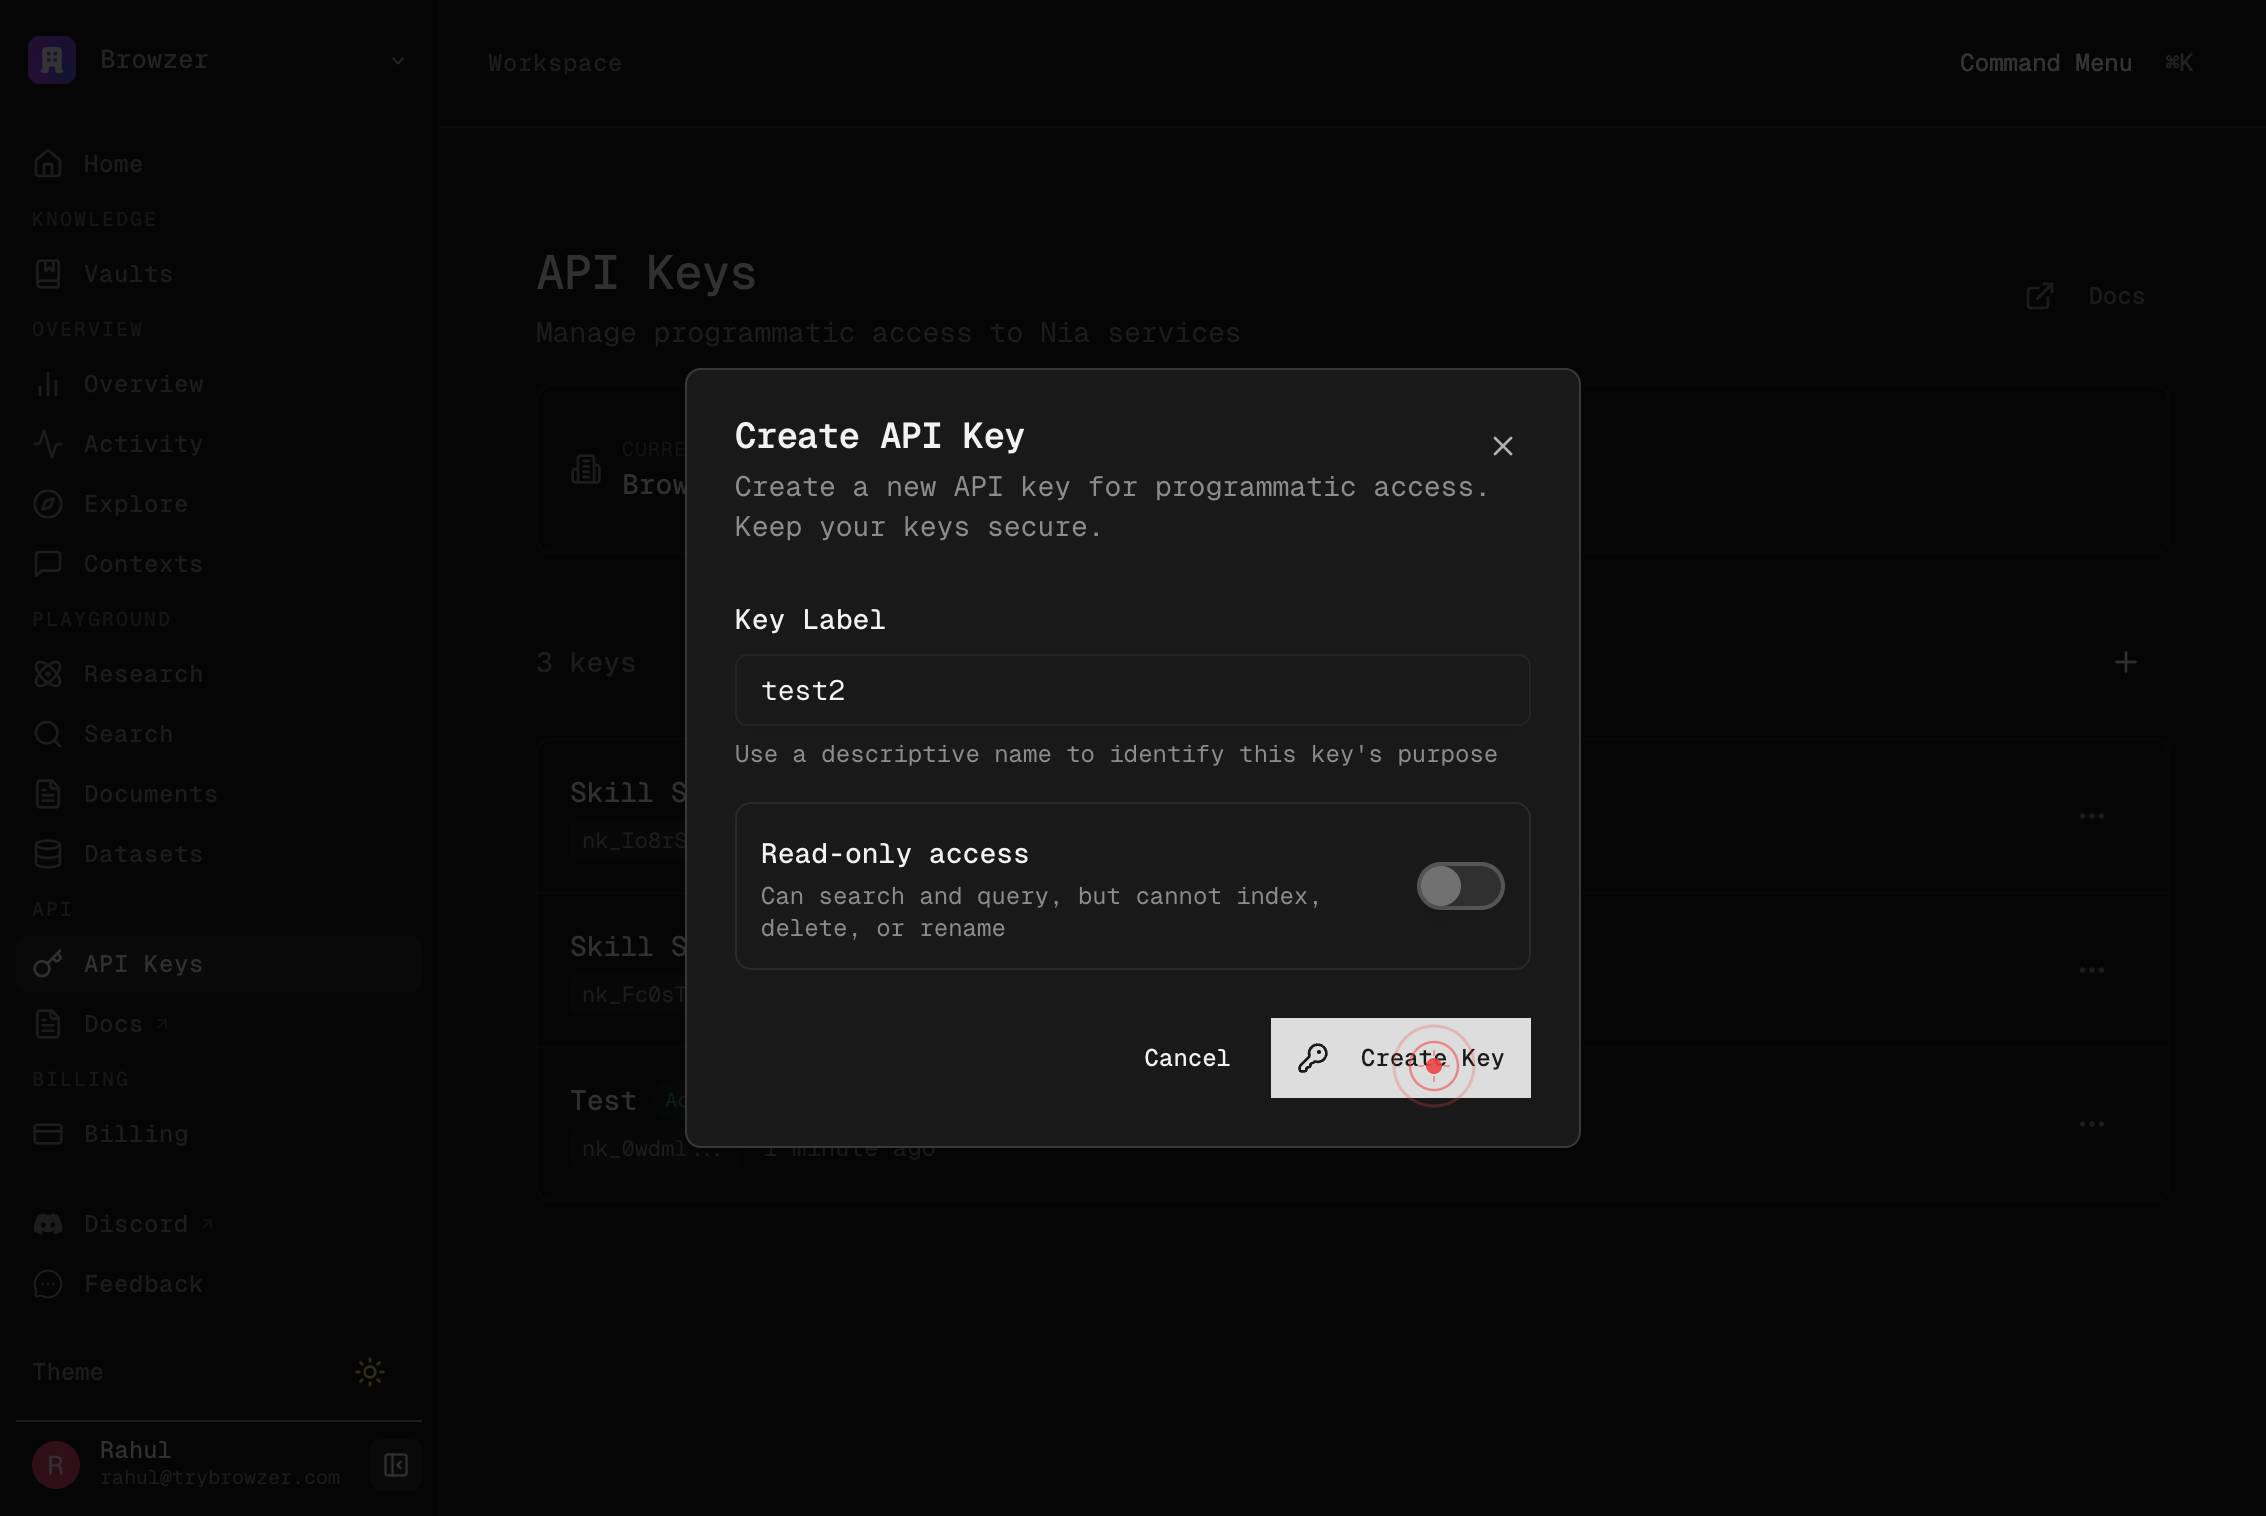
Key LabelEnter a descriptive label for your API key in the 'Key Label' text field. Use a name that clearly indicates the key's purpose (e.g., 'Production MCP Client', 'Development Integration', 'Claude Desktop') so you can easily identify it later if you need to rotate or revoke it.
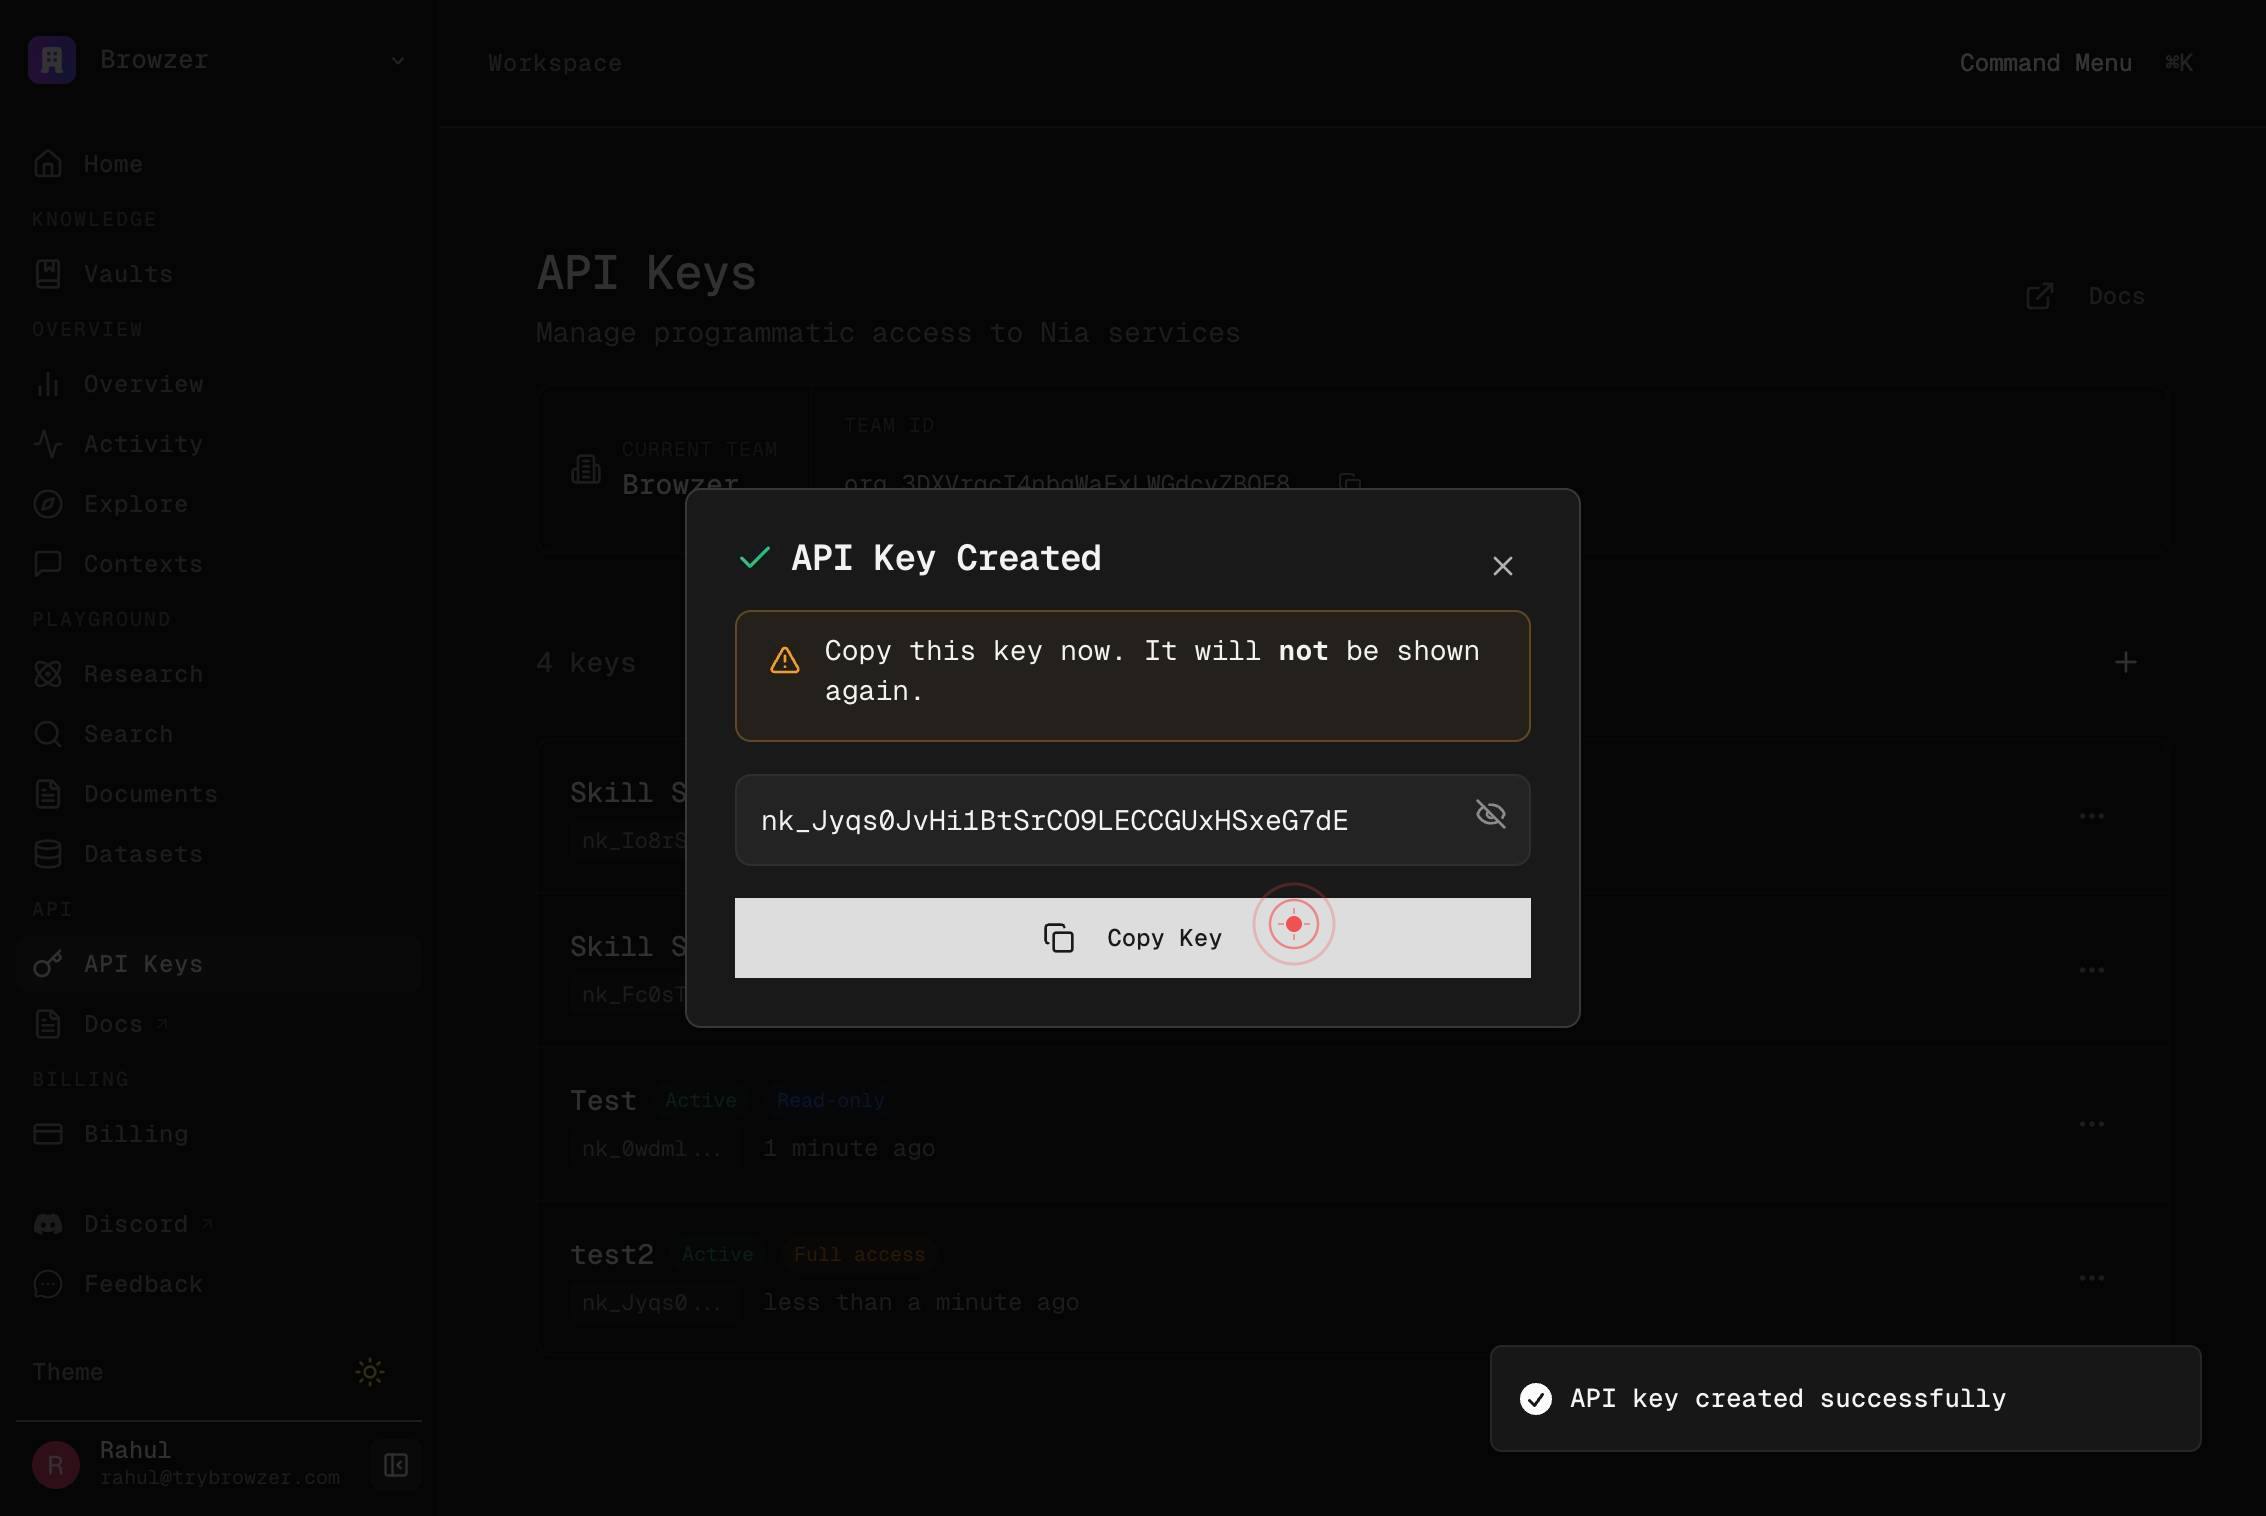
Create KeyClick the 'Create Key' button to generate your new full-access API key. Nia will create the key and display it on screen.
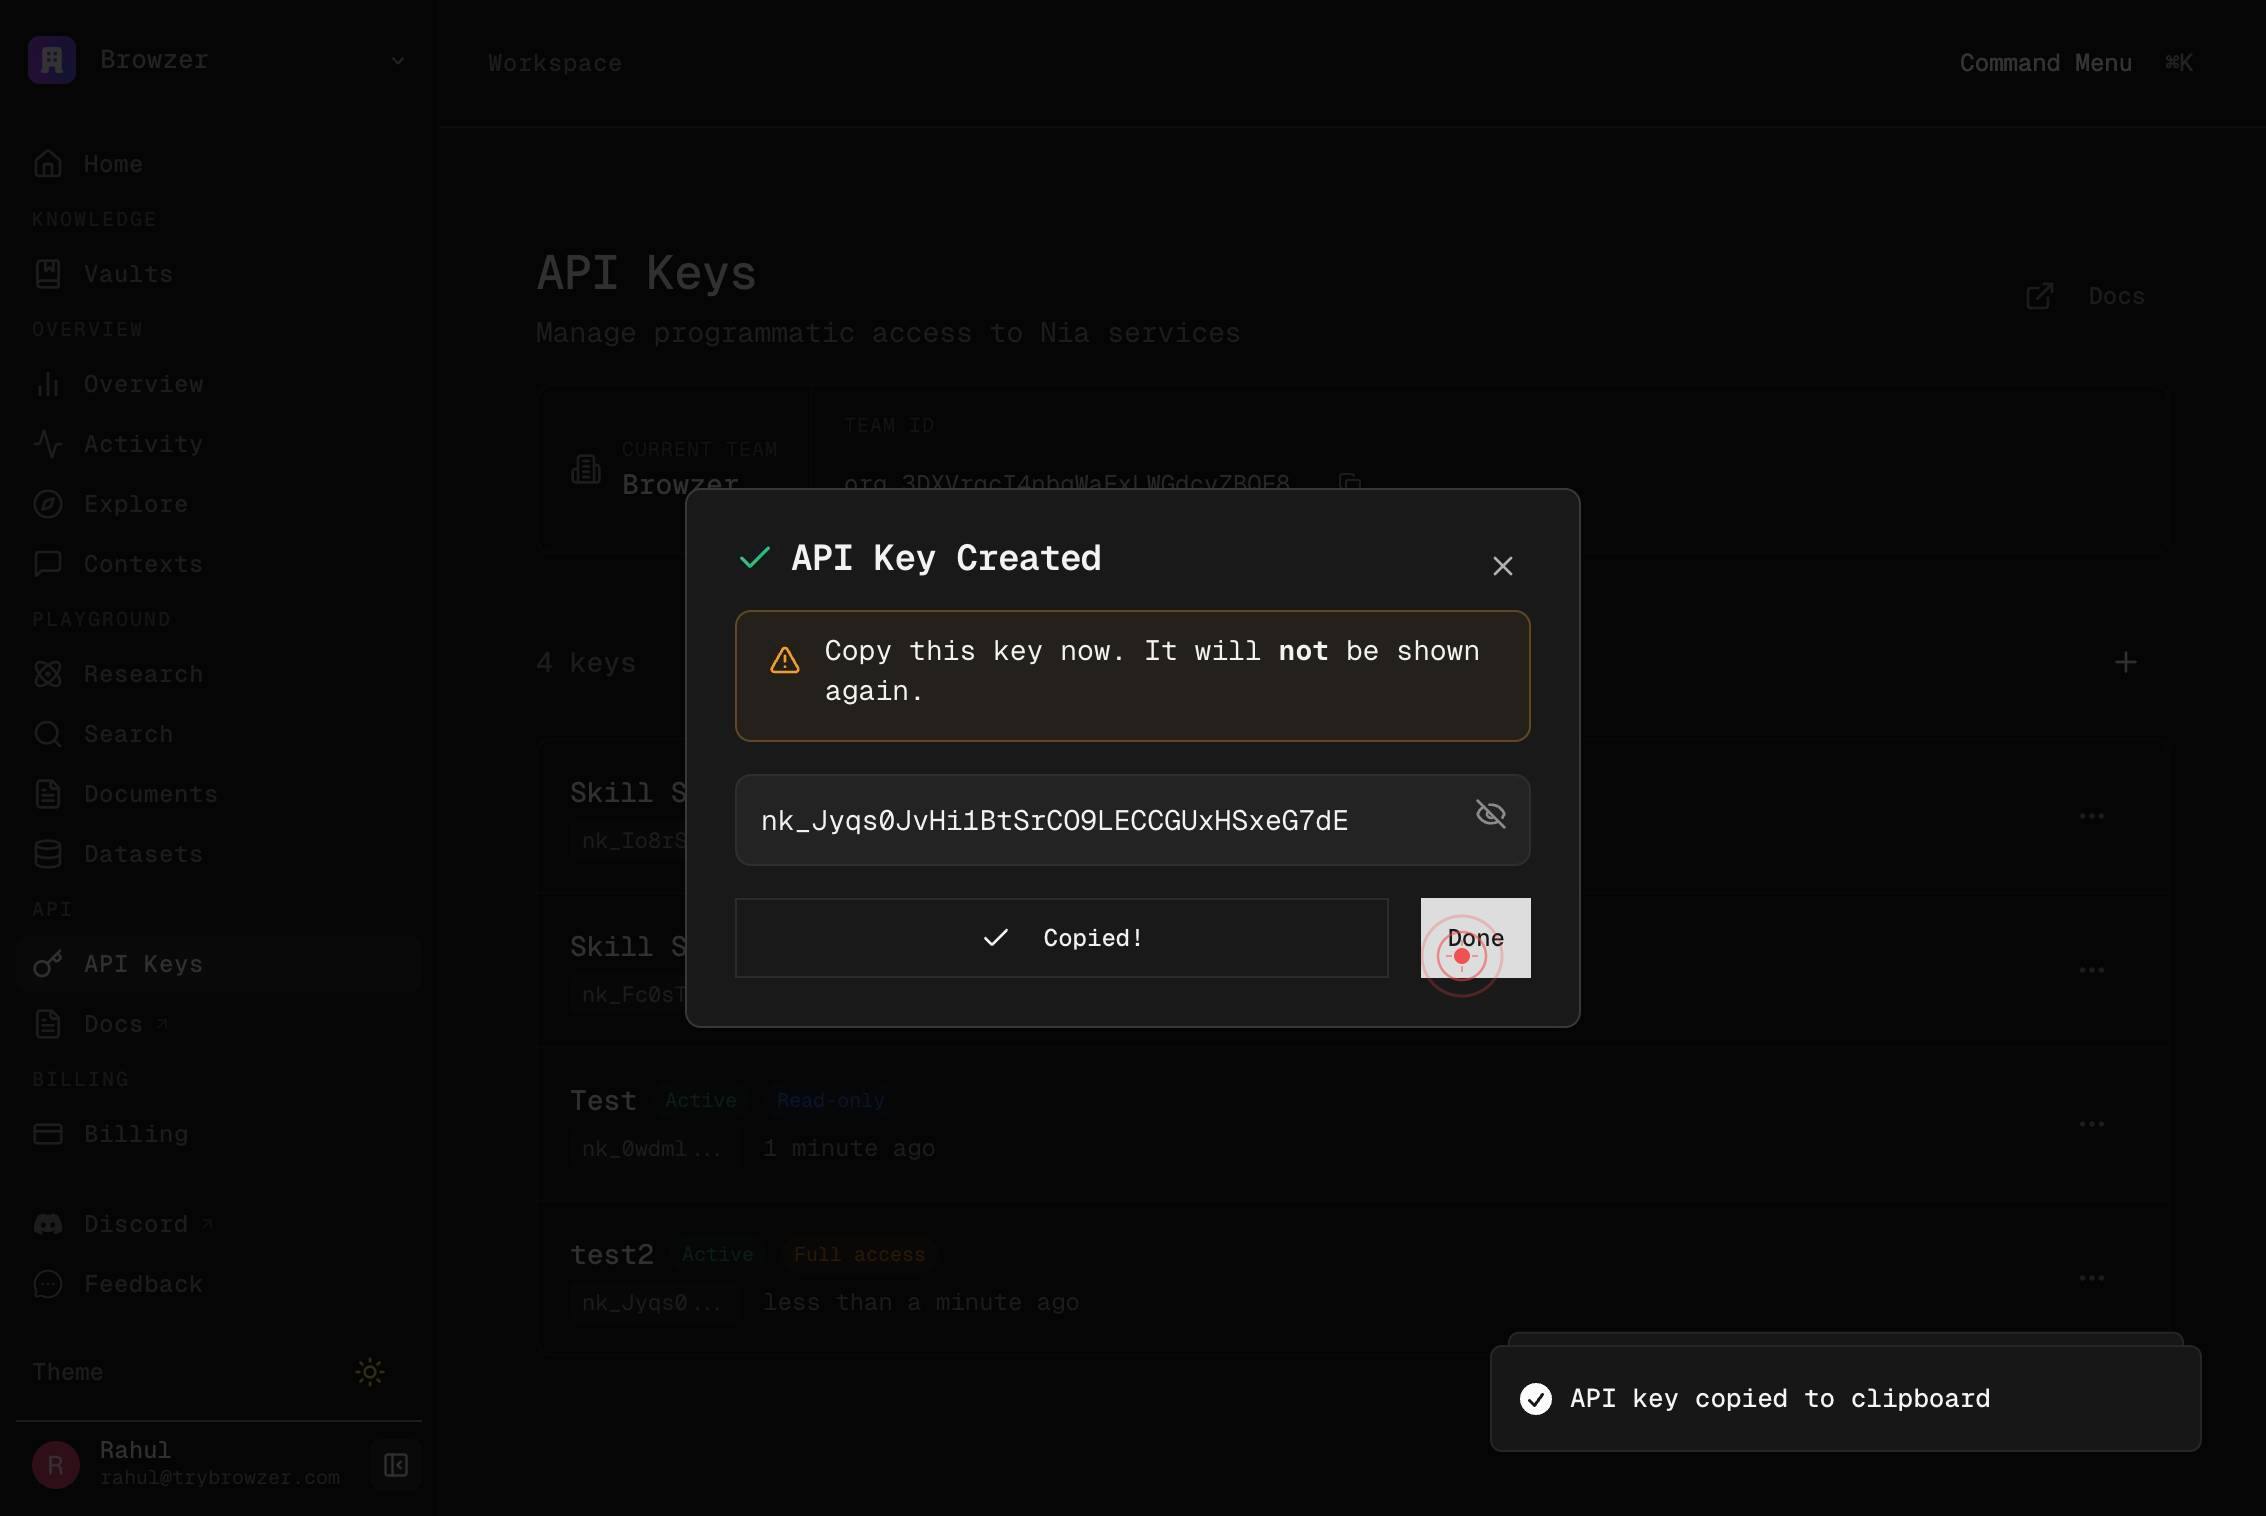
Copy KeyCopy the generated API key to your clipboard by clicking the 'Copy Key' button. This button is typically located next to or below the displayed key value.
DoneClose the key creation dialog by clicking the 'Done' button. Your API key is now created, copied to clipboard, and ready to use in your applications, SDK configurations, or MCP client setups.
Confirm it worked
- 1A success dialog or notification appears confirming the API key was created.
- 2The API key is displayed on screen in a copyable format (typically 40+ characters starting with 'sk-proj-' or 'nk_').
- 3The 'Copy Key' button is present and clickable, confirming the key is ready to copy.
- 4After copying, your clipboard contains the full API key (verify by pasting in a text editor or environment variable configuration).
Common issues
Keep reading
Signup - Nia AI Documentation
> Create a new account and receive a read-only API key. [...] A 6-digit verification code is sent to the provided email. Call POST /v2/auth/verify with the code (and this key in the Authorization header) to upgrade to full access. [...] type: [...] API keys are [...] - type [...] description: Idempot [...] key for safe retries [...] required: - email - organization_name [...] type: [...] required: - loc [...] - type [...] securitySche [...] type: http [...] scheme: bearer [...] bearerFormat: API Key [...] : API key must be provided in the Authorization header
docs.trynia.aiLogin Verify - Nia AI Documentation
> Verify login code and receive a new full-access API key. [...] paths: /auth/login/verify: post: tags: - Auth summary: Login Verify description: Verify login code and receive a new full-access API key. operationId: login_verify_v2_auth_login_verify_post requestBody: content: application/json: schema: $ref: '#/components/schemas/LoginVerifyRequest' required: true responses: '200': description: Successful Response content: application/json: schema: $ref: '#/components/schemas/LoginVerifyResponse' '422': description: Validation Error content: application/json: schema: $ref: '#/components/schemas/HTTPValidationError' [...] ) type: object required: - email - code [...] loc - [...] - type [...] title:
docs.trynia.ai