Guide
Index Github Repo
Overview
Nia is a Search & Index API designed to help you index and explore GitHub repositories, codebases, and documentation. By indexing a repository, you unlock semantic search capabilities across the codebase, enabling you to find implementation patterns, understand architecture, and answer code-related questions without manually reviewing files. This workflow walks you through the dashboard-based indexing process. Note: the UI indexing path (described here) works reliably for both public and private repositories. If you need programmatic/API-based indexing for private repos, be aware that the API endpoint currently has a known limitation; the dashboard UI is the recommended method for private repository indexing.
Before you begin
- A Trynia account (create one at app.trynia.ai if needed)
- GitHub App installed in your organization or personal account — this avoids GitHub API rate limits and enables private repository access. If not yet installed, Trynia will prompt you to install it during onboarding.
- The GitHub repository URL or owner/repo slug (e.g., facebook/react or github.com/owner/repo)
Step by step
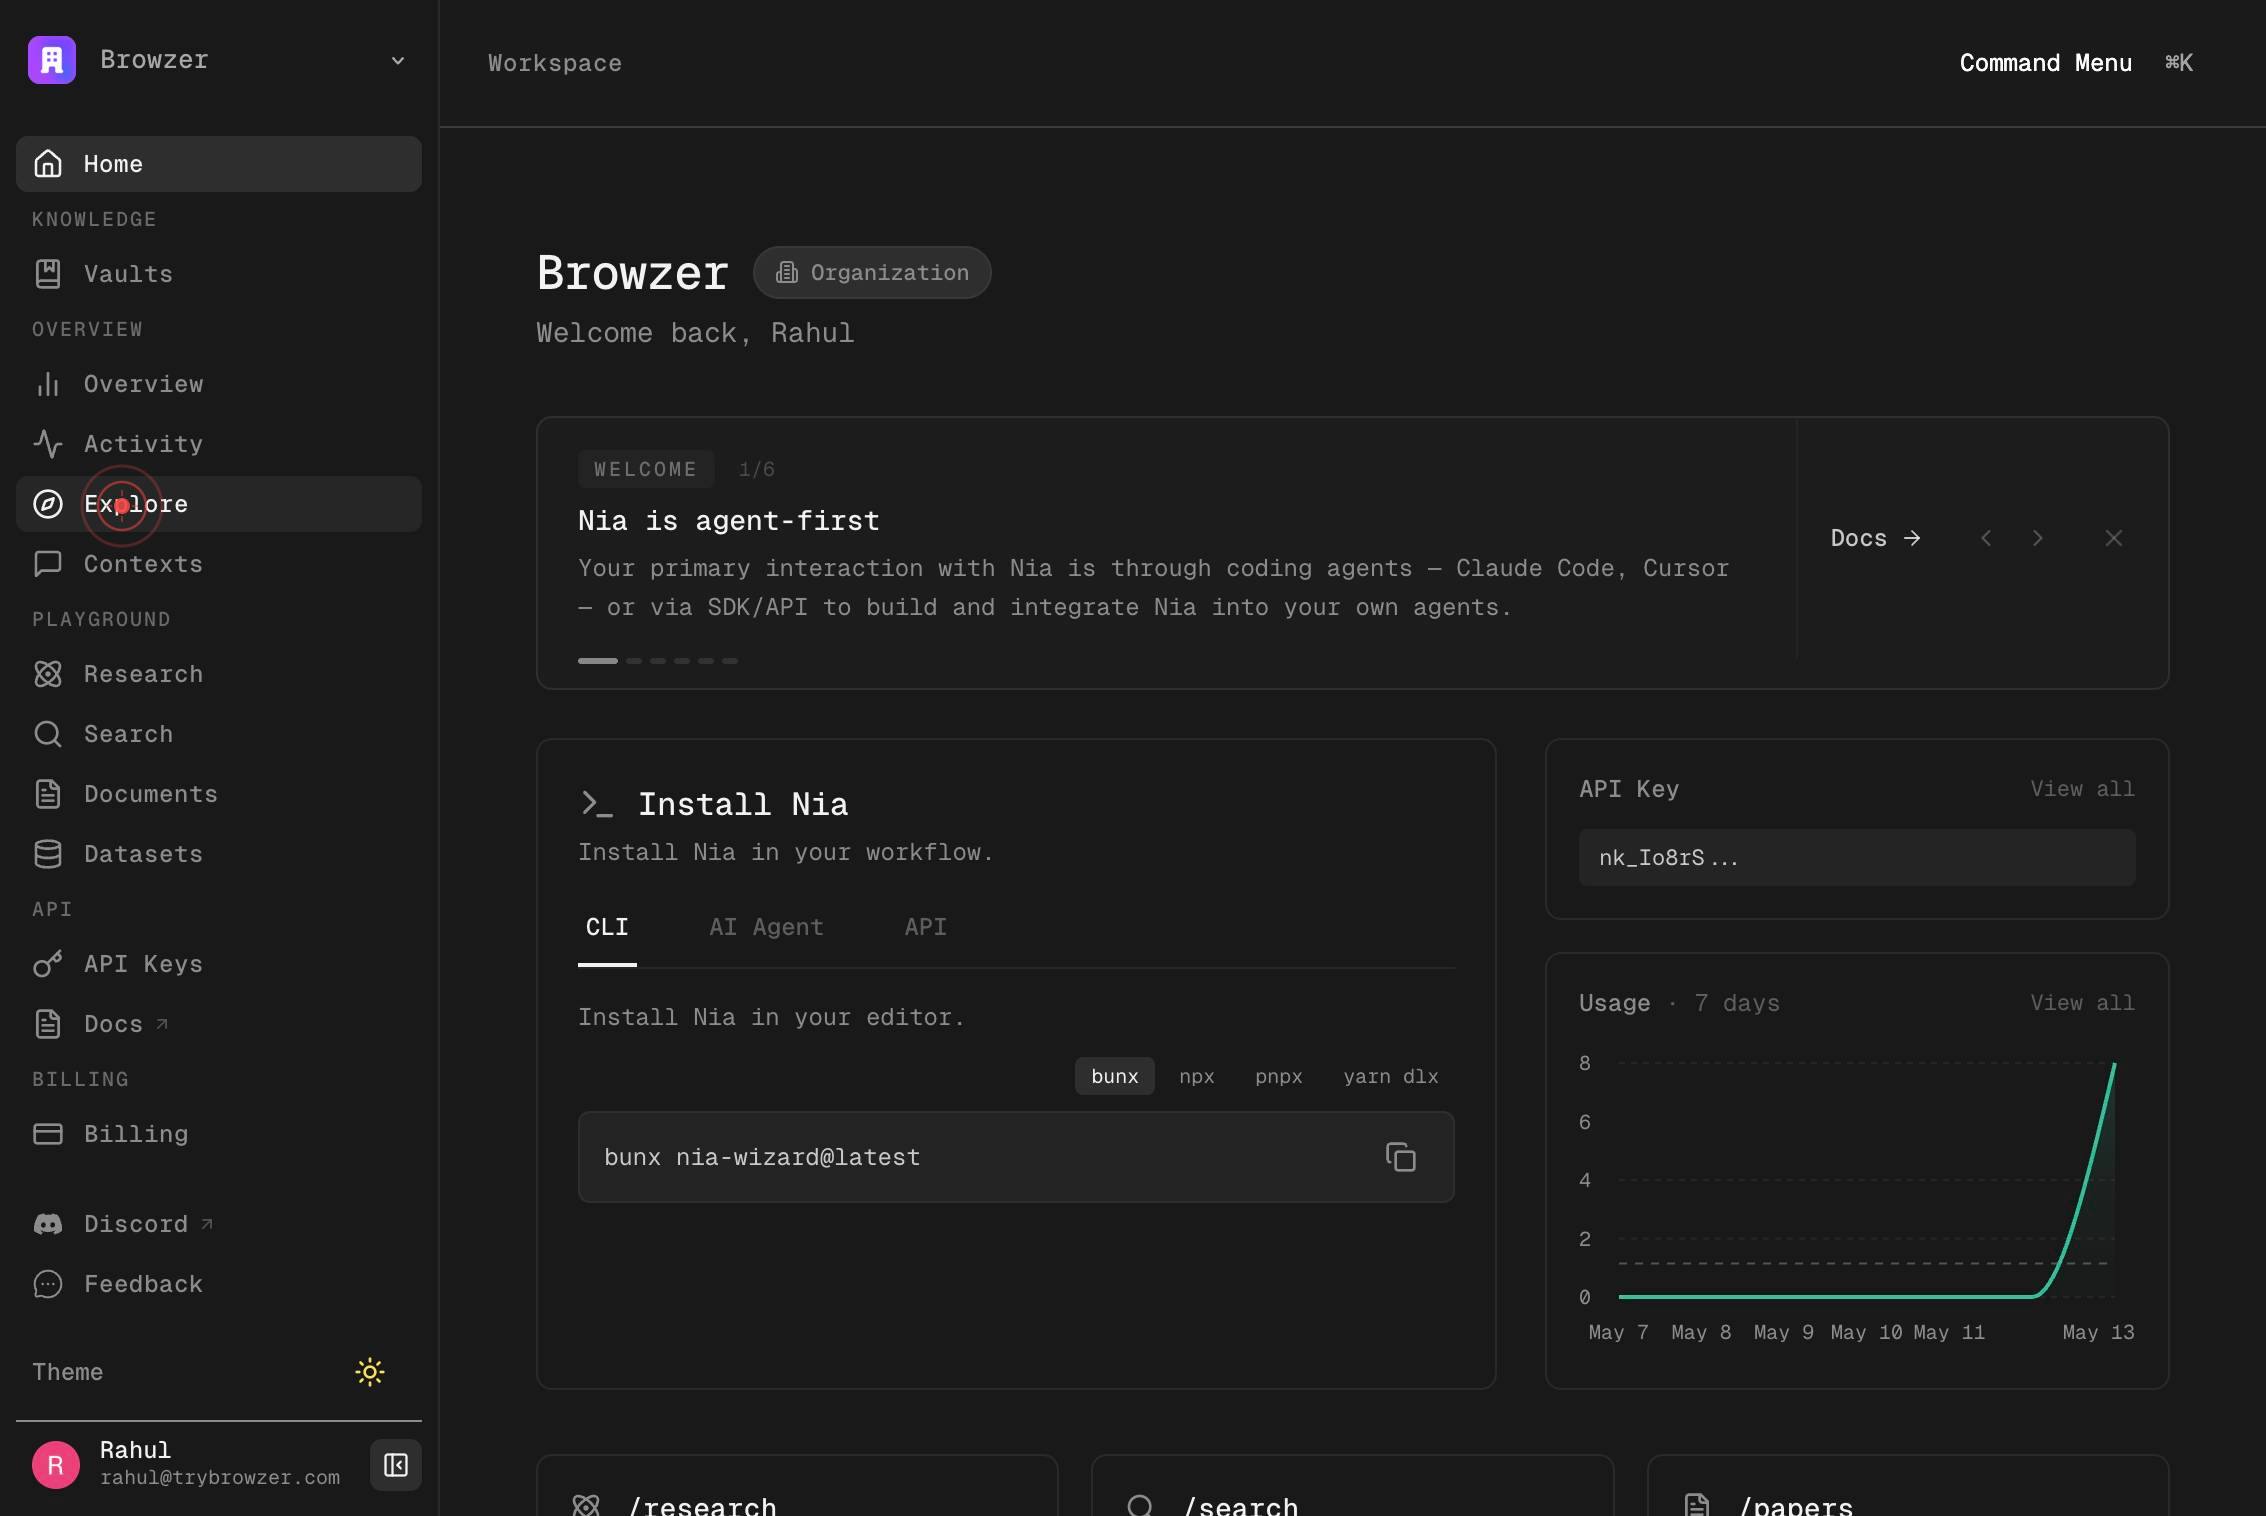
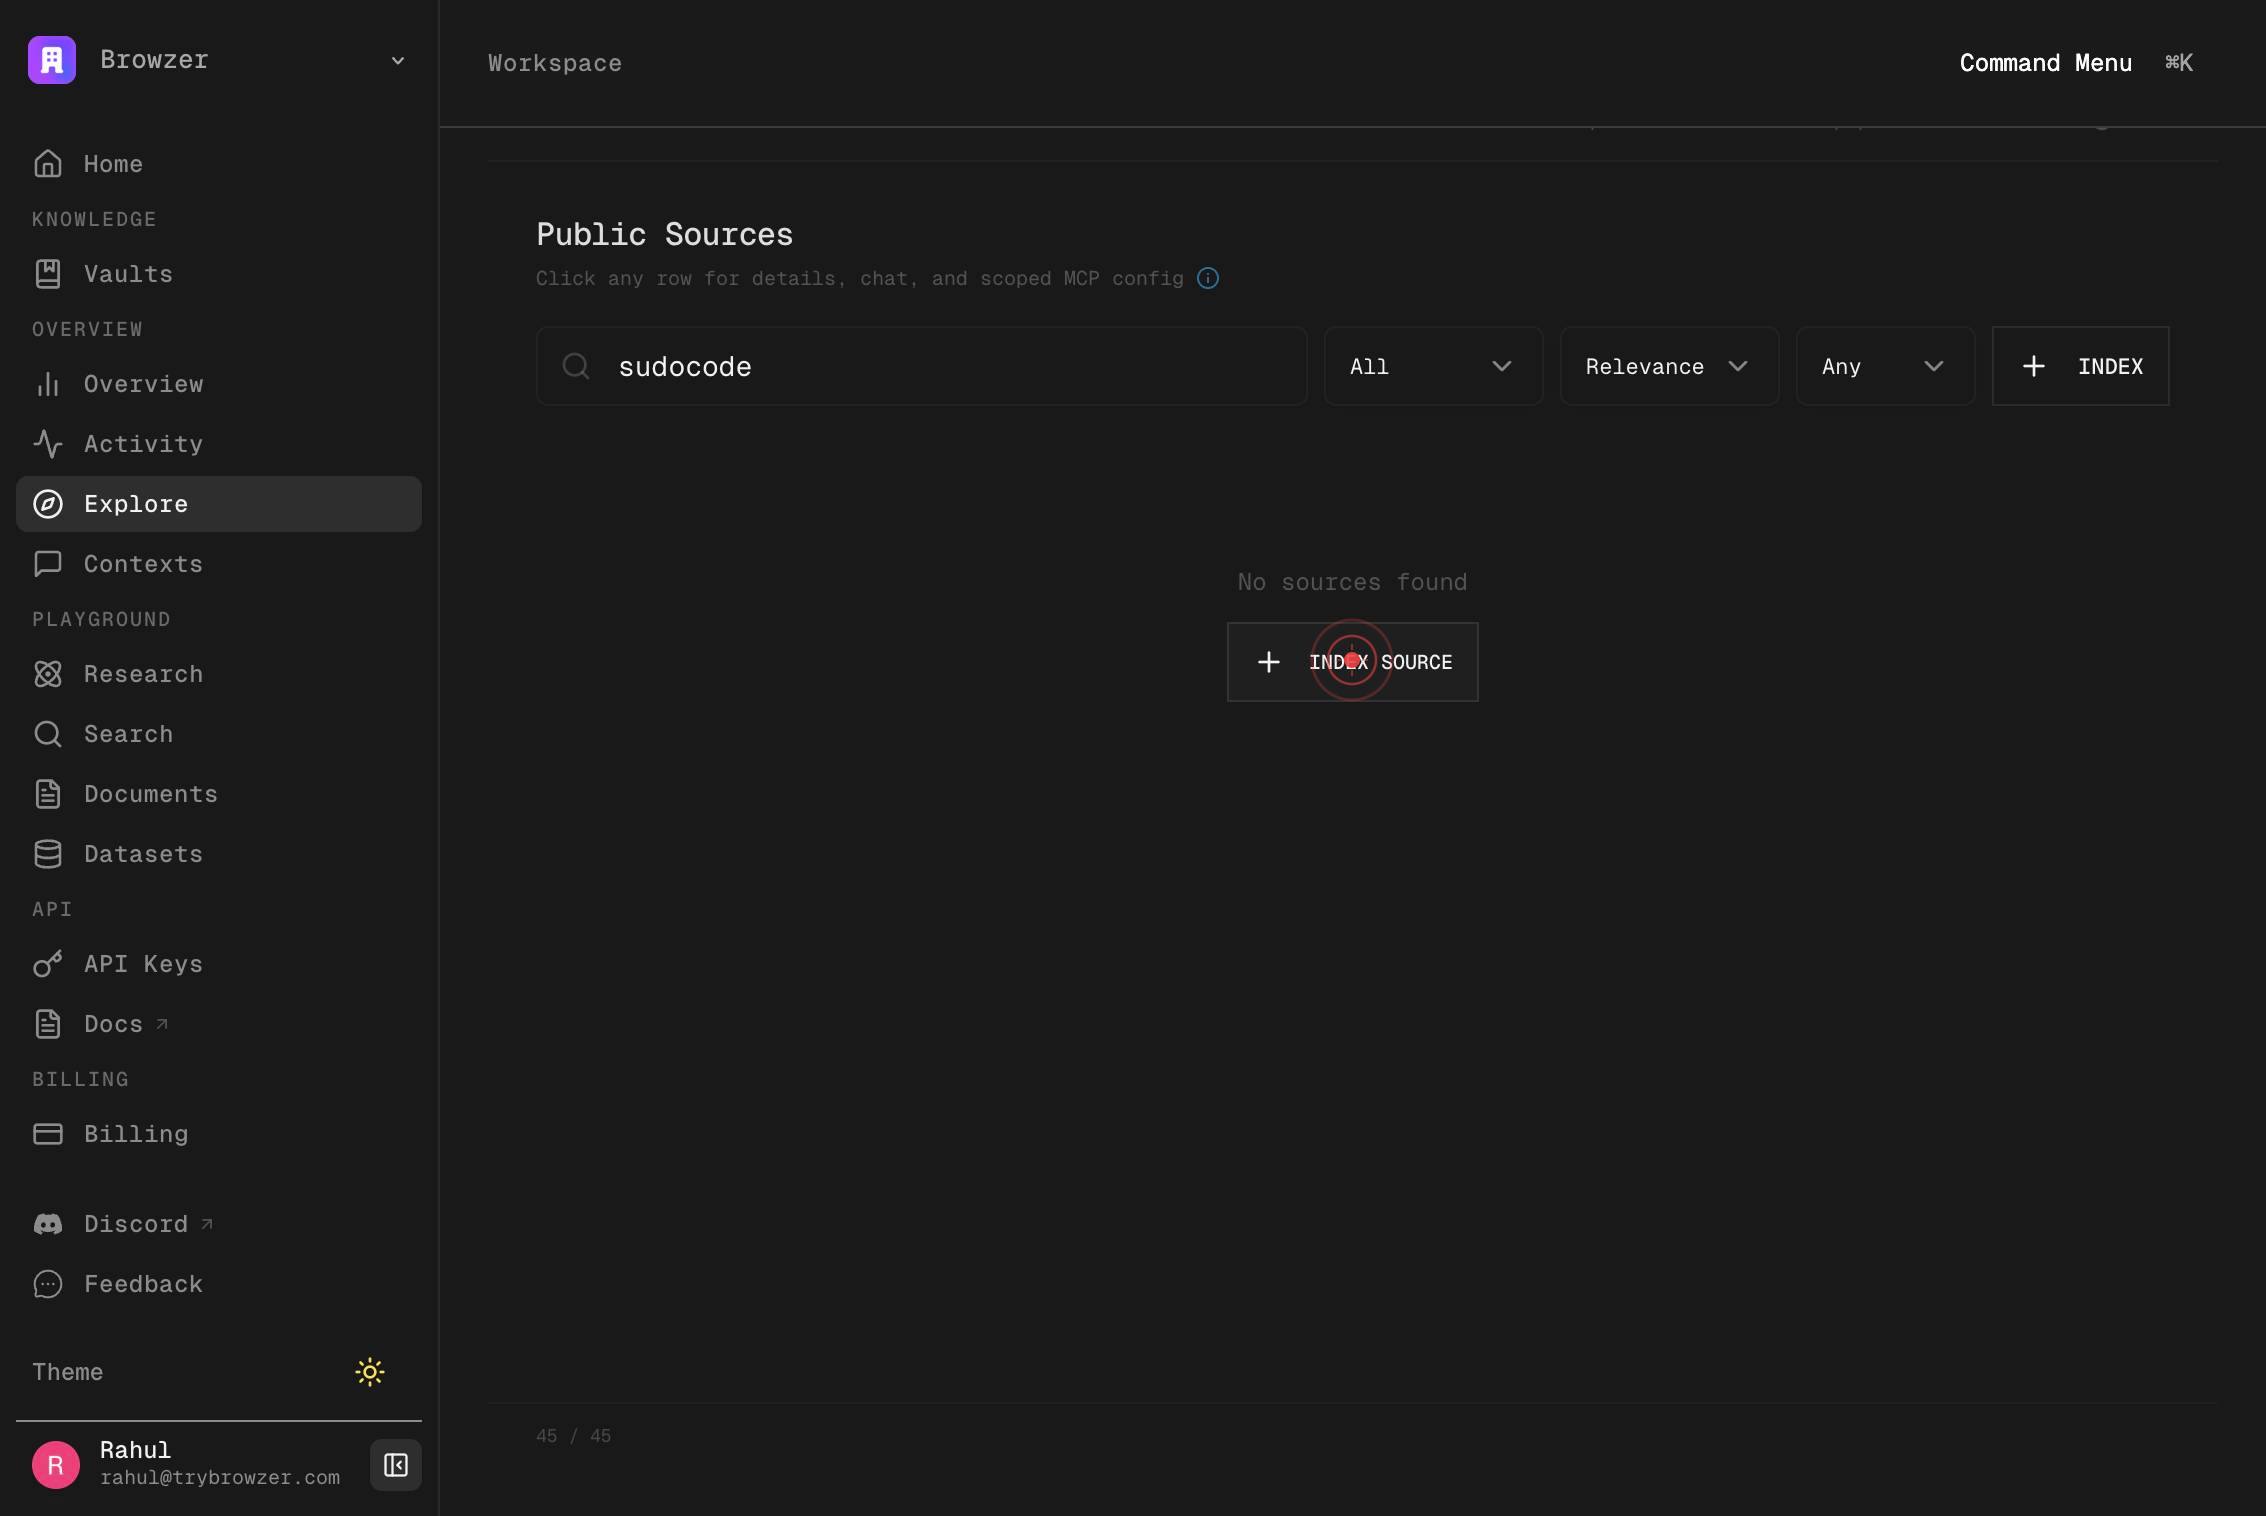
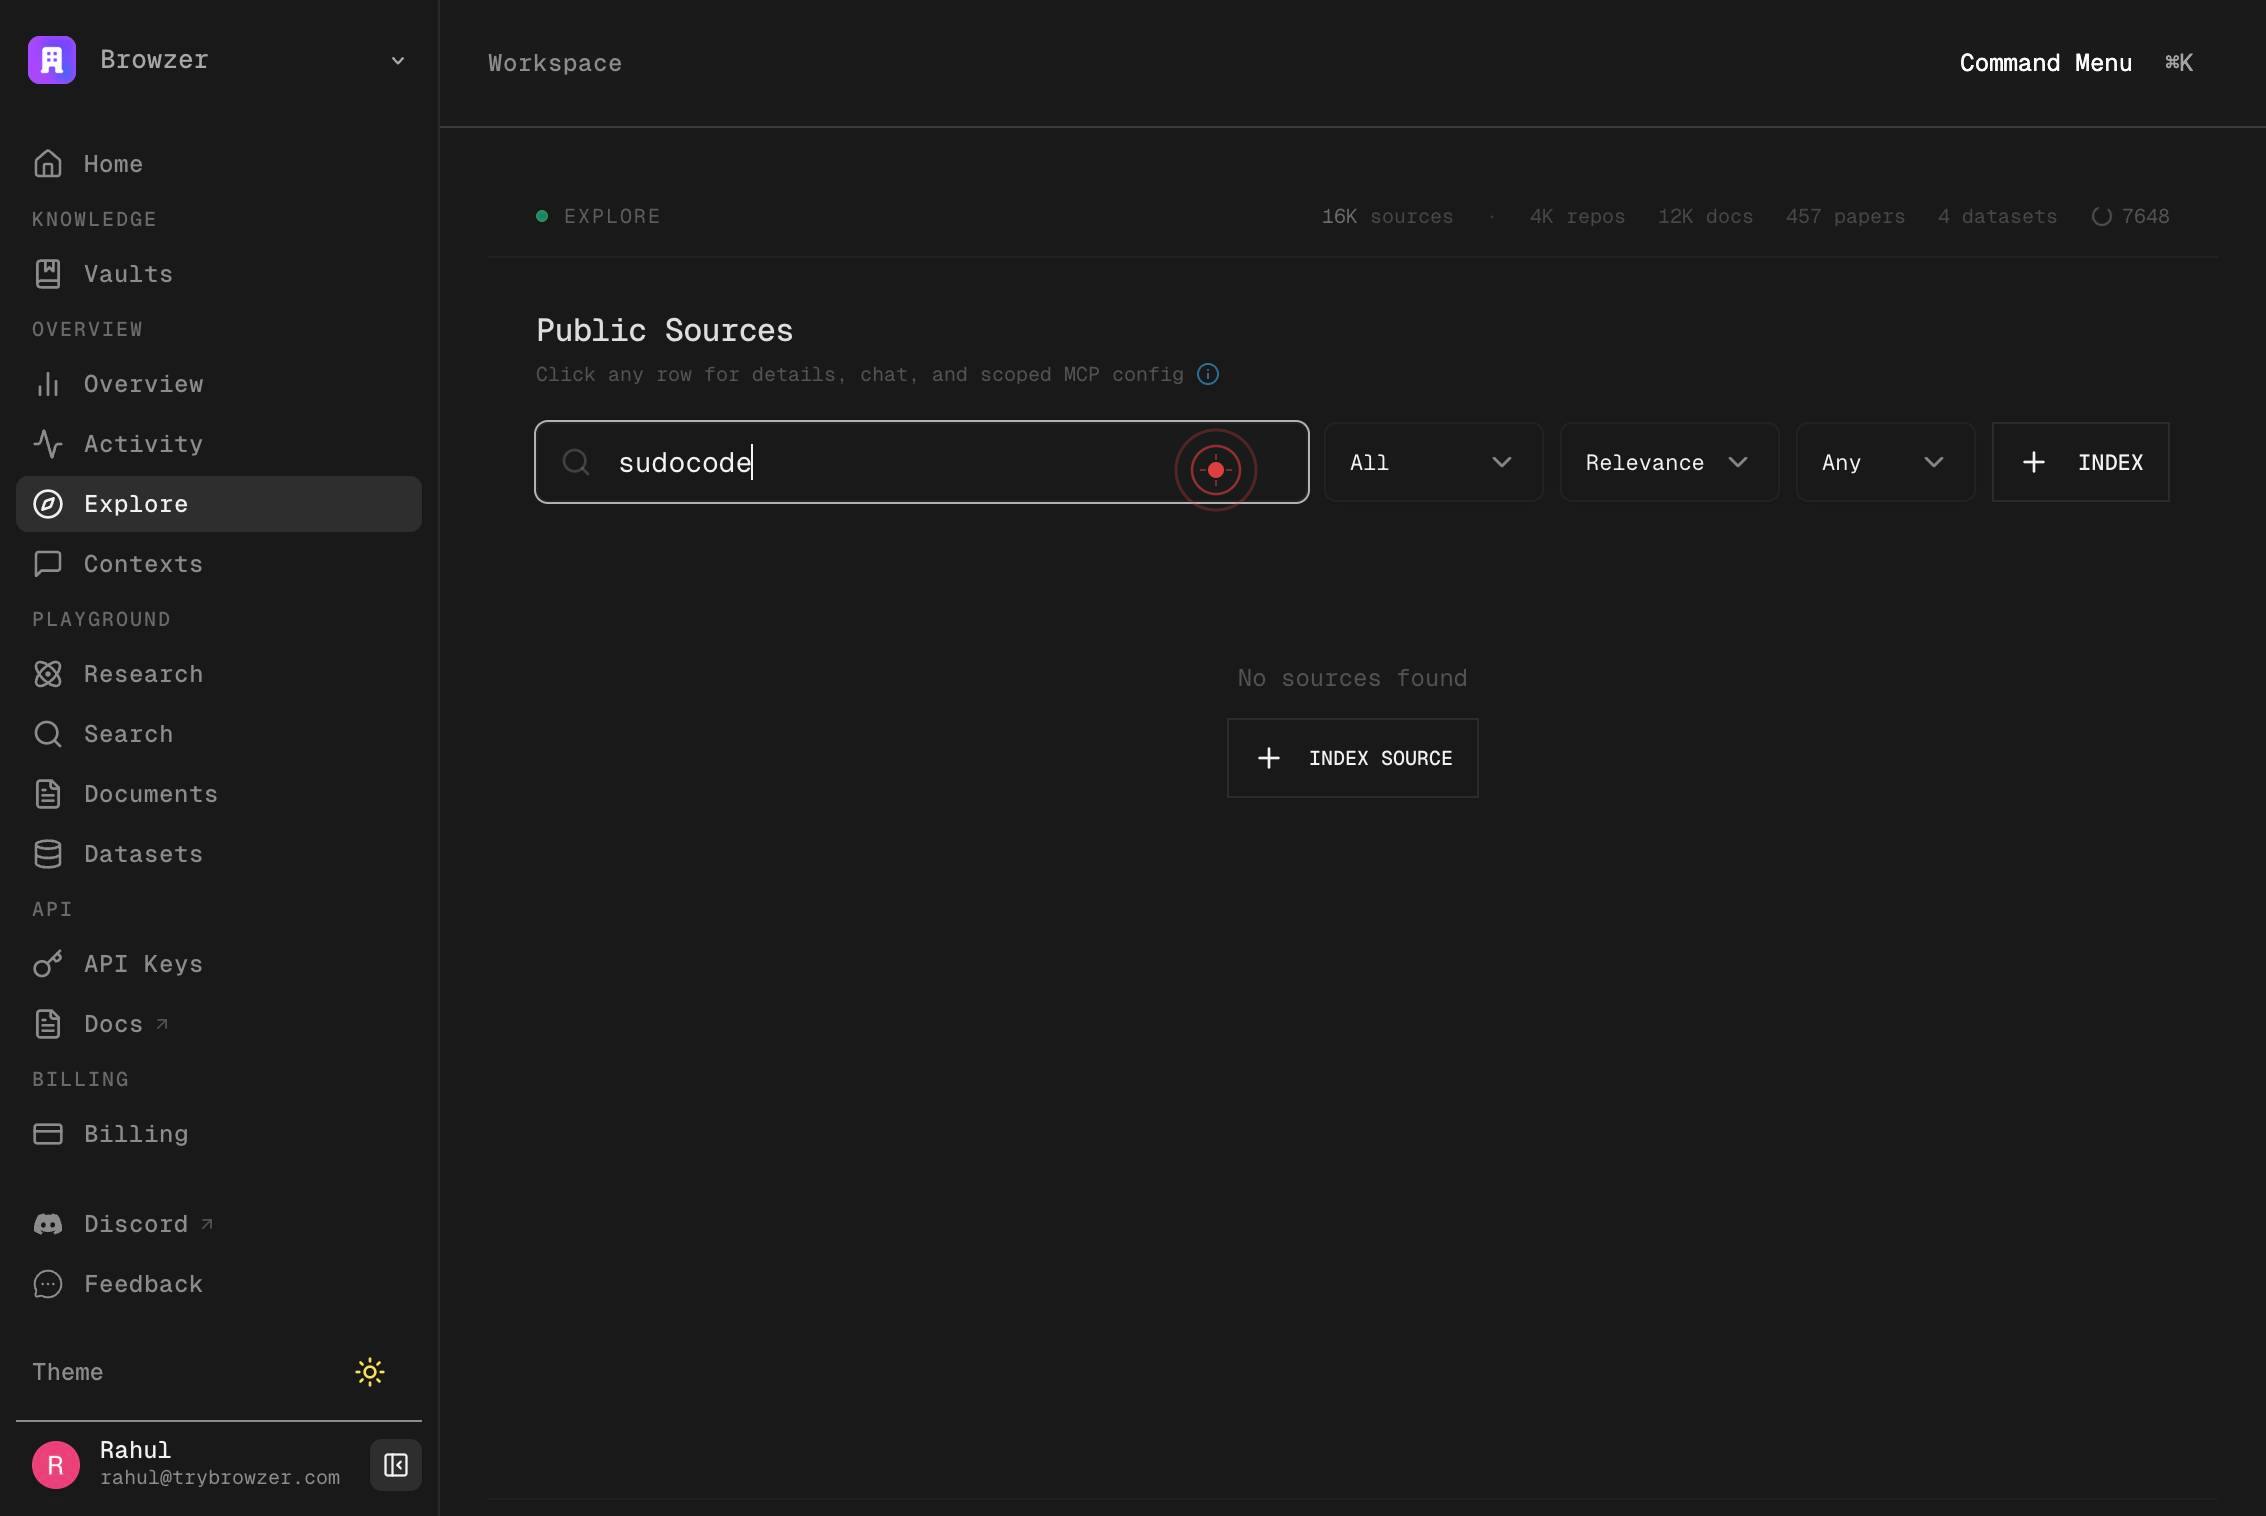
ExploreNavigate to the Explore section by clicking the Explore link in the top navigation. This is where you can browse, manage, and index repositories.
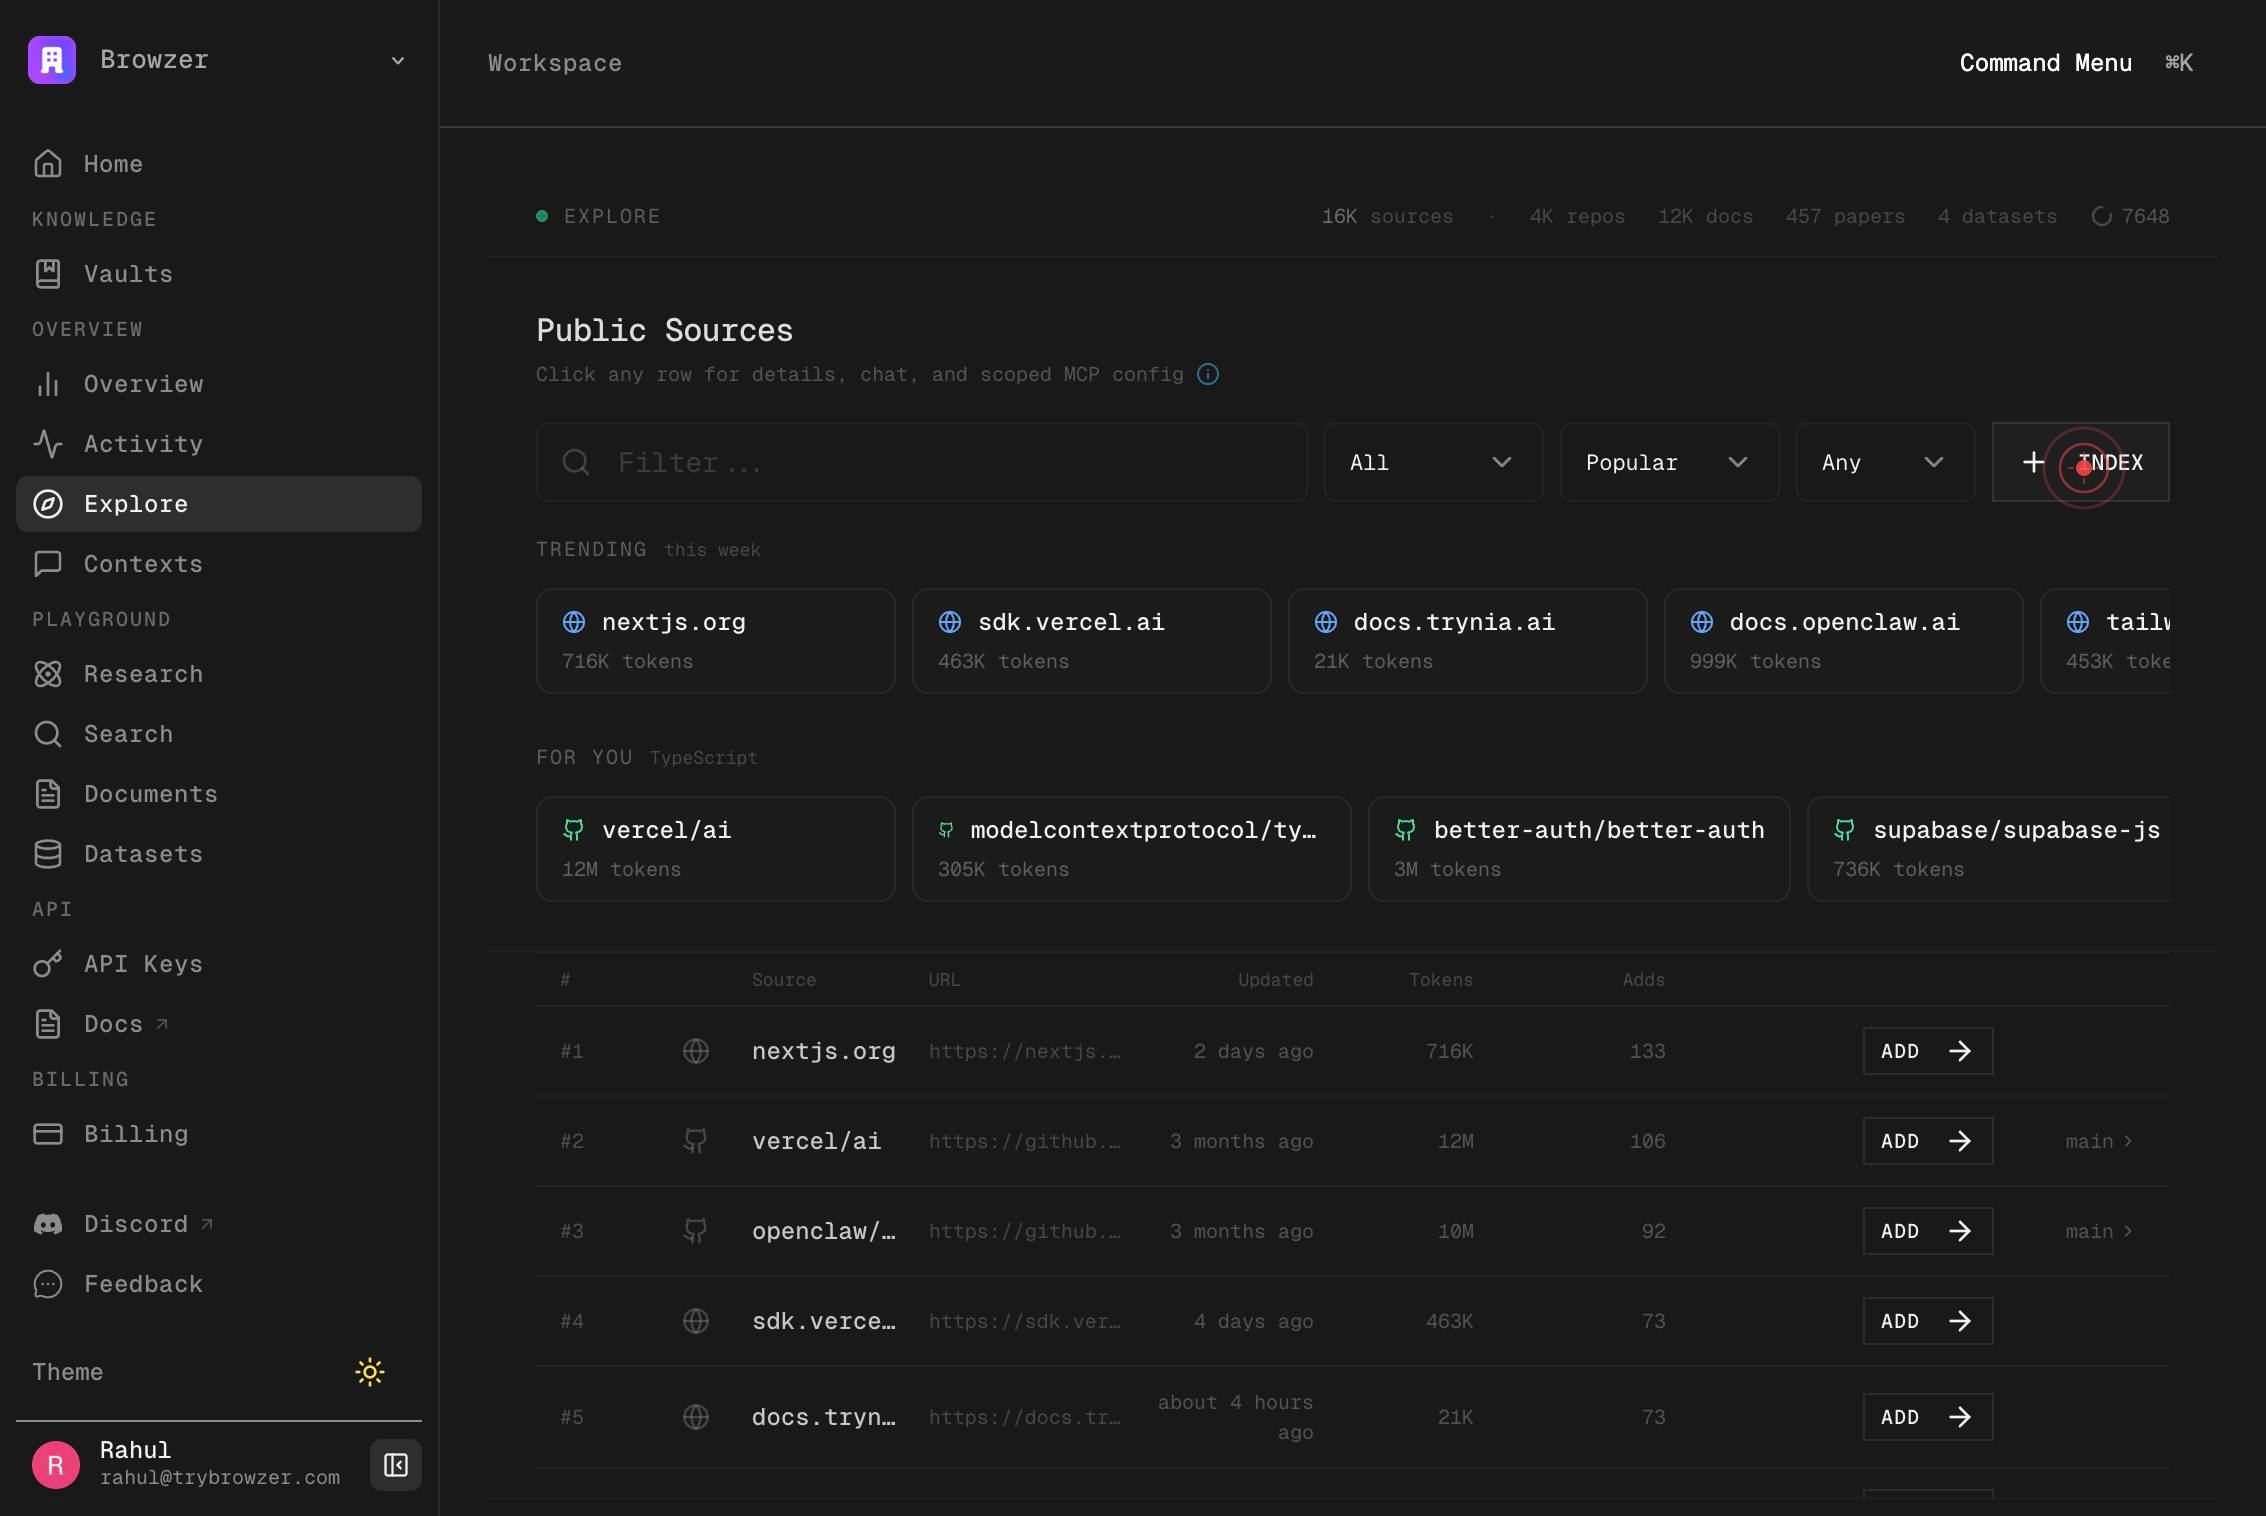
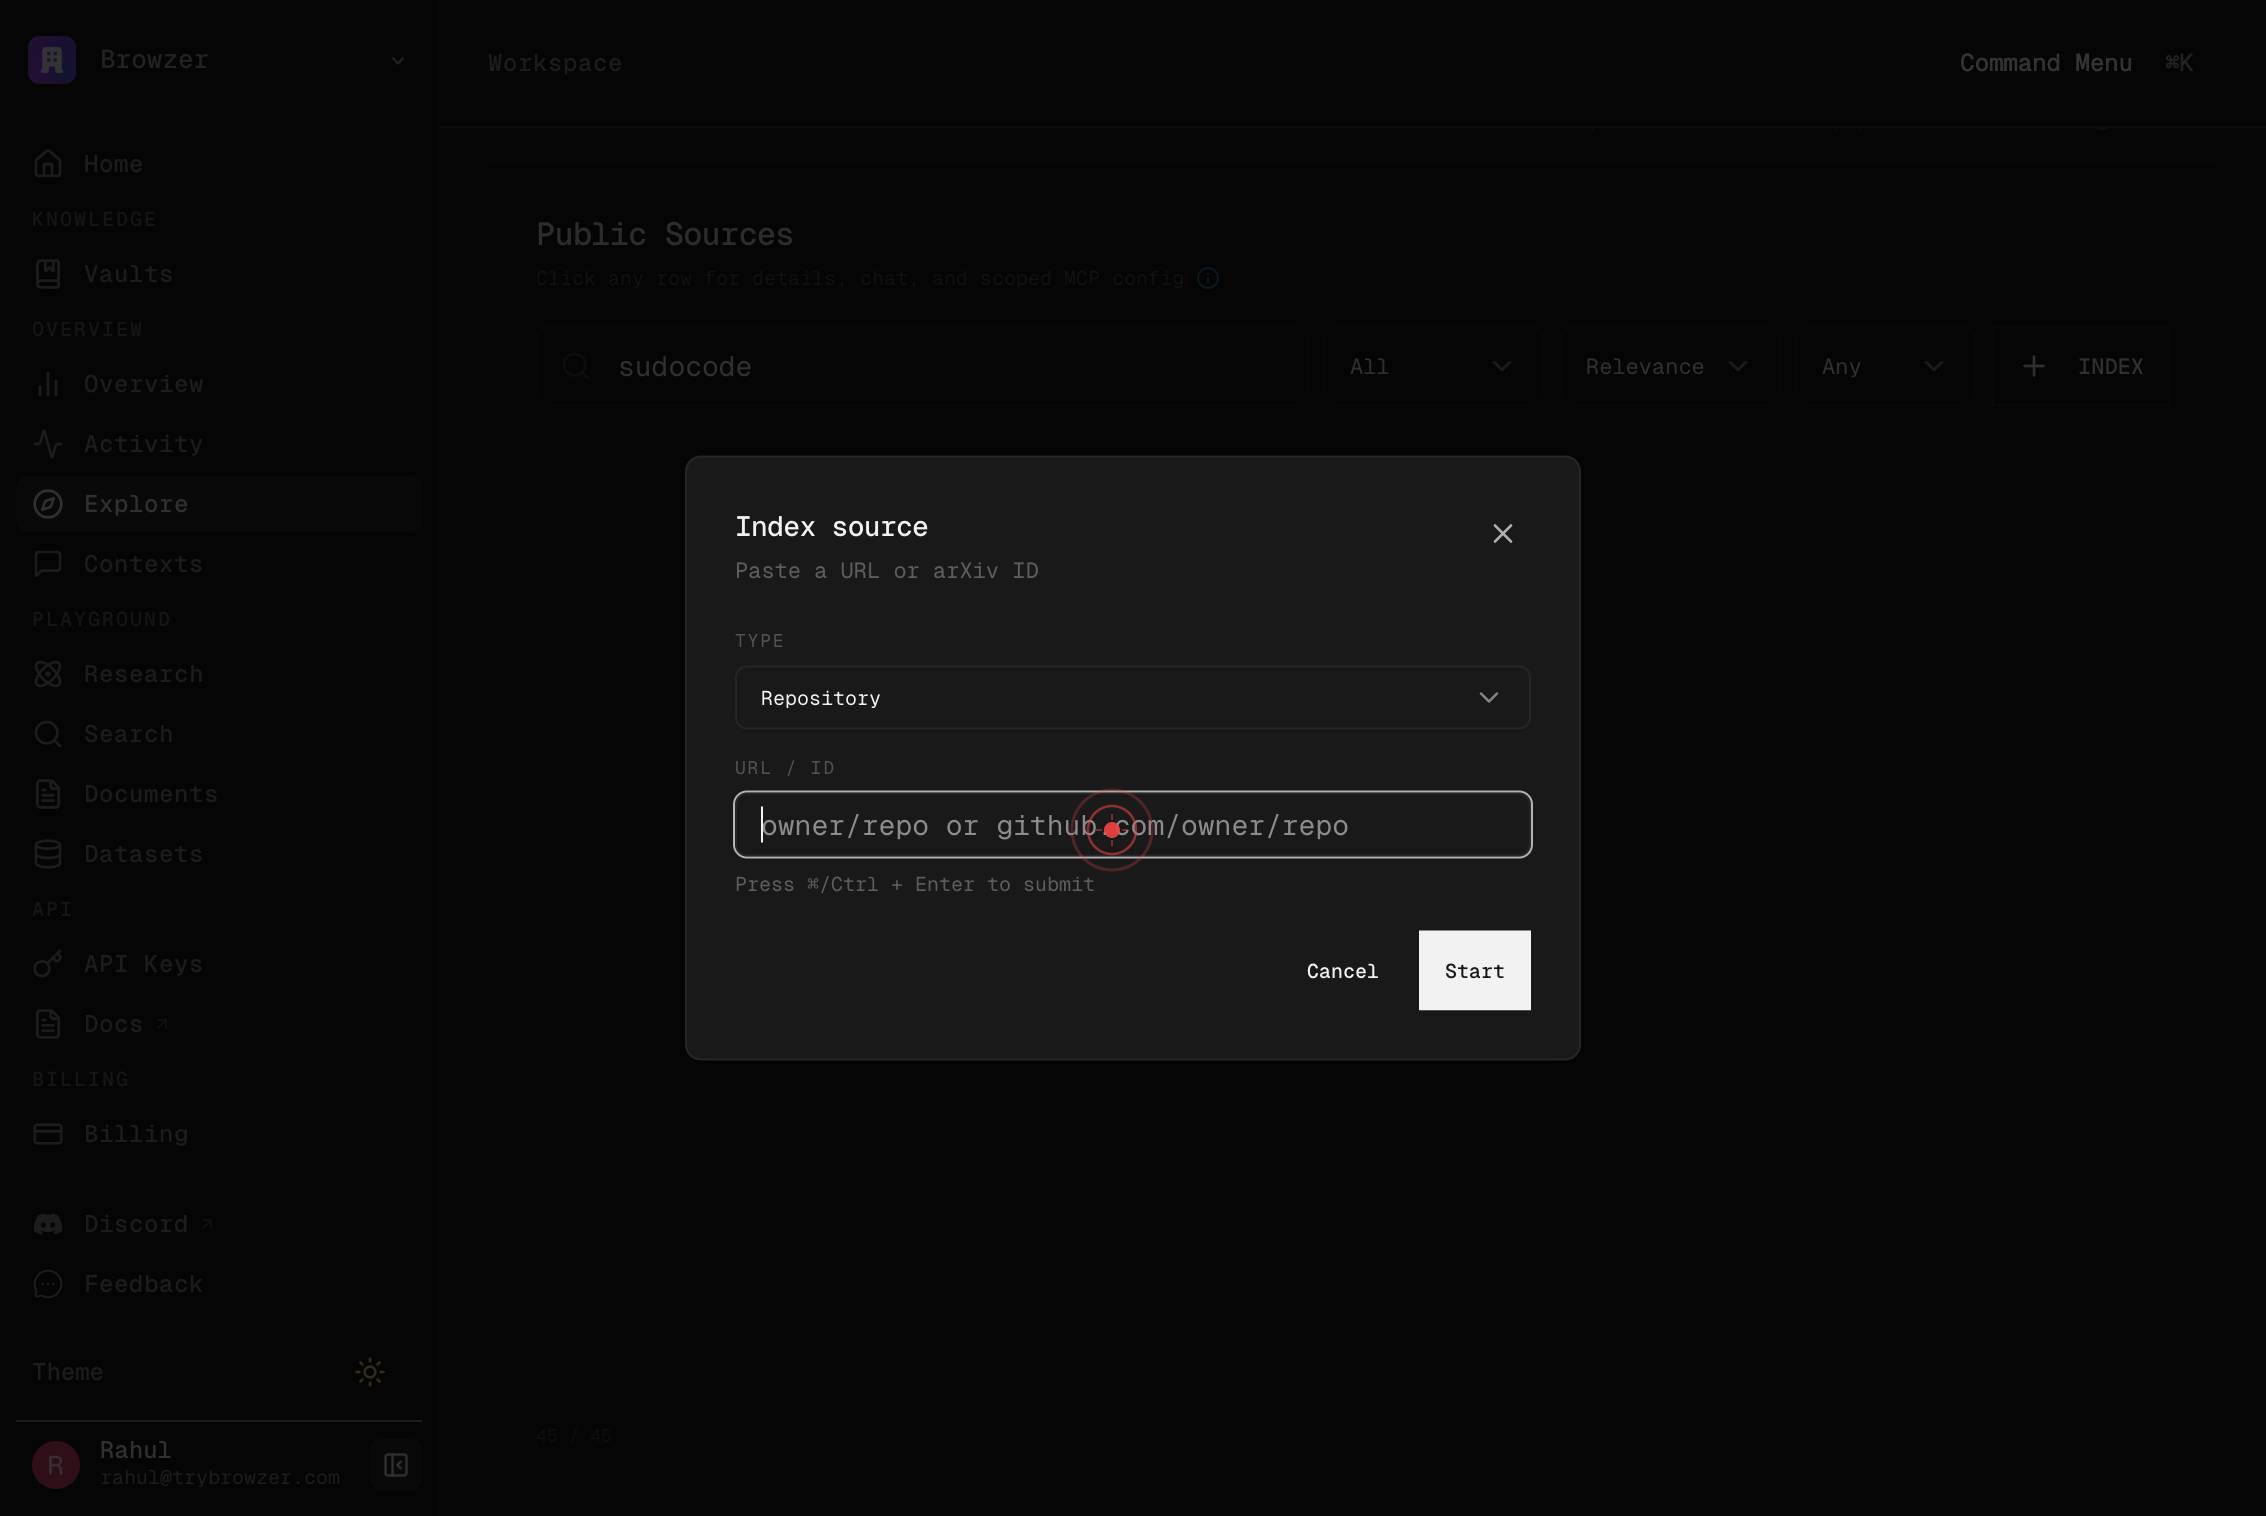
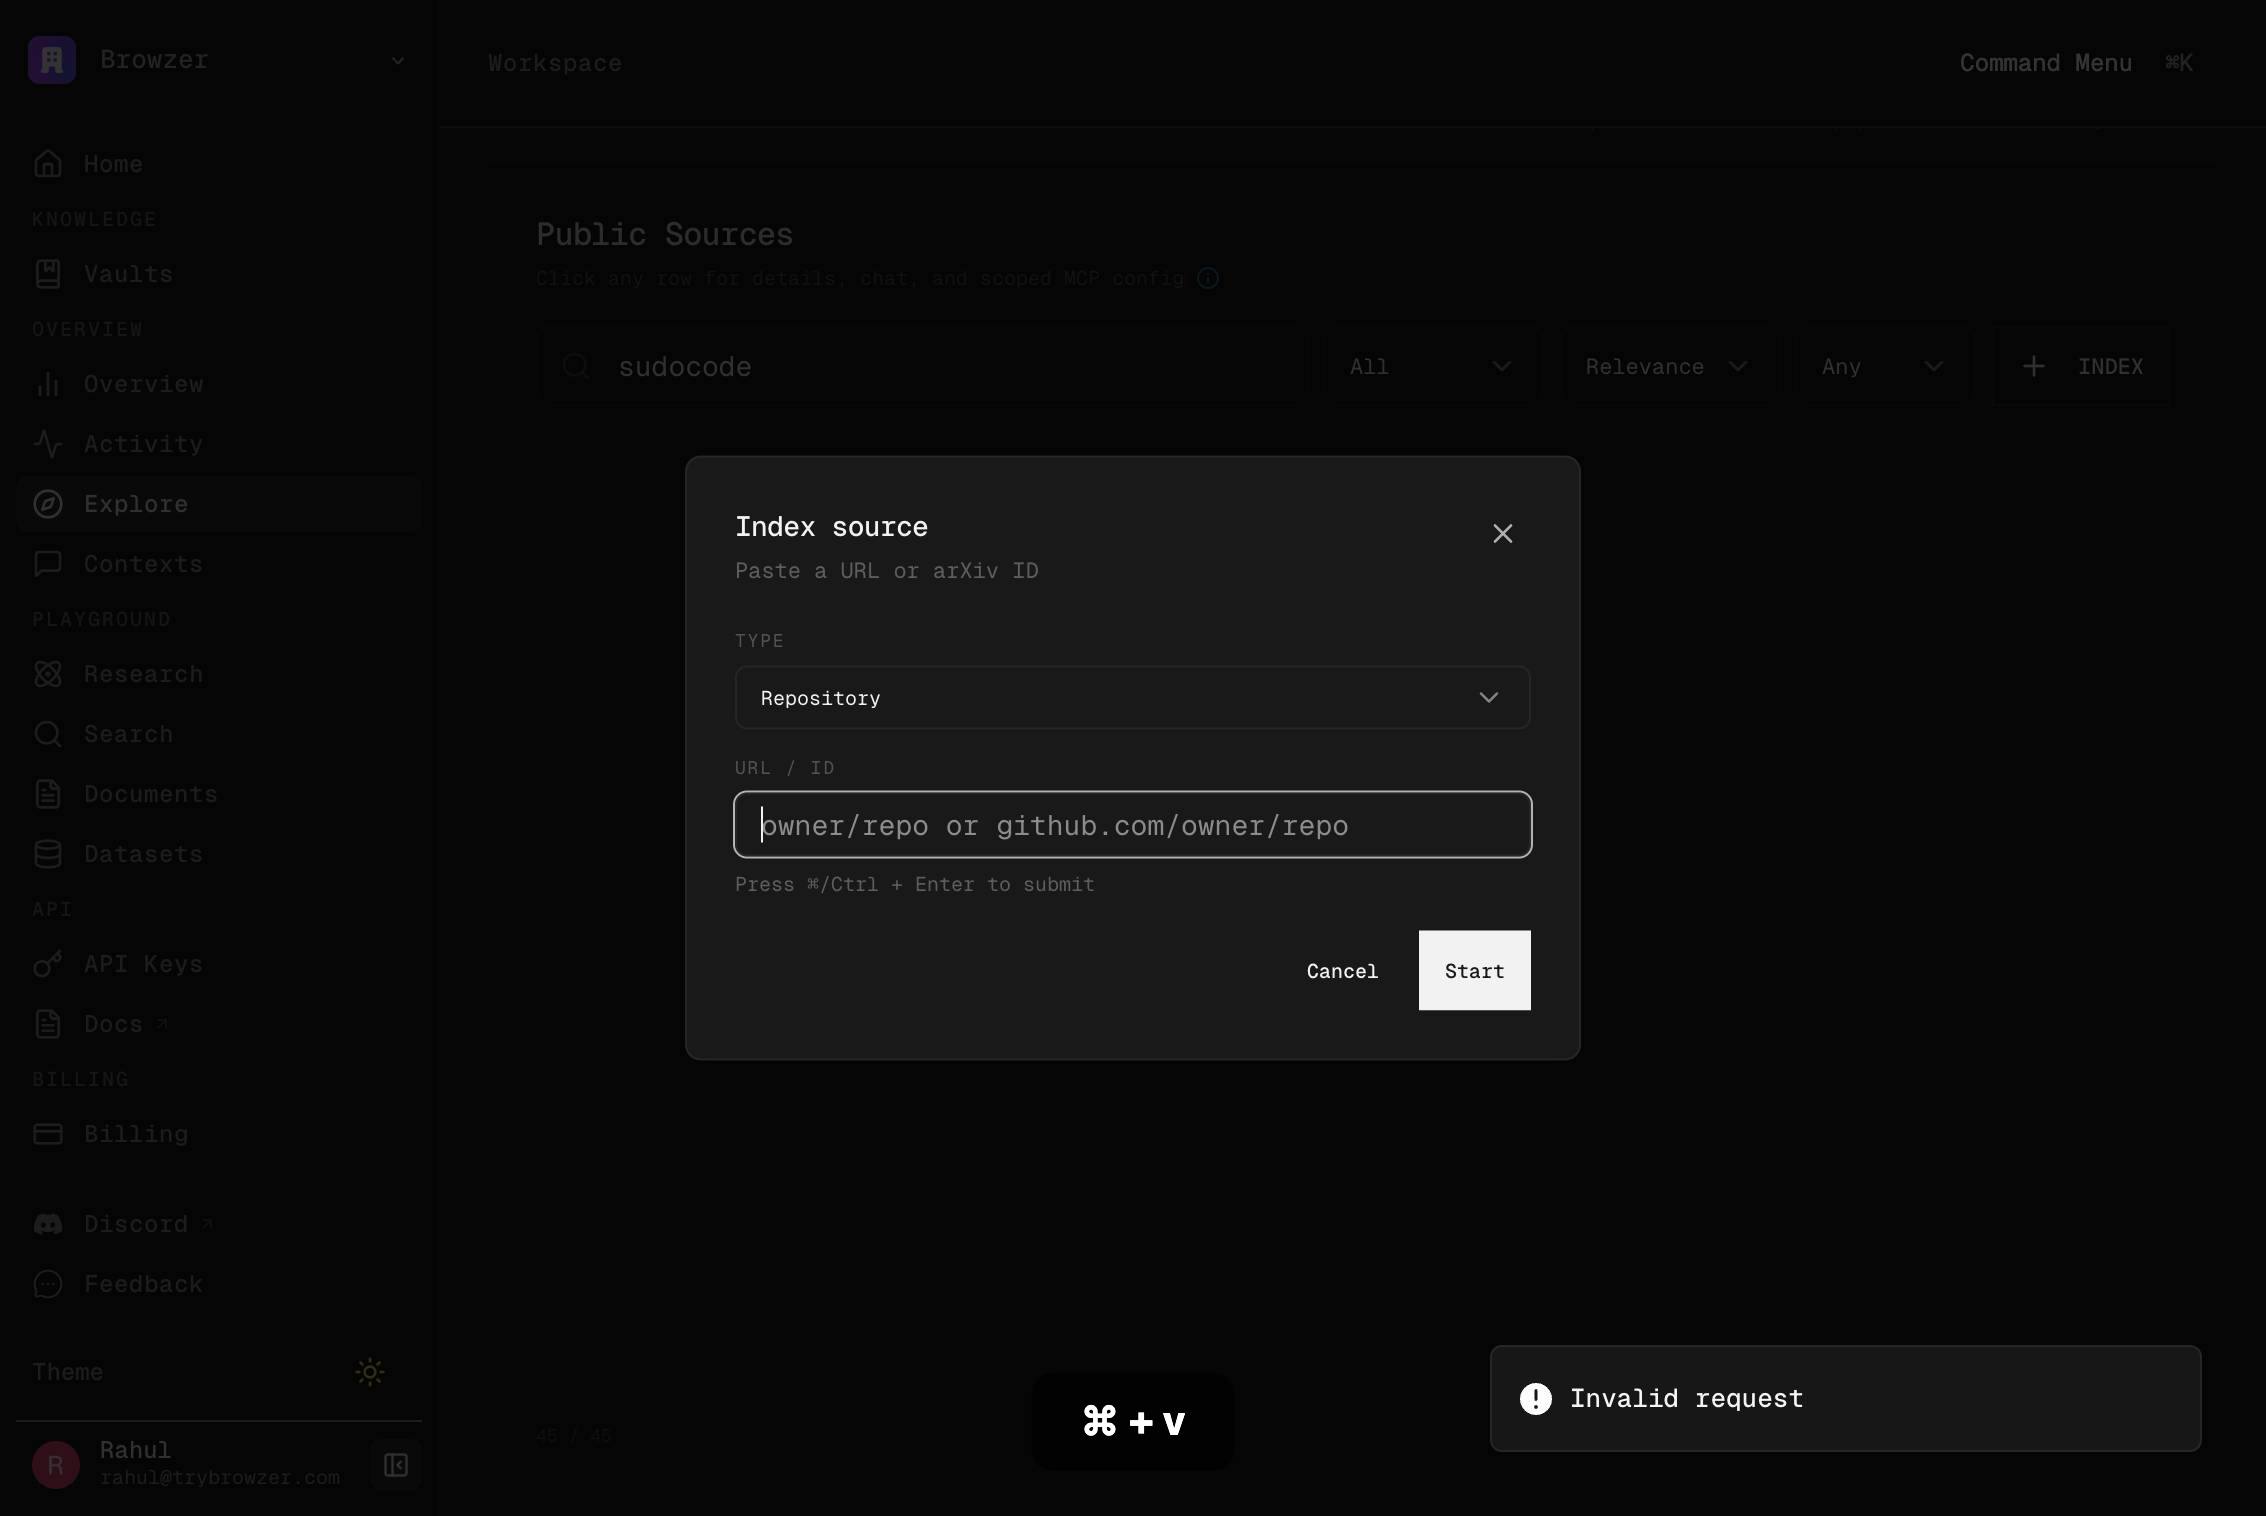
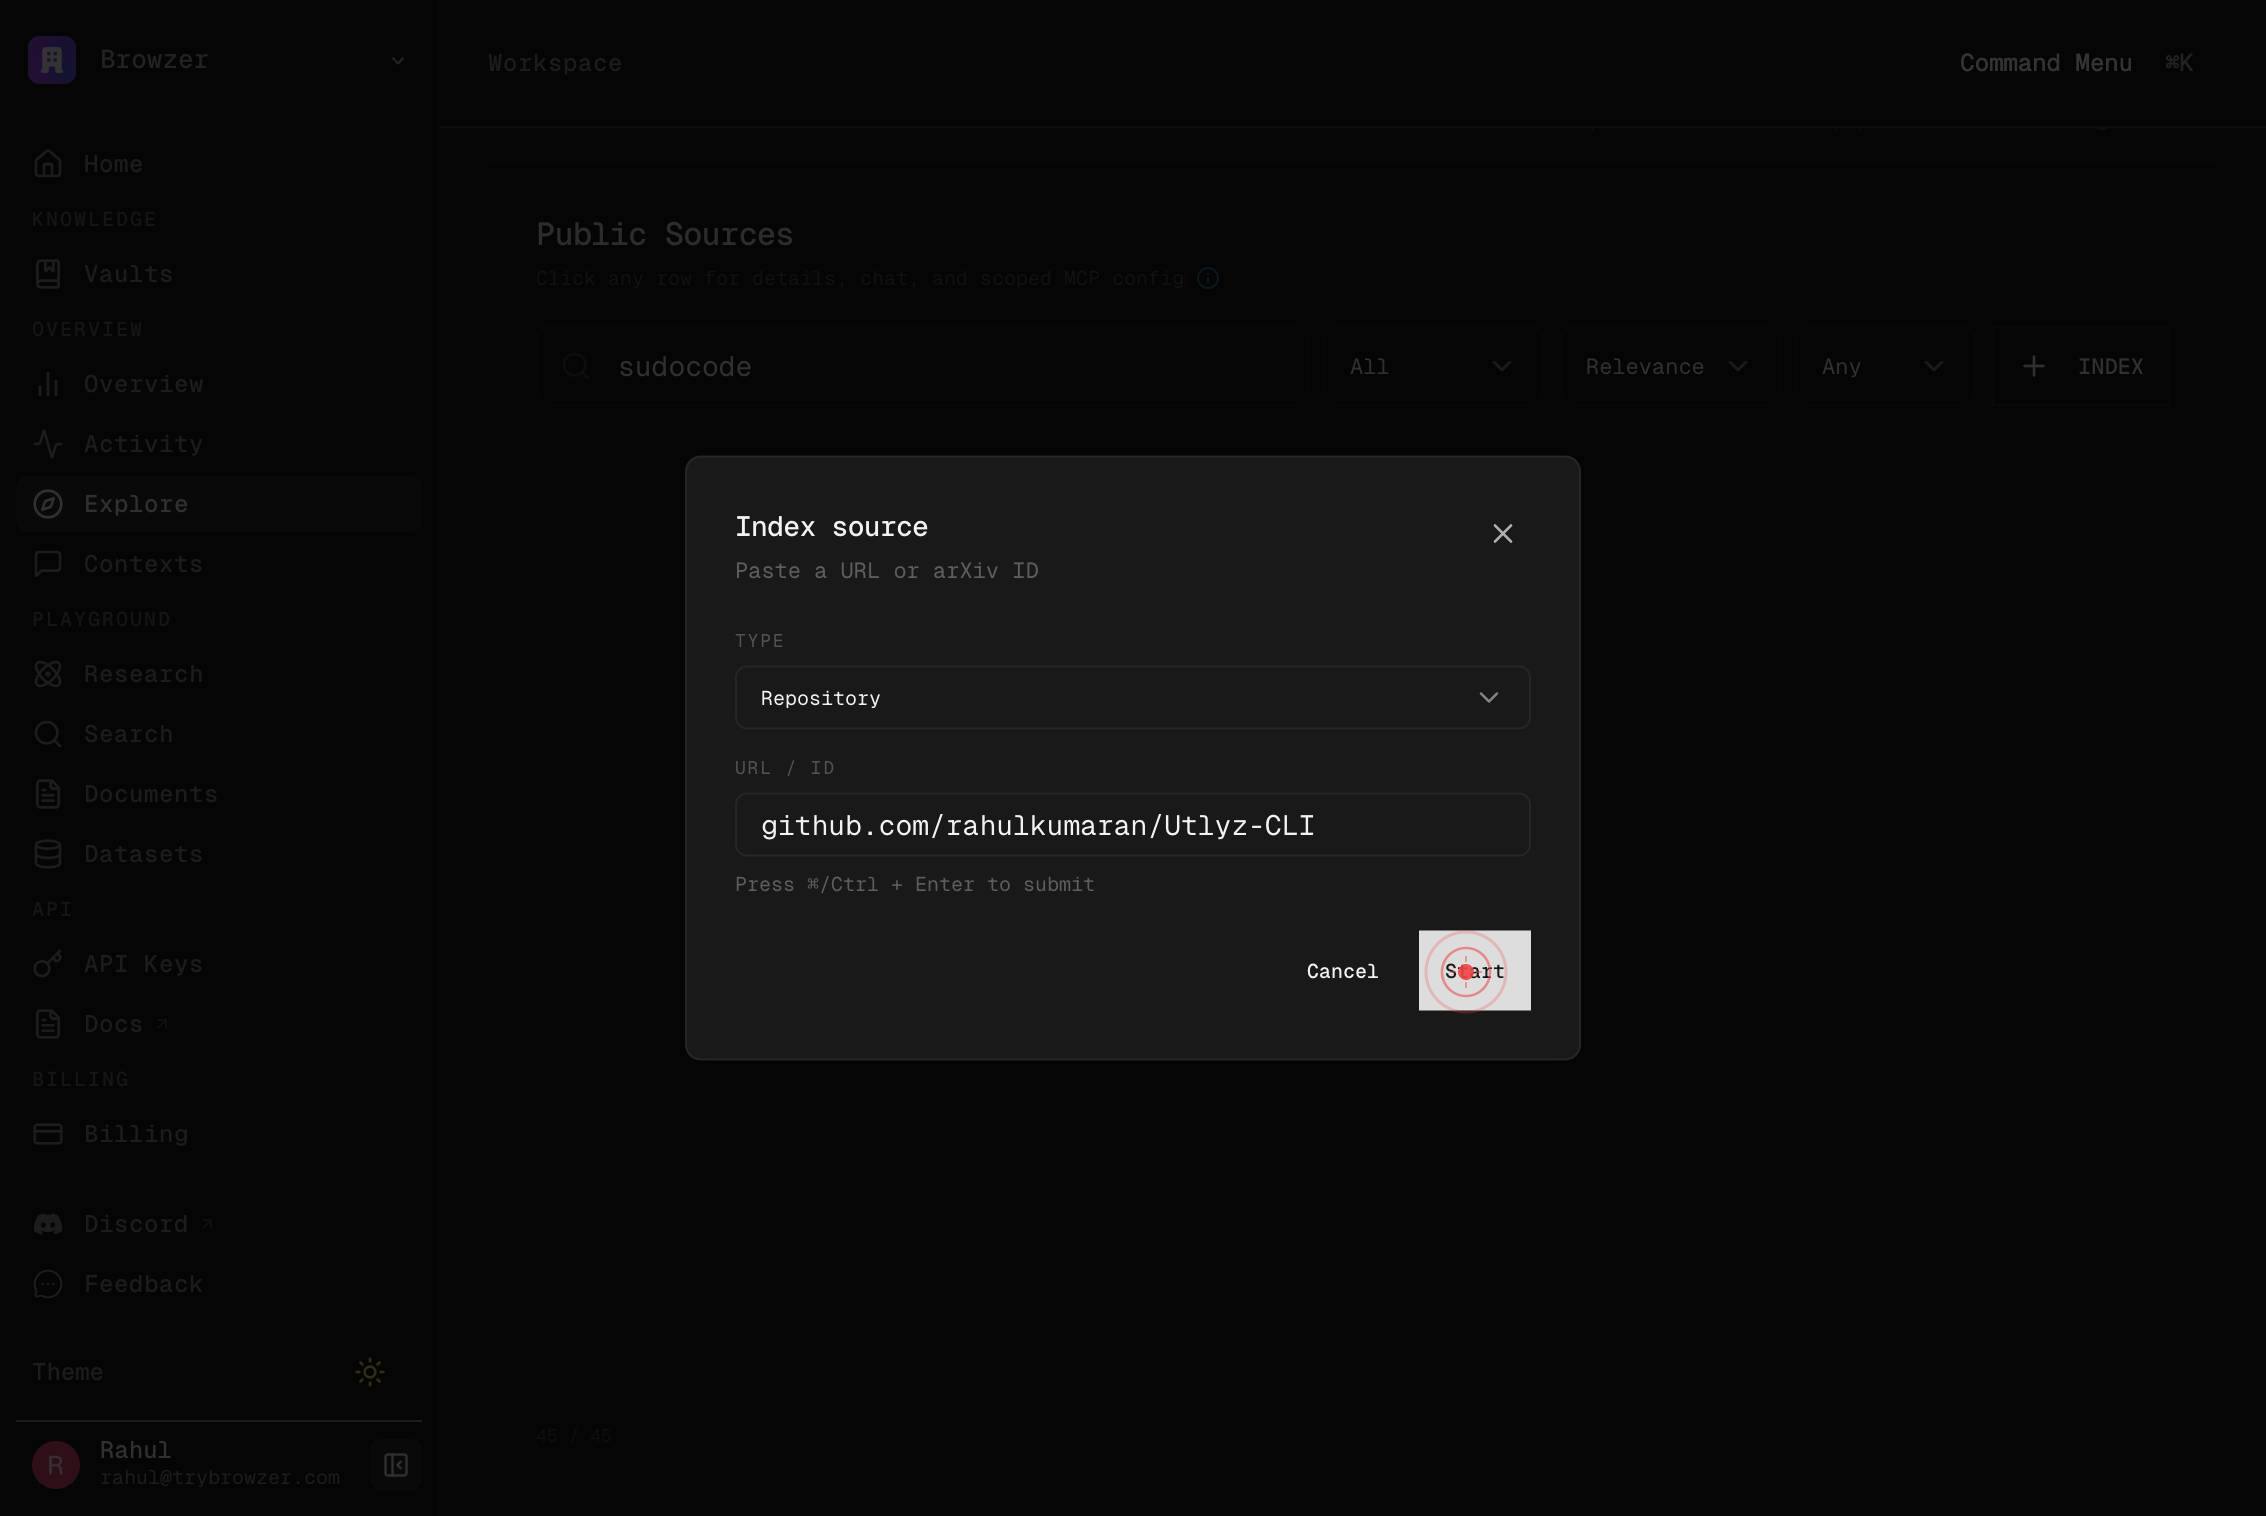
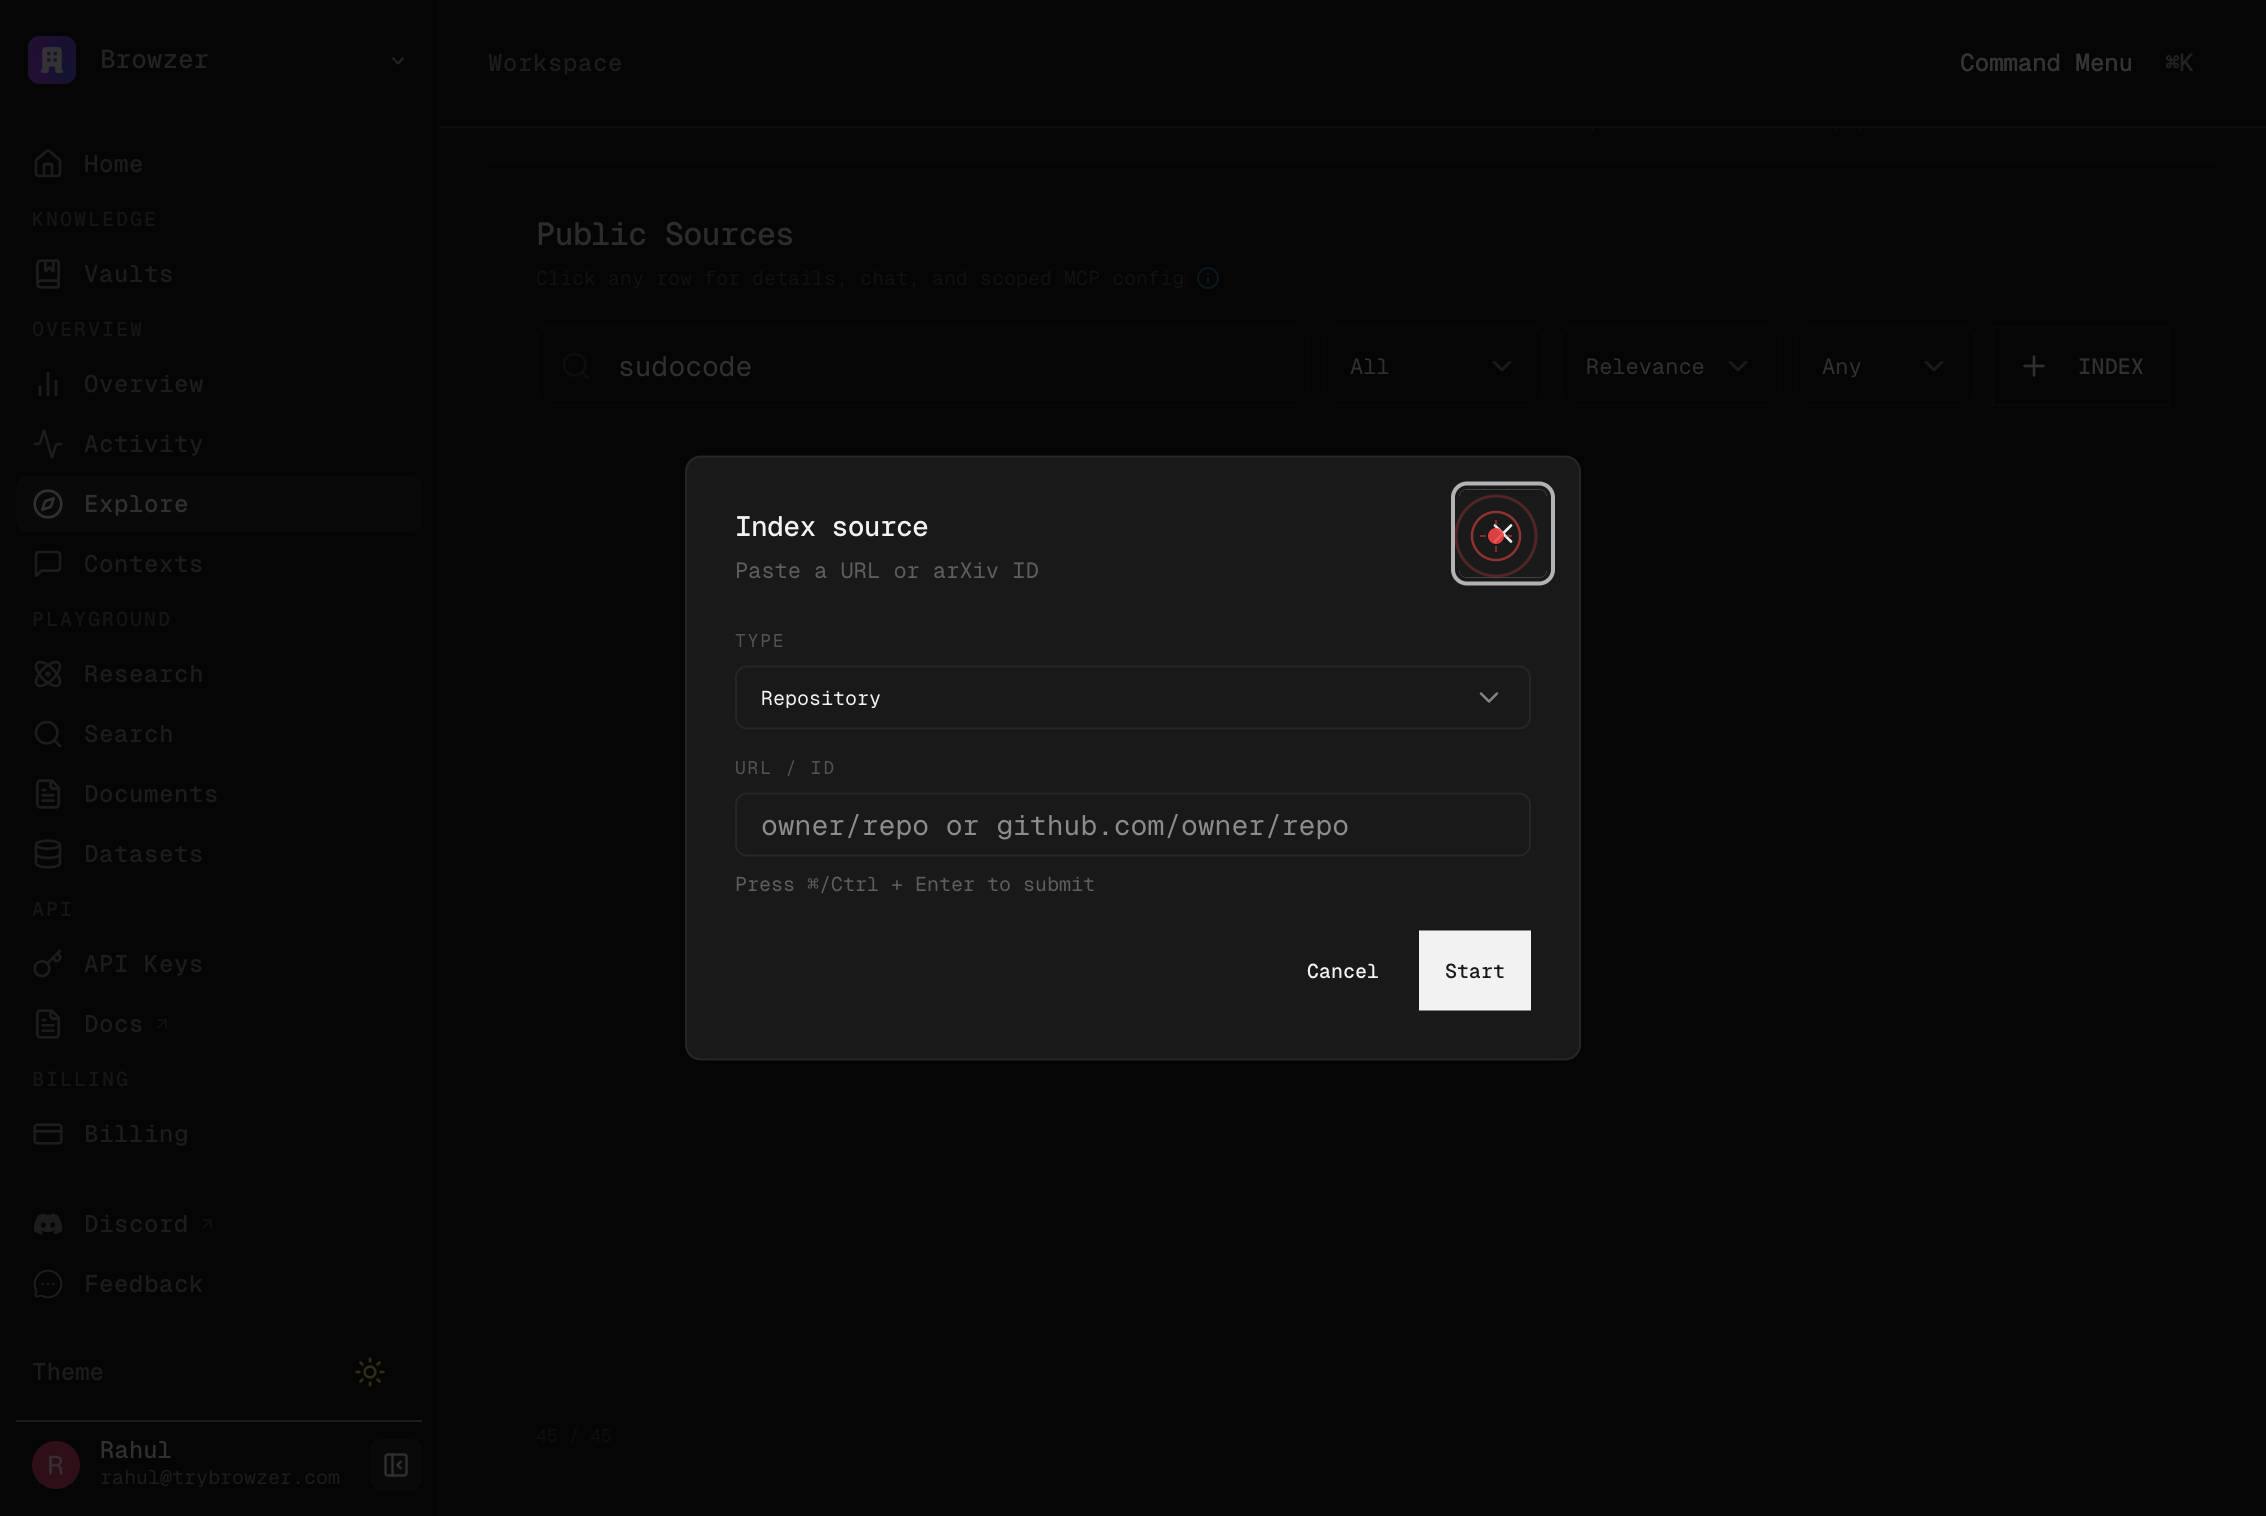
INDEXClick the INDEX button to open the repository indexing dialog. This launches the interface for adding a new repository to your workspace.
owner/repo or github.com/owner/repoClick into the repository input field labeled 'owner/repo or github.com/owner/repo' to focus it and prepare for text entry.
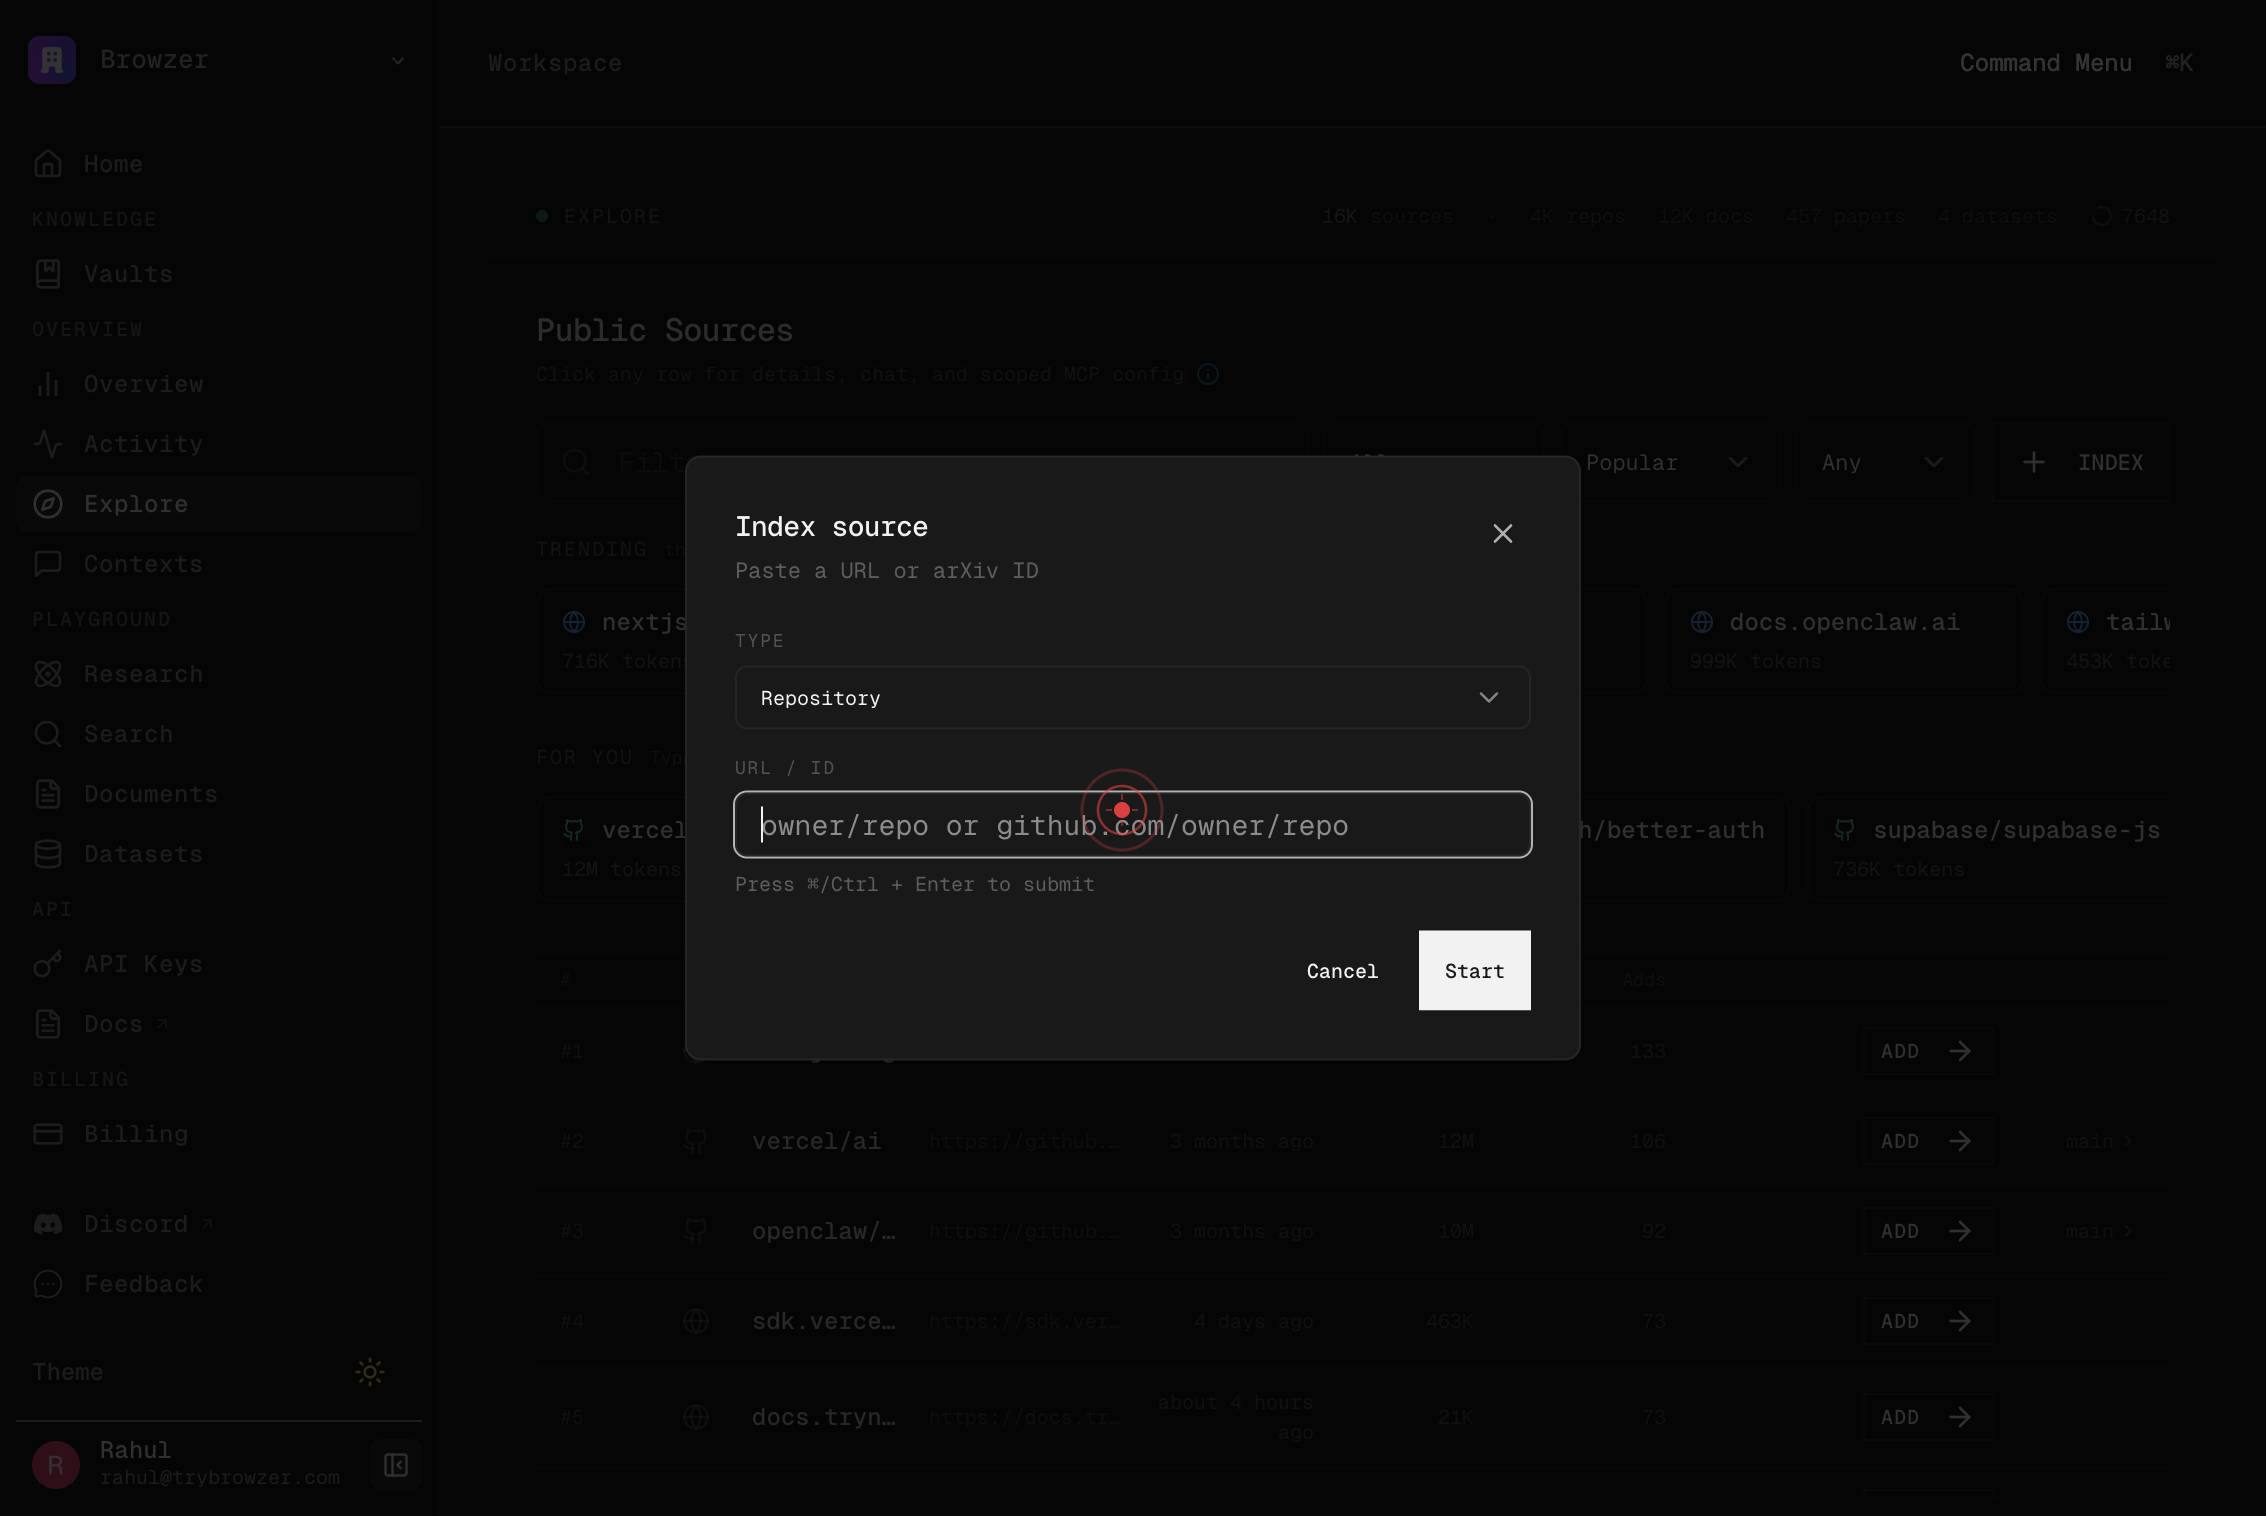
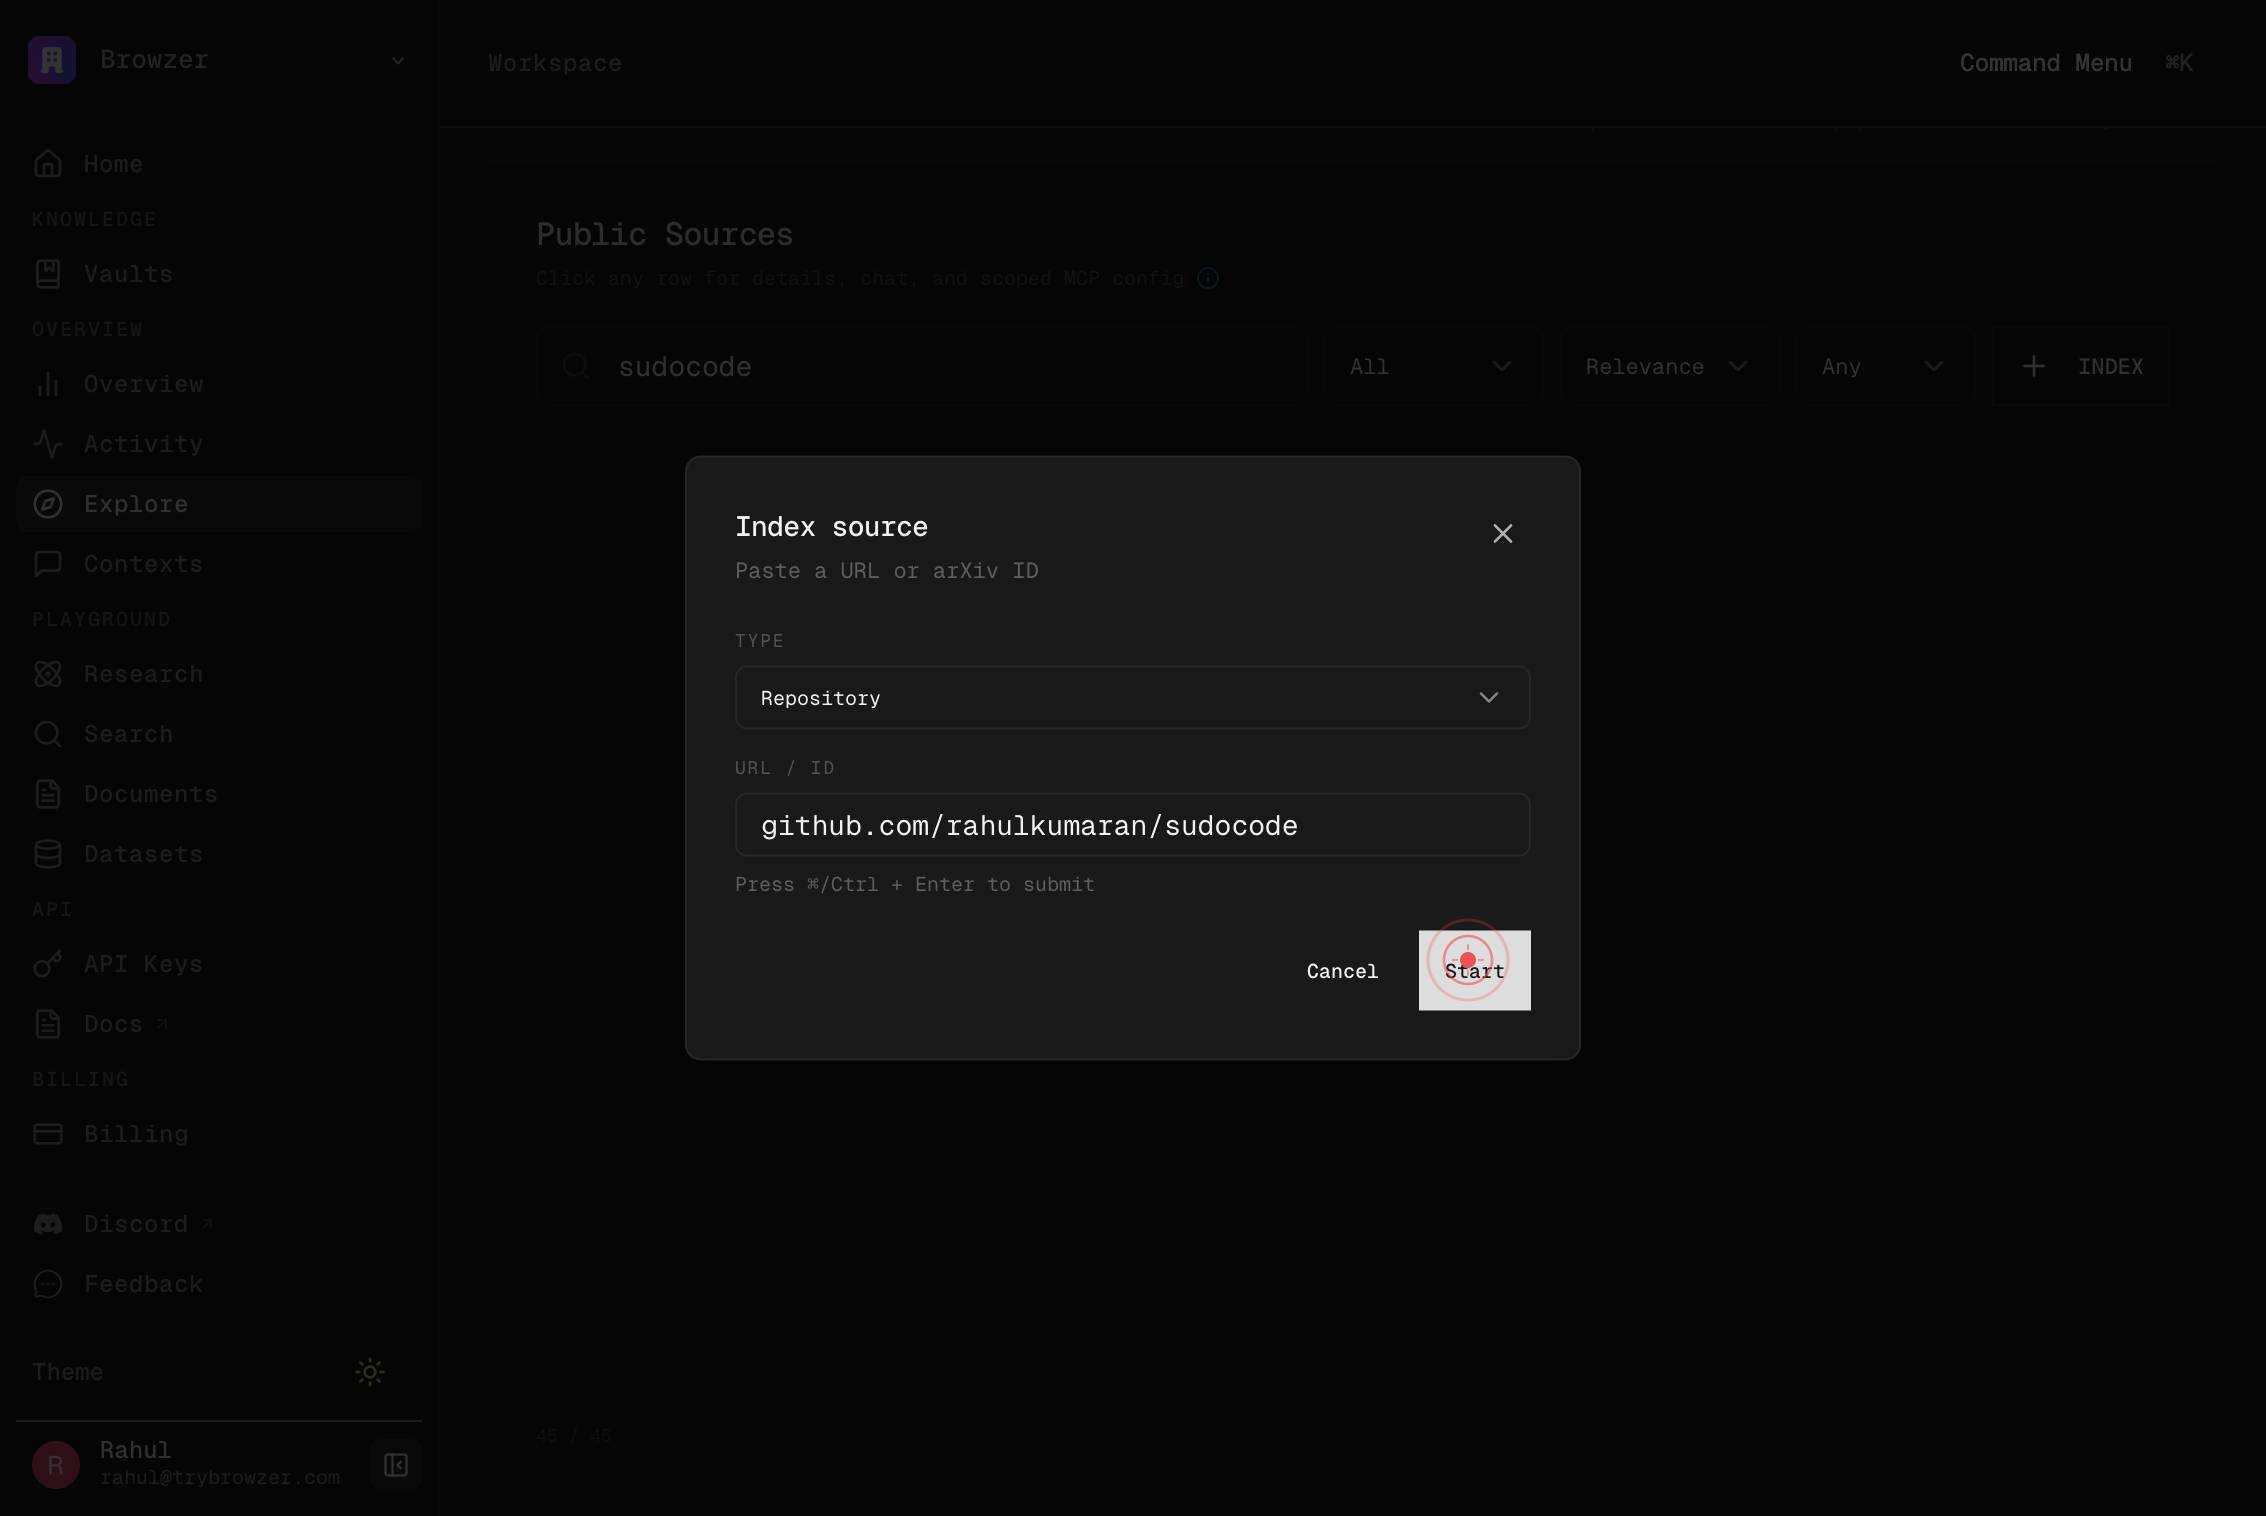
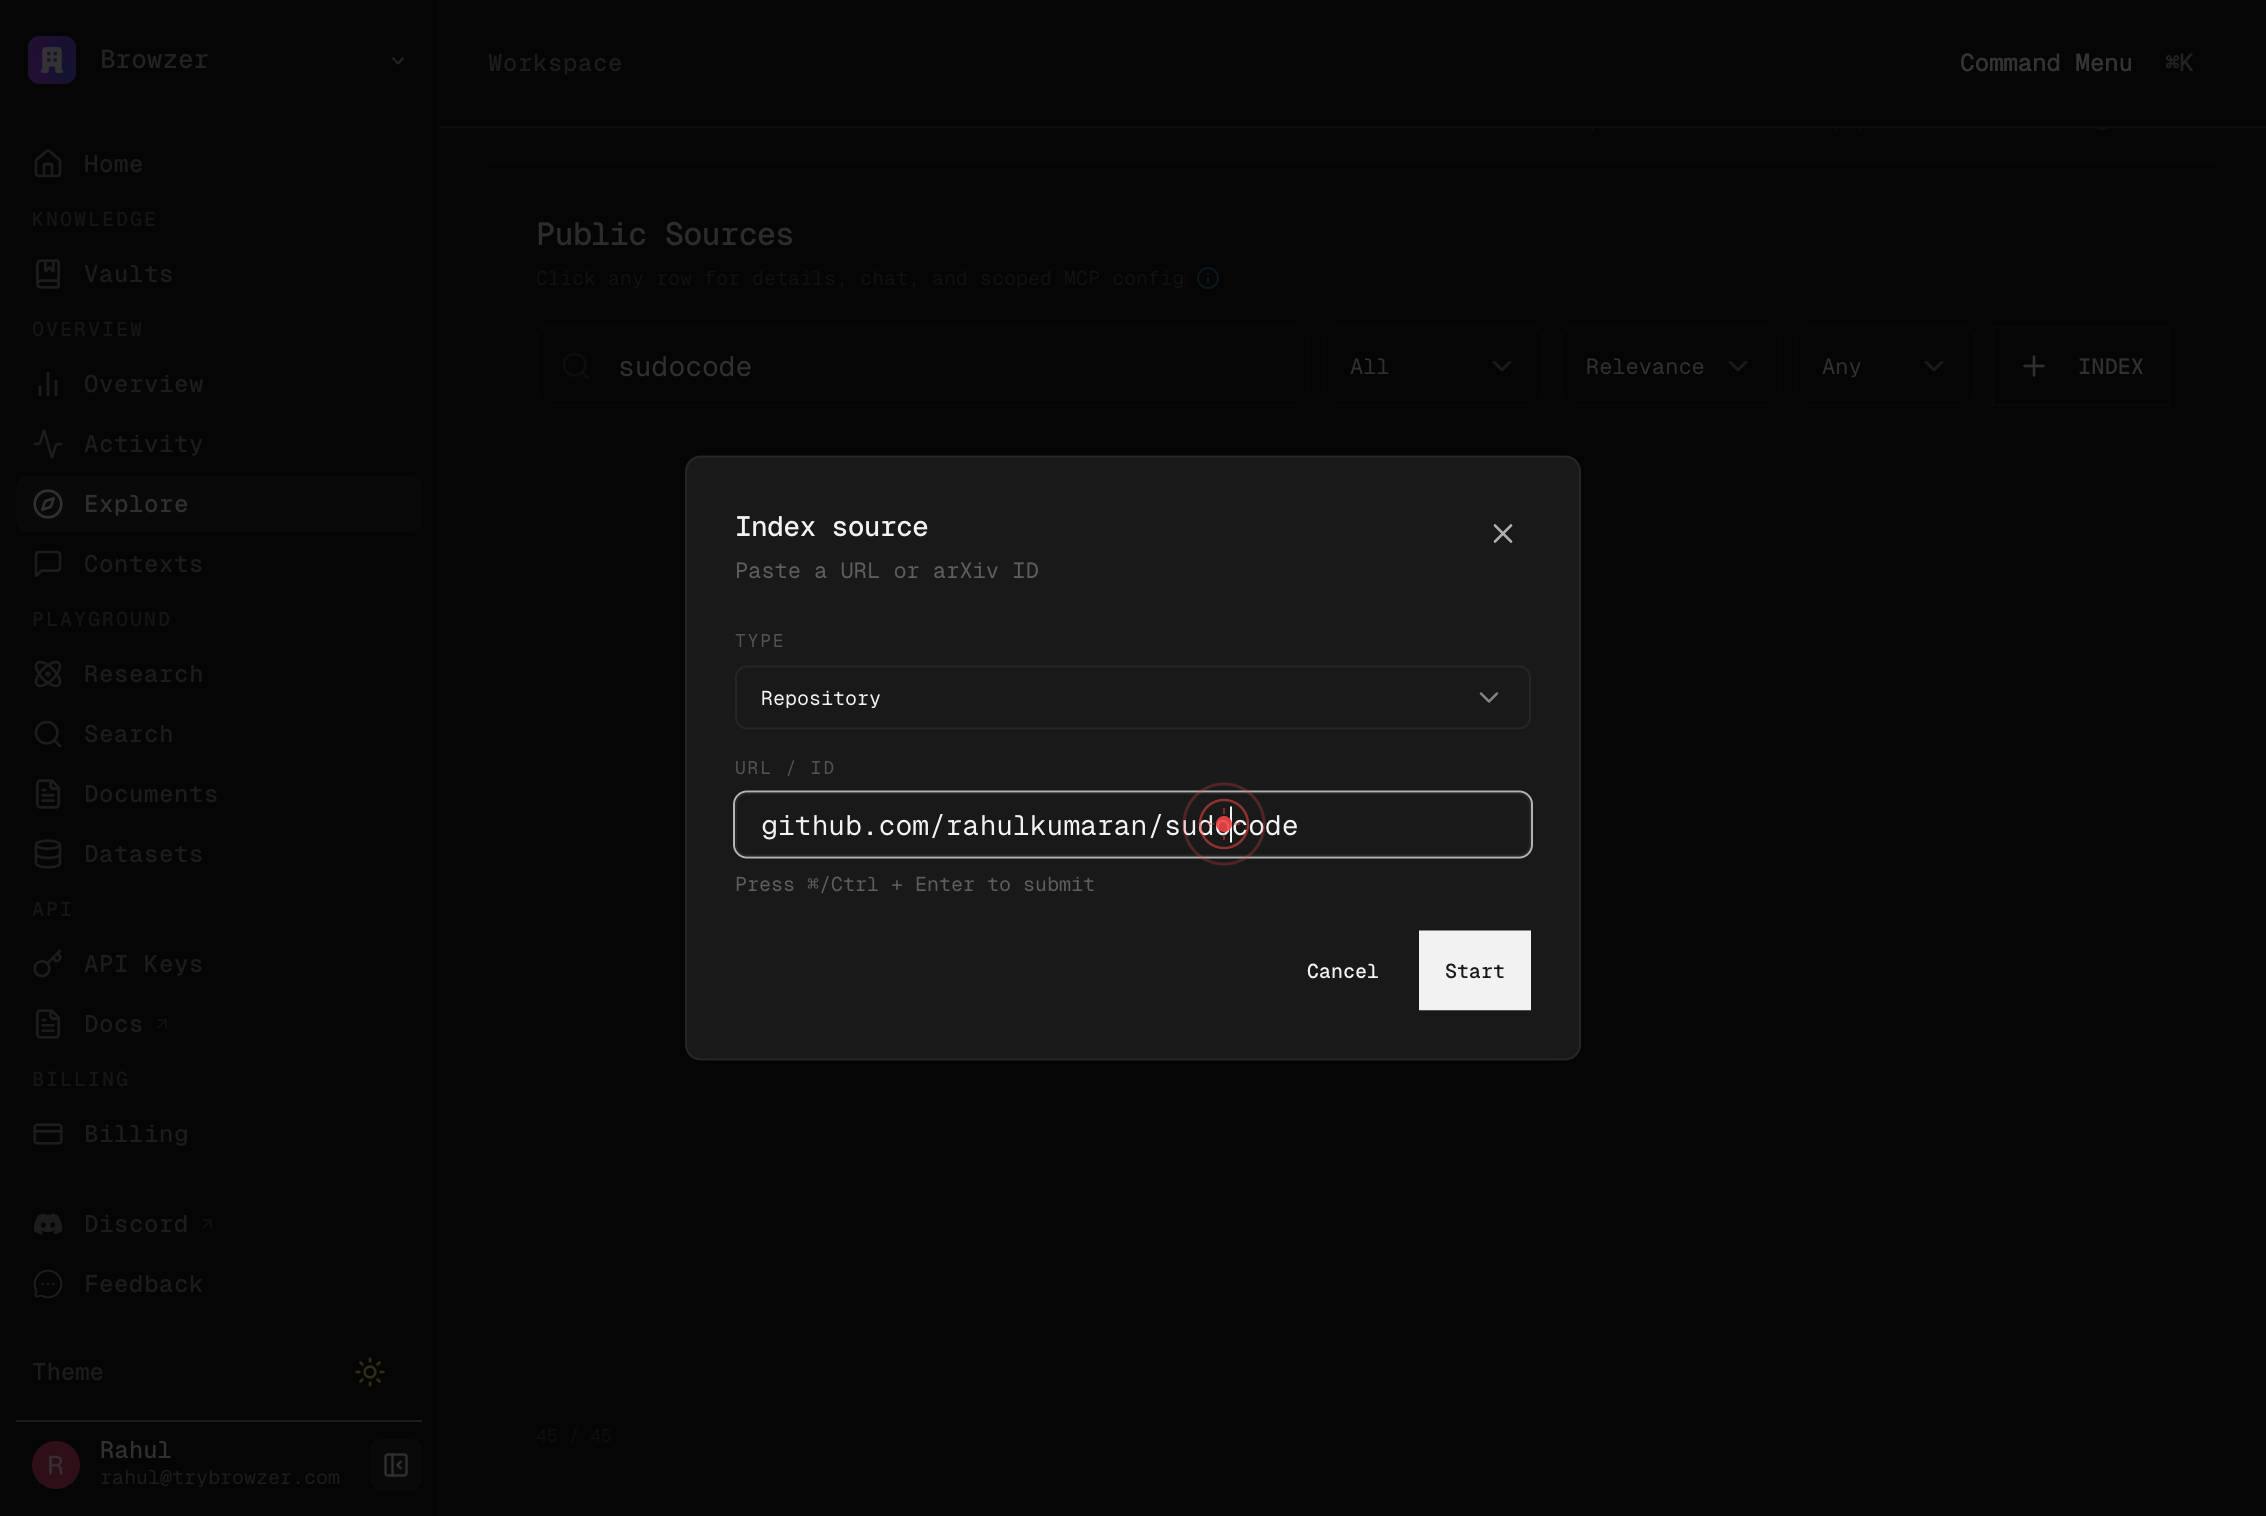
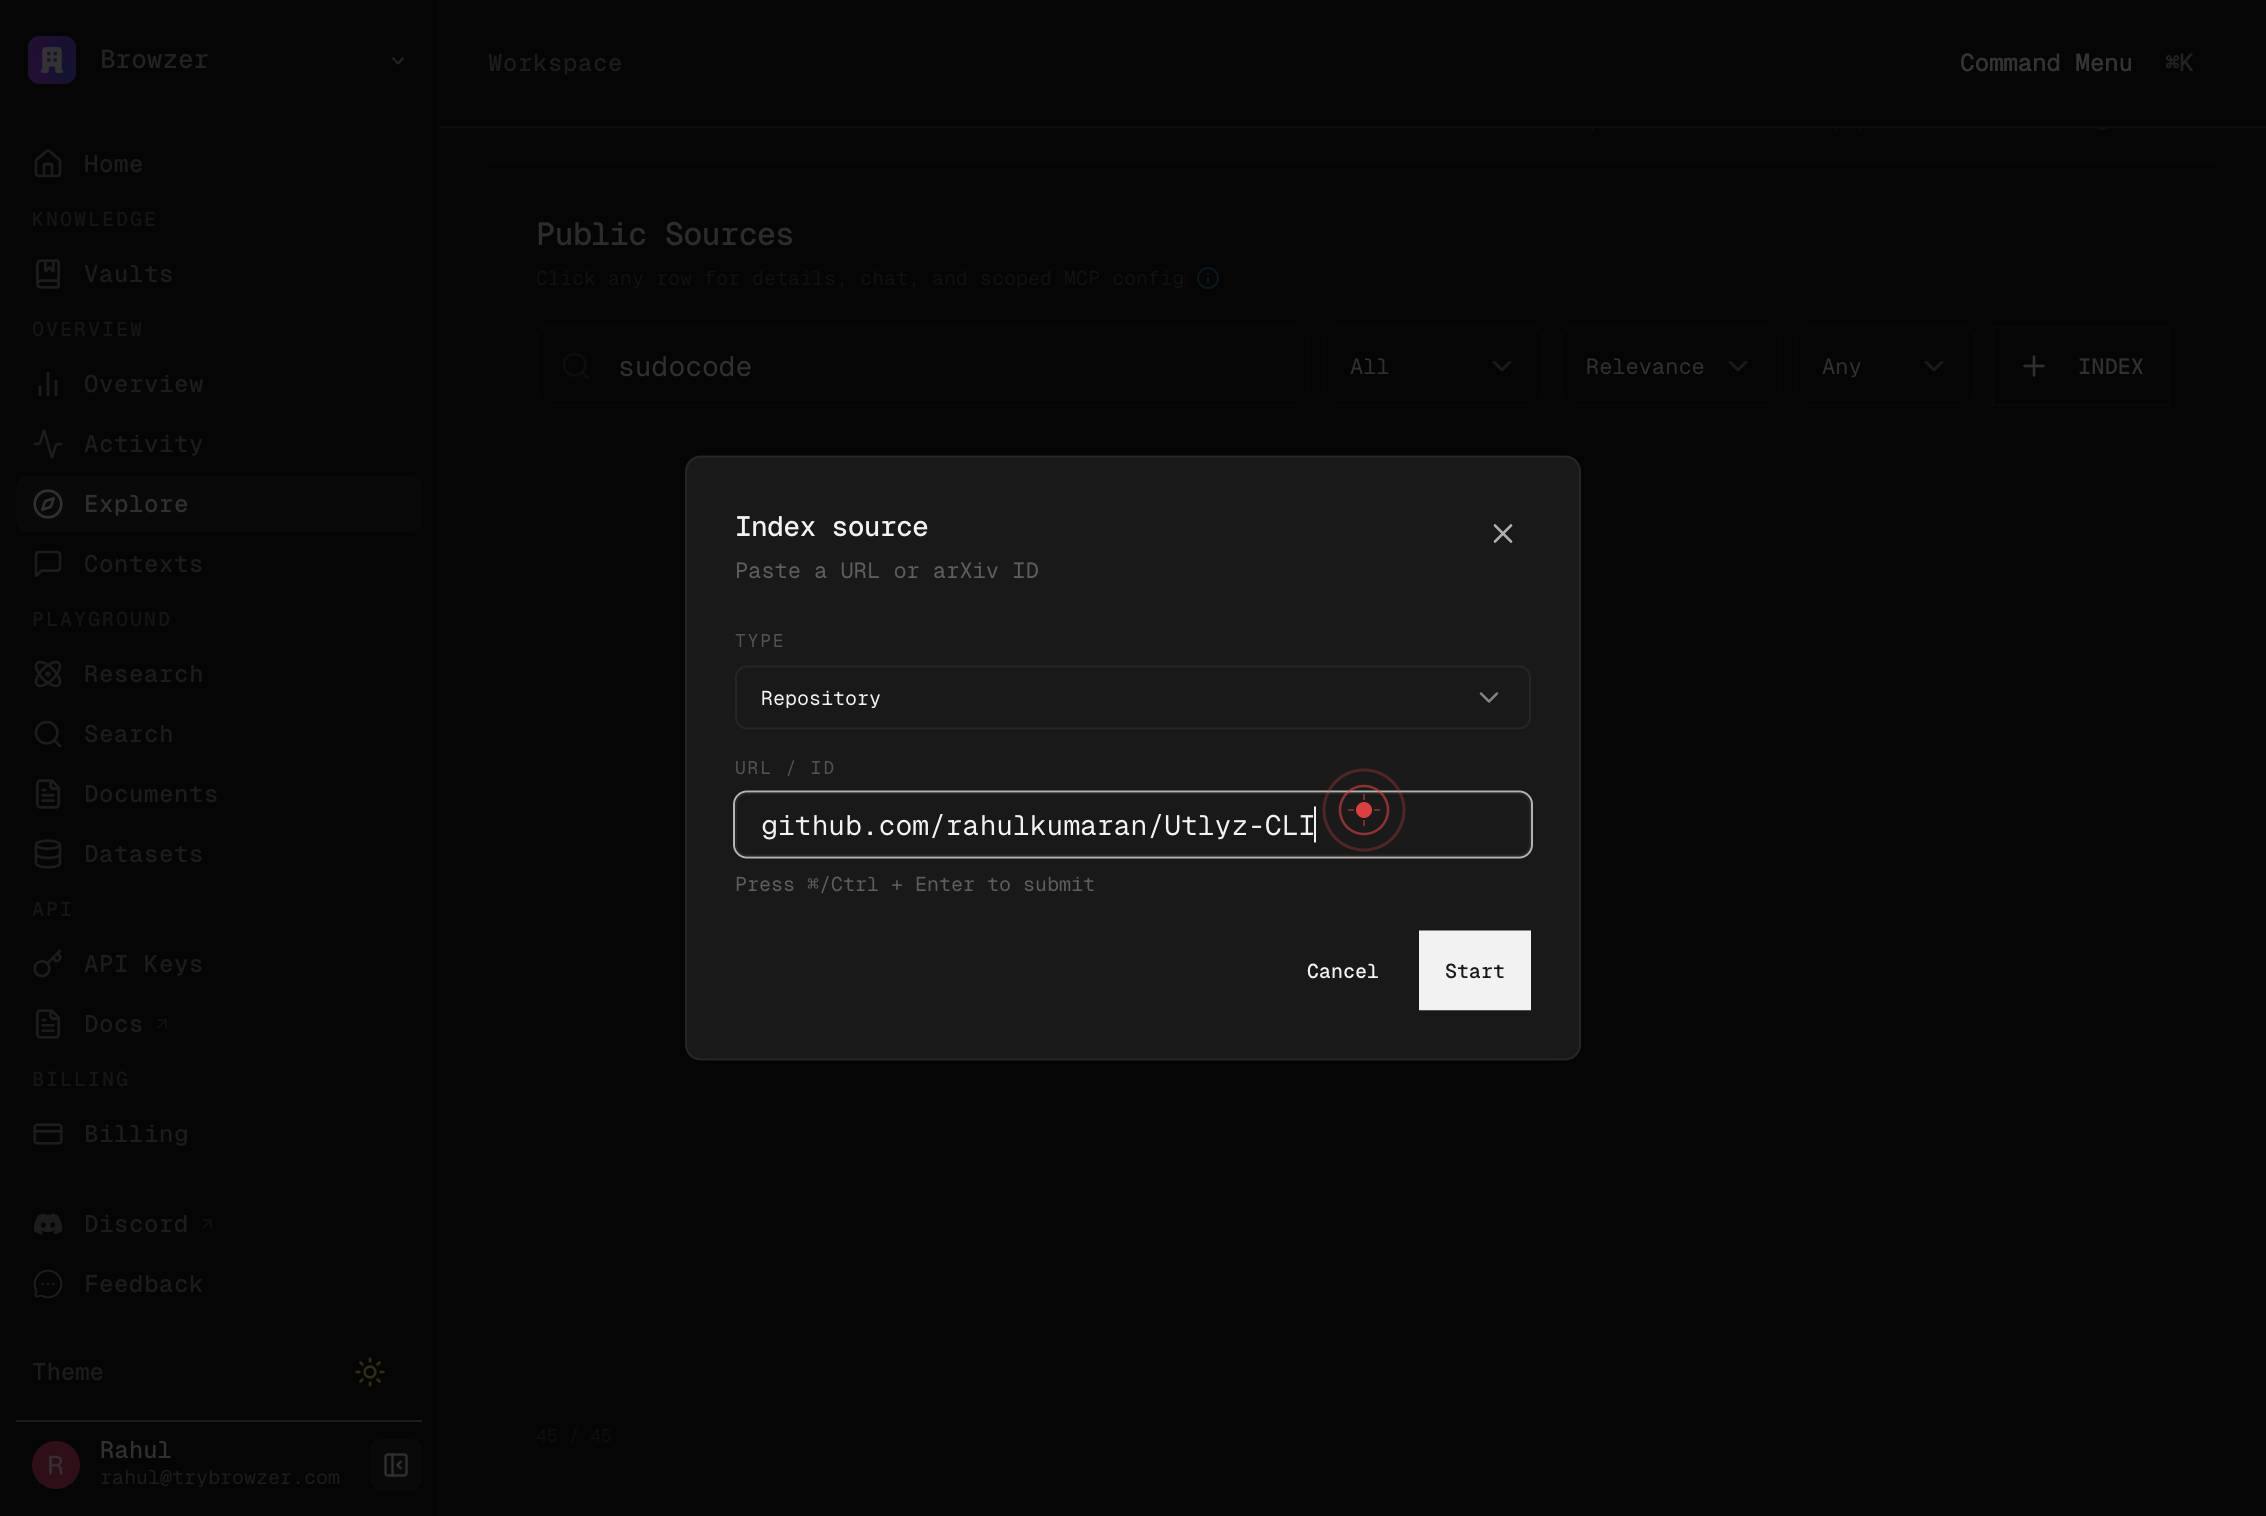
owner/repo or github.com/owner/repoType the GitHub repository identifier in the format owner/repo (e.g., facebook/react) or as a full GitHub URL (github.com/owner/repo). Trynia accepts both formats.
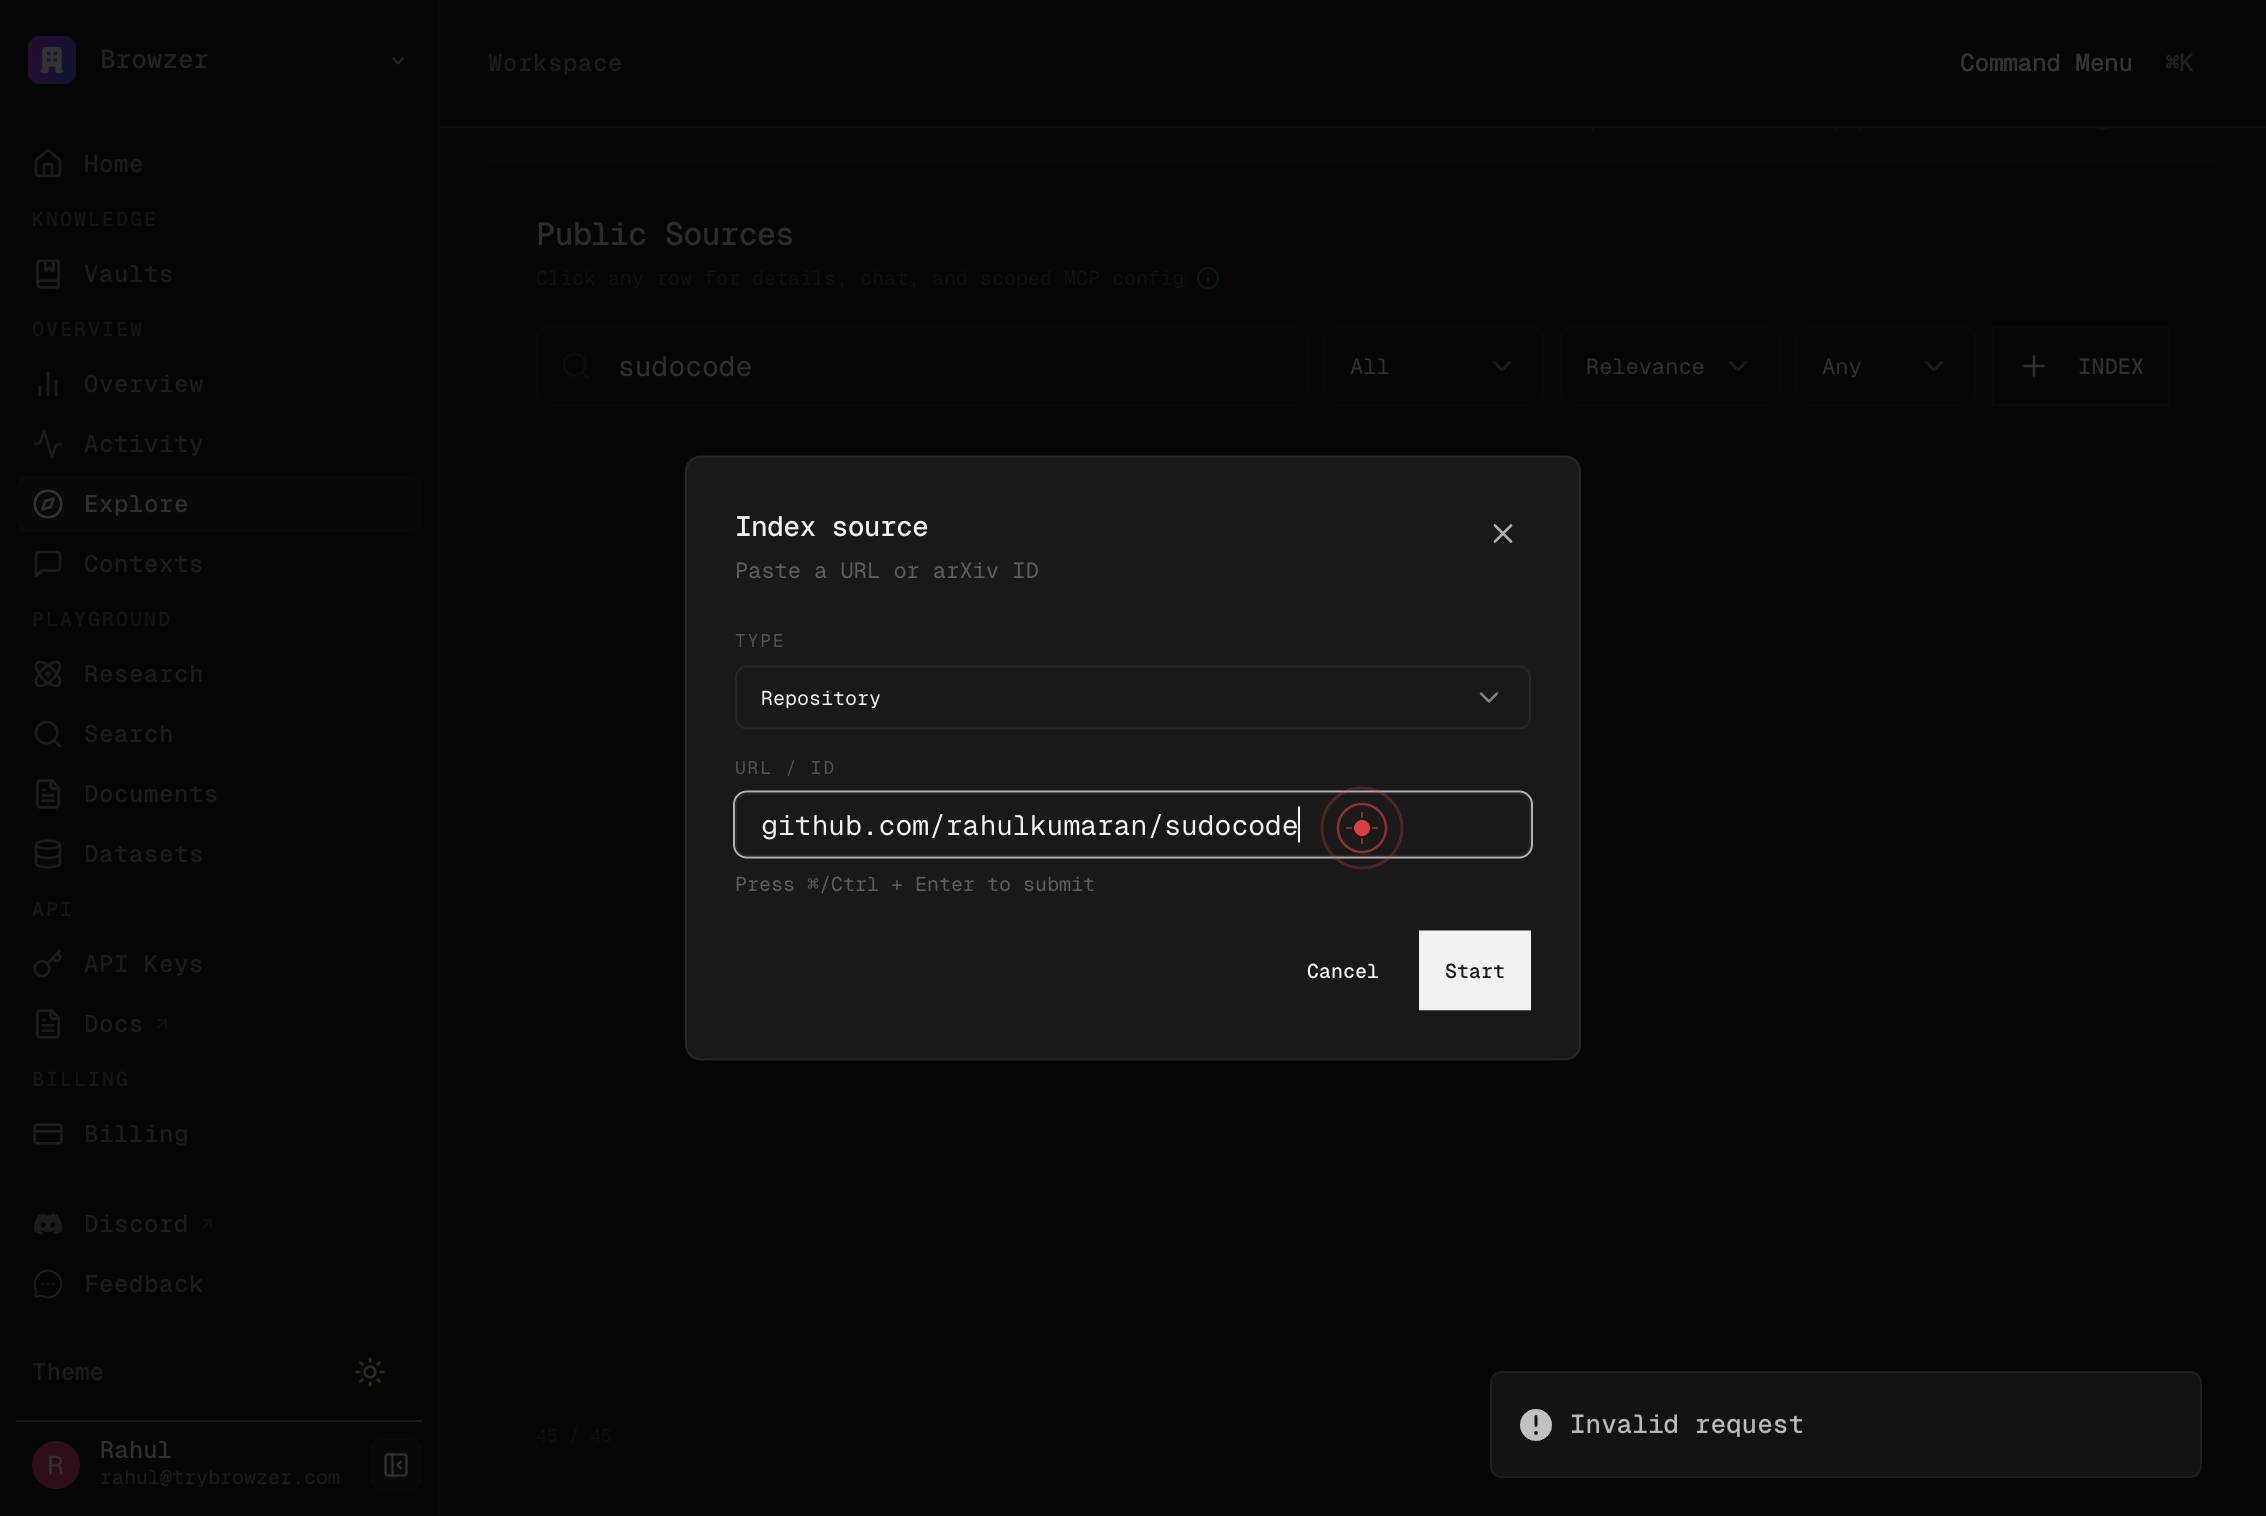
StartClick the Start button to initiate validation of the repository URL and proceed to the filtering options.

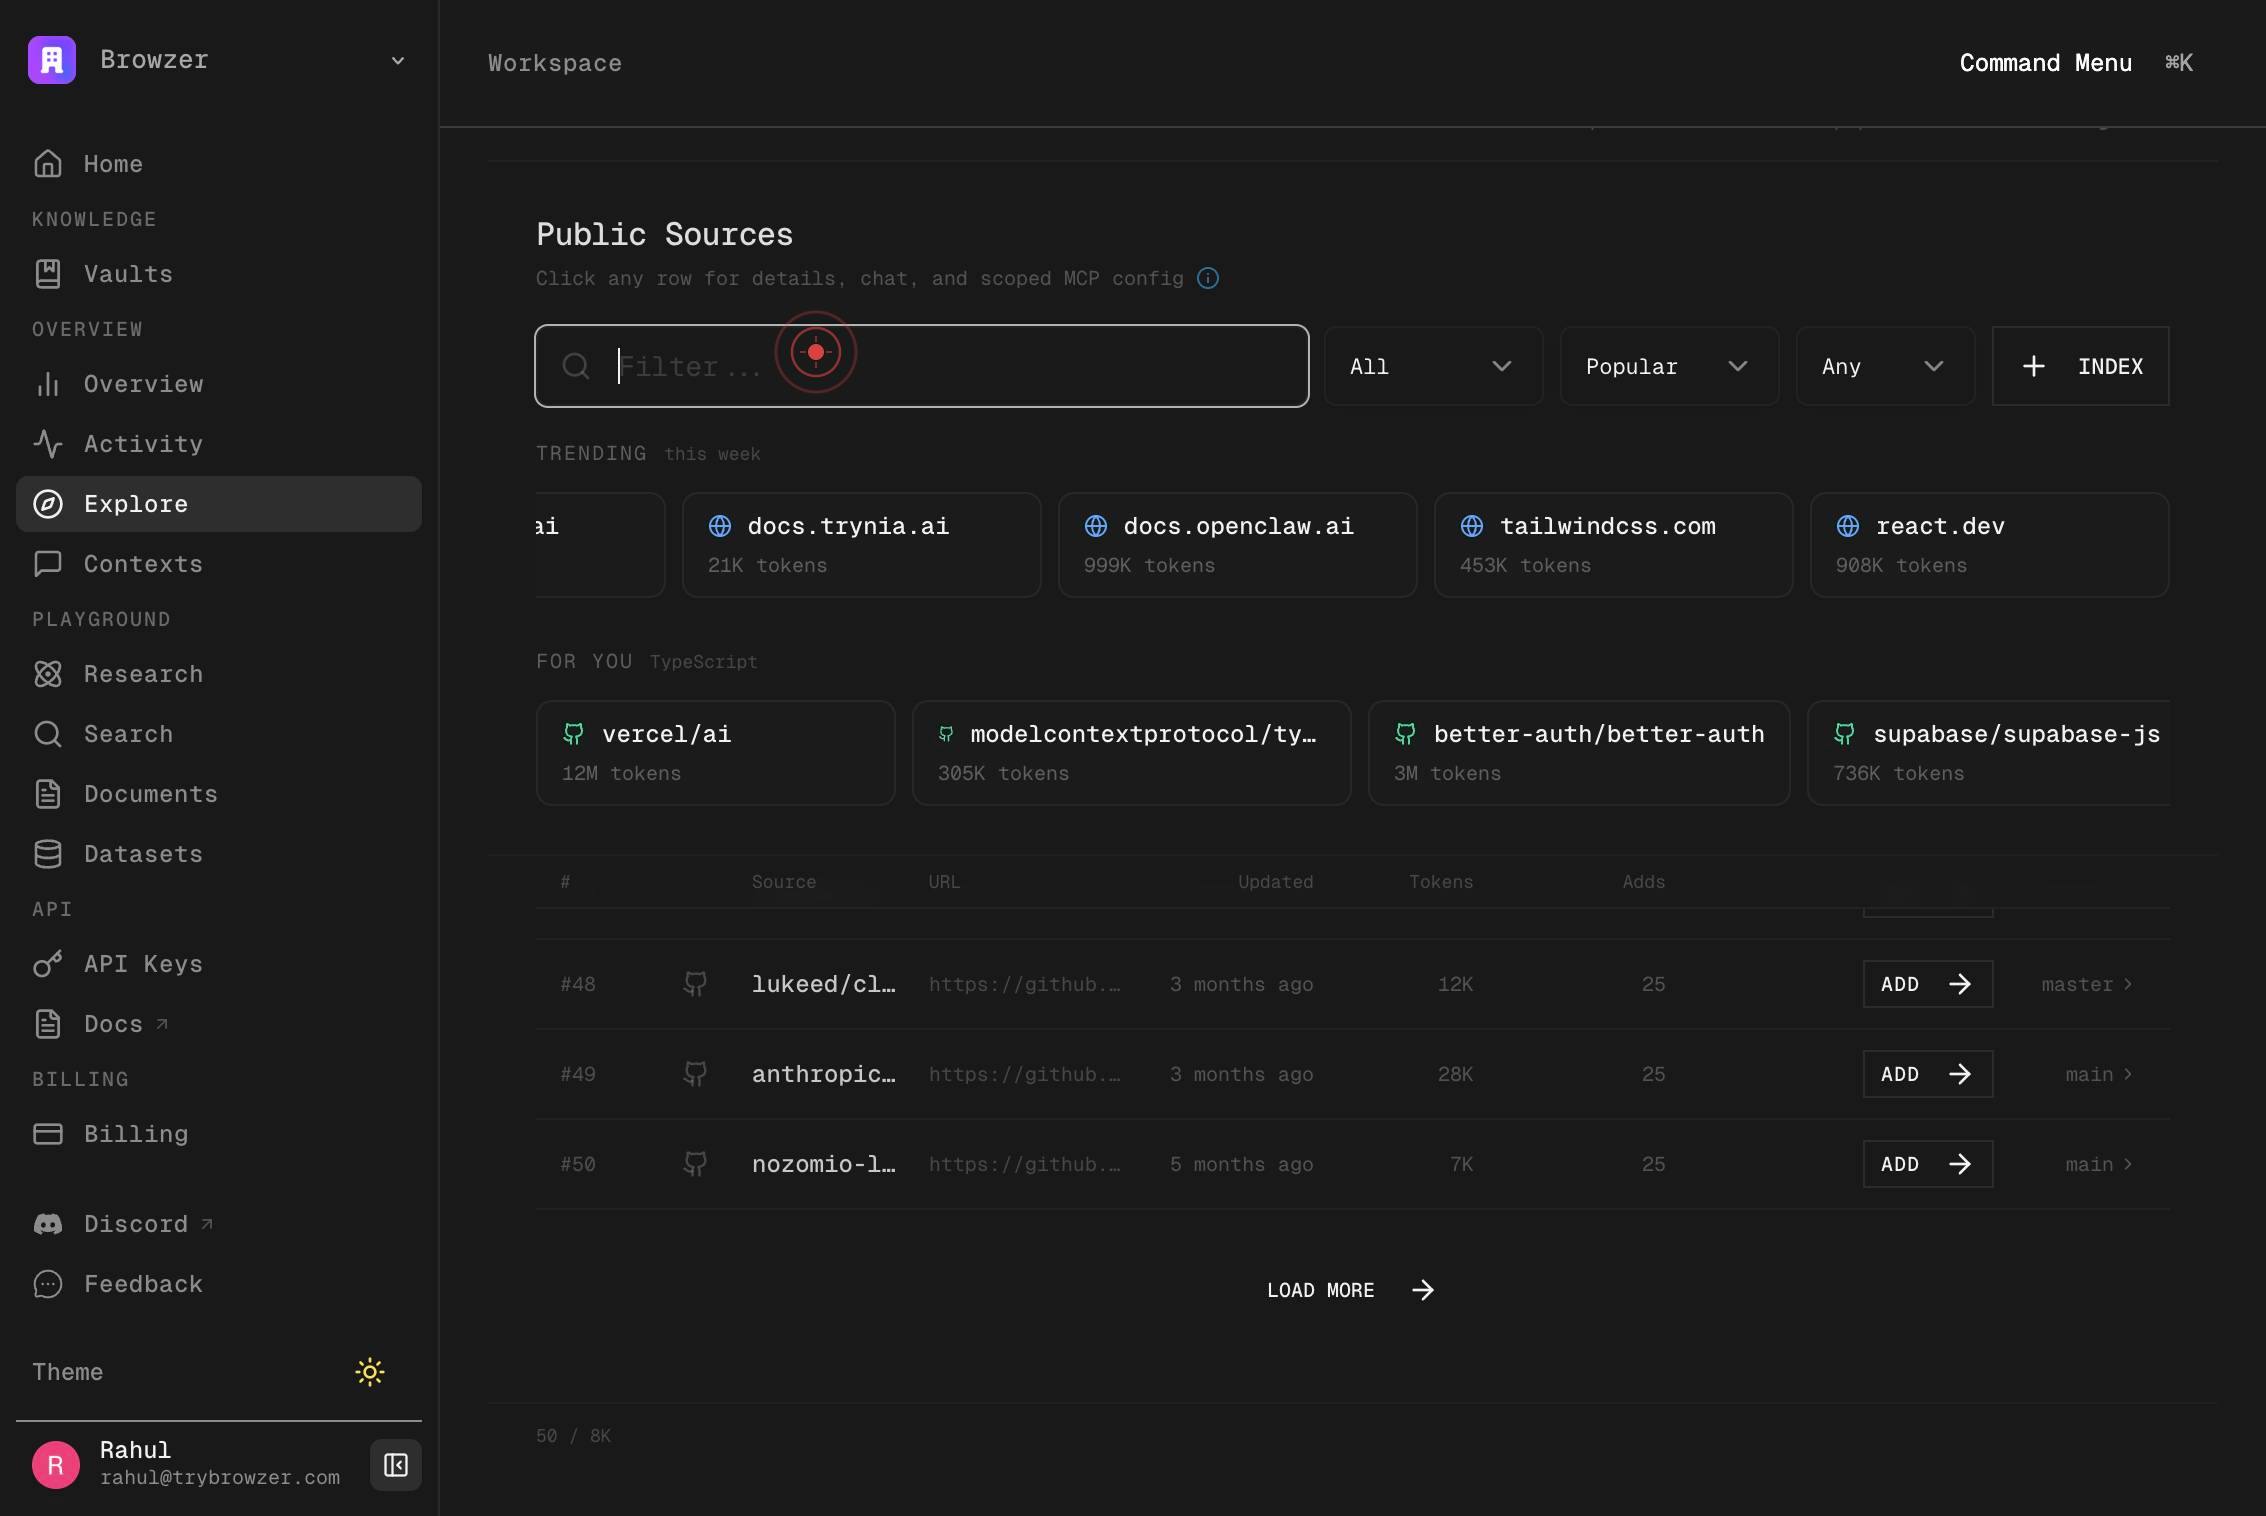
Filter...Click into the Filter input field to add optional filtering criteria. Filters allow you to exclude or include specific file patterns, branches, or paths during indexing.
Filter...Type your filter expression in the Filter field. This may use glob patterns (e.g., **/*.test.js to exclude tests) or other filter syntax supported by Trynia.
INDEX SOURCEClick the INDEX SOURCE button to finalize your configuration and begin the indexing process. This submits the repository and filters to Trynia's indexing service.
owner/repo or github.com/owner/repoClick into the repository input field again (in case you need to add another repository or verify the entry). This step may occur if you're adding multiple repositories or if the workflow requires re-entry.
owner/repo or github.com/owner/repoType the repository identifier again if entering a second or alternative repository, using the same owner/repo or github.com/owner/repo format.
StartClick the Start button to validate and proceed with the second repository, if applicable.
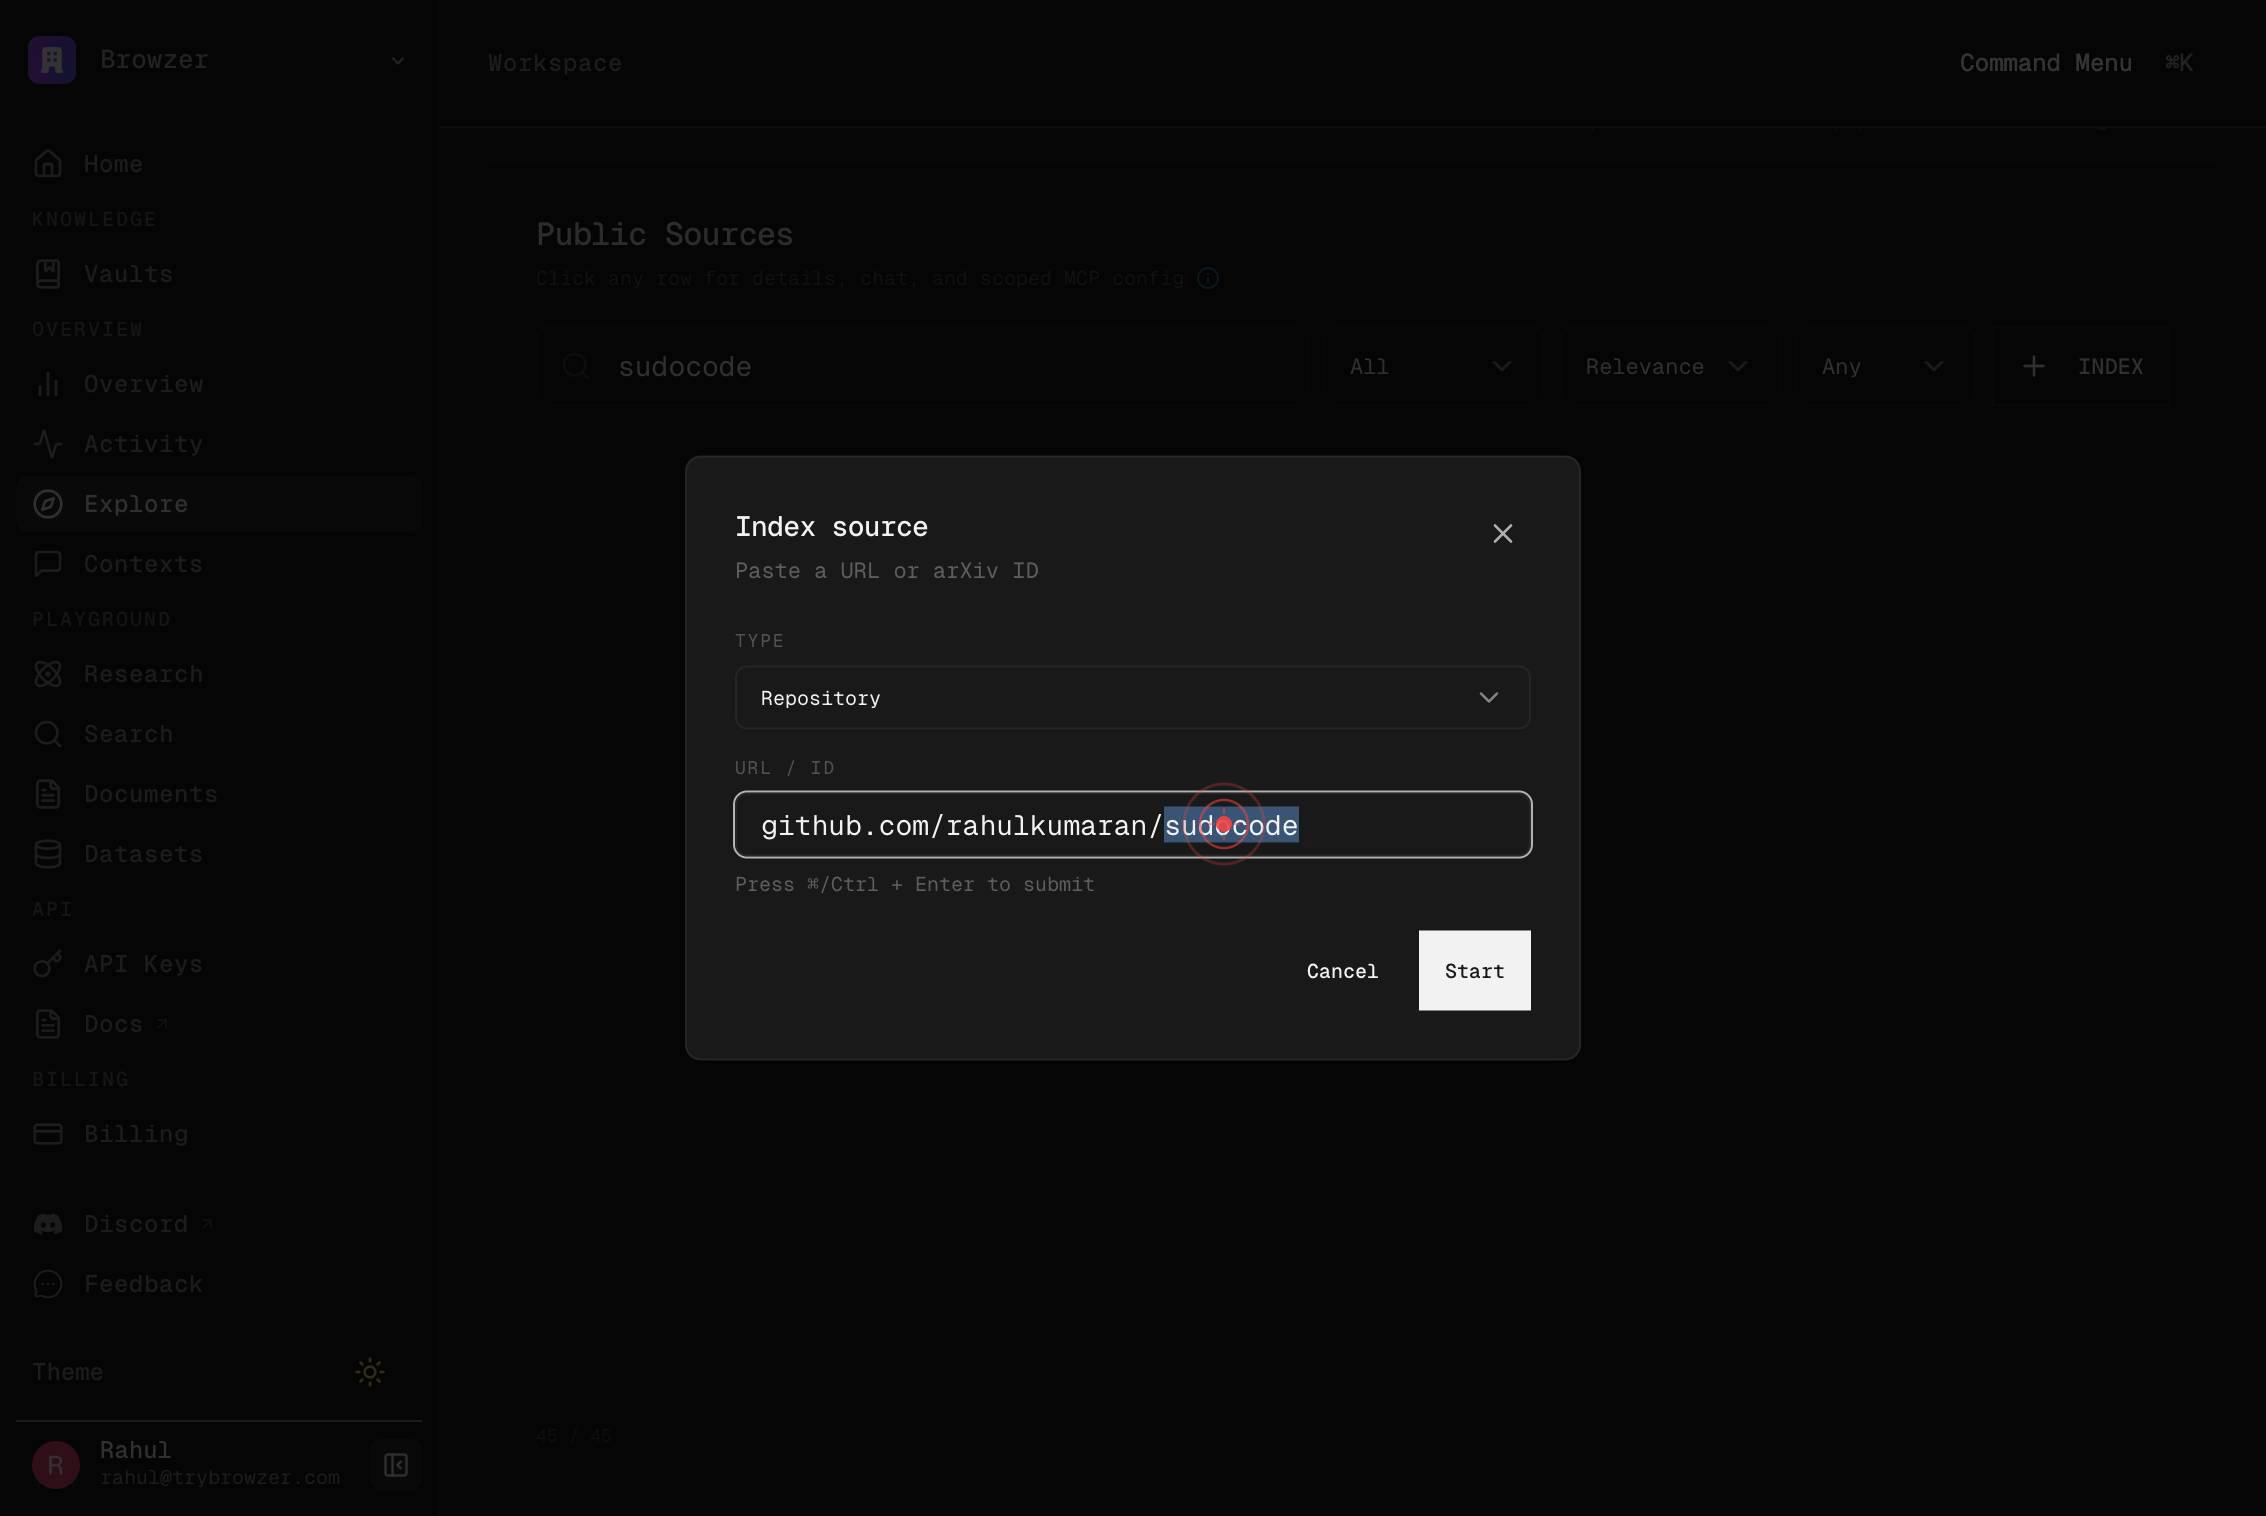
owner/repo or github.com/owner/repoClick into the repository input field to focus it for potential editing or correction of the repository name.
owner/repo or github.com/owner/repoClick into the repository input field again to ensure focus, allowing you to select and manipulate the text if needed.

owner/repo or github.com/owner/repoClick into the repository input field once more to prepare for text selection or editing operations.

Press Cmd+C to copy the currently selected or highlighted text in the repository field. This is useful if you need to preserve the repository name for use elsewhere.

Press Cmd+C again to copy the text (repeated action, possibly to ensure the clipboard contains the correct value).

Press Cmd+C once more to copy the text (third repetition, may indicate double-checking or clipboard verification).

Press Cmd+C to copy the text a fourth time (additional verification or clipboard operation).

owner/repo or github.com/owner/repoType a new or corrected repository identifier into the input field, replacing any previous content. This may be used if you're switching to a different repository or correcting a typo.
Press Cmd+X to cut the text in the repository field, removing it and placing it on the clipboard. Use this if you need to clear the field and move its content elsewhere.

owner/repo or github.com/owner/repoType a repository identifier into the input field (entering new text after a cut operation or from scratch).
Press Cmd+V to paste the content from the clipboard into the repository field. This completes a cut-and-paste operation if you copied a repository name earlier.
owner/repo or github.com/owner/repoClick into the repository input field to focus it, readying the field for text entry or selection.
owner/repo or github.com/owner/repoClick into the repository input field again to ensure it has focus before performing any text operations.
owner/repo or github.com/owner/repoType the final or corrected repository identifier into the field (e.g., owner/repo).
Press Enter to submit the repository identifier. This confirms the entry and may proceed to the next stage of indexing configuration.
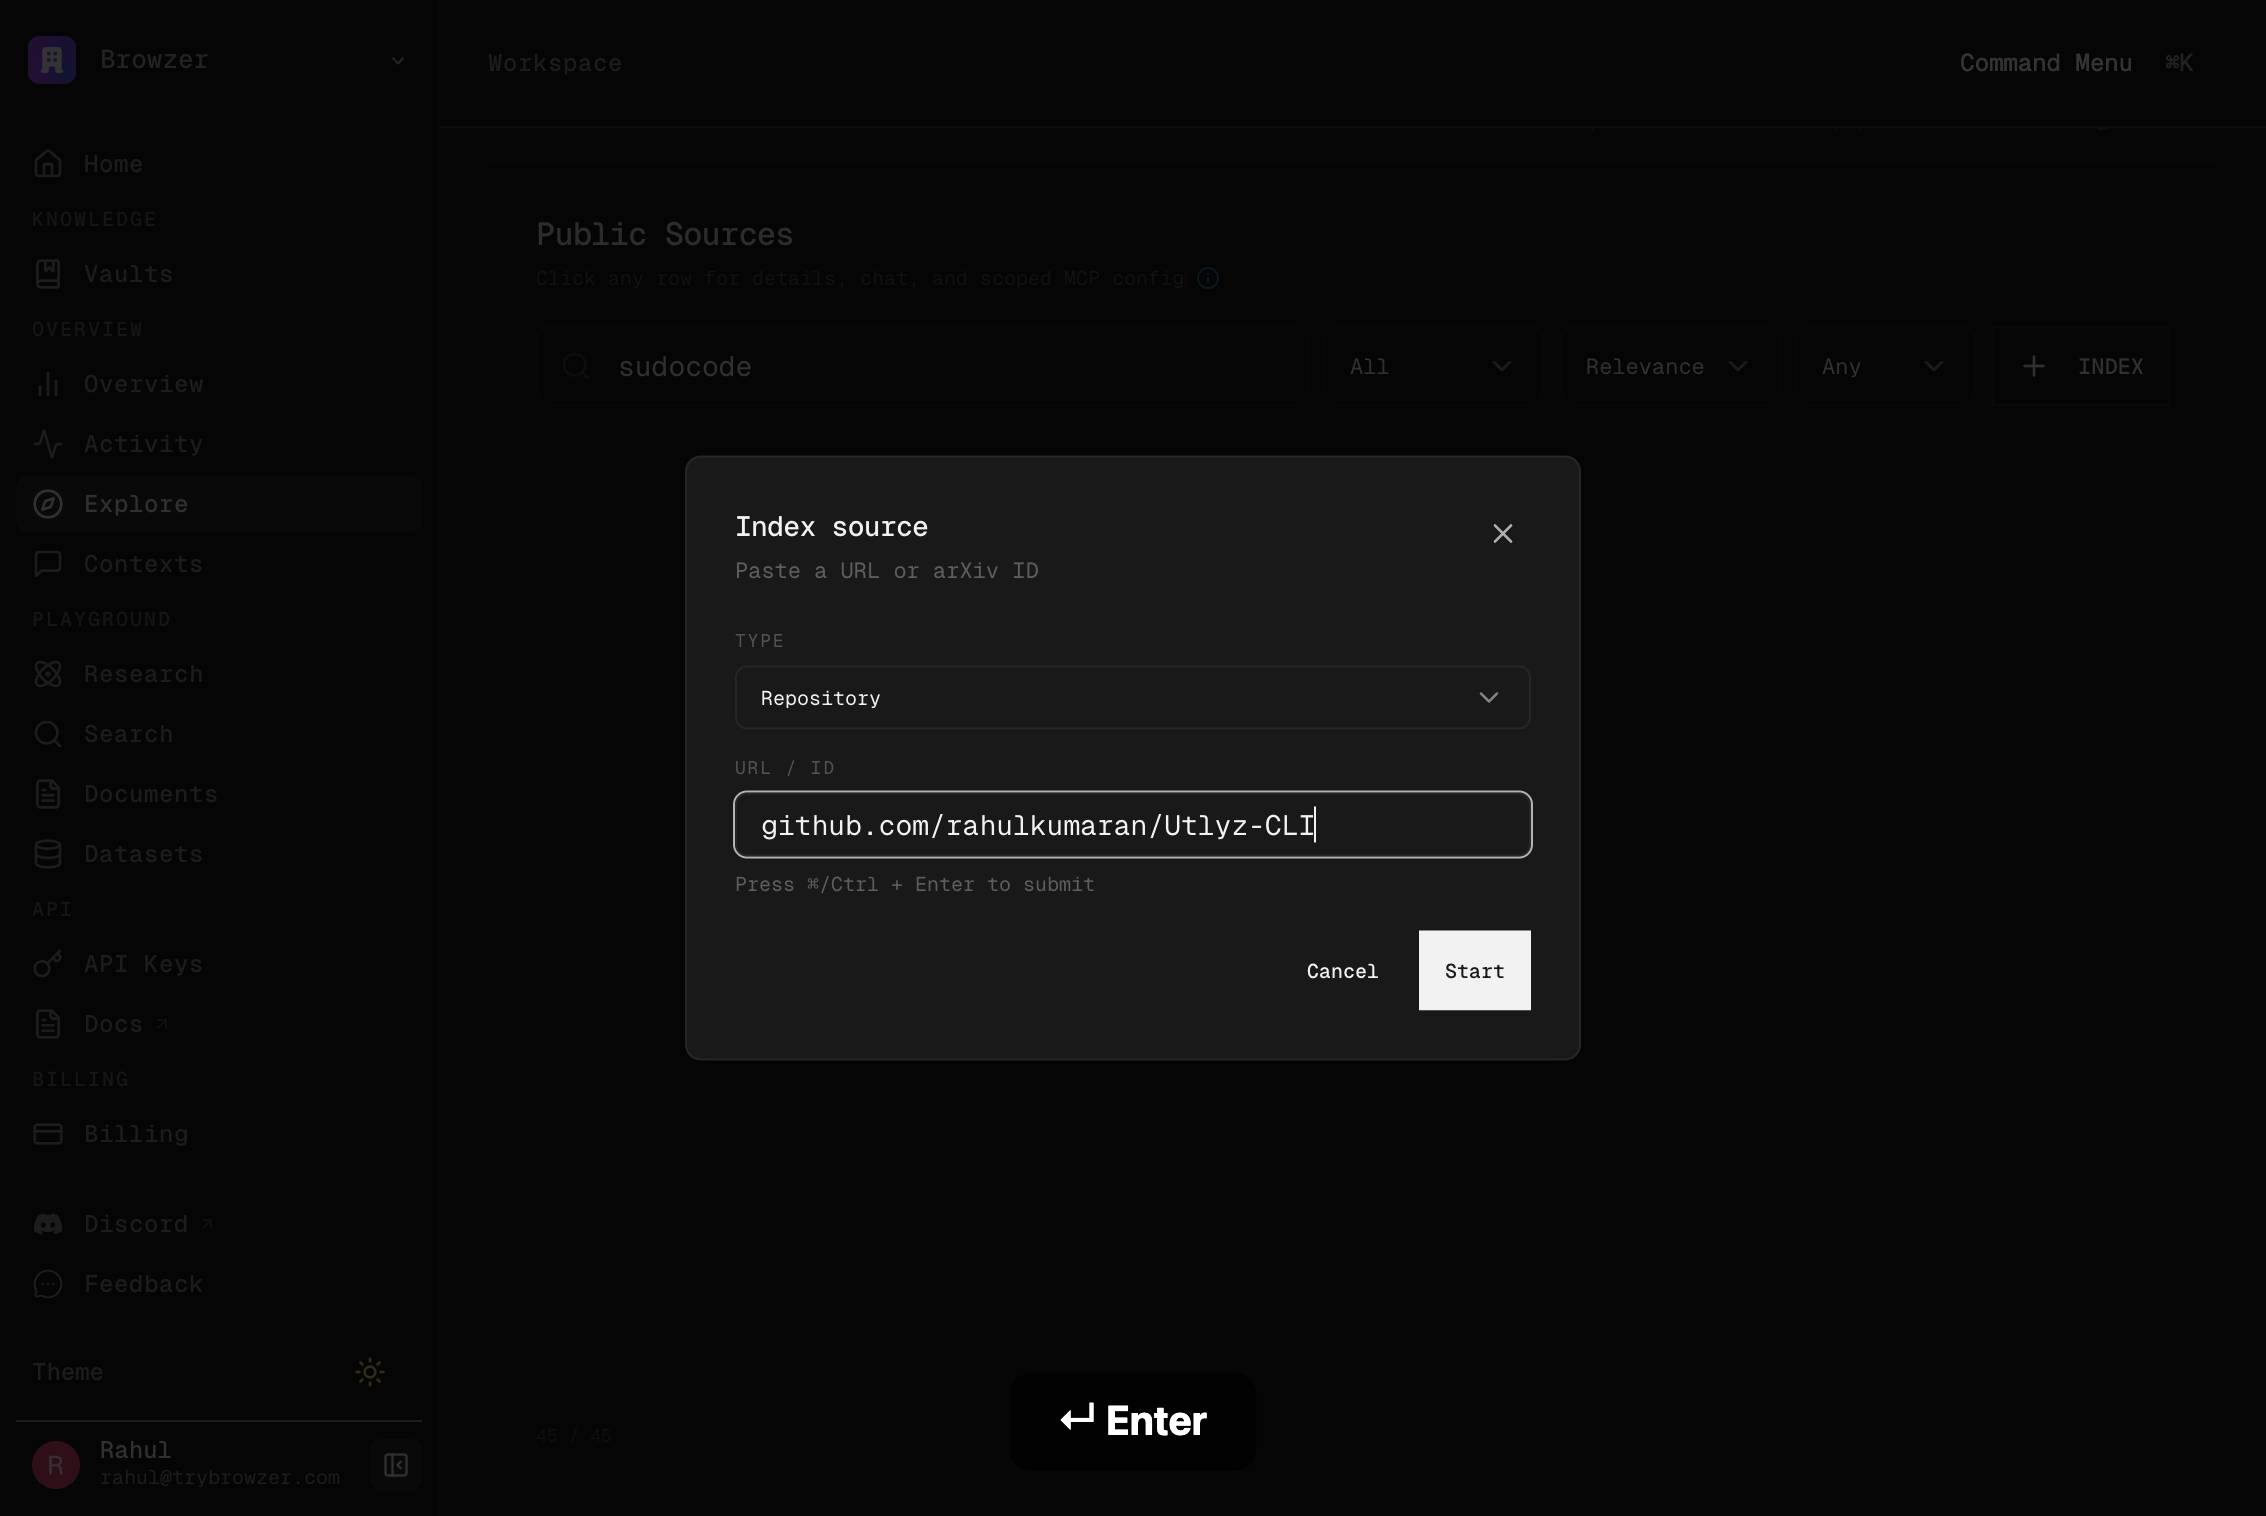
StartClick the Start button to validate and proceed with the indexing workflow. This confirms your repository selection and moves forward to filtering or final submission.
Browzer Home KNOWLEDGE Vaults OVERVIEW Overview Activity Explore Contexts PLAYGROUND Research Search Documents Datasets API API Keys Docs BILLING Billing SETTINGS Organization Integrations Answer Model Local Sync Context Transfer Referral Discord FeeClick on the main page body or background area (which contains the navigation menu: Home, Knowledge, Vaults, Overview, Activity, Explore, Contexts, Playground, Research, Search, Documents, Datasets, API, Settings, Billing, etc.). This may dismiss a dialog or reset focus.
Browzer Home KNOWLEDGE Vaults OVERVIEW Overview Activity Explore Contexts PLAYGROUND Research Search Documents Datasets API API Keys Docs BILLING Billing SETTINGS Organization Integrations Answer Model Local Sync Context Transfer Referral Discord FeeClick on the page body again to dismiss any open dialogs or to deselect focused elements and return to the main view.
owner/repo or github.com/owner/repoClick into the repository input field to re-focus it, in case you need to make additional entries or corrections.
owner/repo or github.com/owner/repoClick into the repository input field again to ensure focus before typing or editing the repository name.

owner/repo or github.com/owner/repoClick into the repository input field once more to prepare for text entry or selection.

owner/repo or github.com/owner/repoType a repository identifier into the field (potentially a different repository or a corrected name).
CloseClick the Close button to dismiss the indexing dialog or any open modal. This exits the current indexing workflow without submitting, or confirms the completion of the indexing job.
Filter...Click into the Filter input field to add or modify filtering criteria for the repository indexing.
Filter...Click into the Filter field again to re-focus it, ensuring the field is active before typing filter expressions.
Filter...Click into the Filter field once more to confirm focus and prepare for filter text entry.

Filter...Type your filter expression into the Filter field to exclude or include specific file patterns, directories, or branches during indexing.
Confirm it worked
- 1After clicking Start, the indexing job begins — you should see a confirmation or status message indicating that indexing has been initiated
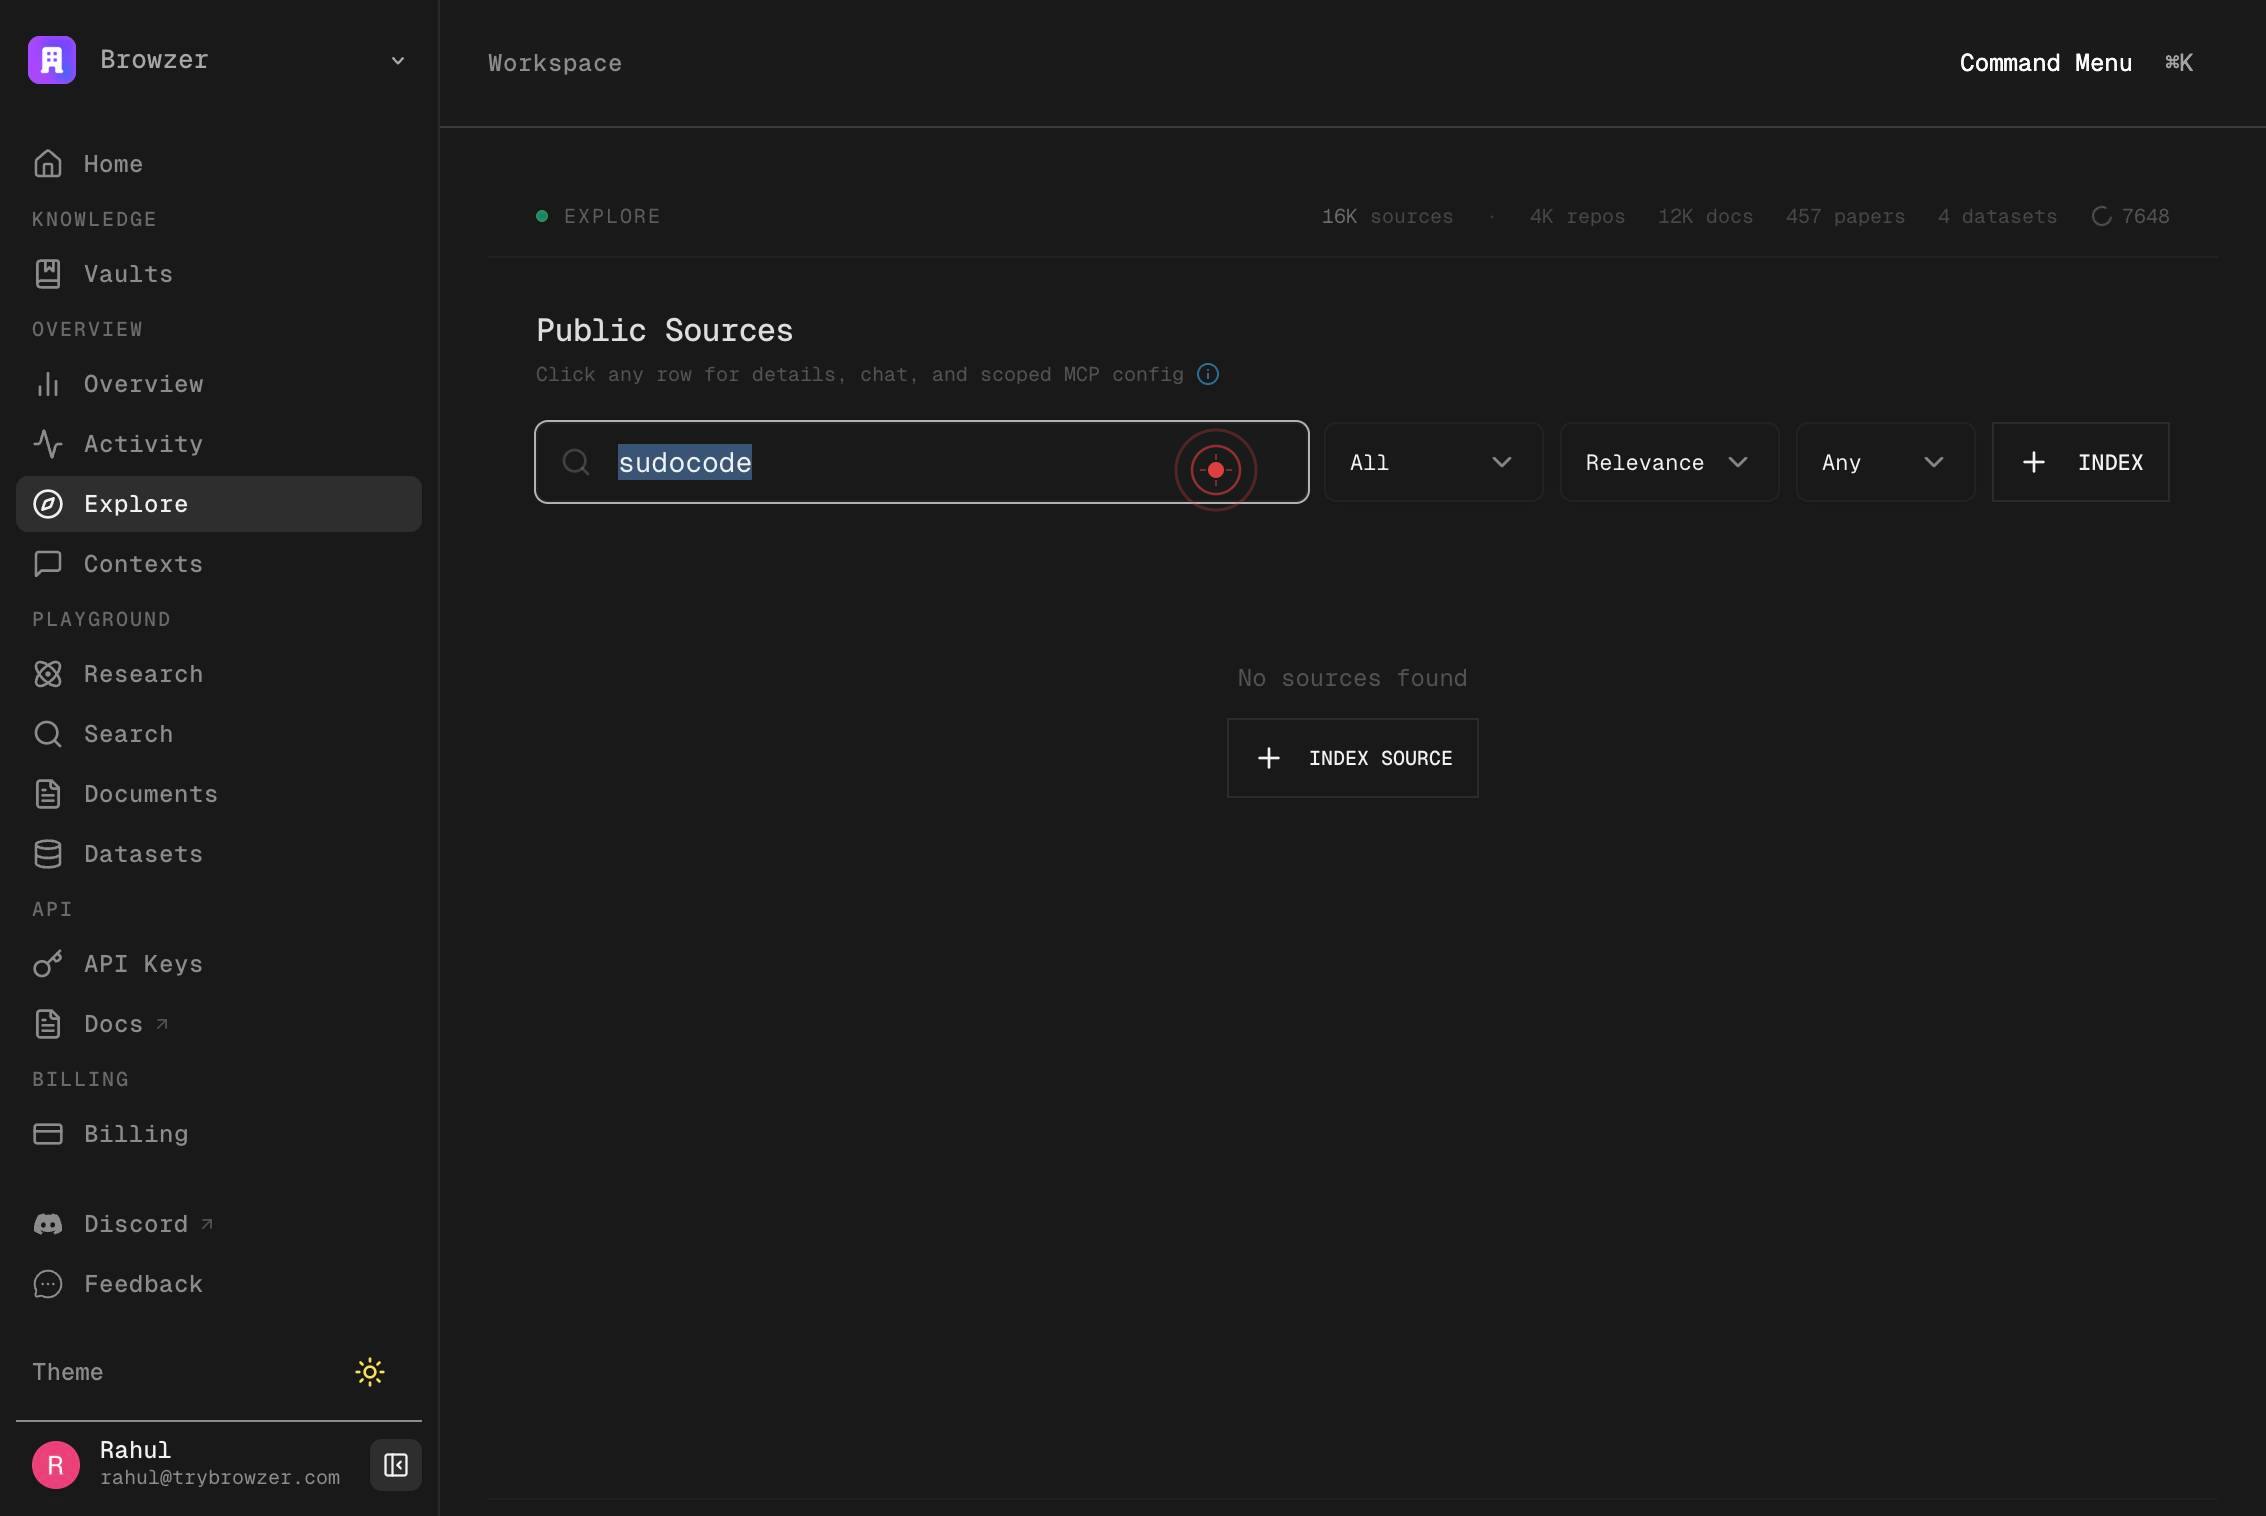
- 2Navigate to the Explore section and search for your repository — it should appear in the indexed sources list
- 3Once indexing completes (this may take minutes to hours depending on repository size), you can run semantic searches across the codebase and retrieve code snippets, file trees, and search results
Common issues
Keep reading
API Guide - Nia AI Documentation
### Index a Repository [...] ```bash curl -X POST https://apigcp.trynia.ai/v2/sources \ -H "Authorization: Bearer $NIA_API_KEY" \ -H "Content-Type: application/json" \ -d '{"type": "repository", "repository": "vercel/ai"}' [...] ```bash curl -X POST https://apigcp.trynia.ai/v2/sandbox/search \ [...] _KEY" [...] -d [...] "repository": [...] ://github. [...] /ai", "ref": "main", "query": "How does [...] Text relate to the data [...] protocol?" }' [...] structured output, citations) | [...] | `POST /extract [...] structured data from [...] | | `POST /oracle/jobs` | Start [...] Oracle research job | | `POST /github/tracer` | Live GitHub code search agent | | `POST /packages/search` | Semantic search in package source code | | `POST /packages/grep` | Regex search in package source code | | `POST /contexts` | Save cross-agent conversation context | | `GET /sources-summary` | Quick inventory of all source types | | `GET /usage` | API usage statistics and limits |
docs.trynia.aiExamples - Nia AI Documentation
## Repository Operations [...] ### Index a Repository [...] ```python from nia_py import AuthenticatedClient from nia_py.api.v2_api import index_repository_v2_v2_repositories_post from nia_py.models import RepositoryRequest [...] client = AuthenticatedClient( base_url="https://apigcp.trynia.ai/v2", token=os.environ["NIA_API_KEY"], ) [...] result = index_repository_v2_v2_repositories_post.sync( client=client, body=RepositoryRequest(repository="vercel/ai", branch="main"), ) [...] print(f"Indexing started: {result}") [...] Or with the high-level SDK: [...] ```python sdk.sources.create({"url": "https://github.com/vercel/ai", "branch": "main"}) [...] result = await [...] 2ApiRepositories [...] .indexRepositoryV [...] RepositoriesPost({ repository: "vercel/ [...] ", branch: "main [...] with the high [...] ```typescript await sdk.sources.create({ url: "https://github.com/vercel/ai", branch: "main" }); [...] ## GitHub Tracer
docs.trynia.ai