Guide
Add Memory by Uploading a File
Overview
Supermemory is a universal memory API designed to enhance AI applications with fast, scalable memory storage. By uploading files directly into Supermemory, you convert static documents into dynamic, queryable memories that your AI applications can access and reference. This is particularly useful when you need to preserve research documents, PDFs, images, or structured data as persistent context that AI models can draw upon during interactions. The file upload feature transforms unstructured documents into indexed memories, making them instantly available for retrieval and synthesis across your AI workflows.
Before you begin
- You have an active Supermemory account and are logged into app.supermemory.ai
- You have a document file ready to upload (PDF, image, markdown, or supported document format)
- You have read/write access to create new memories in your Supermemory workspace
Step by step
Add memoryCClick the 'Add memory' button to open the memory creation interface. This is your entry point to start creating a new memory in Supermemory.
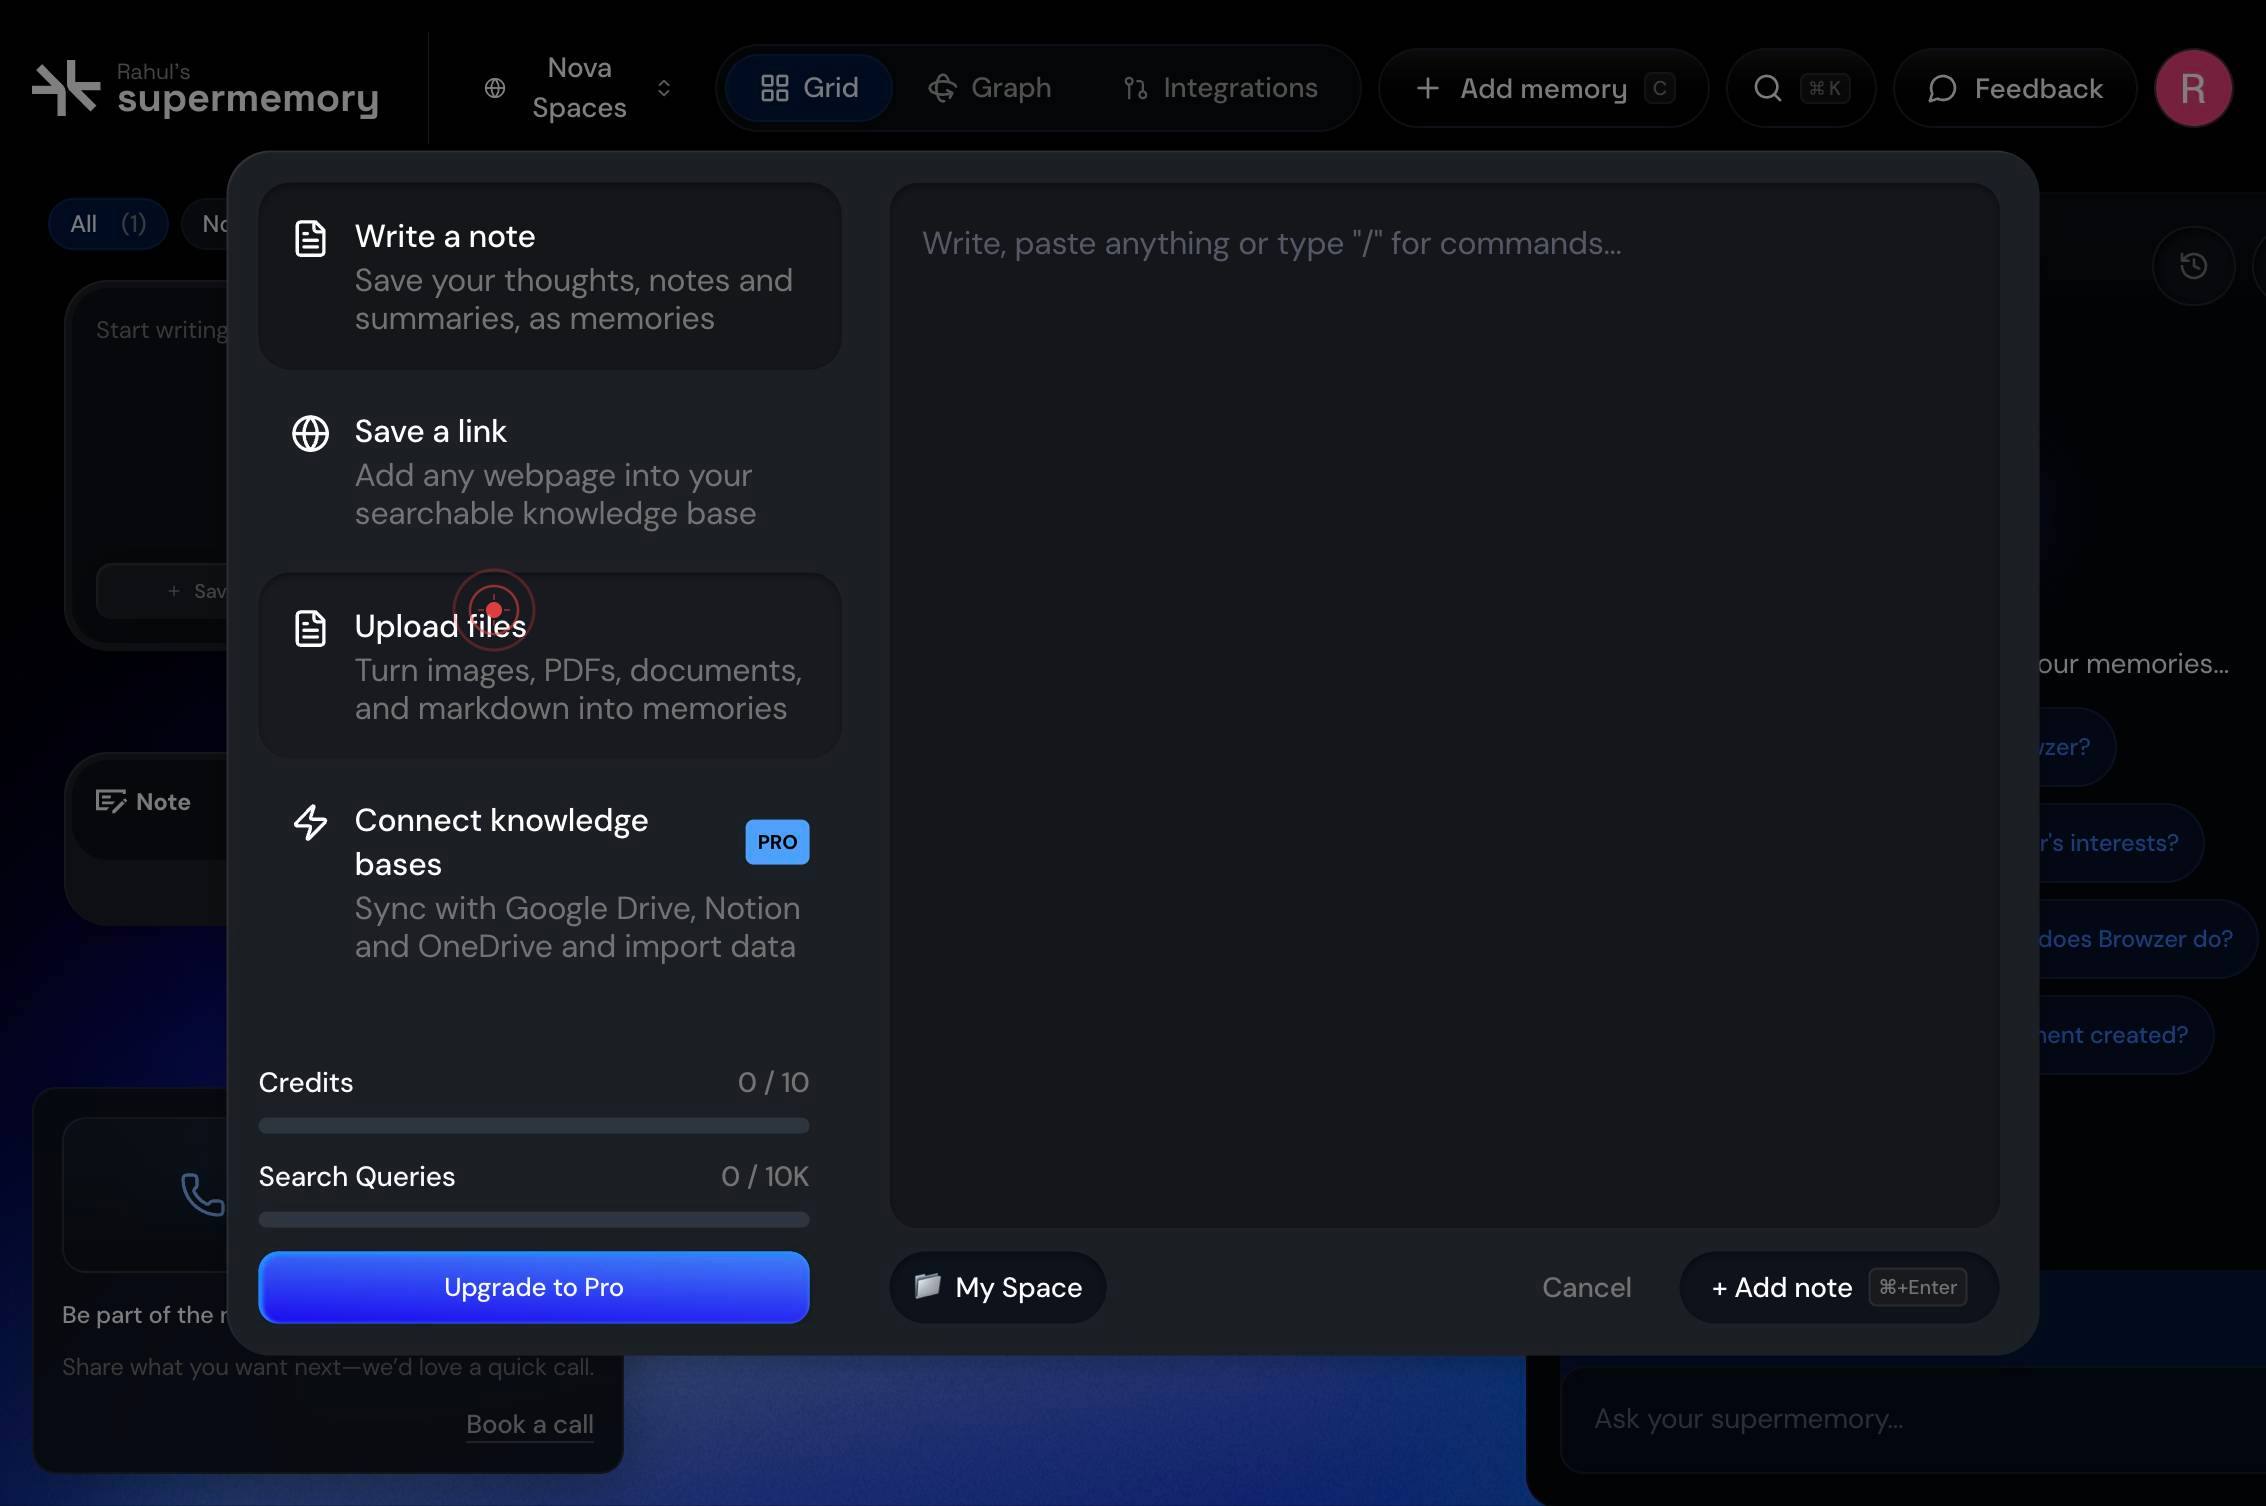
Upload files Turn images, PDFs, documents, and markdown into memoriesSelect the 'Upload files' option to activate the file upload feature. This option allows you to convert images, PDFs, documents, and markdown files into searchable memories.
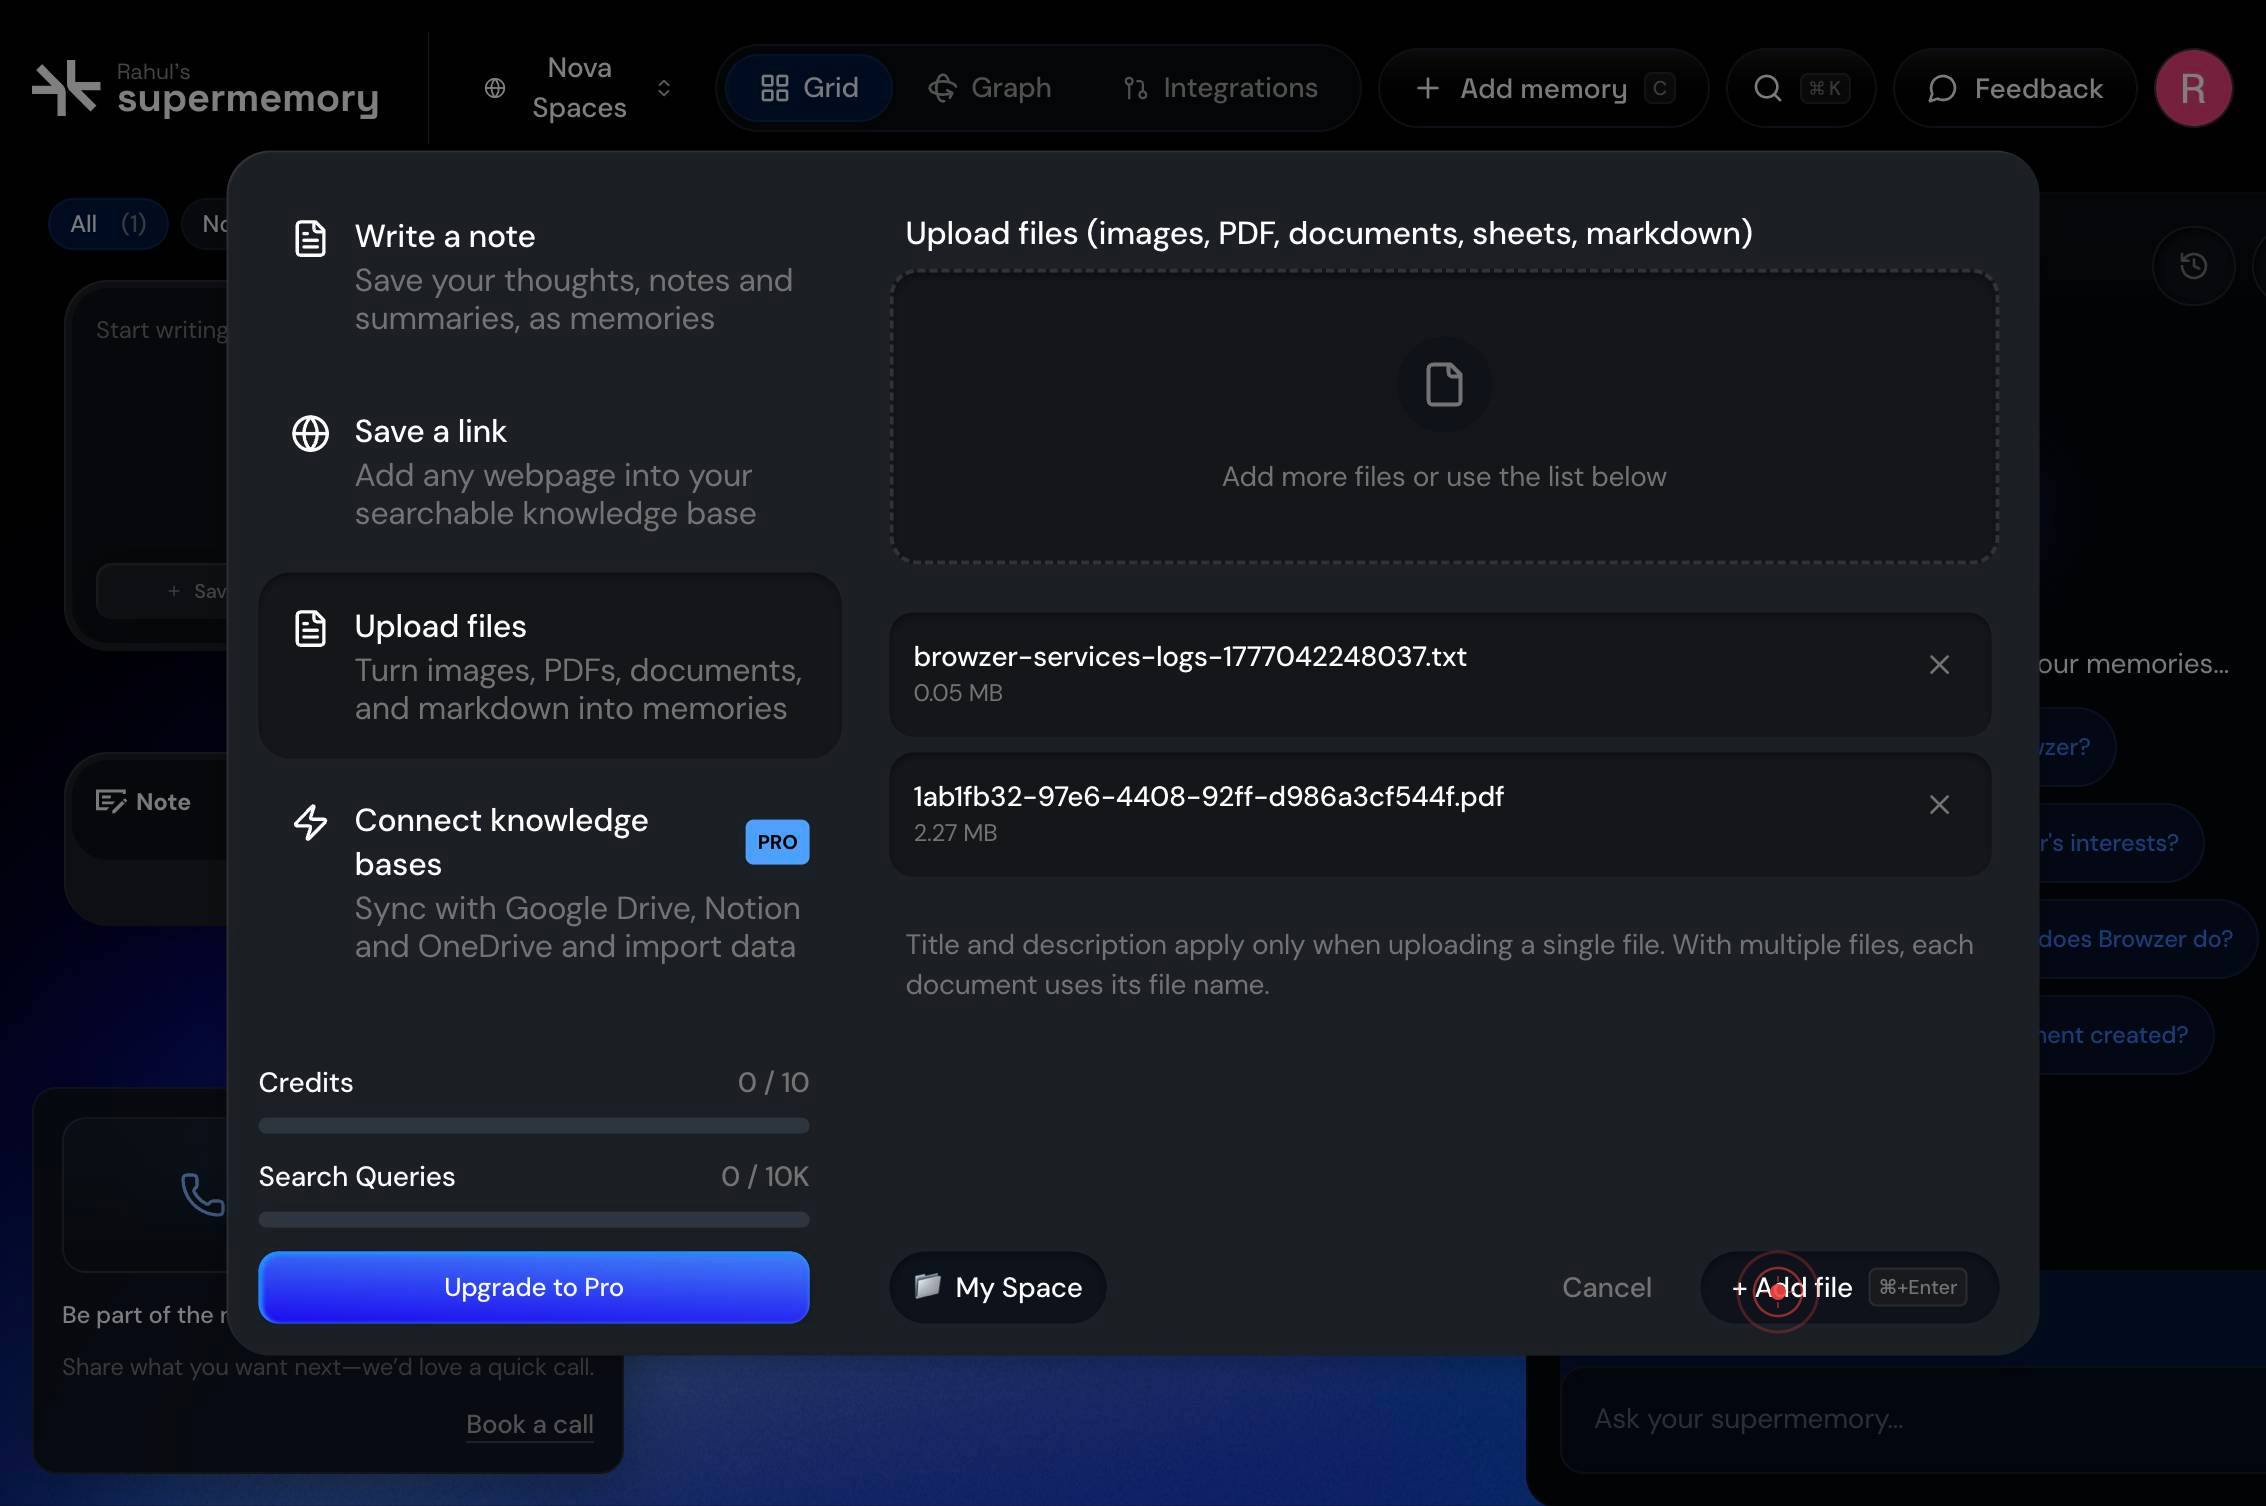
Add more files or use the list belowClick on the upload area (labeled 'Add more files or use the list below') to open your file browser. This action triggers a standard system file dialog where you can select the document you wish to convert into a memory.
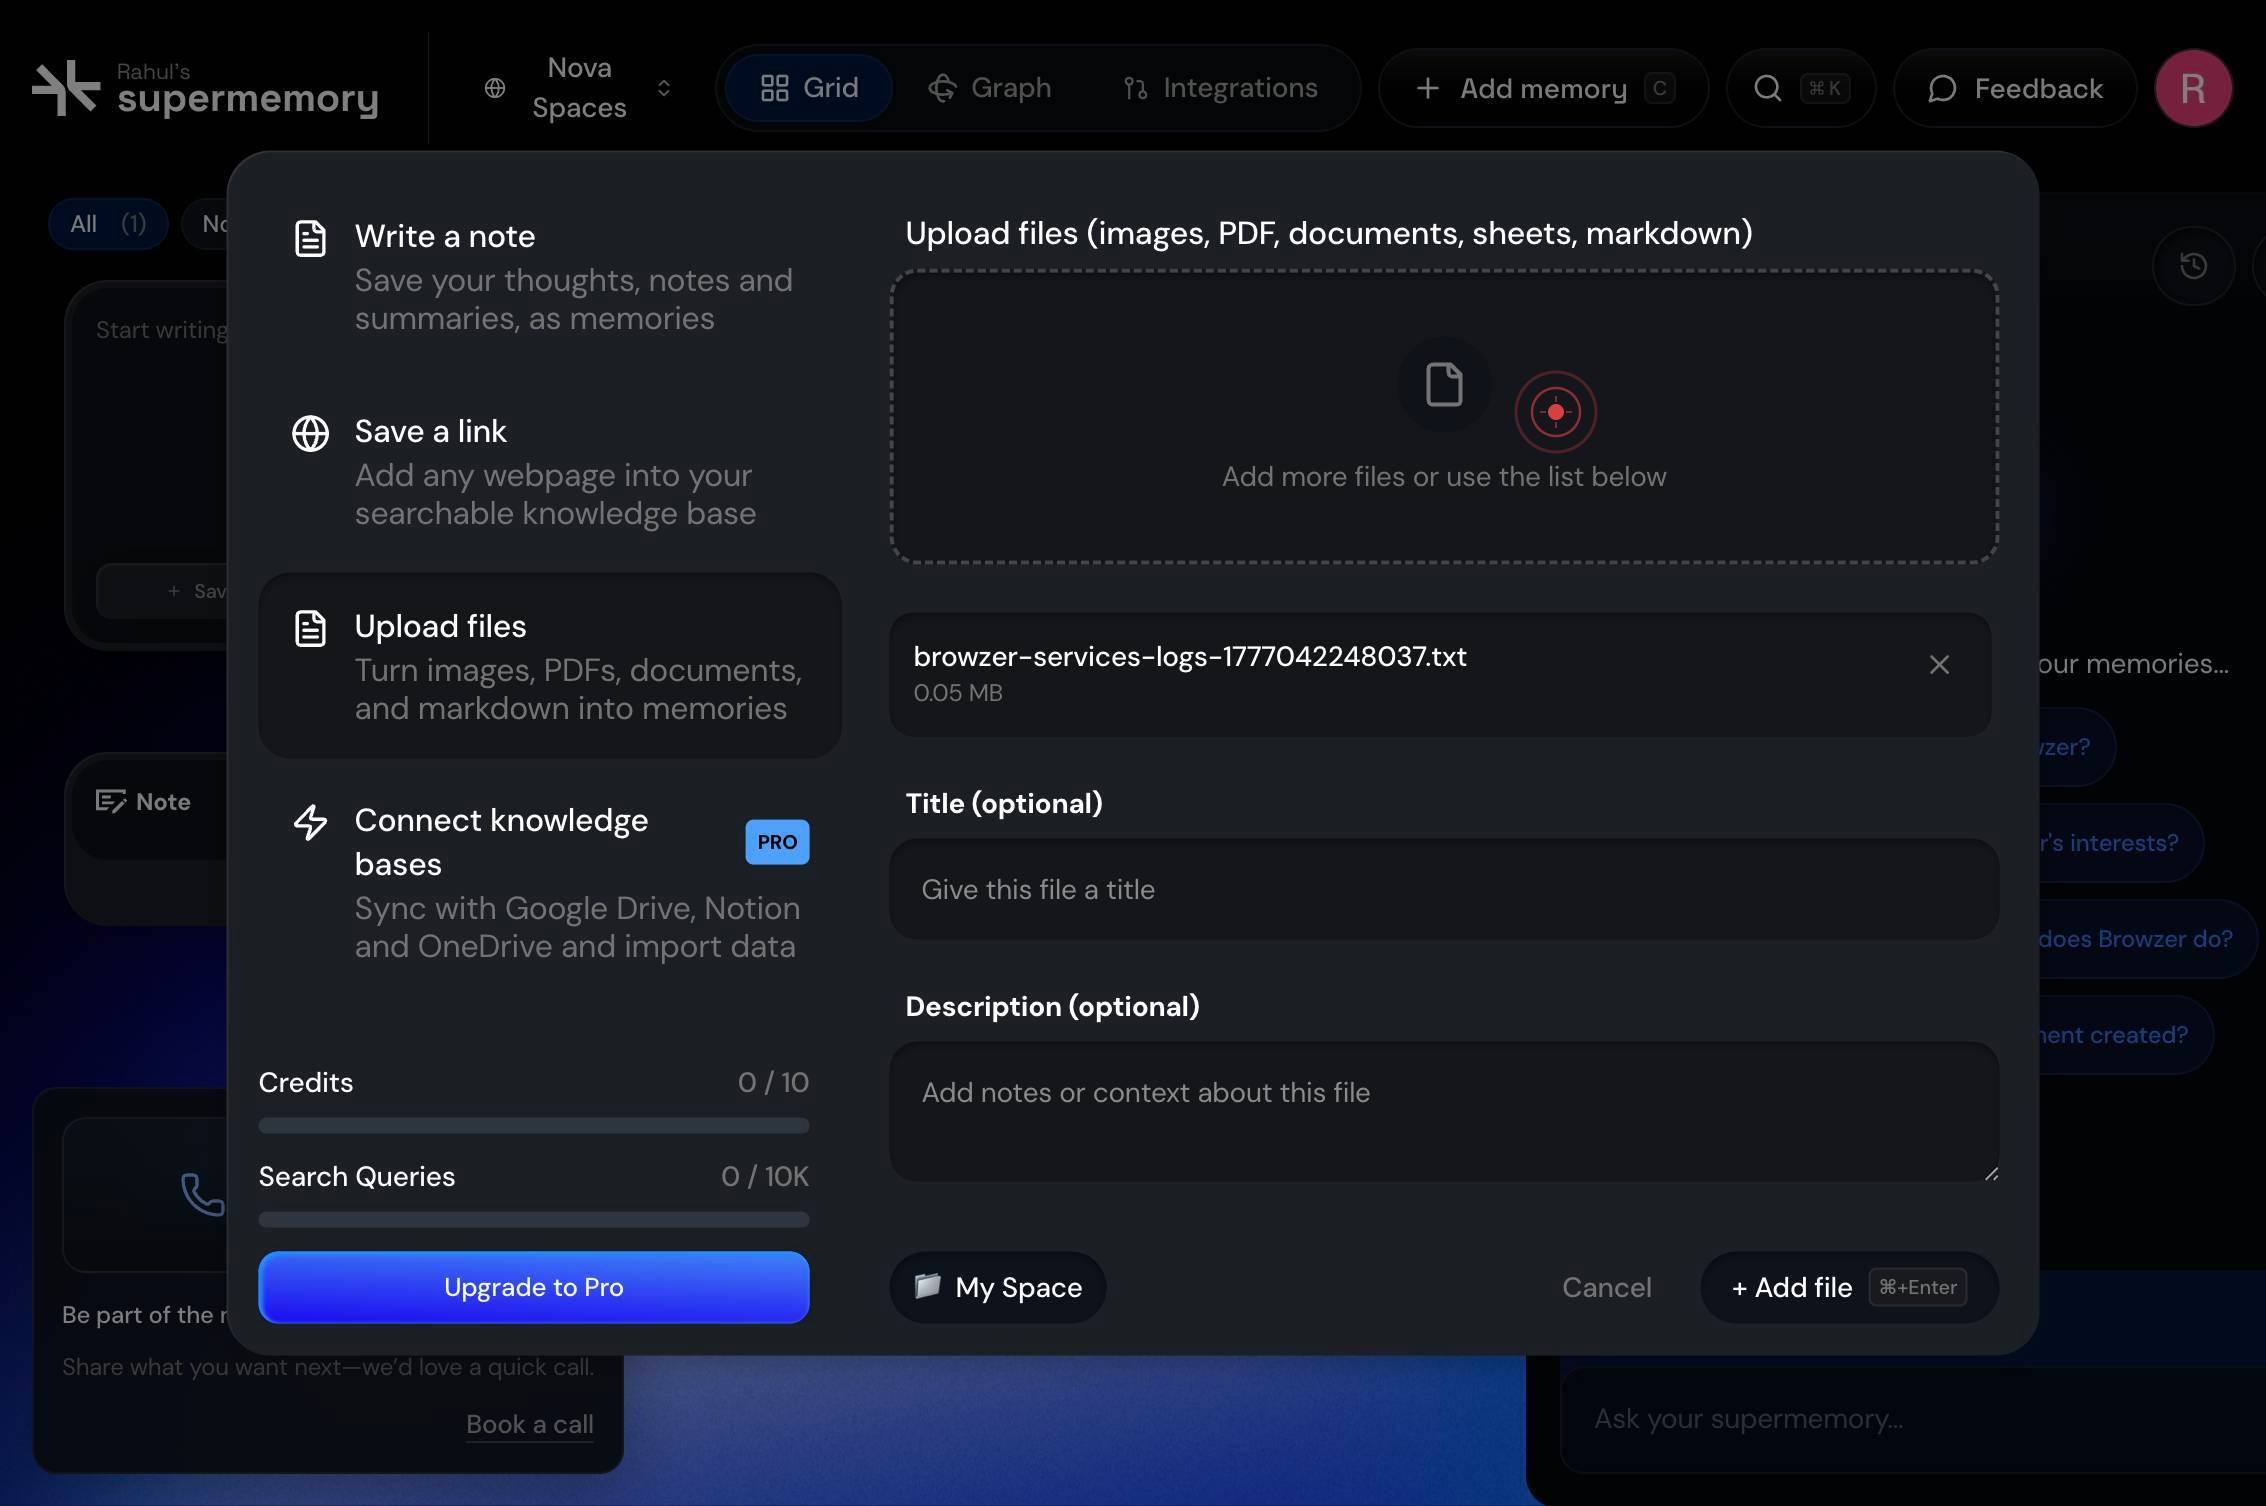
Select and upload your file from your system. The file is transmitted to Supermemory's servers, where it will be processed and indexed for later retrieval.
+ Add file ⌘+EnterClick the '+ Add file' button to confirm and submit your uploaded file for processing. This action finalizes the memory creation and triggers Supermemory to index the document content.
Confirm it worked
- 1The file appears in the upload queue or list displayed on the memory creation screen
- 2After clicking 'Add file,' the file transitions to a processing or 'added' state (visually indicated by a checkmark or status change)
- 3A new memory entry is created in your Supermemory library and is visible in your memories list after processing completes
- 4The document content becomes searchable and retrievable through Supermemory's API or interface
Common issues
Keep reading
Ingesting context to supermemory - supermemory | Memory API for the AI era
> ## Documentation Index > > Fetch the complete documentation index at: https://supermemory.ai/docs/llms.txt > Use this file to discover all available pages before exploring further. IMPORTANT: thes
supermemory.aiapps/docs/add-memories/examples/file-upload.mdx at main · supermemoryai/supermemory
# File: supermemoryai/supermemory/apps/docs/add-memories/examples/file-upload.mdx - Repository: supermemoryai/supermemory | Memory engine and app that is extremely fast, scalable. The Memory API for
github.comHow to Upload Large Files with Additional Data Using Python Requests Without MemoryError: A Complete Guide
How to Upload Large Files with Additional Data Using Python Requests Without MemoryError: A Complete Guide ## Table of Contents# Advanced Tips for Reliable Uploads - Timeouts, Retries, and Error Ha
py4u.org