Guide
Create New Space
Overview
Supermemory is a universal memory API that enables AI applications to store, organize, and retrieve contextual information efficiently. Spaces are the primary organizational unit within Supermemory—they let you partition memories by project, use case, or domain, so you can maintain clean separation between different memory collections. Creating a new Space is the first step to setting up a structured memory system for your AI workflows. Whether you're building a documentation tool, chatbot, or knowledge retrieval system, you'll want to create dedicated Spaces to keep memories organized and queryable.
Before you begin
- You have an active Supermemory account and are logged in to app.supermemory.ai
- You have access to the Spaces management interface (available on the main dashboard)
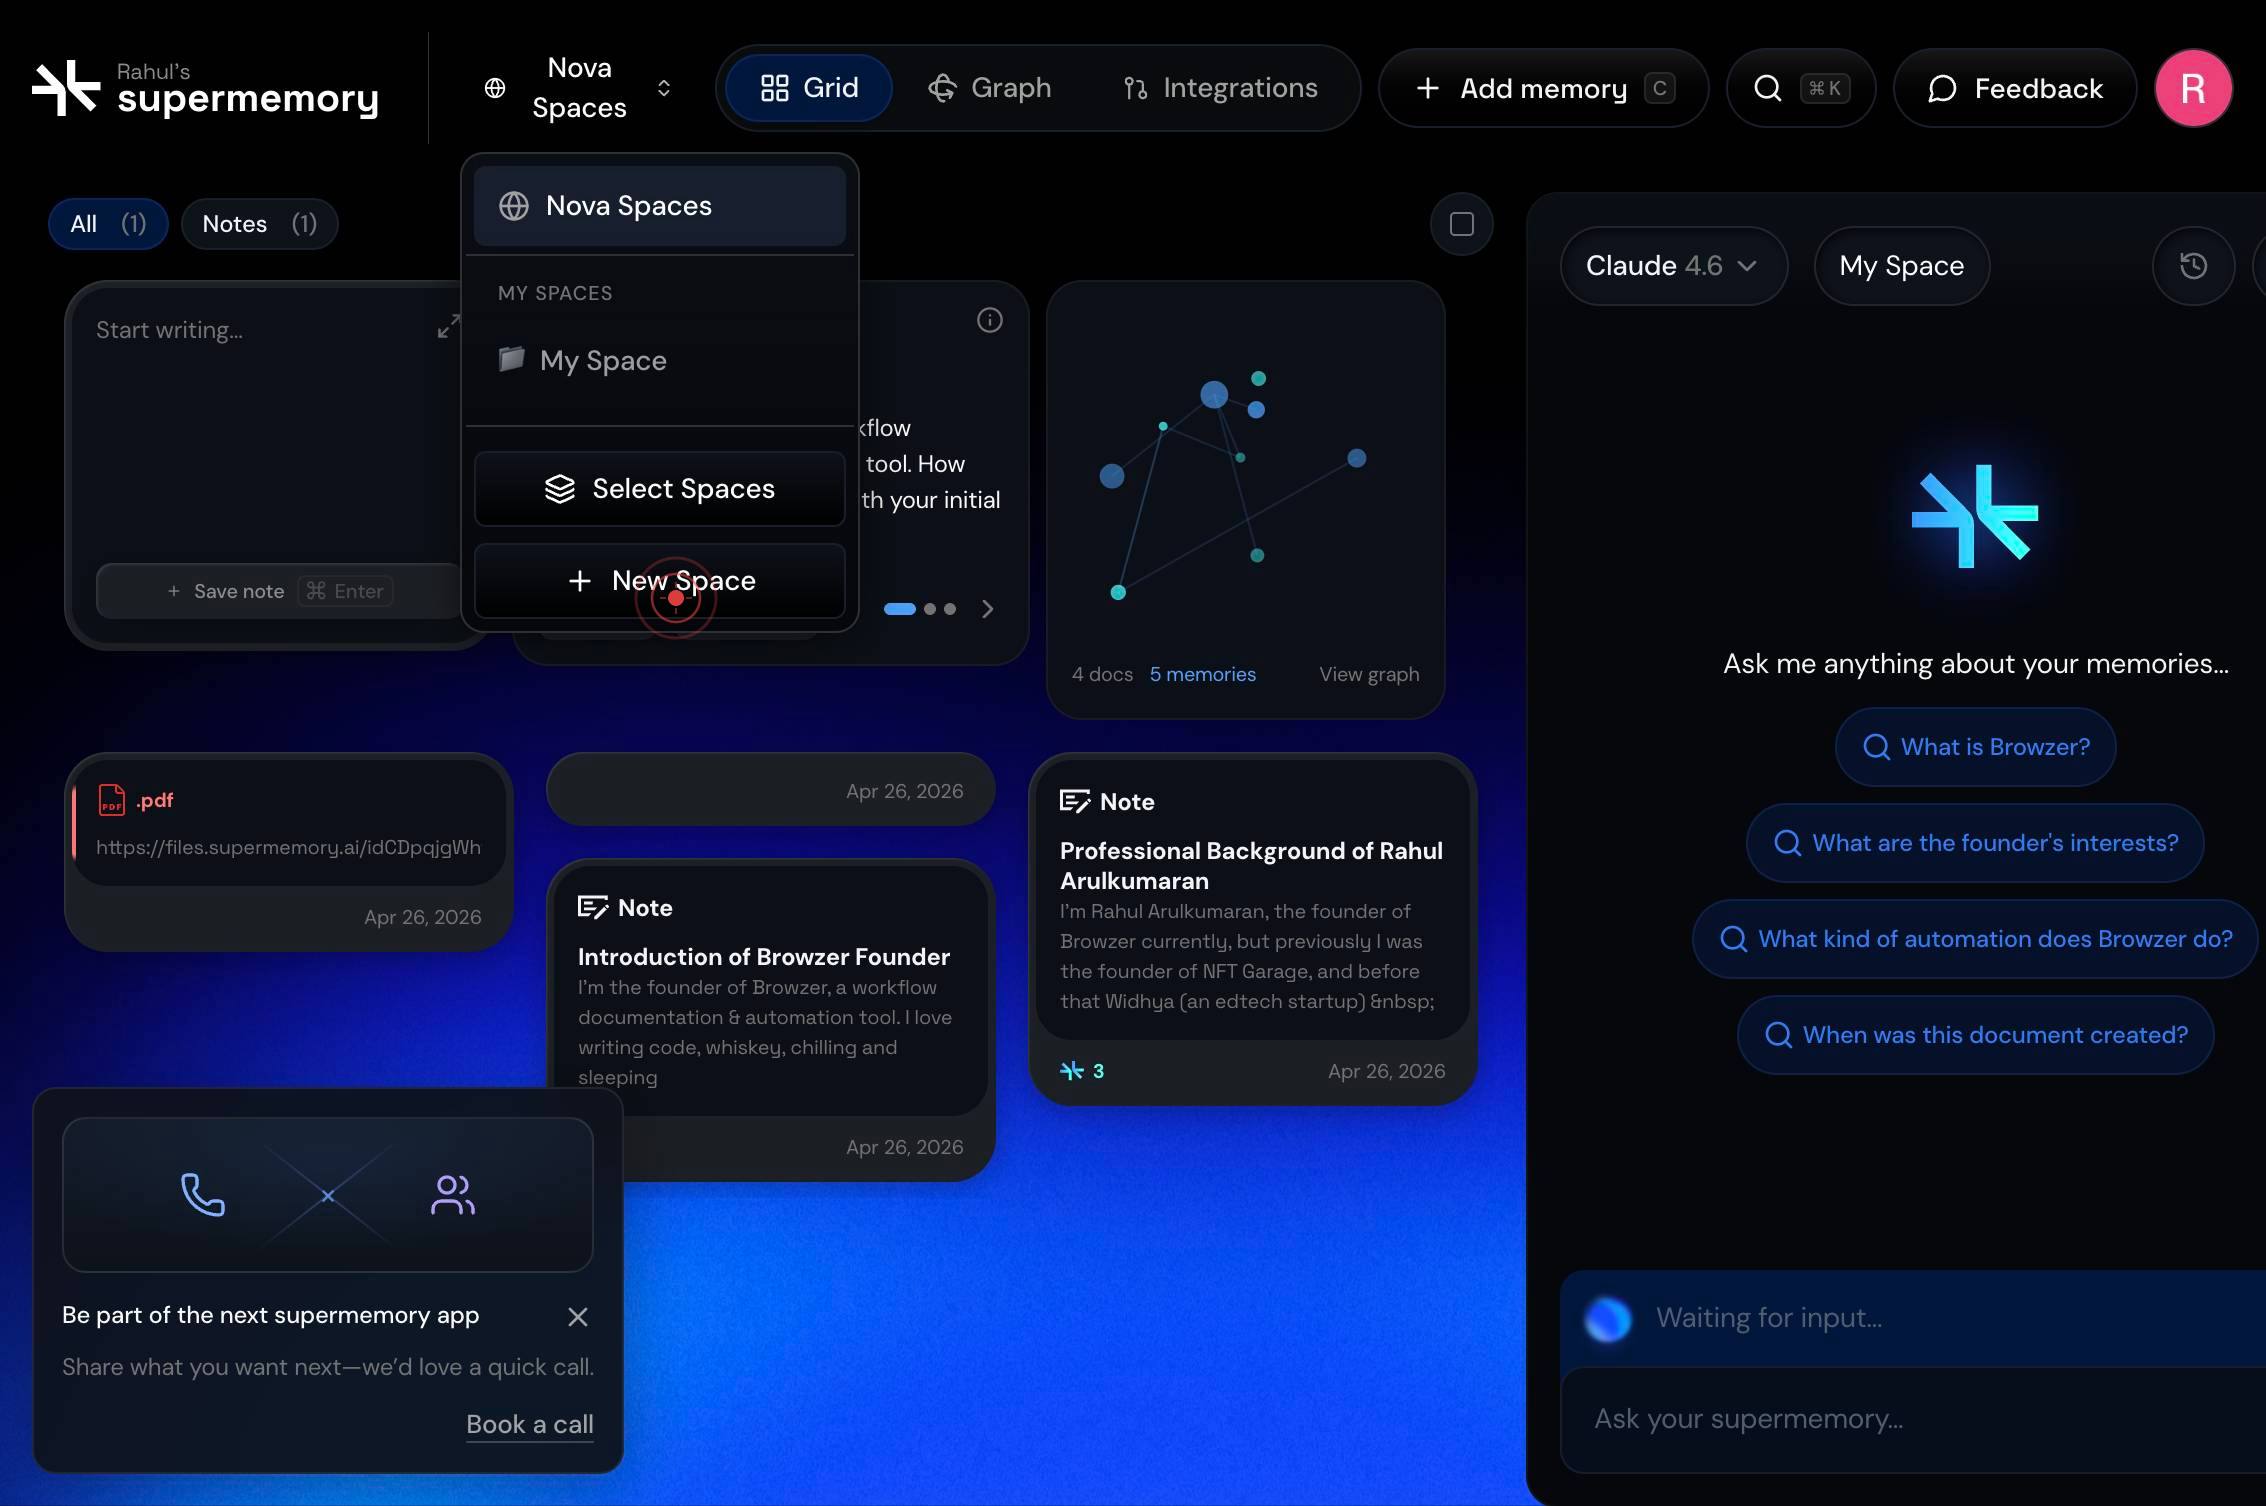
Step by step
Rahul's supermemory Nova Spaces Grid Graph Integrations Add memory C K Feedback All (1) Notes (1) Save note Enter powered by supermemory Browzer's Vision You're building Browzer, a workflow documentation & automation tool. How does its current stage Navigate to the Supermemory dashboard by ensuring you are on the main application page at app.supermemory.ai, which displays your Spaces grid and memory management interface.

New SpaceClick the 'New Space' button to open the Space creation dialog or input form.
Space nameBegin typing your desired Space name in the 'Space name' text field to identify the purpose or category of this memory collection.
Space nameClick on the 'Space name' text field to ensure it has focus and is ready to receive your input.
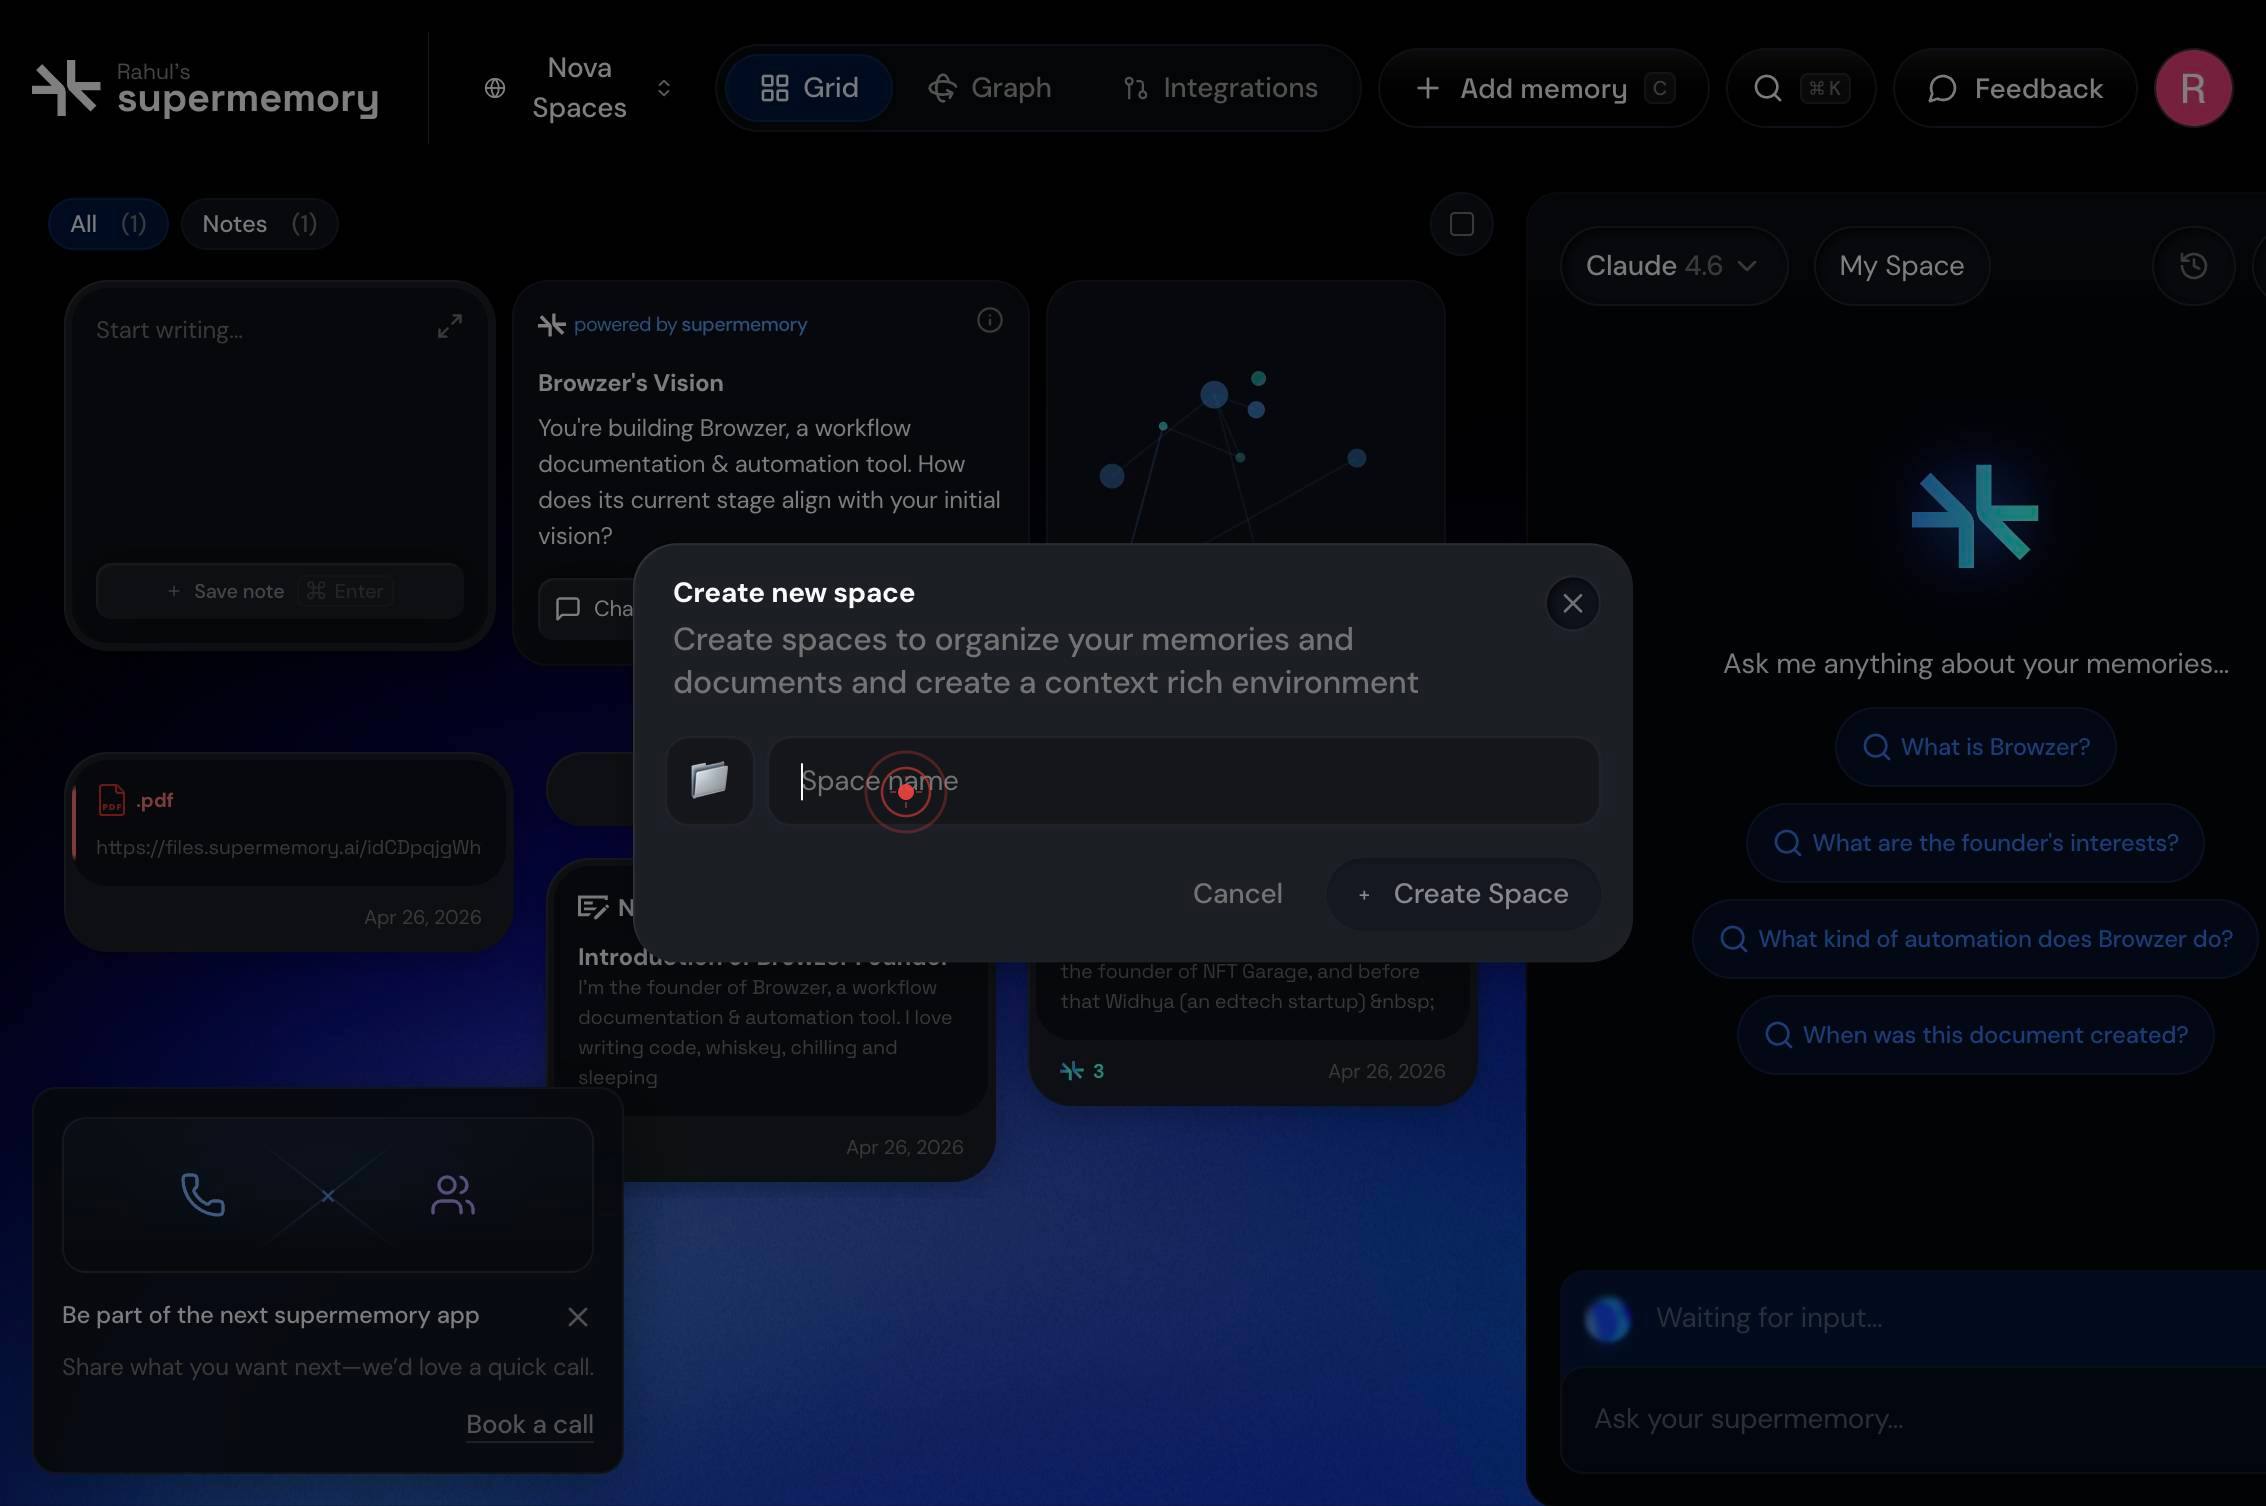
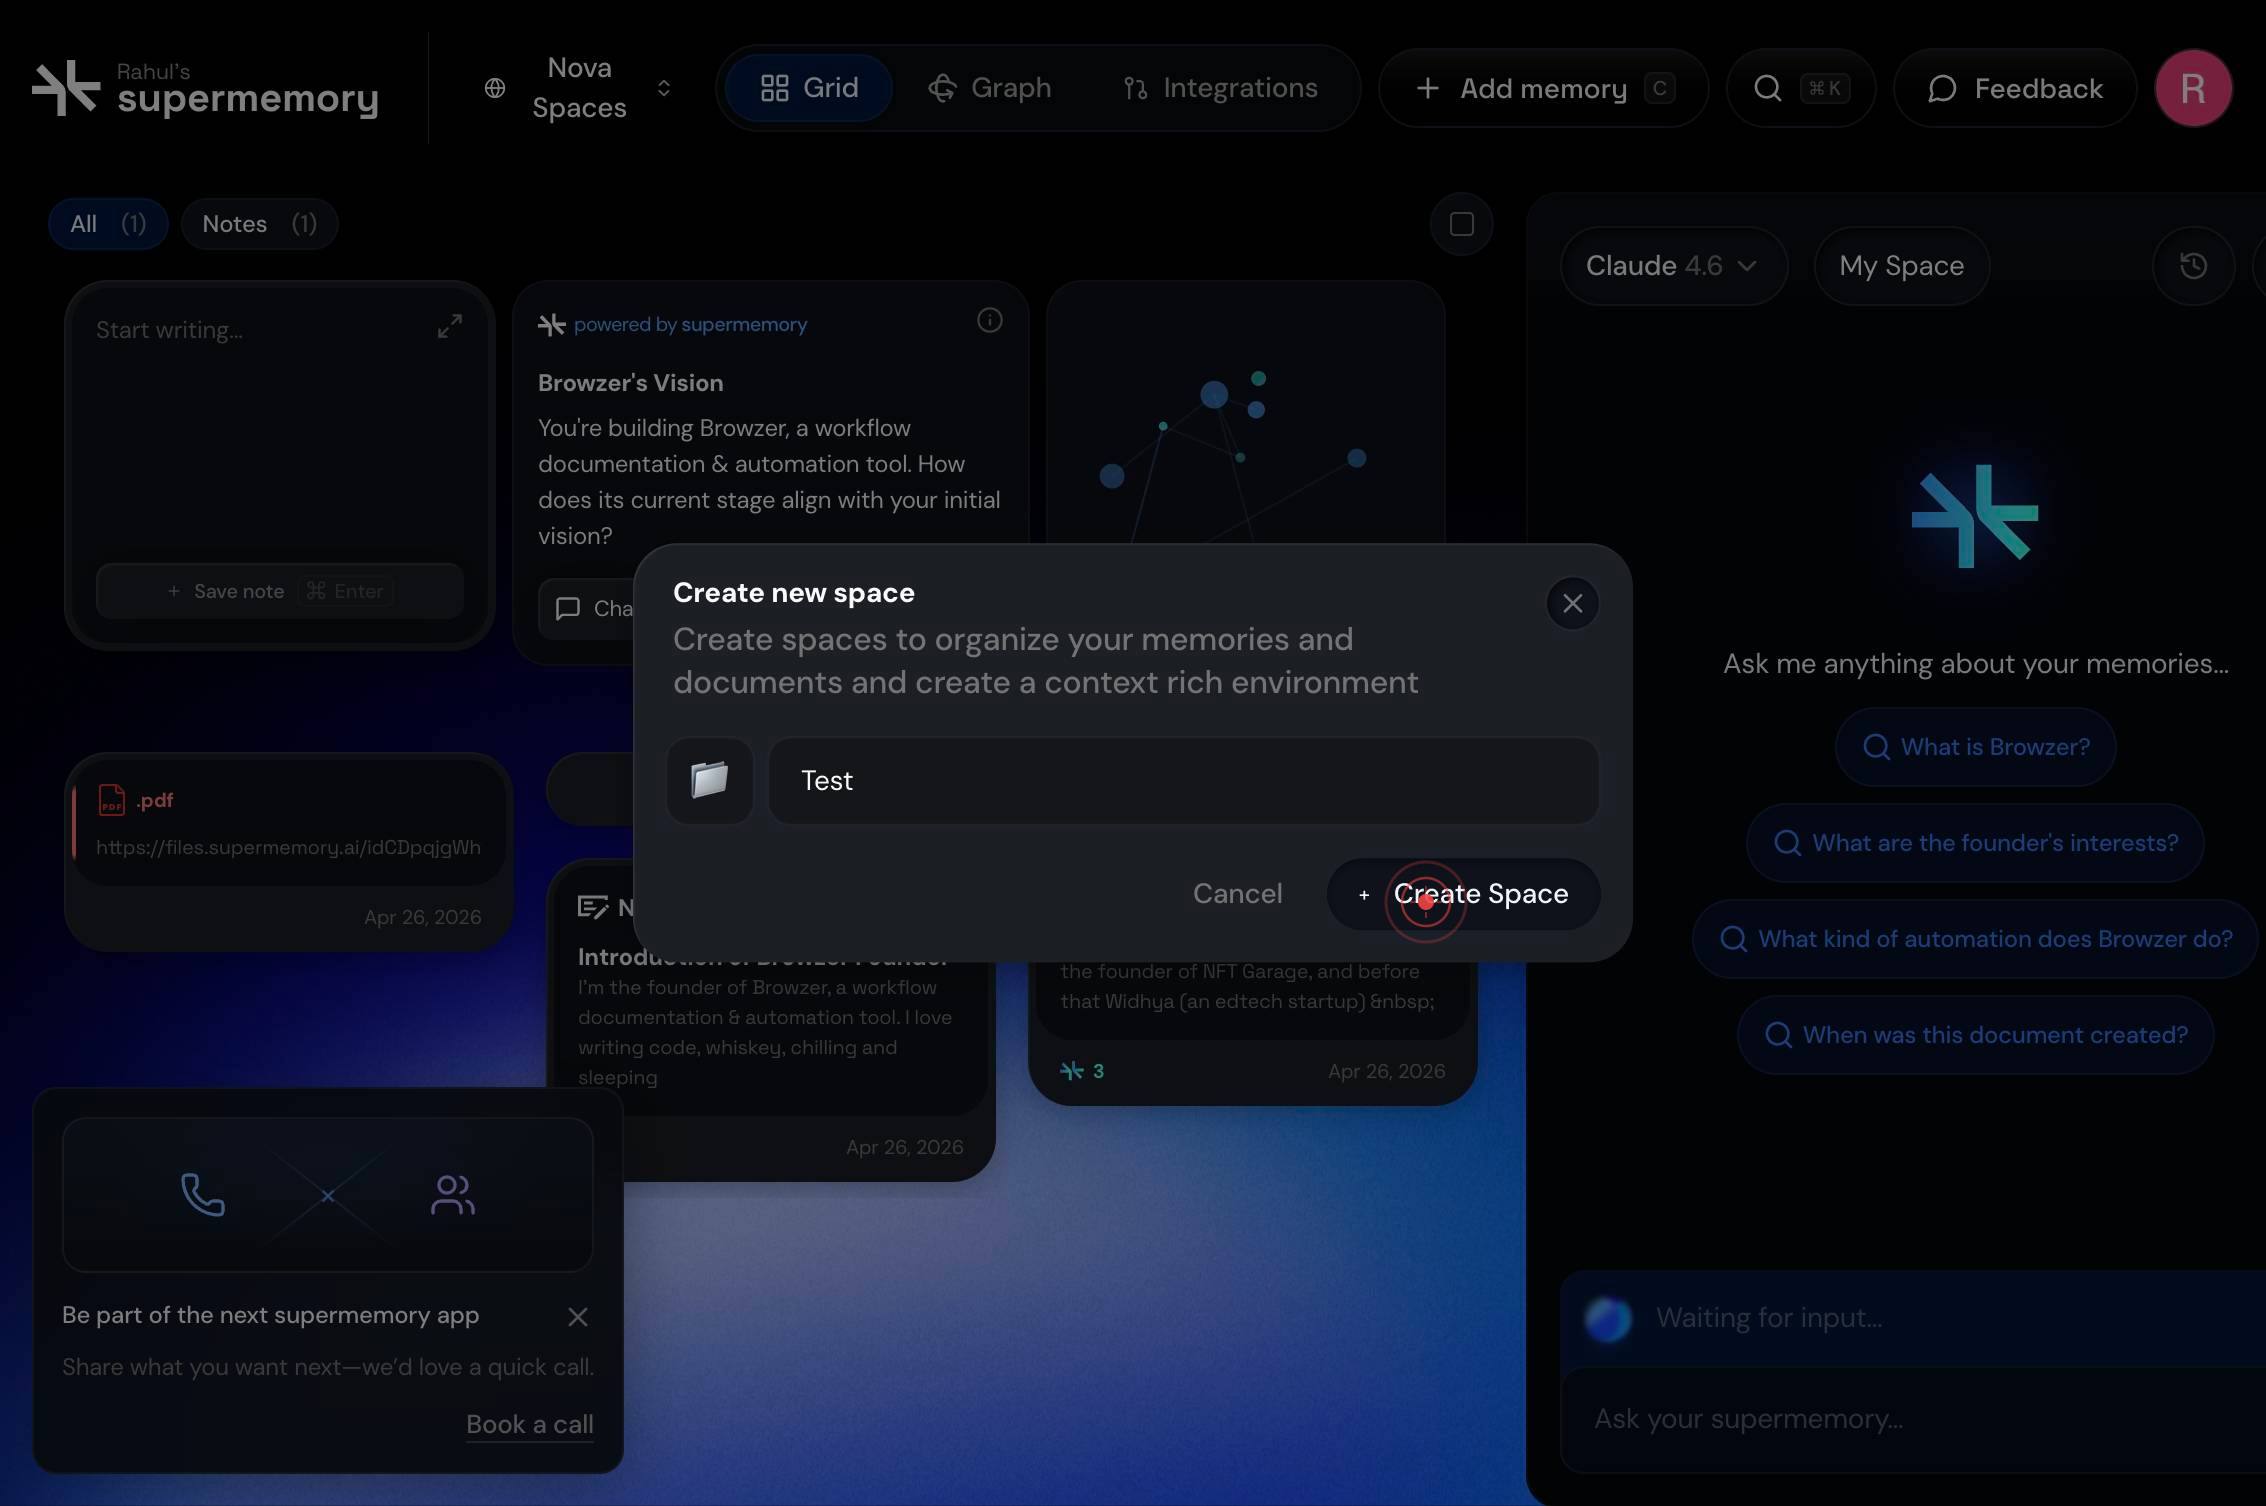
Space nameType the name of your new Space into the focused text field, confirming that the text appears as you enter it.
+Create SpaceClick the '+Create Space' button to finalize and create the new Space with the name you entered.
Confirm it worked
- 1You see the new Space appear in your Spaces list with the name you provided
- 2The Space is immediately available for use in the selection dropdown or navigation menu
- 3You can click on the newly created Space to open it and add memories to it
Common issues
Keep reading
How to Create and Configure Resources | Kadence Help Center
How to Create and Configure Resources | Kadence Help Center Copyright (c) 2023, Intercom, Inc. ([email protected]) with Reserved Font Name "Inter". This Font Software is licensed under the SIL Open F
help.kadence.coCreating spaces with the Space tool
Creating spaces with the Space tool # Creating spaces with the Space tool Tool Workspace: Tool set Space Design Suite, Architect, Landmark: Space Planning Spotlight, ConnectCAD: Add tool to work
app-help.vectorworks.netCreate and edit Spaces – ClickUp Help
Create and edit Spaces – ClickUp Help Ask me anything Spaces are the highest organizational level of your Workspace and hold all of your Folders and Lists. # What you'll need Spaces are included i
help.clickup.com